# Glow Documentation — full text
> Every published Glow documentation page, concatenated. Generated at build time from the same sources as llms.txt.
> Pages: 128. Index with per-page URLs: https://docs.getglow.ai/llms.txt
---
Source: https://docs.getglow.ai/build/action-steps/change-fields
# Change Fields
> Rename, add and drop fields on a record so the next step gets exactly the shape it expects.
**Change fields** reshapes a record on its way between two steps. Rename a field the receiving system calls something else, add one it needs, drop the ones it should never see.
> Dock: Data · Change · Takes: a record · Returns: the changed record
It is the step that saves you from writing code purely to move data from one shape into another.
> **Transforming single fields inline?** If you only need to clean, uppercase, format, or extract a specific field value before passing it to a downstream step, use [Data Transformation](/build/core-concepts/data-transformation) (e.g. `{{ 3.company | trim | upper }}` or `{{ 3.users | pluck:email }}`). Use the **Change fields** canvas step when reshaping entire records (renaming, adding, and dropping multiple keys simultaneously).
## Three passes, in a fixed order
The step runs three passes, always in this order.
| Pass | When it runs | What it does |
| ----------------- | ------------ | ----------------------------------------------------- |
| **Rename fields** | First | Each row gives a field's current name and its new one |
| **Set fields** | Second | Each row sets a field to a value |
| **Remove fields** | Last | Each row names a field to leave out of the result |
Because renaming happens first, **a Set row can write to a name that only exists because a Rename above created it**. And because removal happens last, a field you set can still be removed in the same step. That suits a value you need briefly and do not want to pass on.
## Setting it up
### Add the step
Open **Tools** in the dock and choose **Change fields** under Data.
### Point it at a record
**Start from** takes the record you want to change, normally a reference to an earlier step such as `{{ 3 }}`.
### Rename what needs renaming
Under **Rename fields**, add a row per field: its current name, then the name it should have. **Add Row** for each one.
### Set what needs setting
Under **Set fields**, add a row per field with its value. The value can be a reference, so `{{ 1.email }}` or `{{ $today }}` both work.
### Remove what should not travel on
Under **Remove fields**, name any field to leave out: usually an internal identifier, or a large blob you do not want carried into the next step.
## What it passes on
The changed record itself, with your renames, sets and removes applied. Fields sit at the top level, so a downstream step reads them directly:
```
{{ 4.firstName }}
{{ 4.greeting }}
```
Everything you did not mention travels through unchanged, keeping its type.
## Examples to copy
### Match a CRM's field names
An enrichment API returns `company_name` and `employee_count`, but your CRM expects `Company` and `Headcount`.
**Start from:** `{{ 3.ret }}`. Two **Rename** rows: `company_name` → `Company`, `employee_count` → `Headcount`. Nothing else needed.
### Stamp a record before storing it
**Set fields:** `processedAt` = `{{ $now }}`, `source` = `Website form`, `workflowUrl` = `{{ $workflow_url }}`.
The last one gives whoever finds the record later a link straight back to the workflow that wrote it.
### Cut a record down before sending it on
An app returns fifty fields and the next system wants six.
Use **Remove fields** for the big ones: the raw HTML of an email, an attached
file, an internal id nobody downstream reads. A smaller record moves between
steps faster and stays under the size a run may carry.
### Rename, then build on the new name
**Rename:** `first_name` → `firstName`. **Set:** `greeting` = `Hi {{ 3.first_name }}`.
The rename gives downstream steps the tidy `firstName`; the greeting is built from the source step's value. A `{{ }}` reference always reads an earlier step's stored output: a step cannot reference its own result while it is still being made.
## What's Next?
- 👉 **[Workflow Data & Mapping →](/build/core-concepts/workflow-data)**: understand how values move from one Step to the next.
- **[Parse JSON](/build/action-steps/parse-json)**: turn a JSON string into a record you can reshape.
- **[AI Data Transform](/build/ai-features/ai-transform)**: reshape unstructured content when there are no fixed fields to select.
---
Source: https://docs.getglow.ai/build/action-steps/code-execution
# Code editor
> Run Python inside a workflow: how to read earlier steps, which libraries are available, what the step passes on, and the limits it runs under.
The Code editor step runs Python inside your workflow and passes on whatever your code prints. Use it for the calculations, reshaping and business rules that the visual steps do not cover.
> Dock: Data · Dev tools · Returns: whatever your code prints
**Look for it as "Code editor" in the dock.** That is the label it carries there, under **Tools → Data → Dev tools**.
**Keyboard shortcut:** `t+c`
> The step runs **Python 3.13**, with the standard library plus numpy and pandas
> available. The Language field reflects that and is fixed.
## Setting it up
### Add the step
Press `t+c`, or open **Tools** in the dock and select **Code editor** under **Dev tools**.
### Write your Python
Reference earlier steps with `{{ }}` placeholders, on their own and without quotes. The section below covers the syntax.
### Print what the next step needs
The step passes on what you print, not what you return.
### Run the workflow to see the result
Open the step's **Executions** tab to read the output.
## Reading data from earlier steps
Reference an earlier step by its number, the same as in any other field, and **write the reference on its own and unquoted**:
```python filename="main.py"
customer_name = {{ 2.customer_name }}
order_total = {{ 2.total }}
products = {{ 3.$full_result }}
```
Each reference arrives as **a real Python value**, not as text that gets pasted into your program. A JSON object becomes a `dict`, a list becomes a `list`, and `true` / `false` / `null` become `True` / `False` / `None`. Nothing needs quoting or escaping, and a customer called `O'Brien` cannot break your code.
`{{ 3.$full_result }}` gives you a whole step's output as one value, which is the usual way to get a list of records to loop over.
### "Reference is inside a longer piece of text"
If the step fails with that message, this is the cause and the fix.
A reference has to be a value on its own. Written inside a longer piece of text it has no correct meaning, so the step refuses to run rather than guessing:
```python filename="Rejected"
print("Hello {{ 2.name }}")
```
Assign it first and build the text afterwards:
```python filename="Works"
name = {{ 2.name }}
print(f"Hello {name}")
```
The same applies inside an f-string or any other quoted run, and to every kind of reference, `{{ $var.KEY }}` and `{{ $secret.KEY }}` included. Assign first, then use the variable.
Full placeholder syntax, including `{{ $now }}` and `{{ $var.KEY }}`, is documented in [Variable Reference Syntax](/reference/variable-syntax).
## Available libraries
The step runs **Python 3.13** with the full standard library, plus two data libraries. Import them as normal: there is nothing to install and nothing to declare.
### The two data libraries
| Library | Version | For |
| ---------- | ------- | ----------------------------------------- |
| **numpy** | 2.5.1 | Numeric arrays and mathematics |
| **pandas** | 2.3.3 | Tables, grouping, joins and summarisation |
Both versions are pinned rather than tracking the latest release, so the same program keeps producing the same result.
### The standard library, by what you came to do
Everything in Python 3.13's standard library imports, which is far more than most workflows need. These are the modules worth knowing about:
| You want to | Import |
| ------------------------------------- | --------------------------------------------------------- |
| Read or write JSON | `json` |
| Do date and time arithmetic | `datetime` — and `zoneinfo` for time zones |
| Match or replace text patterns | `re` |
| Read or write CSV | `csv` (with `io.StringIO` for text you already have) |
| Hash or sign something | `hashlib`, `hmac` |
| Encode for an API | `base64`, `urllib.parse` for query strings and escaping |
| Count, group or deduplicate | `collections` — `Counter`, `defaultdict` |
| Averages, medians, standard deviation | `statistics` |
| Money and exact decimals | `decimal` — avoids the rounding errors of ordinary floats |
| Generate an ID | `uuid`, `secrets` |
| Combine or chunk lists | `itertools`, `functools` |
| Compress or unpack an archive | `gzip`, `zipfile`, `tarfile` |
```python filename="main.py"
import json
import re
from datetime import datetime, timedelta
from zoneinfo import ZoneInfo
from collections import Counter
import pandas as pd
```
### Finding what you need
Check the table above first: most of what people install a package for is already in the standard library. `datetime`, `re`, `csv`, `hashlib` and `json` between them cover the large majority of workflow code.
If it is a package for calling a service (`requests` being the usual one), that work belongs in a step rather than in code; see [What to use instead](#what-to-use-instead) below.
For anything genuinely missing, ask support. The library set is deliberately small so that runs stay reproducible, and additions are considered on request.
## What it passes on
**Print what you want to pass on.** The step captures what your code writes to output. A bare `return` produces nothing downstream.
```python filename="main.py"
import json
print(json.dumps({
"final_total": final_total,
"discount_applied": discount,
}))
```
What you printed sits under `result.executionOutput`:
```
{{ 4.result.executionOutput }}
```
> **Note the `result.` in the middle.** This step nests its output one level
> deeper than most, so `{{ 4.executionOutput }}` finds nothing. Insert the
> reference from the data icon rather than typing it and you get the right
> path.
> **`executionOutput` is text, not an object.** You cannot reach into it with
> `{{ 4.result.executionOutput.final_total }}`, because there is nothing to
> walk into. To use individual fields downstream, print JSON as above and put a
> [Parse JSON](/build/action-steps/parse-json) step after this one.
### Print JSON, not Python objects
`print(my_dict)` produces Python's own formatting: single quotes, `True`, `None`. A Parse JSON step cannot read that. Use `json.dumps()` so the output is valid JSON. Class instances, lambdas and circular references cannot be serialised at all, so convert them to plain values first.
## What to use instead
Your code runs on its own: everything it needs arrives through references, and everything it produces leaves through what it prints. Reaching out to the world is the job of the steps around it, not of the code. That keeps credentials out of a code box and every request visible in the run history.
A few things people reach for out of habit therefore do not apply here, and each has a step that does the job better:
| Habit | What happens | Use instead |
| --------------------------------------- | ----------------------------------------------------------------------- | ------------------------------------------------------------------------------------------------------------------------------------------------------------------- |
| `import requests` to call an API | The package is not available, and the network is unreachable regardless | An [HTTP Request](/build/action-steps/http-request) step before this one to fetch, and one after it to send. It handles authentication, retries and errors for you. |
| Sending mail with `smtplib` | No connection | A Gmail, Outlook or SendGrid step from the dock's **Apps** group. |
| Connecting to a database from code | No connection | The database step for that service, which keeps the credentials in your workspace. |
| `open("out.csv", "w")` beside your code | `Read-only file system` | Write to `/tmp` for scratch space during the run, then print what matters. To keep a file, pass the contents to a Drive, S3 or email step. |
| Reading a file an earlier run wrote | `FileNotFoundError` | Every run starts clean. Carry values between runs through the steps themselves, or store them in an app. |
| `input()` to ask for a value | `EOFError` — nobody is at a keyboard | Reference the value with `{{ 2.field }}`, or collect it with a [Human Review](/build/action-steps/user-approval) step. |
**This is the design, not a gap to work around.** A step that fetched its own data would hide that request from the run history, retry nothing when the API is down, and put an API key in a code box. Keeping the reaching-out in dedicated steps is what makes a failed run readable at three in the morning.
## Limits
| Limit | Value |
| -------------- | ------------------ |
| Run time | 150 seconds |
| Output kept | 100,000 characters |
| Memory | 1.5 GB |
| Network access | None |
**Run time.** A program that passes 150 seconds is stopped and the step fails. Filter large lists before expensive work, and check that loops terminate.
**Output.** Past 100,000 characters the result is stored truncated and marked with how many characters were dropped. A step printing a large dataset therefore passes on something that is no longer valid JSON. Print only what the next step needs. For a genuinely large result, print a summary and send the full data onward with a following [HTTP Request](/build/action-steps/http-request) or an app step such as Google Sheets.
**Memory.** Beyond 1.5 GB the program stops with a `MemoryError`. Process records in batches rather than loading everything at once.
**Network.** Your code cannot open connections, so `urllib`, `socket` and anything built on them will not reach a server. Fetch the data with an [HTTP Request](/build/action-steps/http-request) step before this one and read its result with `{{ N.$full_result }}`; to send something onward, print it and follow this step with an HTTP Request.
## When a run fails
An uncaught exception fails the step and the branch stops. The error message carries what your program printed before it failed, including the traceback, so the step's **Executions** tab tells you which line went wrong.
Guard optional data rather than assuming it is there — the chained `.get()` on
the highlighted line is what stops a missing field failing the step:
```python filename="main.py" {2}
payload = {{ 2.$full_result }}
value = payload.get("response", {}).get("data", {}).get("value", "default")
```
Because a failed run stops the branch, there is no result carrying a flag to test: by the time a later step can read the output at all, the code ran. So the check worth adding on a critical path is not "did it succeed?" but "is what it printed the shape I expected?". Where the outcome drives money, deletion or anything else irreversible, follow the step with a [Condition](/build/action-steps/conditions) that asserts the shape and give the rest an error path.
## Examples to copy
### Work out a total
```python filename="main.py"
import json
order_total = {{ 2.total }}
discount = order_total * 0.1 if order_total > 100 else 0
final_total = order_total - discount
print(json.dumps({
"final_total": round(final_total, 2),
"discount_applied": round(discount, 2),
}))
```
### Score and rank a list
A workflow fetches product data and needs weighted scores before writing to a spreadsheet.
```python filename="main.py"
import json
products = {{ 3.$full_result }}
scored = []
for product in products:
score = (product["rating"] * 0.6) + (product["reviews"] * 0.004)
scored.append({
"name": product["name"],
"score": round(score, 2),
"tier": "premium" if score > 4.0 else "standard",
})
scored.sort(key=lambda p: p["score"], reverse=True)
print(json.dumps({"ranked_products": scored}))
```
### Group and summarise with pandas
```python filename="main.py"
import json
import pandas as pd
orders = pd.DataFrame({{ 3.$full_result }})
by_region = (
orders.groupby("region")["amount"]
.agg(["sum", "count"])
.round(2)
.reset_index()
)
print(json.dumps(by_region.to_dict(orient="records")))
```
Follow any of these with a **Parse JSON** step reading `{{ 4.result.executionOutput }}`, and the result becomes addressable field by field.
## What's Next?
- 👉 **[Parse JSON →](/build/action-steps/parse-json)**: turn printed JSON into fields that later Steps can select.
- **[Helper Functions](/build/action-steps/helper-functions)**: use a ready-made conversion instead of maintaining code.
- **[AI Data Transform](/build/ai-features/ai-transform)**: reshape unstructured content without code.
---
Source: https://docs.getglow.ai/build/action-steps/combine
# Combine
> Bring two lists together: one after the other, or matched on a field they share.
The **Combine** step takes two lists and returns one. It either places the second list after the first, or matches records from each on a field they have in common.
> Dock: Data · Lists · Takes: two lists · Returns: one combined list
Reach for it when the data you need is split across two places: contacts in one system and their orders in another, incidents from a ticketing tool and the service levels that apply to them.
```mermaid
flowchart LR
A[Get Customers] --> C[Combine]
B[Get Orders] --> C
C --> D[Send Summary]
```
## Setting it up
### Connect two branches to it
Combine takes exactly two incoming connections, each from a different step, and each supplies one of the two lists. It always waits for both branches before it runs; the **AND** chip on its input shows this. If you add a third connection, or a second one from the same step, the canvas declines it and says why. See [Merging Parallel Branches](/build/core-concepts/steps-and-the-canvas#merging-parallel-branches).
### Choose how to combine
**Append lists** places the second list's items after the first list's. **Match fields** pairs records that share a value.
### Pick the two lists
**First list** and **Second list** each read from one of the connected branches. The branch you pick for the first list is no longer offered for the second, so each list comes from its own step. You can also paste a JSON list into either field.
### Name the field to match on, if you are matching
**Field in first list** and **Field in second list** name the field in each. They do not have to be spelled the same: `customer.id` on one side can meet `account.externalId` on the other.
## Deciding what happens to records with no partner
**Keep unmatched records** is the setting that decides the shape of the answer, and it is worth understanding once rather than guessing.
Two lists sharing a field `id`:
```
First list [{"id": 1, "name": "Lovelace"}, {"id": 2, "name": "Hopper"}, {"id": 3, "name": "Turing"}]
Second list [{"id": 1, "total": 100}, {"id": 2, "total": 250}, {"id": 9, "total": 7}]
```
Records 1 and 2 exist in both. Record 3 is only in the first list, record 9 only in the second.
| Setting | What comes back |
| -------------------- | ------------------------------------------------------------------------------- |
| **Matches only** | The two matched records, merged. Nothing else. |
| **From both lists** | The two matches, then `{"id": 3, "name": "Turing"}` and `{"id": 9, "total": 7}` |
| **From first list** | The two matches, then `{"id": 3, "name": "Turing"}` |
| **From second list** | The two matches, then `{"id": 9, "total": 7}` |
**Choose by what a missing partner means to you.** A customer with no orders is still a customer, so _From first list_ keeps them. An order with no customer record is a problem worth seeing, so _From both lists_ surfaces it.
## When both records use the same field name
A matched pair can carry the same field twice, when both lists have a `name` with different values. **When field names collide** decides which one survives.
Set it to **Second list wins**, the default, and the second list's value is kept; **First list wins** keeps the first's. The two match fields count as ordinary fields here: when they have different names, both stay in the merged record, and when they share a name this setting picks the value like any other field.
## Capital letters matter unless you say otherwise
Matching is exact by default: `ACME` and `acme` are two different customers, and neither finds the other.
**Ignore letter case** is off to begin with. Turn it on and they match. Codes that arrive from different systems are the usual reason: one exports upper case, the other lower.
## One record can match several
Nothing stops a record in one list from matching more than one in the other. **Every match is returned, one row each.**
One customer against two orders for the same `id` gives two rows, both carrying the customer's fields:
```
[{"id": 1, "name": "Lovelace", "total": 100},
{"id": 1, "name": "Lovelace", "total": 999}]
```
That is usually what you want. It also means the result can be longer than either input, which is worth knowing before you count rows downstream.
## What it passes on
Combine returns an object with two fields: `results` holds the combined list and `resultCount` holds its size.
```
{{ 5.results }}
```
A step after it can iterate over that list, or read a single entry:
```
{{ 5.results.0.name }}
```
`{{ 5.resultCount }}` gives the number of records without counting them yourself.
## Limits
Each input list can hold up to 10,000 records, and the combined result up to 100,000. A run over either ceiling fails with a message naming the list. Narrow each branch with [Filter](/build/action-steps/filter-items) before combining, or split the work across runs.
## Examples to copy
### Attach service levels to incidents
Incidents arrive from a ticketing tool; the service level for each client lives in a Custom Variables step.
- **How to combine**: Match fields
- **Field in first list**: `clientId`
- **Field in second list**: `clientId`
- **Keep unmatched records**: From first list
- **Ignore letter case**: on
_From first list_ keeps an incident whose client has no service level recorded. Those are the ones worth noticing, and dropping them would hide the gap. Ignoring case covers clients whose id is written differently by the two systems.
### Put two exports one after the other
Two branches each fetch a page of results, and you want them as one list.
- **How to combine**: Append lists
The first list's items come first, then the second list's. No field names are involved.
## What's Next?
- [Filter](/build/action-steps/filter-items) — split one list into what you keep and what you discard
- [Custom Variables](/build/action-steps/custom-variables) — hold a lookup table for matching against
- [Variable Reference Syntax](/reference/variable-syntax) — how to read a list entry by position
---
Source: https://docs.getglow.ai/build/action-steps/conditions
# Conditions Step
> Route a workflow down different paths by testing your data, using typed operators, plain-language AI rules, or both.
The **Conditions** step decides where a workflow goes next. Each condition that is met sends the run down its own route, and an **ELSE** route catches the case where none are.
> Dock: Flow · Returns: the route taken
## Every condition is checked on its own
The most useful thing to know first: Conditions is not a single test with two outputs.
You add as many conditions as you need, and **each is evaluated independently**. A condition that is met sends the run to the step you point it at. Two conditions can both be met, and both routes run.
Conditions checks each route in turn; the ones that match run, and if none does, the Else route takes the run.
**ELSE runs only when no condition is met.** It is the catch-all, not the "false" side of a pair.
**Conditions is the one that can take more than one route.** Where the answer is one of several — a refund, a complaint or a question — [Switch](/build/action-steps/switch) is the step, and exactly one route runs. See [Choosing a Flow Step](/build/action-steps/routing) for the difference between the three routing steps.
> **A step with no conditions set passes everything through.** The panel says so
> in place: _"All data passes through if no conditions are set."_ An empty
> Conditions step is not a closed gate. It is an open one.
## Two kinds of rule
Every rule is one of two kinds, and you pick which when you choose its **type**. A new rule starts as an **AI Condition**, so describing the test in words is always available without setting anything up.
| | Typed rule | AI Condition |
| --------------------- | ----------------------------------------------------------- | ---------------------------------------------------------------------- |
| **How you write it** | Pick a type, an operator and a value | Describe the test in plain language |
| **How it decides** | A comparison | A model reads the value and judges |
| **Same input, twice** | Same answer, always | Can differ between runs |
| **Cost** | None | One model call each time it is evaluated |
| **Good for** | `status is equal to active`, `amount is greater than 10000` | "the message sounds like a complaint", "the address is outside the UK" |
**AI Condition is the one to reach for when the test needs judgement**: tone, intent, whether free text describes a complaint. Nothing else in the step can answer those.
**Switch the type to a comparison once you know the exact value you are testing.** Six types cover the ordinary cases — Text, Number, Yes/no, Record, List, Date & Time — and a comparison costs nothing, answers instantly, and gives the same result every time. On a workflow running at volume, that difference adds up.
You can mix the two in one step. A condition can hold a typed rule and an AI rule together, joined with AND or OR like any other pair.
## Setting it up
### Add a condition
Click **Add new condition**. Each condition gets its own **Then go to** route.
### Pick the data to test
Click the left-hand field to open the data picker. It lists **System Variables**, **Team Variables and Secrets**, and every step before this one, grouped by step number.
If the step has already run, the picker shows its **real values** next to each field. You choose `email` while looking at an actual address.
> **The picker's labels are shortened, and they are not the reference syntax.**
> A field shown as `3.email` is the `email` inside step 3's output. The real
> reference depends on the step: for an HTTP Request or app step it is
> `{{ 3.ret.email }}`, and other steps use a different wrapper or none (see
> [Variable Reference Syntax](/reference/variable-syntax)). Insert fields by
> clicking them rather than typing what the label appears to say.
### Choose the type, then the operator
Pick the kind of data you are testing: **Text**, **Number**, **Yes/no**, **Record**, **List**, or **Date & Time**. The operator list changes to match it.
### Set the value to compare against
The right-hand field takes text or another dynamic reference. Operators like _is empty_ need no second value, and the field disappears when you pick one.
### Point the route at a step
Under **Then go to**, choose where the run continues when this condition is met. Do the same under **ELSE** for the case where none are.
## Operators
**Pick the type first.** The operators you get depend on it. Choose **Text** and you can ask whether text contains a word. Choose **Number** and you can ask whether a value is over 100. The list changes underneath you, so a type left on the default offers you the wrong questions.
Start here:
| Testing… | Choose | Then reach for |
| --------------------------------- | ----------- | ---------------------------------------- |
| Names, emails, statuses, any text | Text | `is equal to`, `contains`, `starts with` |
| Amounts, counts, scores | Number | `is greater than`, `is less than` |
| A yes/no flag | Yes/no | `is true`, `is false` |
| A list, and how long it is | List | `contains`, `length greater than` |
| A record with fields in it | Record | `exists`, `is empty` |
| A date or timestamp | Date & Time | `is after`, `is before` |
| Whether something is there at all | any type | `exists`, `is empty` |
Those last four (`exists`, `does not exist`, `is empty`, `is not empty`) work whatever type you pick, and need no value to compare against. They are the ones to use when the question is "did we get this field?" rather than "what is in it?".
> **Where a field may be absent, test that it is there first.**
>
> A field that never arrived is not equal to anything, so `is not equal to`
> matches it. That is usually not what you meant: you wanted records whose value
> differs, not records that have no value at all.
>
> Click **Rule**, put `exists` on the same field, and add the comparison as an
> **AND** rule after it. The condition then covers only the records you meant.
>
> This applies to `is not equal to`. The other operators return no match for a
> field that is absent, so they need no guard.
The full lists, if you want them:
`is equal to` · `is not equal to` · `contains` · `does not contain` ·
`starts with` · `does not start with` · `ends with` · `does not end with` ·
`matches regex` · `does not match regex`
The last two take a **regular expression**, a pattern language for matching
text. It is useful for things like "a valid-looking email" or "starts with
three digits". If you have not met one before, `contains` and `starts with` cover
most needs. A pattern that takes too long to evaluate fails the rule rather
than holding up the run.
`is equal to` · `is not equal to` · `is greater than` · `is less than` ·
`is greater than or equal to` · `is less than or equal to`
An empty field does not count as zero. "Is the discount less than 100" is
**no** when there is no discount at all, rather than yes.
`is true` · `is false` · `is equal to` · `is not equal to`
`is true` and `is false` need no value to compare against.
> **Almost any text counts as true here, including the word `no`.**
>
> This type is for real yes/no flags. If your data carries the words `yes`
> and `no`, or `Y` and `N`, choose **Text** and `is equal to` instead, or
> everything comes out true.
Only `exists`, `does not exist`, `is empty` and `is not empty`.
You can ask whether a whole record is there, and nothing more. There is no
way to compare two records against each other. To test something inside the
record, point the condition at that field instead of at the record.
`contains` · `does not contain` · `length equal to` · `length not equal to` ·
`length greater than` · `length less than` ·
`length greater than or equal to` · `length less than or equal to`
`contains` asks whether an item is in the list. The `length` operators
compare how many items it has.
`is equal to` · `is not equal to` · `is after` · `is before` ·
`is after or equal to` · `is before or equal to`
ISO dates, HTTP/RFC1123 dates and `YYYY-MM-DD HH:mm:ss` all parse. A numeric
epoch (a plain count of seconds, like `1735689600`) does not, and neither
does a time on its own like `10:30`.
## Combining rules with AND and OR
A single condition can hold as many rules as it needs. Click **Rule** and choose which kind to add:
| Choice | What it does |
| ------------ | ----------------------------------------------------- |
| **AND rule** | Adds to the current group. Every rule in it must hold |
| **OR rule** | Starts a new group. Any one group matching is enough |
There is no combinator to set. Rules inside a group are always joined with AND, and groups are always joined with OR — the choice you make is which of the two you are adding, and the panel prints **AND** and **OR** between the rows so you can read the result back.
That covers the usual shapes. "Over £10,000 **and** in the UK" is two AND rules in one group. "Over £10,000 **or** flagged urgent" is two groups.
> **A condition with no rules matches everything.** An empty group passes, so a
> route left unconfigured fires on every run alongside whatever else matched.
> Delete a route you are not using rather than leaving it blank.
## Writing an AI Condition
Choose **AI Condition** as the rule's type and the operator menu is replaced by a single box: describe what you are testing, in words. **Prompt Examples** offers starting points.
Write it as a statement that is either true or false of the value in front of it — "this message is asking for a refund" reads better than "check if refund". The model sees the value you pointed the rule at and nothing else, so anything it needs to judge has to be in that value.
AI Condition is available in **Conditions** and [Filter](/build/action-steps/filter-items#describing-a-rule-in-words). The [Switch](/build/action-steps/switch) step is typed-only. In Filter it costs a call **per item**, so a hundred-item list is a hundred calls; in Conditions it is one call per rule, per evaluation.
> **A rule the model could not answer counts as "not met".** If the call fails
> or comes back unreadable, that route does not fire and the run carries on —
> falling to ELSE if nothing else matched. The reason is recorded against the
> rule in the run's history, so open the step in
> [Executions](/build/core-concepts/executions) when a branch you expected did
> not run.
>
> That is the safe behaviour for routing, and it is a reason to keep an AI rule
> off the path where a missed branch would go unnoticed.
## What it passes on
After a run, the step's badge tells you what happened:
| Badge | Means |
| -------------- | -------------------------------------------------------- |
| **Green tick** | A condition was met and the run continued down its route |
| **Red X** | No condition was met |
A red X with an empty ELSE route means the run stopped there. That is a legitimate design, and it is how you end a branch deliberately. But it looks identical to a mistake, so set an ELSE route if you want the distinction to be visible later.
## Limits
### Set capitalisation for each text rule
Text is compared exactly, so `Active` does not match `active`. To ignore capitals, turn on **Ignore capitalisation** on the rule itself.
The setting applies to the rule where you turn it on. For a Conditions step with four text rules, set **Ignore capitalisation** on each rule that should match regardless of case.
The toggle only appears where it changes the answer: on text comparisons and on a List `contains`. Numbers, dates and the presence checks have no capitals to ignore.
> **With capitals ignored, a `matches regex` rule lowercases the value but not
> your pattern.** An uppercase letter written into the pattern can then never
> match. Write the pattern in lower case, or leave the toggle off and handle
> capitals in the pattern itself.
## Examples to copy
### Route big leads
Send enterprise-sized leads down a different path from everyone else.
| Setting | Value |
| -------------- | ---------------------------- |
| **Data** | `{{ 2.ret.employee_count }}` |
| **Type** | Number |
| **Operator** | `is greater than` |
| **Value** | `100` |
| **Then go to** | the enterprise sequence |
| **ELSE** | the self-serve sequence |
Nothing here is "true" or "false". The condition either matches and takes its route, or it does not and ELSE takes over.
### Check a response before using it
Continue only when an API actually returned something usable.
| Setting | Value |
| -------------- | -------------------------------------------------------------------------- |
| **Data** | `{{ 3.ret.status }}` |
| **Type** | Number |
| **Operator** | `is equal to` |
| **Value** | `200` |
| **Then go to** | the step that reads the data |
| **ELSE** | a [Stop and Error](/build/action-steps/stop-and-error) naming the endpoint |
The status field exists only with **Include Full Response** turned on in the [HTTP Request](/build/action-steps/http-request) step.
### Skip internal and test addresses
Two rules joined with **AND**. Click **Rule** to add the second.
| | Data | Type | Operator | Value |
| ---------- | ------------------- | ---- | ------------------- | ------------------ |
| **Rule 1** | `{{ 2.ret.email }}` | Text | `does not contain` | `@yourcompany.com` |
| **AND** | `{{ 2.ret.email }}` | Text | `does not end with` | `.test` |
Both must hold for the route to fire. Point ELSE at a logging step so you can see what was skipped.
## What's Next?
- Route to many named outputs with the [Switch Step](/build/action-steps/switch).
- Keep or discard items in a list with [Filter](/build/action-steps/filter-items).
---
Source: https://docs.getglow.ai/build/action-steps/custom-variables
# Custom Variables
> Hold a value under a name you choose, and read it back anywhere later in the same run.
The **Custom Variables** step holds one or more values under names you choose, so later steps can read them back by name.
> Dock: Data · Change · Takes: any value · Returns: each variable by name
**Keyboard shortcut:** `t+v`
## When it is worth one
Any step can already read any earlier step by number, so a variable is not how you move data forward. `{{ 3.email }}` does that on its own.
Reach for one when the value is not already sitting in an earlier step's output. A running total you keep adding to, a flag you set once and check much later, or a starting value you want written down in one obvious place instead of repeated across four fields.
## Setting it up
1. Press `t+v`, or open **Tools → Data → Change** in the dock and select **Custom Variables**.
2. Under **Variables**, type a name in the **Name** column and its value in the **Value** column. Each variable takes one row, and the step opens with an empty row ready to fill.
3. Select **Add variable** for each further value. One step can define several variables at once, which keeps the canvas shorter than a step per value. The minus at the end of a row removes that variable.
4. The value can be typed in directly (`0`, `pending`), or picked from an earlier step. The picker sits on the value only: a name is always something you type.
> **A variable lasts one run and no longer.** The next run starts with nothing
> set, whatever the last one left behind. To keep a value between runs, put it
> in a [workspace variable](/manage/workspace-settings/secrets-and-variables), a
> spreadsheet row, or a record in your own system.
> **Each Custom Variables step keeps its own values.** Two steps can both set a
> `status`, and they do not overwrite each other: `{{ 3.status }}` and
> `{{ 7.status }}` are two different values, read from two different steps.
> Within one step, a name used on two rows keeps the later row's value.
## Types
Each row carries a **type**, shown beside its value: **Text**, **Number**,
**Yes/no**, **List** or **Record**. It is set for you as you type — write
`["red", "amber", "green"]` and the row reads **List**; write `42` and it reads
**Number**.
```
["red", "amber", "green"] row reads List
{"plan": "pro"} row reads Record
42 row reads Number
true row reads Yes/no
```
A typed list is a real list downstream: point **Run for each item** at it and it
runs once per entry, the same as a list from an earlier step.
**A row holding a reference is Text.** `{{ 3.ret.items }}` on its own still
arrives as whatever that step produced, with its type intact — the row shows Text
because the value is a reference until the run resolves it, not because the list
is flattened.
Mix a reference into surrounding text and the result really is text.
`Order {{ 3.id }} for {{ 3.customer }}` is one sentence, and that is all
combining values this way can produce.
## What it passes on
Each variable becomes a field on the step, named exactly as you named it. A step 3 that sets `discount_rate` is read downstream as:
```
{{ 3.discount_rate }}
```
There is no wrapper in between. The variable name follows the step number directly. Insert references from the data picker rather than typing them, and check the [Variable Reference Syntax](/reference/variable-syntax) if a path is not resolving.
## Examples to copy
### A decision made early, used late
A workflow looks up a customer at step 2. It needs their loyalty tier at step 9, after a lookup, a branch and a loop have all run.
1. At step 3, set `loyalty_tier` from the CRM lookup.
2. At step 9, use `{{ 3.loyalty_tier }}` to pick the discount.
You could reference the CRM step directly. The variable earns its place when the tier comes from somewhere different depending on the branch taken. Then one name means one thing, wherever the run went to find it.
### A flag decided mid-flow
1. Somewhere in the middle, a Custom Variables step (say step 7) sets `requires_approval` from a rule: an amount over the threshold makes it `true`.
2. At the end, branch on `{{ 7.requires_approval }}` to decide whether to route through [Human Review](/build/action-steps/user-approval).
**Read the flag from the step that set it.** A variable belongs to its step, so a later step setting the same name does not change an earlier one. The branch has to reference the step whose value it wants.
### Counting what a loop did
You do not need a variable for this. A step running per item passes on `{{ N.stats }}`, with `total`, `succeeded`, `failed` and `skipped` already counted. See [Loops & Iteration](/build/action-steps/loops). Reach for a variable only when you are counting something the loop does not track for you.
## What's Next?
- Reference stored values correctly using the [Variable Reference Syntax](/reference/variable-syntax).
- Store values that must persist across runs in [Secrets and Variables](/manage/workspace-settings/secrets-and-variables).
---
Source: https://docs.getglow.ai/build/action-steps/date
# Date
> Format a date for people to read, shift it, pull out a part of it, measure the gap between two, or round it.
The **Date** step does one thing to a date and hands back the answer. Format it for a person, shift it, pull out one part, measure the gap between two dates, round it, or take the current date.
> Dock: Data · Change · Takes: a date · Returns: a date or a number
Dates are unavoidable in operations work: invoice due dates, SLA windows, "anything older than 30 days". This step handles them without a trip to the Code editor.
> **Format or shift dates directly inside fields:** You can format, shift, or snap dates directly within any variable reference using [Data Transformation](/build/core-concepts/data-transformation):
> - Format for reading: `{{ 1.created_at | format_date:date_medium:Europe/Prague }}`
> - Add 30 days: `{{ 1.invoice_date | date_add:30:days }}`
> - Start of month: `{{ 1.timestamp | date_start_of:month }}`
>
> Use the dedicated **Date** canvas step when you need to calculate gaps between dates (Between) for downstream [Conditions](/build/action-steps/conditions) or when multiple steps reuse the computed date.
## Setting it up
### Add the step
Open **Tools** in the dock and choose **Date**.
### Pick what to do
**What to do** decides which of the other fields appear:
| Operation | What it does |
| ------------ | --------------------------------------------- |
| **Format** | Renders a date as display text |
| **Add** | Moves a date forwards |
| **Subtract** | Moves a date backwards |
| **Extract** | Pulls out one part: the year, month, weekday… |
| **Between** | Measures the gap between two dates |
| **Round** | Snaps to a whole day, hour, month… |
| **Now** | Takes the current date and time |
### Give it the date
**Date** takes what you are working with, usually a reference such as `{{ 1.created_at }}`. Write it out as `2026-08-03`, `2026-08-03 14:22` or `2026-08-03T14:22:00Z`, or use `{{ $now }}`.
**Between** also needs **Second date**.
### Fill in the rest
**Add** and **Subtract** take **How much** and a **Unit**: years through seconds.
**Extract** takes **Part to extract**: year, quarter, month as a number or a name, week of the year, day of the month, day of the year, day of the week as a number or a name, hour, minute or second.
**Between** takes **Measure in**. The gap is counted in whole units, so 36 hours measured in days answers 1.
**Round** takes **Round to** (year, month, week, day, hour or minute) plus a **Direction**. Down goes back to the start of the unit; up goes forward to the next boundary. A date already sitting on a boundary is left alone either way, and weeks start on Monday.
### Choose a format and timezone
**Format** offers ISO (`2026-08-03`), day-first (`03/08/2026`), month-first (`08/03/2026`), long date (`3 August 2026`), date and time (`2026-08-03 14:22`), long date and time (`3 August 2026 at 14:22`), or **Custom**.
Custom takes a pattern built from these tokens: `YYYY` `YY` for the year, `MMMM` `MMM` `MM` `M` for the month, `DD` `D` for the day, `dddd` `ddd` for the weekday, `HH` `H` `hh` `h` for the hour, `mm` `m` for minutes, `ss` `s` for seconds, and `A` `a` for am/pm. Anything in `[square brackets]` is written out as-is, so `[Due] DD MMM` gives `Due 03 Aug`.
**Timezone** matters whenever a date crosses midnight for somebody. Set it to the timezone the reader is in, not the one the server is in.
> **If the incoming date is in an unusual shape**, use **Input format** to say
> how to read it. Without it, Glow makes a sensible guess, which is right for
> ISO dates and ambiguous for things like `03/04/2026`.
## What it passes on
**Two keys mean the same thing on every operation, so learn them once:**
| Reference | What it holds |
| ------------------- | ---------------------------------------------- |
| `{{ N.date }}` | The machine-readable instant, for another step |
| `{{ N.formatted }}` | The display text, for a person to read |
Use `formatted` in a message and `date` when another step needs to work with it.
**`{{ N.result }}` is the operation's primary answer**, and what kind of thing it is depends on the operation: an instant from Format, a number from Extract or Between. `{{ N.resultType }}` names that kind (`date`, `text` or `number`), so one look tells you what you are about to reference.
**Extract and Between have no instant to give**, so `date` and `formatted` are absent on those two rather than holding something misleading. A reference to a key that is not there fails visibly instead of returning a plausible wrong value.
| Operation | `result` is | `date` and `formatted` |
| --------------------------------- | ----------- | ---------------------- |
| Format, Add, Subtract, Round, Now | an instant | present |
| Extract | a number | absent |
| Between | a number | absent |
The step also publishes the **operation** and **timezone** it used, so a stored run can be read back later without opening the panel.
## Examples to copy
### A due date thirty days out
**What to do:** Add · **Date:** `{{ 1.invoice_date }}` · **How much:** 30 · **Unit:** days.
Put `{{ N.formatted }}` in the email and `{{ N.date }}` wherever another step needs the date itself.
### How old is this ticket?
**What to do:** Between · **Date:** `{{ 2.created_at }}` · **Second date:** `{{ $now }}` · **Measure in:** days.
Follow it with a [Condition](/build/action-steps/conditions) on `{{ N.result }}` to escalate anything past your SLA.
### Only run on weekdays
**What to do:** Extract · **Part to extract:** Day of the week (number).
Days are numbered the international way: **Monday is 1 and Sunday is 7**. A [Condition](/build/action-steps/conditions) on `{{ N.result }}` set to **is less than** `6` therefore runs on weekdays only.
### The start of this month
**What to do:** Round · **Round to:** month · **Direction:** down.
Useful as the "from" date of a monthly report.
## What's Next?
- Branch on the answer with [Conditions](/build/action-steps/conditions).
- See what `{{ $now }}` and `{{ $today }}` give you in [Variable Syntax](/reference/variable-syntax).
---
Source: https://docs.getglow.ai/build/action-steps/delay
# Wait
> Pause a run for a set time, until a date and time, or until a webhook call or form submission resumes it.
The **Wait** step pauses a workflow and decides when it starts again. It can wait a fixed amount of time, wait until a particular date and time, or hold the run open until something outside Glow answers.
> Dock: Flow
**Find it under Flow in the Tools panel**, or place it with the `f` then `d` shortcut.
```mermaid
flowchart LR
A[Create User] --> B[Wait 10 Minutes] --> C[Send Welcome Email]
```
A waiting run is not running. Glow puts the run down and picks it up when the wait is over. A step that waits two days costs no more than one that waits two seconds.
## Setting it up
The first field is **Wait Mode**, and it changes every field below it. The four modes are:
| Wait Mode | Continues when |
| ---------------------------------- | ---------------------------------------------- |
| **For a time interval** | The amount of time you set has passed |
| **Until a specific date and time** | The clock reaches the date and time you set |
| **On webhook call** | Another system calls this run's resume address |
| **On form submitted** | Somebody fills in a form and submits it |
The default is **For a time interval**.
### For a time interval
Two fields: **Amount** and **Unit**. Amount defaults to 5, Unit offers Seconds, Minutes, Hours and Days. "Wait 2 days" is Amount 2, Unit Days.
Reach for this mode when you are spacing out calls to another service. It also suits giving a system a moment before you read back something you just wrote.
### Until a specific date and time
Two fields: **Resume at** and **Timezone**.
**Resume at** takes a date and time like `2026-01-01 09:00`. It also takes a reference to an earlier step, which is where most of its value is. A renewal date that arrived in the trigger becomes the moment the run continues:
```
{{ 2.renewalDate }}
```
**Timezone** is the zone that date and time is read in. It defaults to the timezone of whoever built the workflow. Daylight saving is applied for the date being waited for rather than for today. A wait set now for a date in June gets June's offset.
A value carrying its own offset (ending in `Z`, or `+02:00`) is read as an absolute moment. The Timezone field does not apply to it.
If the moment you name has already passed when the step runs, the workflow carries straight on rather than failing. "Wait until 09:00" evaluated at 09:05 continues immediately.
### On webhook call
The run stops and waits for another system to call it. When the step runs, Glow mints a resume address that belongs to that one run, and publishes it on the step's output as `resumeUrl`. Send it to whoever needs to call it back:
```
{{ 4.resumeUrl }}
```
Put a step after the Wait that hands the address on. Two common shapes: an HTTP Request that registers it as a callback with a supplier's API, or a Slack message that posts it into a channel.
Anything the caller POSTs to that address is carried into the workflow as `formData`. A supplier confirming with `{"orderId": "A-91", "status": "shipped"}` gives your later steps `{{ 4.formData.orderId }}` and `{{ 4.formData.status }}`.
The address is created when the step runs, not when you build the workflow, and each one answers for a single run. There is no address to copy out of the panel beforehand. Calling an address a second time, after the run has moved on, does nothing.
> **Run the workflow once and confirm it is waiting before you build on it.**
> Open the step's **Executions** tab after the run: a suspended step shows a
> pending status and its resume address, and the steps after it have not fired.
> That check takes a moment and tells you the address is live and reachable
> before you hand it to a supplier or post it into a channel.
### On form submitted
The same suspension, but the address opens a page a person fills in. Configure the page with:
| Field | What it does |
| -------------------- | ------------------------------------------------------ |
| **Form Title** | Heading shown above the form |
| **Form Description** | Short explanation shown under the heading |
| **Form Fields** | The fields somebody fills in. At least one is required |
Each field takes a **Field name**, which is the key later steps read it by, and a **Label**, which is what the person sees. You also set a **Type**, whether it is **Required**, and optional **Placeholder** and **Help text**. The choice types take a comma-separated list of **Choices**.
The types available are short text, long text, number, date, dropdown, multi-select, checkbox, radio and file.
The form page shows the workflow's name, your title and description, and the deadline if you set one. Once somebody submits, the page says so. A second visitor to the same link sees that it has already been answered.
The answers arrive as `formData`, keyed by the field names you chose. A field named `reason` is read by a later step as `{{ 4.formData.reason }}`.
> Both waiting modes resume through a published workflow. Where the workflow is
> no longer Live, the address reports that it needs publishing rather than
> continuing the run.
### Resumed and Expired
The two waiting modes give the step two outputs, listed under **Branches**: **Resumed** and **Expired**.
Drag a connection from each to the steps that should follow it. Resumed is the normal path, taken when the call or the submission arrives. Expired is taken when nothing arrives in time.
Leave Branches empty and the step behaves like any single-output step. Resuming continues down its normal output, and expiring settles the run through its error path. An unanswered wait is therefore visible as a failure rather than mistaken for an answer. Wiring the Expired branch turns that into a path of its own, such as a chaser email or a hand-off to a person.
**Timeout (seconds)** is what sets the deadline. Leave it blank or at 0 and the step waits indefinitely, and only Resumed can ever fire.
## What it passes on
What the step publishes depends on its mode.
**For a time interval and Until a specific date and time**, the step publishes one value:
| Reference | Contains |
| ---------------- | ------------------------------------------------------------------------------- |
| `{{ N.result }}` | A sentence confirming the wait, e.g. "Next steps will be executed after 2 days" |
The two timed modes wait and then carry on, so there is nothing else worth
passing down. If a later step needs the moment the run resumed, use
`{{ $now }}` there rather than reading it back off this step.
**On webhook call and On form submitted**, while the run is paused:
```json
{
"status": "pending",
"waitMode": "form",
"resumeUrl": "https://…",
"formUrl": "https://…",
"expiresAt": "2026-08-10T09:00:00.000Z"
}
```
`formUrl` is the page a person opens, and appears in form mode only. `expiresAt` is null when there is no timeout.
Once the wait resumes, the step's own result carries what came back:
| Reference | Contains |
| ------------------------- | ------------------------------------------- |
| `{{ N.formData. }}` | What was submitted, or what the caller sent |
| `{{ N.decision }}` | `resumed` or `expired` |
| `{{ N.answeredAt }}` | When the answer arrived |
Steps before the Wait are untouched by it. Anything later steps need from them is read as usual.
## Limits
A timeout, and a timed wait, both run to a maximum of **13 days**. The field refuses a larger number when you type it. To pause for longer, end the workflow and start a second one on a [Scheduler](/build/triggers/scheduler) trigger at the date you want.
For anything longer, run the later half of the work as its own workflow on a [Scheduler Trigger](/build/triggers/scheduler) rather than holding a run open. That is also the better shape for "every morning at nine", which is a schedule rather than a pause inside one run.
## Examples to copy
### Stay under a third party's rate limit
Put a Wait of Amount 2, Unit Seconds as the last step of a [Repeater](/build/action-steps/loops) loop body, before the connection back into the Repeater step. Each pass then waits before the next begins, so the requests arrive spread out rather than all at once.
### Continue on the renewal date
Set Wait Mode to **Until a specific date and time** and Resume at to `{{ 1.renewalDate }}`. The run continues on the day named in the record that started it, with no scheduled job to maintain.
### Wait for a supplier to confirm
Set Wait Mode to **On webhook call** and Timeout to `172800` for two days. Follow the Wait with an HTTP Request that sends `{{ 4.resumeUrl }}` to the supplier as a callback address. Wire Resumed to the fulfilment steps and Expired to a chaser email.
### Ask somebody for the missing detail
Set Wait Mode to **On form submitted** and add a short text field named `poNumber`. Email `{{ 4.formUrl }}` to the account manager. Later steps read `{{ 4.formData.poNumber }}`.
> Because Glow is multiplayer, a teammate watching a running workflow sees when
> a Wait step started and when it is due to resume.
## What's Next?
- Run a workflow on a recurring clock instead of pausing mid-run with the [Scheduler Trigger](/build/triggers/scheduler).
- Ask a named person for a decision, with buttons and branches of your own, using [Human Review](/build/action-steps/user-approval).
- See execution ceilings in [System Limits & Quotas](/reference/system-limits).
---
Source: https://docs.getglow.ai/build/action-steps/filter-items
# Filter
> Check every item in a list on its own and split it into the ones you keep and the ones you discard.
The **Filter** step takes a list and checks each item on its own. Items that match your rules continue on the **KEPT** route, and the rest go to **DISCARDED**.
> Dock: Flow · Takes: a list · Returns: two lists
Use it to strip a list down before doing expensive work on it. You might keep only active users out of a hundred, or only the orders above a threshold.
**Think of it as a Condition applied to every item**, with the verdict's routing built in: an item that passes continues on KEPT, one that fails takes DISCARDED. Each route carries on with its share of the list — and a route that ends up with no items does not run at all.
**Filter is the only one that divides a list.** The other two look at the run as a whole and pick a path. Ask yourself whether you are splitting _items_ or choosing a _route_ — and see [Choosing a Flow Step](/build/action-steps/routing) for the difference between the three.
Filter splits a list in two: the items that matched leave by one route and the rest by Discarded, and both routes run.
## Choose the list, then write the rules
The panel opens with **List**: choose which list to filter, from the steps connected before this one. Connect an earlier step first and its lists are offered; **Enter it myself** takes a typed list instead.
Then each rule reads the way you would say it out loud: **a property of an item, an operator, a value**, as in `status is equal to active`. The property picker offers the fields of the list you chose.
Before an earlier step is connected, the List field says so:
> Connect an earlier step to choose one of its lists.
> **Connect the step that returns the list first.** The picker only offers lists
> from steps before this one on the canvas. Until the link exists, the Filter
> has nothing to offer you and the FILTERING line stays empty.
To point the Filter at a different list, pick a property from that list in one of the rules. The binding follows the property. Check the FILTERING line afterwards to confirm you landed on the list you meant. That matters when two upstream steps return similar-looking lists.
## Setting it up
### Select a property
Click **Select a property** on the first rule and choose a field of the item you want to test.
### Choose the type and operator
Pick the data type: **Text**, **Number**, **Yes/no**, **Record**, **List**, or **Date & Time**. Then pick an operator from that type's list. The catalogue is shared with [Conditions](/build/action-steps/conditions#operators).
### Add more rules if you need them
Click **Rule** to add another. Rules within a group are joined with **AND**. Separate groups are joined with **OR**. The panel states the result plainly: items matching **all rules in any group** are kept.
### Point the routes at steps
Choose a step under **KEPT**. Under **DISCARDED**, choose a step if you want to do something with the rejects, or leave it unassigned to drop them.
> **With no rules configured, every item is kept.** An unfinished Filter is not
> a closed gate.
## Referring to the item
Inside the rules, `{{ $item }}` is the whole item, `{{ $item.field }}` one of its properties, and `{{ $itemIndex }}` its position in the list, counting from 0.
> Filter uses `$item`, with a dollar sign. [Run for each
> item](/build/action-steps/loops/run-for-each-item) uses `item`, without one.
> The two are separate mechanisms and the tokens are not interchangeable.
## One record works too
Filter is happiest with a list, but a **single record** is fine: it is treated as
a list of one, and comes out on KEPT or DISCARDED like any other item.
That makes it a useful gate for a single thing. "Only carry on if this order is
over £500" is a Filter with one record in and one route out, and unlike a
[Conditions](/build/action-steps/conditions) step, the item itself travels down
the route rather than only the decision.
What the step accepts:
| Input | What happens |
| ----------------------------------------- | ------------------------------- |
| A list | Each item is checked on its own |
| A single record | Treated as a list of one |
| Text holding a list or record | Read as one, if properly formed |
| A blank value, a bare number or some text | **The step fails** |
The last row is deliberate. A bare value has no fields to test, so wrapping it
silently would produce a rule that can never match. The step says so instead:
_"Filter needs a list or record. Connect a step that returns a list, or pick a
field that holds one."_
## When an item does not make sense
Sometimes a rule cannot be answered for a particular item. You are comparing dates and one record has "last Tuesday" in that field, or comparing numbers and one has "N/A".
**Those items are discarded rather than stopping the run.** One bad record does not cost you the other ninety-nine, and the step tells you it finished with problems.
The catch is that **discarded then means two things at once**: items that genuinely did not match, and items nobody could make sense of. If that distinction matters, send DISCARDED somewhere you can look at it rather than dropping it.
## Capital letters matter here
**Ignore capitalisation** is off by default, so `Active` does not match
`active`. Text is compared exactly until you say otherwise, which is the same
rule the [Switch](/build/action-steps/switch) step follows.
Turn it on to ignore capitals across every rule in the step. You can also set it
on **a single rule**, which overrides the step for that rule alone. That helps
when one field arrives from a system that capitalises inconsistently and the
rest do not.
## Describing a rule in words
Where no operator fits, set a rule's type to **AI Condition** and write what you are testing in plain language: "the message sounds like a complaint", "the address is outside the UK". **Prompt Examples** offers starting points.
> **Watch the count on a long list.** An AI condition costs a model call for
> every item, so a hundred items means a hundred calls, and two runs on the same
> item can differ. Use it for the tests a comparison cannot express, and switch
> the rest to a typed operator once you know the value you are testing.
AI Condition is available in **Filter** and [Conditions](/build/action-steps/conditions#writing-an-ai-condition). The [Switch](/build/action-steps/switch) step is typed-only.
## A branch with no items does not run
If every item matches, nothing connected to DISCARDED fires. If none match, nothing connected to KEPT fires. That is usually what you want, but it means a step on only one route is skipped when that route has no items. The run finishes successfully, without doing that work.
If something must happen either way, put it before the Filter or on both routes.
## What it passes on
Downstream steps read the results by number, like any other step:
| Reference | What it holds |
| ------------------------ | ----------------------- |
| `{{ N.kept }}` | The items that matched |
| `{{ N.discarded }}` | The items that did not |
| `{{ N.keptCount }}` | How many were kept |
| `{{ N.discardedCount }}` | How many were discarded |
> **Discarded items are always in the step's result, even with the DISCARDED
> route unassigned.** Leaving that route empty stops them continuing through the
> workflow. It does not throw them away. If you need to see what fell out, read
> `{{ N.discarded }}` on any later step.
## Limits
A single Filter step processes up to **100,000 items**. Above that it stops with an error rather than quietly doing part of the job.
If you use `matches regex` in a rule, all that pattern-matching together gets **five seconds** across the whole list. Any single pattern gets **250 milliseconds**. Go over either and the step fails, naming how many items it got through. It will not hand you a half-filtered list. If you hit it, filter on something simpler first to cut the list down, or simplify the pattern.
## Examples to copy
### Keep only active users
| Setting | Value |
| ------------ | -------------------------------- |
| **Property** | `status`, from the list of users |
| **Type** | Text |
| **Operator** | `is equal to` |
| **Value** | `active` |
Picking `status` out of the list of users is what binds the Filter to that list. Check the FILTERING line to confirm. The next step reads `{{ N.kept }}`.
### Drop consumer email domains
Two rules with **AND**. Click **Rule** to add the second.
| | Property | Type | Operator | Value |
| ---------- | -------- | ---- | ------------------- | ------------ |
| **Rule 1** | `email` | Text | `does not end with` | `@gmail.com` |
| **AND** | `email` | Text | `does not end with` | `@yahoo.com` |
Both must hold for an item to be kept. Matching is exact by default, so turn **Ignore capitalisation** on if `@Gmail.com` should be caught too.
### Keep products that are in stock
| Setting | Value |
| ------------ | ----------------- |
| **Property** | `stock_count` |
| **Type** | Number |
| **Operator** | `is greater than` |
| **Value** | `0` |
Point **DISCARDED** at a step that logs what fell out rather than leaving it empty. Otherwise you cannot tell "nothing was out of stock" from "the rule was wrong".
## What's Next?
- Process each kept item individually with [Loops & Iteration](/build/action-steps/loops).
- Route the whole run instead of a list with the [Conditions Step](/build/action-steps/conditions).
---
Source: https://docs.getglow.ai/build/action-steps/helper-functions
# Helper Functions
> Ready-made utility steps for formatting, conversion, and lookups, without writing a Code editor step.
**Helper Functions** is an app of small utility steps for everyday data work. It covers converting values, reshaping text, and similar chores that would otherwise need custom code.
Find it in the dock under **Tools → Data → Convert**, alongside **Formatting** and the built-in data steps.
> Helper Functions are **steps you place on the canvas**, not expressions you
> type into a field. There is no `{{ formatDate(...) }}` function syntax.
> Placeholders reference data, they do not call functions. See [Variable
> Reference Syntax](/reference/variable-syntax) for what a placeholder can
> contain.
## Setting it up
### Open the dock
Click **Tools** in the dock, then the **Data** category.
### Pick a function
Open **Helper Functions** and choose the operation you need. Each one is a normal step with its own inputs and output.
### Wire it up
Connect it into your flow. Reference its output downstream by step number, for example `{{ 3.result }}`.
Some functions do not appear in the catalogue, because a native step does the same job better. These are the ones you are most likely to go hunting for:
| Looking for | Use instead |
| ----------------------- | ------------------------------------------------------------------------------------------------------------ |
| Send HTTP request | [HTTP Request](/build/action-steps/http-request) |
| Schedule task in future | [Wait](/build/action-steps/delay), or the [Scheduler Trigger](/build/triggers/scheduler) for a recurring job |
| Pause between steps | [Wait](/build/action-steps/delay) |
| Trigger workflow | The [Subflow](/build/action-steps/trigger-workflow) step, which waits for the result |
| Send email | The email connector for your provider, from the Apps panel |
| Send to S3 | The AWS connector from the Apps panel |
If a function you expected is not in the list, check **Common Alternatives** below before assuming it is missing.
## Formatting
**Formatting** sits beside Helper Functions under **Tools → Data → Convert** and works the same way. Pick an action, and it becomes a step. It is where most everyday tidying lives.
| Group | What it covers |
| ------------- | --------------------------------------------------------------------------------------------------------------------------------------------- |
| **Text** | Trim whitespace, transform case, replace text, set a default when a value is empty, encode or decode a URL, convert between HTML and Markdown |
| **Extract** | Pull an email address, phone number, URL or number out of a longer string, or match your own regular expression |
| **Date/Time** | Format a date, add or subtract time, compare two dates |
| **Numbers** | Format a number, format a currency value |
| **Data** | Convert JSON to a string |
Reach for **Set Default Value** more often than seems necessary. An empty field arriving at a later step is one of the quieter ways a run goes wrong, and it costs one step to rule out.
## Common alternatives
Much of what you might reach for a helper function to do is handled by a dedicated step:
| You want to | Use |
| ---------------------------------- | --------------------------------------------------------------------------------- |
| Reshape or reformat data | [AI Data Transform](/build/ai-features/ai-transform) |
| Parse a JSON string | [Parse JSON](/build/action-steps/parse-json) |
| Break text into a list | [Split Text](/build/action-steps/split-text) |
| Strip HTML down to plain text | [HTML to Text](/build/action-steps/html-to-text) |
| Insert the current date or time | `{{ $now }}` / `{{ $today }}` — see [Variable Syntax](/reference/variable-syntax) |
| Format, shift or compare a date | [Date](/build/action-steps/date) |
| Group a list and count or total it | [Summarize](/build/action-steps/summarize) |
| Anything not covered above | [Code editor](/build/action-steps/code-execution) |
For a one-off transformation, **AI Data Transform** is usually the quickest route. Describe the change in plain language rather than finding the right function.
For anything repeated, precise, or performance-sensitive, **Code editor** is the more predictable choice. It runs the same way every time, and is far easier to debug than a chain of small utility steps.
## What's Next?
- Describe a transformation instead of coding it with [AI Data Transform](/build/ai-features/ai-transform).
- Write it yourself in [Code editor](/build/action-steps/code-execution).
---
Source: https://docs.getglow.ai/build/action-steps/html-to-text
# HTML to Text
> Strip the markup out of an HTML string and get readable text back.
The **HTML to text** step takes a string full of markup and gives you back the readable text inside it.
> Dock: Data · Convert · Takes: HTML · Returns: text
Most often you need it because an email body, a CRM note or a fetched web page arrived as HTML. The next step wants text a person can read: a Slack message, a spreadsheet cell, a summary.
> **No extra step needed?** You can strip HTML directly inside any field token using [Data Transformation](/build/core-concepts/data-transformation) with `{{ 2.html_body | strip_html }}`. Use this dedicated **HTML to text** step when you want the cleaned text stored as a standalone canvas output for multiple subsequent steps to reuse.
**Keyboard shortcut:** `t+h`
## Setting it up
1. Press `t+h`, or open **Tools → Data → Convert** in the dock and select **HTML to text**.
2. In the **Input** field, pick the HTML from an earlier step.
3. Save the step.
## What it passes on
The converted text is read by step number, like any other step:
```
{{ 3.ret }}
```
Run the step once and read the **Executions** tab to confirm the path before you build against it. That is quicker than reasoning it out, and it settles the question for good.
## What it leaves behind
- **Styles and scripts.** Markup that is not readable text is stripped along with the tags.
- **Entities and odd markup.** Encoded characters are turned back into the characters they stand for, and imperfectly nested tags do not stop the step.
- **Empty input.** An empty or missing input produces an empty string.
The exact output for a given page is worth confirming once in the **Executions** tab rather than predicting it. HTML in the wild varies more than any rule about it does.
> **Links come through as text only.** "Visit this link" survives; the address
> behind it does not. If you need the URLs, pull them out with a [Code
> editor](/build/action-steps/code-execution) step before stripping the tags.
## Examples to copy
### What goes in and what comes out
```html
Order Confirmation
Thank you for your order, Jane.
- Item: Widget Pro
- Quantity: 3
- Total: $89.97
Visit this link to track your order.
```
**Out:**
```
Order Confirmation
Thank you for your order, Jane.
- Item: Widget Pro
- Quantity: 3
- Total: $89.97
Visit this link to track your order.
```
The step preserves the structure (paragraphs become line breaks, list items are prefixed with dashes) while removing all HTML markup.
### An email body into Slack
An email trigger gives you the message as HTML. Slack shows the tags rather than
the words unless you convert it first.
**What to do:** add HTML to text after the trigger, set **HTML** to the email's
body field, and put `{{ 3.ret }}` in the Slack step's message — replacing `3`
with this step's own number.
### A page you fetched into an AI step
An [HTTP Request](/build/action-steps/http-request) returns a page as markup, and
an AI step reading it spends most of its budget on tags.
**What to do:** put HTML to text between them, with **HTML** set to
`{{ 3.ret.body }}`, and reference the converted text in the prompt.
## What's Next?
- Break the resulting text into a list with [Split Text](/build/action-steps/split-text).
- Write a custom parser for more complex extraction using [Code editor](/build/action-steps/code-execution).
---
Source: https://docs.getglow.ai/build/action-steps/http-request
# HTTP Request
> Call any REST API from a workflow, with control over the method, URL, headers and payload.
The **HTTP Request** step calls an API that has no ready-made step in Glow. It sends exactly the method, URL, headers and payload you configure, and nothing else.
> Dock: Data · Dev tools · Returns: the API's response
Reach for it whenever a service you need has no Glow connector yet, or when the connector exists but the endpoint you want is not one of its actions. It also reaches your own systems, provided they are reachable from the internet: an endpoint on a private network or a `localhost` address is refused.
**Add it from Tools → Data → Dev tools on the canvas dock.** Searching the Apps panel for "HTTP" turns up a separate connector of the same name. This page describes the built-in step under Tools, which is the one to use.
---
## How it fits in a workflow
```mermaid
flowchart LR
A[Webhook Trigger] --> B[Parse JSON] --> C[HTTP Request] --> D{Status 200?}
D -->|Yes| E[Slack Success]
D -->|No| F[Slack Error Alert]
```
---
## Setting it up
### Select the Method
Choose the HTTP method required by the target API:
- **GET:** Retrieve data from an API
- **POST:** Create a new resource or submit data
- **PUT / PATCH:** Update an existing resource
- **DELETE:** Remove a resource
- **HEAD / OPTIONS:** Inspect headers or verify CORS capabilities without downloading the body
### Define the URL
Enter the full URL for the API endpoint (e.g., `https://api.example.com/v2/orders`).
Inject values from earlier steps with `{{ }}`, referencing each step by the number shown on the canvas. For a field the trigger received, that gives you `https://api.example.com/orders/{{ 1.order_id }}`.
Use the data selector beside the field rather than typing the path. What a step exposes varies by step type, and picking the value inserts the reference that actually resolves.
**Query parameters have their own section.** You do not have to build a query string by hand. Add them as name/value pairs (or raw JSON) and Glow assembles the URL, handling URL encoding and nested keys (e.g., `filter[status]=active` or `ids[]=1&ids[]=2`) for you.
### Set Headers & Authentication
**Authentication** is its own field, above the headers. Pick the type and fill in the value. Glow builds the header for you:
| Type | What you supply |
| ---- | --------------- |
| **None** | Nothing. The default. |
| **Bearer Token** | The token, e.g. `{{ $secret.API_TOKEN }}` |
| **Basic Auth** | Username and password |
| **API Key in Header** | The header name the service expects, and the key |
Use **Headers** for everything else the API asks for: `Accept`, `Content-Type`, a request id. You only need to write an `Authorization` header by hand for a scheme none of the four types covers.
Both **Headers** and **Query Parameters** can be filled in as name/value **Fields** or pasted wholesale as **JSON**. Use whichever matches what the API's own documentation gives you.
> **Put credentials in [secrets](/manage/workspace-settings/secrets-and-variables), not in the header value.** A token typed directly into the field is visible to anyone who can open the workflow. It also travels with the workflow if that is shared or published as a template.
### Configure the Payload
For methods that send data (POST, PUT, PATCH) configure the request body. **Body Type** offers:
| Option | Sends |
| --------------------- | ------------------------------------------------------------ |
| **JSON** | `application/json` — the usual choice for REST APIs |
| **Form URL Encoded** | `application/x-www-form-urlencoded` (`a=1&b=2`) |
| **Form Data** | `multipart/form-data` for structured key-value form fields |
| **Text** | `text/plain`, sent exactly as you write it |
| **None** | No body at all (sends `Content-Length: 0` for POST/PUT) |
**Form URL Encoded and Form Data are not the same thing.** If an API's documentation shows `a=1&b=2`, you want Form URL Encoded.
### Advanced Options & Timeout
Configure behavior for slow or custom endpoints under **Advanced Options**:
- **Timeout (seconds, 1-300):** How long the step waits before aborting. Defaults to **30 seconds**.
- **Ignore HTTP Status Errors (4xx/5xx):** Treats non-2xx error codes as successful runs, passing the error payload downstream instead of stopping the run.
- **Ignore SSL Certificate Issues:** Disables strict TLS/SSL certificate validation. Useful when connecting to internal staging servers, self-signed certificates, or testing environments.
- **Include Full Response (status, headers, body):** Returns response headers and status codes alongside the body.
> **Payload size limit:** Outbound responses are capped at **10 MB**. If an API returns a larger payload, the step halts with `OutboundResponseTooLargeError`.
### Skip the form: Import cURL
Most API documentation provides a `curl` command. Click **Import cURL**, paste the command, and Glow automatically configures the method, URL, query parameters, headers, authentication, and request body.
*Paste the command as the API's documentation gives it to you. Glow reads the method, URL, headers and body out of it.*
#### Examples to Copy & Import
**1. POST Request with JSON Body and Bearer Auth:**
```bash
curl -X POST https://api.getglow.ai/v1/leads \
-H "Authorization: Bearer {{ $secret.API_KEY }}" \
-H "Content-Type: application/json" \
-H "Accept: application/json" \
-d '{
"email": "lead@email.com",
"name": "John Doe"
}'
```
**2. GET Request with Query Parameters and Custom Header:**
```bash
curl -X GET "https://api.getglow.ai/v1/customers?status=active&limit=50" \
-H "X-API-Key: {{ $secret.SERVICE_KEY }}" \
-H "Accept: application/json"
```
> Importing a cURL command overwrites whatever is currently configured on the
> step. Import the cURL snippet first, then map any dynamic `{{}}` variables.
---
## What it passes on
The response is stored under `ret`. Glow automatically detects the response content type:
### Default JSON Output
Parsed JSON sits directly under `ret`:
```json
{
"ret": {
"id": 1042,
"title": "Invoice #1042",
"status": "paid"
}
}
```
Access fields directly: `{{ 3.ret.id }}` or `{{ 3.ret.status }}`.
### Full Response (Status & Headers)
When **Include Full Response** is enabled under Advanced Options, `ret` contains `body`, `headers`, and HTTP status codes:
```json
{
"ret": {
"body": {
"id": 1042,
"title": "Invoice #1042"
},
"status": 200,
"statusCode": 200,
"statusMessage": "OK",
"headers": {
"content-type": "application/json; charset=utf-8",
"x-ratelimit-remaining": "98"
}
}
}
```
Access fields with `{{ 3.ret.body.id }}` and status with `{{ 3.ret.status }}`.
### Binary & Non-Text Responses
When downloading non-text files (PDFs, images, zip files), Glow encodes the binary buffer as Base64:
```json
{
"ret": {
"data": "JVBERi0xLjQKJcfs...",
"encoding": "base64",
"contentType": "application/pdf",
"fileName": "statement.pdf"
}
}
```
This object can be handed directly to file upload steps or forwarded to external APIs.
> **Run the step once and read the Executions tab** rather than working the path
> out from the API's own documentation. What Glow stores is the shape you
> reference, and one look settles it.
---
## Troubleshooting & Error Handling
> **When the API answers with an error**
>
> Any non-2xx status, such as `400 Bad Request` or `500 Internal Server Error`, is treated as a failure and halts the workflow. Three settings change that:
>
> - **Ignore HTTP Status Errors (4xx/5xx)**, in the step's own **Advanced Options**, turns an error status into an ordinary result. The step passes on the response body instead of failing. Use it when a `404` is a real answer ("no such customer") rather than a fault. Pair it with **Include Full Response** so a [Condition](/build/action-steps/conditions) can read the status and decide what it meant.
>
> The remaining two are in the step's **Test & Debug** tab:
>
> - **Retry on fail** repeats the request before giving up. Off by default, so a `429` or `5xx` fails the run on first response unless you turn it on. See [Error Handling](/build/core-concepts/error-handling).
> - **If this step fails → Continue** lets the run carry on so you can handle the failure yourself. Follow it with a [Conditions](/build/action-steps/conditions) step checking `{{ 3.ret.status }}`, replacing `3` with this step's number. That reference needs **Include Full Response** turned on. Without it the step returns only the body and there is no status to test.
### Common Errors
| Code | Meaning | What to Do |
| :------ | :---------------- | :---------------------------------------------------------------------------------------- |
| **401** | Unauthorized | Verify your authentication credentials in the headers. |
| **403** | Forbidden | Confirm you have permission to access the requested resource. |
| **404** | Not Found | Check the URL structure and verify any dynamically injected variables (like `id`). |
| **429** | Too Many Requests | You have hit an API rate limit. Add a **Wait** step before the request to throttle calls. |
## Top Real-World Recipes
### Post Lead to Custom API
Send clean dynamic data from an earlier step (e.g. step 1) to an internal endpoint:
- **Method:** `POST`
- **URL:** `https://api.yourcompany.com/v1/leads`
- **Auth:** `Bearer Token` → `{{ $secret.CRM_API_KEY }}`
- **Body (JSON):**
```json
{
"email": "{{ 1.email }}",
"first_name": "{{ 1.first_name }}",
"company": "{{ 1.company_name }}",
"source": "glow_workflow"
}
```
### Call an API for Each Item in a List
When running in **Run for each item** mode (or inside a [Repeater](/build/action-steps/loops/repeater)), reference the current item using `{{ item }}`:
- **Method:** `PATCH`
- **URL:** `https://api.example.com/v2/contacts/{{ item.id }}`
- **Body (JSON):**
```json
{
"status": "synchronized",
"last_updated": "{{ $now }}"
}
```
Every row in the incoming list executes an isolated HTTP call.
### Forward Entire Webhook Payload
To forward an entire incoming event without picking individual fields, use `$full_result`:
- **Method:** `POST`
- **URL:** `https://webhook.site/your-endpoint`
- **Body (JSON):**
```json
{
"event_type": "typeform_submission",
"timestamp": "{{ $now }}",
"raw_payload": "{{ 1.$full_result }}"
}
```
### Fetch OAuth 2.0 Access Token
Authenticate using `client_credentials` with **Form URL Encoded** body:
- **Method:** `POST`
- **URL:** `https://auth.provider.com/oauth/token`
- **Body Type:** `Form URL Encoded`
- **Fields:**
- `grant_type`: `client_credentials`
- `client_id`: `{{ $secret.CLIENT_ID }}`
- `client_secret`: `{{ $secret.CLIENT_SECRET }}`
The response token will be available in downstream steps as `{{ 2.ret.access_token }}`.
---
## What's Next?
- **[Parse JSON](/build/action-steps/parse-json)**: Turn raw text or nested strings into addressable fields.
- **[Error Handling & Retries](/build/core-concepts/error-handling)**: Configure automatic retries on 429/5xx status codes.
- **[Secrets & Variables](/manage/workspace-settings/secrets-and-variables)**: Securely manage API tokens and environment endpoints.
---
Source: https://docs.getglow.ai/build/action-steps/limit
# Limit
> Cut a list down to the first few entries.
The **Limit** step shortens a list. You say how many entries to keep, and it returns that many from the start.
> Dock: Data · Lists · Takes: a list · Returns: a shorter list
Use it to stop work getting out of hand. The top ten results rather than every match. A handful of records while you are still testing. A batch small enough to stay inside an API's rate limit.
> **Slicing inside a field?** You can take the first *N* items of a list or shorten a string directly inside field tokens using [Data Transformation](/build/core-concepts/data-transformation):
> - First *N* list items: `{{ 2.items | keep_first:3 }}`
> - First / last item only: `{{ 2.items | first }}` or `{{ 2.items | last }}`
> - Shorten string length: `{{ 2.description | limit:100 }}`
>
> Use the **Limit** canvas step when passing a sliced list into a downstream [Loop](/build/action-steps/loops) or multi-step branch.
## Setting it up
### Choose the list
Pick it from the lists the field offers, which come from the steps before this one. Choose **Enter it myself** to type a reference such as `{{ 3.results }}` or paste a JSON list instead.
### Say how many to keep
A whole number. Zero is allowed and returns an empty list.
### Choose which end to take them from
The beginning of the list, or the end.
## Order decides which ones survive
Limit has no opinion about which entries are the most important. It takes them from whichever end you chose, and the entries keep the order they were already in.
**So sort first if "the top ten" means anything more than "any ten".** A [Sort](/build/action-steps/sort) ahead of Limit turns it into the highest-value ten.
Taking from the end is the shortcut when the list is already in the order you want and you need its tail. The ten most recent entries, in a list sorted oldest first.
## A list shorter than the limit comes back whole
Asking for ten when the list has four returns all four. It is not an error and nothing is padded.
## What it passes on
The shortened list:
```
{{ 5.$full_result }}
```
The step also counts the items for you: `{{ 5.resultCount }}` is how many it passed on, and `{{ 5.results }}` is the list as the data panel offers it.
## Examples to copy
### The three biggest orders
- A [Sort](/build/action-steps/sort) step first: field `total`, type Number, descending
- Then **Limit**: 3, from the beginning
Without the Sort, this is three arbitrary orders.
### A safe test run
While building a workflow that emails every customer, a Limit of 2 in front of the email step keeps a mistake from reaching everyone.
Remember to remove it before the workflow goes live.
## Limits
Limit works on lists of up to 100,000 items. A longer list is refused with a message naming both numbers, rather than being cut short. Split it first.
## What's Next?
- [Sort](/build/action-steps/sort) — decide which entries end up first
- [Filter](/build/action-steps/filter-items) — keep entries by a test rather than by count
- [Loops & Iteration](/build/action-steps/loops) — do something with each entry that survives
---
Source: https://docs.getglow.ai/build/action-steps/loops
# Loops & Iteration
> Two ways to repeat work in Glow: a setting on one step, and the Repeater step for a body of several.
Glow repeats work in two ways, and the difference is a shape rather than a rule. **Run for each item** is a setting that runs one step once per entry. The **Repeater** step repeats a body of several steps.
Use them to send one message per customer, enrich fifty leads, or page through an API.
## A loop is always something you drew
Nothing in Glow starts looping on its own. A step given a list of fifty records does not quietly run fifty times: it runs once, with the list as its input, until you say otherwise.
That is deliberate. Repeating is either a setting you switched on, visible on the step's badge, or a Repeater with a line running back into it. Either way you can point at the thing that makes it repeat.
Two things follow, and both save time later:
- **You can read a canvas and know what it does.** Nobody has to open every step to find the one that fans out over a thousand records.
- **You can plan for repeated work.** The loop is visible on the canvas, so you can review the steps and item count before running it.
## Which one? Count the steps
**How many steps does the work take per item?** That one question decides it.
Two loop shapes: Run for each item fans one step out over a list, while the Repeater sends the flow back around a circuit. See /build/action-steps/loops.
| Use | When |
| -------------------------------------------------------------------------------- | --------------------------------------------------------------------------------- |
| **[Run for each item](/build/action-steps/loops/run-for-each-item)** — a setting | One step needs to run once per item. Most cases. |
| **[Repeater](/build/action-steps/loops/repeater)** — a step on the canvas | Several steps run together per item, or the body repeats a fixed number of times. |
**One step** — sending an email per customer, writing each row to a sheet — needs no loop on the canvas at all. Open that step's repeat badge, switch it to **Each item**, and choose the list.
**More than one step** — look the customer up, decide something, write it back — is a loop body, and a body needs the Repeater step.
Repeater also covers the cases with no list. **A fixed number of times** runs the body N times, with `{{ item.$index }}` as the counter — that is how you call page 1, 2, 3 of an API. **Until a rule is met** keeps going until what a pass produced satisfies a rule you write, for when the finish line is a result rather than a count.
## Worked examples of each
Real jobs, and which mechanism each one needs.
| The job | Use | Why |
| ---------------------------------------------------------------------- | ------------------------- | ------------------------------------------------------------------ |
| Email every person who filled in this week's form | **Run for each item** | One step — the email — per person. |
| Write each row of a CSV into a spreadsheet | **Run for each item** | One step per row. |
| Post a Slack message for every failed payment | **Run for each item** | One step per payment. |
| For each lead: look up the company, score it, write it back to the CRM | **Repeater** | Three steps per lead, and step two needs step one's answer. |
| For each invoice: read the PDF, check the total, file it or flag it | **Repeater** | The body branches, so it cannot be one step. |
| Fetch pages 1 to 10 of an API | **Repeater**, fixed count | No list to walk — a counter, with `{{ item.$index }}` as the page. |
| Retry a flaky call five times with a wait between | **Repeater**, fixed count | The body is a call plus a Wait, repeated a set number of times. |
The pattern behind the table: **count the steps the work takes for one item.** One step is a setting; more than one is a Repeater.
## What they share
Both bind the current item to `{{ item }}`, so what you write inside the loop is the same either way.
| Reference | What it holds |
| ------------------- | ------------------------------------- |
| `{{ item }}` | The entry being processed |
| `{{ item.$index }}` | Position in the list, counting from 0 |
| `{{ item.$total }}` | How many items there are altogether |
Both also collect what every pass produced into `{{ N.results }}`, with `{{ N.items }}` carrying per-item detail and `{{ N.stats }}` the totals.
> **[Filter](/build/action-steps/filter-items) uses a different form.** Its
> rules take `{{ $item }}` and `{{ $itemIndex }}`, with the dollar sign at the
> front. Filter evaluates its rules itself rather than running a pass per item,
> which is why the two look alike but are not interchangeable.
## One mechanism per list, never both
A step inside a Repeater's body already runs once per pass, so its own **Each item** mode is switched off there. Going the other way, the canvas refuses a connection that would close a loop around a step set to repeat on its own.
**Why it works that way:** both answer the same question, which is how many times a step runs. Each has its own answer. A step set to **Each item** over 50 records, inside a Repeater running 50 passes, would run 2,500 times. Almost nobody means that, and it is expensive to discover by running it.
So the rule is one mechanism per list:
- Work that takes **one step** per item: the step's own **Each item** setting.
- Work that takes **several steps** per item: a Repeater, with those steps plain inside its body.
For a list inside a list — every order for every customer — use two Repeaters in sequence rather than one inside the other. Flatten the inner list with a [Combine](/build/action-steps/combine) step first, then loop over the result.
## Plan for loop usage
Usage depends on the steps that run and the work they perform on each pass. Standard action steps consume 1 Step credit per item pass, while control steps are free. See [Step Credits, Tokens & Storage](/manage/billing/credits-and-allowances) for how repeated work and failed attempts are counted.
Where the list comes from somewhere you do not control, cap it — with Repeater's **Safety limit**, or with a [Filter](/build/action-steps/filter-items) before it reaches the loop. See [System Limits](/reference/system-limits) for the concurrency your plan allows.
## What's Next?
- [Run for each item](/build/action-steps/loops/run-for-each-item): the setting, in full.
- [Repeater](/build/action-steps/loops/repeater): the step, its circuit, and how to pace it.
- [Variable Syntax](/reference/variable-syntax): the full reference for `{{ }}`.
---
Source: https://docs.getglow.ai/build/action-steps/loops/repeater
# Repeater
> The step that repeats a body of several steps: once per item in a list, a fixed number of times, or until a rule is met.
**Repeater** repeats a body of steps: look the customer up, decide something, write it back, then round again. It runs once per item in a list, a fixed number of times with no list at all, or until a rule you write is met.
> Dock: Flow · Takes: a list, or a count · Returns: a list of results
Where one step does the work per item, the [Run for each item](/build/action-steps/loops/run-for-each-item) setting is simpler and needs nothing on the canvas. Repeater is for a body.
## It is a circuit, not a block
This is the one thing worth understanding before you build anything.
Repeater has two outputs. **Each time** is the body of the loop, and **When finished** is what happens after it. The steps you connect to **Each time** run once per pass.
What makes the loop repeat is the connection **back**: the last step of the body has to connect into the Repeater step again. That returning line is what starts the next pass.
Two loop shapes: Run for each item fans one step out over a list, while the Repeater sends the flow back around a circuit. See /build/action-steps/loops.
Think of it as a circuit rather than a container. The work does not sit inside Repeater; it flows out of **Each time**, through your steps, and back in.
> **Check the Execution log after your first test run.** Open it from the
> toolbar and count the steps: Repeater and every step in its body should be
> there, the body's steps once per pass.
>
> A run can report that every step succeeded while listing only the steps before
> the loop. That is the signal the circuit is not carrying: the returning
> connection is the first thing to check.
## Setting it up
### Add the step
Open **Tools** in the dock and choose **Repeater** under Flow.
### Choose how to repeat
**How to repeat** offers three modes:
- **Once per item in a list**: one pass per item. The usual choice.
- **A fixed number of times**: a count, with no list involved. Useful for paging through an API or a retry ladder you control yourself.
- **Until a rule is met**: passes keep going until what the last one produced satisfies a rule you write. Reach for it when the finish line is a result rather than a count — a paged API that says when it has no more pages, or a job you poll until it reports done.
### Point it at the list
For list mode, **List** takes a reference to a list an earlier step produced, for example `{{ 3.result }}`. Insert it from the data icon rather than typing it.
### Group items into batches, if one call can take several
**Items per batch** starts at 1, so each pass handles one item. Raise it and each pass receives a group of items instead. Inside the body, `{{ item }}` then holds the whole group as a list, and the data selector labels it **Current batch**. The final group can be smaller when the list does not divide evenly.
Group items when one call can handle many records at once, such as an API that accepts fifty rows per request: fewer passes finish a long list sooner.
### Build the body
Connect the first step of your loop to the **Each time** output, then chain as many steps as the work needs.
### Close the loop
Connect the last step of the body **back into the Repeater step**. This is what makes it repeat.
### Add what comes after
Anything connected to **When finished** runs once, after every pass is done.
## Referring to the current item
Inside the loop, `{{ item }}` is the whole item and `{{ item.field }}` is one of its properties.
Two more give you the position:
| Reference | What it holds |
| ------------------- | ------------------------------------- |
| `{{ item.$index }}` | Position in the list, counting from 0 |
| `{{ item.$total }}` | How many items there are altogether |
**Both sit under `item`.** Write `{{ item.$index }}`, not a bare `{{ $index }}`.
## Steps in the body do not loop on their own
A step inside the body already runs once per pass, so its **Each item** setting is switched off there. You do not need it: `{{ item }}` inside the body is the entry this pass is working on.
**Why they cannot be combined:** both decide how many times a step runs, and each has its own answer. A step set to Each item over 50 records, inside a Repeater running 50 passes, would run 2,500 times. Almost nobody means that, and it is an expensive thing to find out by running it.
For a list inside a list — every order for every customer — use two Repeaters in sequence rather than one inside the other. Flatten the inner list with a [Combine](/build/action-steps/combine) step first, then loop over the result.
## What decides when the loop stops
In the first two modes the number of passes is settled before the first one runs: it comes from the list's length, or from the count you typed. Nothing that happens inside the loop changes it.
**Until a rule is met** works the other way round. Repeater runs a pass, checks your rule against what that pass produced, and either stops or goes round again. The count is decided one pass at a time, which is what lets the loop finish on a result rather than on a number.
Two things follow from that, and both are worth knowing before you build one:
- **The passes run one after another.** A pass cannot start before the one before it has been judged, so **Passes running at once** is held at 1 in this mode whatever it says.
- **The rule may only read the pass that just finished**, plus `{{ item.$index }}` and `{{ item.$total }}`. Point it at a step outside the loop and the run stops with a message saying the reference is outside the completed pass.
**Safety limit** is what guarantees the loop ends. In this mode reaching it fails the step rather than finishing quietly, so the run tells you the rule was never met instead of leaving you to wonder whether it was.
## Controlling the pace
**Passes running at once** sets how many passes run concurrently (up to **10**, depending on your plan tier; see [System Limits](/reference/system-limits)).
- **Higher values:** Finish long lists sooner.
- **Lower values:** Avoid rate limits on external services.
- **Until a rule is met:** Stays at 1 because each pass must be evaluated before the next begins.
Most third-party APIs have a rate limit, and a loop is the easiest way to meet it. If you start seeing `429` responses, lower this before changing anything else.
**Safety limit** caps how many passes the loop may run (default **10,000**). Lower this when processing external lists to prevent runaway loops. In **Until a rule is met** mode, hitting the safety limit deliberately fails the step so you know the condition was never satisfied.
> **Plan for repeated work.** Usage depends on the steps that run in the loop
> and the work they perform on each pass. See [Step Credits, Tokens &
> Storage](/manage/billing/credits-and-allowances). A list whose length you do
> not control is worth capping: with **Safety limit**, or with a
> [Filter](/build/action-steps/filter-items) before it reaches the loop.
## When a pass fails
**If a pass fails** decides what happens next, and it defaults to **Stop the run**.
| Setting | What happens |
| -------------------------- | ---------------------------------------------------------------------------------------------------------------------------- |
| **Stop the run** (default) | The loop stops. Passes already done keep what they did: a message sent is still sent. The rest of the list is not attempted. |
| **Skip it and carry on** | The remaining passes run. Failures are recorded, and the step finishes successfully. |
Which you want depends on the work. Sending a hundred notifications: skip, and chase the failures afterwards. Writing a hundred rows that must all land together: stop, and fix the cause before rerunning.
> **With skipping on, check `{{ N.items }}` rather than the step's status.** The
> step finishes green and `{{ N.results }}` is simply shorter than the list you
> put in. If anything downstream depends on every item having been processed,
> `items` is where the per-item detail lives.
## What it passes on
The loop collects what every pass produced into `{{ N.results }}`, where `N` is the step number. **That collection is itself a list**, so it appears in the next step's data selector like any other list, and a later step can loop over it in turn.
| Reference | What it holds |
| ----------------- | -------------------------------------------------------- |
| `{{ N.results }}` | Successful results only, in the order of your input list |
| `{{ N.items }}` | Every item with its position, status and error |
| `{{ N.stats }}` | `total`, `succeeded`, `failed`, `skipped` |
`stats` is what you want for a summary message. "Processed 47 of 50" needs no counting on your side.
**`results` holds successes only, in your input order.** When several passes run at once they finish in whatever order the other system answers, and the results are then reordered to match the list you supplied. So `{{ 5.results }}` is never in completion order.
The consequence worth planning for: **when some passes fail, `results` is shorter than the list you put in.** Failures are left out rather than held as empty slots, so position 3 of the results is not necessarily the third item you sent. When you need results lined up against your input, or you need to see what failed, use `{{ N.items }}`: it carries every item with its position, status and error.
> **A very large loop fails rather than passing on a partial answer.** When the
> collected results exceed the size Glow carries between steps, the step is
> marked failed with a message saying so. The work in each pass still happened:
> the results were too large to hand on. Process the list in smaller pages, or
> return less per item: an id and a status reach the ceiling far later than
> whole documents.
## Examples to copy
### Send one message per person
**How to repeat:** Once per item in a list. **List:** `{{ 2.ret.records }}`.
Connect a Slack **Send Message** step to **Each time**, addressed to `{{ item.email }}` with a body using `{{ item.name }}`. Connect it back into Repeater. Set **Passes running at once** to 3 so Slack is not hit all at once.
### Enrich a list, then summarise it
**List:** `{{ 1.leads }}`. On **Each time**, an HTTP Request to your enrichment provider, then back into Repeater.
On **When finished**, an AI Prompt with `Summarise these results: {{ 4.stats }}`. It runs once, with the totals for the whole loop.
### Page through an API
**How to repeat:** A fixed number of times. Set **Number of passes** to the number of pages you want.
On **Each time**, an HTTP Request using `{{ item.$index }}` as the page number, then back into Repeater. **Safety limit** stops it if the count is ever miscalculated.
### Space out requests to a strict API
Put a [Wait](/build/action-steps/delay) of 2 seconds as the last step of the loop body, before the connection back into Repeater. Each pass then waits before the next begins, and the requests arrive spread out rather than all at once.
## What's Next?
- [Run for each item](/build/action-steps/loops/run-for-each-item) — the simpler setting, when one step does the work.
- [System Limits](/reference/system-limits) — concurrency and per-item retries by plan.
- [Variable Syntax](/reference/variable-syntax) — the full reference for `{{ }}`.
---
Source: https://docs.getglow.ai/build/action-steps/loops/run-for-each-item
# Run for Each Item
> A setting on a single step that runs it once per entry in a list, with no loop drawn on the canvas.
**Run for each item** is a setting on a step, not a step of its own. Bind it to a list and that step runs once per entry, leaving the canvas a straight line.
> Dock: A setting on any step · Takes: a list · Returns: a list of results
It covers the common case: send one email per customer, write one row per order, create one ticket per report. If the work takes more than one step per item, you need the [Repeater](/build/action-steps/loops/repeater) step instead.
Two loop shapes: Run for each item fans one step out over a list, while the Repeater sends the flow back around a circuit. See /build/action-steps/loops.
## Setting it up
### Open the step's repeat badge
Click the step on the canvas and find the small badge on it — the one whose
tooltip reads _"Run this step once per item in a list"_. It carries no label
until you set it, and then shows what it is doing: **Each item**, or **Pick a
list** if it still needs one.
### Switch it to Each item
The default is **Once**, meaning the step runs a single time. **Each item** is the setting that makes it repeat.
### Choose the list
Point it at a list an earlier step produced, such as `{{ 3.result }}`. Insert the reference from the data icon rather than typing it: the path depends on which step made the list.
### Write the step's fields against one item
Inside the step, `{{ item }}` is the entry being processed right now. A field that would have read `{{ 3.result.0.email }}` becomes `{{ item.email }}`.
## Referring to the current item
| Reference | What it holds |
| ------------------- | ------------------------------------- |
| `{{ item }}` | The whole entry being processed |
| `{{ item.field }}` | One property of it |
| `{{ item.$index }}` | Position in the list, counting from 0 |
| `{{ item.$total }}` | How many items there are altogether |
**Both position tokens sit under `item`.** Write `{{ item.$index }}`, not a bare `{{ $index }}` — that one is not recognised and passes through as literal text.
> **[Filter](/build/action-steps/filter-items) uses a different form.** Its
> rules take `{{ $item }}` and `{{ $itemIndex }}`, with the dollar sign at the
> front. Filter evaluates its rules itself rather than running a pass per item,
> which is why the two look alike but are not interchangeable.
## Watching it run
A step repeating over a list counts up on the canvas as it goes. Its badge reads `0/12` when the run starts and climbs, so a long fan-out reads as moving rather than stuck.
The badge counts **runs of that step**, one per item. Turning on the option that flattens each item's output changes how many items there are, and the count follows it.
## Not every step offers it
The badge is absent on steps where running once per item makes no sense:
- **Flow control** — [Conditions](/build/action-steps/conditions), [Switch](/build/action-steps/switch), [Filter](/build/action-steps/filter-items). These already work through a list themselves.
- **Steps that take their own inputs** — [Combine](/build/action-steps/combine) names the two lists it joins, and a [Repeater](/build/action-steps/loops/repeater) already decides how many times its body runs.
- **Steps that wait** — [Wait](/build/action-steps/delay), [Human Review](/build/action-steps/user-approval). To pause between passes, put a Wait inside a [Repeater](/build/action-steps/loops/repeater) body instead.
- **Steps with no per-item work** — [Stop and Error](/build/action-steps/stop-and-error), Do Nothing.
- **Triggers**, which start the run rather than doing work in it.
## You cannot use it inside a Repeater
A step in a [Repeater](/build/action-steps/loops/repeater) body already runs once per pass, so **Each item** is switched off for it. The canvas also refuses a connection that would close a loop around a step already set to repeat on its own.
**Why:** both answer the same question — how many times does this step run — and each has its own answer. A step set to Each item over 50 records, inside a Repeater running 50 passes, would run 2,500 times. That is almost never what anybody means, and an expensive thing to discover by running it.
Inside a Repeater body, leave the step alone: the Repeater is already driving the repetition, and `{{ item }}` works exactly the same way.
## What it passes on
The step collects what every run produced, and the collection is itself a list. A later step reads it the same way it reads any other list, and can loop over it in turn.
| Reference | What it holds |
| ----------------- | -------------------------------------------------------- |
| `{{ N.results }}` | Successful results only, in the order of your input list |
| `{{ N.items }}` | Every item with its position, status and error |
| `{{ N.stats }}` | `total`, `succeeded`, `failed`, `skipped` |
> **When two steps loop over the same list, use `{{ N.item }}` rather than
> `{{ N.results }}`.** It gives you what step `N` produced **for the item being
> processed right now**, so "the record step 5 created for this same lead" stays
> correct. See [Variable
> Syntax](/reference/variable-syntax#reading-an-earlier-looping-steps-result-for-this-item).
## Limits
**How long the list may be depends on your plan.** A list longer than your tier's ceiling is refused when the step fans out, with a message naming the limit. See [System Limits](/reference/system-limits#batch-processing-run-for-each-item) for the figure on your plan, and for how many items may process at once.
Each item repeats the step's work. Standard action steps consume 1 Step credit per item processed, while control steps are free. See [Step Credits, Tokens & Storage](/manage/billing/credits-and-allowances) for how repeated work and failed attempts are counted.
Where the list comes from somewhere you do not control, put a [Filter](/build/action-steps/filter-items) or a [Limit](/build/action-steps/limit) in front of it. A list that arrives ten times longer than expected then stops at a number you chose.
See [System Limits](/reference/system-limits) for how many runs may happen at once on your plan.
## Examples to copy
### One email per customer
An earlier step returns `{{ 2.ret.records }}`. Set the email step's repeat badge to **Each item** and point it at that list. Address it to `{{ item.email }}` and write the body with `{{ item.name }}`.
### Number each row as you write it
Writing rows to a sheet, use `{{ item.$index }}` for a sequence number and `{{ item.$total }}` to write "3 of 47" into a status column.
## What's Next?
- [Repeater](/build/action-steps/loops/repeater) — when the work takes more than one step per item.
- [Loops & Iteration](/build/action-steps/loops) — the choice between the two, in one page.
- [Variable Syntax](/reference/variable-syntax) — the full reference for `{{ }}`.
---
Source: https://docs.getglow.ai/build/action-steps/no-operation
# Do Nothing
> A pass-through utility step that organizes your canvas without modifying data.
**Do Nothing** is a step that does nothing, on purpose.
> Dock: Flow · Takes: any value · Returns: the same value, untouched
Use it to join several branches back into one line, or to keep a long connection tidy. It also works as a placeholder for a step you have not built yet. Data passes through unchanged.
## Setting it up
Place it on the canvas and connect it. It has no fields to fill in.
### Connect the incoming branches
Route several branches into one Do Nothing step and they meet at a single point.
### Connect what comes next
Connect its output to the step that should follow. The data arriving from the incoming branches passes through completely unaltered.
### Name it
Rename the step to say what it is for: "Merge notifications", "Add the API call here". A canvas of steps all called Do Nothing tells the next person nothing.
## What it passes on
Whatever reached it, untouched. Because only one branch of a Switch normally runs, the step carries that branch's data through.
In practice you rarely reference the Do Nothing step itself. Reference the step that produced the value instead, so `{{ 3.ret.email }}` rather than this step's number. That path is the same whichever branch the run took, and it survives you deleting the merge point later.
## Examples to copy
A Switch step may trigger three different actions (Slack, Email, SMS). Merge
all three branches back into a single **Do Nothing** step before the final
database update. This keeps the canvas clean.
Long connection lines stretching across the canvas are hard to follow.
Insert a Do Nothing step as a visual routing pin, and steer the lines around
other steps.
When drafting a new workflow, use Do Nothing steps as placeholders for
actions you intend to build later. You can lay out the full structure before
building any of it.
## What's Next?
- See the branching steps a Do Nothing step usually merges back together in the [Switch Step](/build/action-steps/switch).
- Learn the rest of the canvas layout in [Steps and Connections](/build/core-concepts/steps-and-the-canvas).
---
Source: https://docs.getglow.ai/build/action-steps/parse-json
# Parse JSON
> Break one block of text into separate fields, so later steps can pick out the values inside it.
**Parse JSON** breaks one block of text into separate fields, so each value becomes something later steps can pick from. Use it when data arrives as one long block and you need one value inside it, like the customer's name.
> Dock: Data · Convert · Takes: a block of text · Returns: separate fields
**Keyboard shortcut:** `t+p`
## How to tell you need it
Open the earlier step's result. Look for a value sitting inside one long line of text wrapped in braces and quote marks. If the data picker offers you that whole line but not the name inside it, this is the step that opens it up.
It usually comes from one of four places. A webhook that sent its data as text, an app that answered with text rather than named fields, a database column holding JSON, or a `.json` file you have just read.
## Setting it up
1. Press `t+p`, or open **Tools → Data → Convert** in the dock and select **Parse JSON**.
2. In the **Input** field, select the data reference that contains your JSON string (for example, the response body from a previous HTTP Request step).
3. Save the step.
Glow detects the structure of the parsed JSON automatically. Each field then appears as a selectable output in the data reference picker for downstream steps.
## What it passes on
Every value inside becomes its own field on the step, read with the step's own
number in front — `4` in the examples below. Nothing is wrapped.
- **A record inside a record** is reached with another dot: `{{ 4.customer.name }}`.
- **A list** uses the item's position as the next dot, counting from zero, so
`{{ 4.items.0.sku }}` is the first. Square brackets such as `items[0]` are not
recognised.
- **Deeper than that** follows the same pattern all the way down:
`{{ 4.results.2.metadata.tags.0 }}`.
## Examples to copy
### Reading an app's answer
Suppose an HTTP Request step calls `https://api.example.com/orders/12345` and returns the following response body as a string:
```json
{
"order_id": 12345,
"customer": {
"name": "Acme Corp",
"email": "orders@acme.com"
},
"items": [
{ "sku": "WIDGET-A", "quantity": 10 },
{ "sku": "WIDGET-B", "quantity": 5 }
],
"total": 249.99
}
```
Say the Parse JSON step is step 4. Each value inside is then its own field, read with this step's number in front:
| Reference | Value |
| -------------------------- | ------------------- |
| `{{ 4.order_id }}` | `12345` |
| `{{ 4.customer.name }}` | `"Acme Corp"` |
| `{{ 4.customer.email }}` | `"orders@acme.com"` |
| `{{ 4.items.0.sku }}` | `"WIDGET-A"` |
| `{{ 4.items.0.quantity }}` | `10` |
| `{{ 4.items.1.sku }}` | `"WIDGET-B"` |
| `{{ 4.total }}` | `249.99` |
You can now use `{{ 4.customer.name }}` in a Slack message step, or `{{ 4.total }}` in a Conditions step.
The data picker shows these as `customer.name` and `total`, without the step number. That is the label, not the reference. Pick the value from the picker and Glow inserts the full form for you.
## Limits
### When the text is malformed
If the text is not properly formed JSON, the step fails and the error names what
it choked on. Open the earlier step's **Executions** tab and read the raw value —
that is almost always quicker than guessing which character is wrong.
Where the text comes from a system you do not control and is reliably malformed,
put a [Code editor](/build/action-steps/code-execution) step in front to tidy it
first.
### When nothing arrives
An empty input produces no output, so a later step reading one of these fields
finds nothing there and fails. Where the source sometimes sends nothing, put a
[Conditions](/build/action-steps/conditions) step in front testing the input with
**is not empty**.
### When it is very large
A very large piece of JSON takes the step longer to read. If you only need a few fields out of it, pull those out with a [Code editor](/build/action-steps/code-execution) step first.
> **Escaped characters need no work from you.** A string full of `\"` and `\n`
> comes out with those turned back into quote marks and line breaks. There is
> nothing to clean up first.
## What's Next?
- Reference the newly exposed fields downstream using the [Variable Reference Syntax](/reference/variable-syntax).
- Review the shapes Glow recognizes in [Data Types & Structures](/build/core-concepts/data-types).
---
Source: https://docs.getglow.ai/build/action-steps/remove-duplicates
# Remove Duplicates
> Keep each entry in a list only once.
The **Remove duplicates** step returns a list with repeats taken out. You say what makes two entries the same, and it keeps one of each.
> Dock: Data · Lists · Takes: a list · Returns: the list with repeats removed
Use it after combining sources that overlap. The same customer exported from two systems, an address on several orders, a lead that came in twice.
> **Deduplicating inside a single field?** You can remove duplicates directly inside field tokens using [Data Transformation](/build/core-concepts/data-transformation) with `{{ 2.emails | remove_duplicates }}` (or `{{ 2.records | pluck:email | remove_duplicates }}`). Use this dedicated **Remove duplicates** step when deduplicating complex multi-field records or processing large datasets (up to 100,000 items).
## Setting it up
### Choose the list
Pick it from the lists the field offers, which come from the steps before this one. Choose **Enter it myself** to type a reference such as `{{ 3.results }}` or paste a JSON list instead.
### Say what makes two entries the same
For a list of plain values, the value itself. For a list of records, name the field, such as `email` or `customer_id`.
### Choose which copy to keep
The first one seen, or the last.
## Which copy you keep changes the data, not the order
**The surviving items stay in the order they first appeared**, whichever copy wins. Keeping the last one does not reverse anything.
What changes is _which_ record survives, and with real data that matters. Say a customer appears twice, once with an old address and once with a new one. **First** keeps the old, **Last** keeps the new, assuming the newer record came later in the list.
For a list of plain values it makes no difference at all: the same value is the same value.
## Capital letters count unless you say otherwise
**Ignore capitalisation** is off to begin with, so `Active` and `active` are two different values and both survive.
Turn it on when the same thing is spelled differently by two systems: one exports upper case, the other lower.
## What it passes on
The list with repeats removed:
```
{{ 5.$full_result }}
```
Shorter than the input, or the same length when nothing repeated.
The step also counts the items for you: `{{ 5.resultCount }}` is how many it passed on, and `{{ 5.results }}` is the list as the data panel offers it.
## Examples to copy
### One email per person
Two exports combined into one list, some people in both.
- **Field**: `email`
- **Keep**: Last
- **Ignore capitalisation**: on
_Last_ is the choice when the second export is the more recent one and its values should win. Ignoring capitalisation catches `Anna@example.com` and `anna@example.com` as one person.
### Unique tags
A list of plain text values with repeats.
- **Field**: leave empty, so the value itself is compared
- **Keep**: First
## Limits
Remove duplicates works on lists of up to 100,000 items. A longer list is refused with a message naming both numbers.
## What's Next?
- [Combine](/build/action-steps/combine) — merge two lists before removing repeats
- [Sort](/build/action-steps/sort) — decide which copy counts as first
- [Summarize](/build/action-steps/summarize) — count what is left
---
Source: https://docs.getglow.ai/build/action-steps/routing
# Choosing a Flow Step
> Which of the Flow steps decides where a run goes, which divides a list, and which pauses or ends it.
The **Flow** group holds the steps that decide what happens next rather than doing outside work. Three of them route, and picking between those three is the choice people get wrong most often.
## The three that route
They look alike in the panel because they share a rule builder. They answer three different questions.
| | The question it answers | Works on | How many routes run |
| ------------------------------------------------ | ------------------------- | -------------------- | ----------------------------- |
| **[Conditions](/build/action-steps/conditions)** | Which of these are true? | the whole run | every one that matches |
| **[Switch](/build/action-steps/switch)** | Which one of these is it? | the whole run | the first that matches, only |
| **[Filter](/build/action-steps/filter-items)** | Which items qualify? | a list or one record | both, each with its own items |
### Start with what you are holding
**A list?** That is Filter. It checks each item on its own and sends the matching ones down KEPT, the rest down DISCARDED. Both routes carry on with their share, so you can email the ones that passed and log the ones that did not.
**One thing, and a path to choose?** That is Conditions or Switch. Neither divides anything — they look at the run as a whole and decide which way it goes.
### Then ask how many answers you want
**Can more than one be true at once?** Use Conditions. "Is it over £10,000?" and "Is it in the UK?" can both be yes, and both routes run. That is the thing a true/false switch cannot do, and the reason Conditions exists.
**Is it one of several?** Use Switch. A ticket is a refund, a complaint or a question — not two of them. Cases are checked top to bottom and the first match wins, so ordering matters and a general case belongs at the bottom.
> **A single record through a Filter is a useful gate.** "Only carry on if this
> order is over £500" works as a one-item Filter, and the difference from a
> Conditions step is what travels: the Filter sends the record itself down the
> route, where Conditions sends only the decision.
## What they share
All three are built from the same rule builder, so once you have written a rule in one you can write it in any of them:
- **Pick the data, pick a type, pick an operator, give it a value.** Six types cover most tests: String, Number, Boolean, Object, Array, Date & Time.
- **Rules in a group are joined with AND; groups are joined with OR.** You choose which you are adding, not the combinator itself.
- **Text is compared exactly** unless you say otherwise. `Active` does not match `active`.
- **A rule can be written in plain language** instead, as an **AI Condition** — in Conditions and Filter. **Switch is typed-only**, deliberately: it picks one route out of several and stops, so the answer decides where the whole run goes. That is the place you want a comparison rather than a judgement.
The full operator catalogue lives on the [Conditions](/build/action-steps/conditions#operators) page and applies to all three.
## The rest of the Flow group
The other Flow steps do not route on a rule. They change what happens next in some other way.
| Step | What it does |
| -------------------------------------------------------- | ----------------------------------------------------------------------- |
| **[Loops & Iteration](/build/action-steps/loops)** | Repeats work — one step per item, or a body of several |
| **[Subflows](/build/action-steps/trigger-workflow)** | Runs another workflow and waits for its answer |
| **[Wait](/build/action-steps/delay)** | Pauses the run for a set time |
| **[Human Review](/build/action-steps/user-approval)** | Pauses until a person approves or rejects |
| **[Stop and Error](/build/action-steps/stop-and-error)** | Ends the run deliberately, with a message you write |
| **[Do Nothing](/build/action-steps/no-operation)** | Ends a branch tidily, so a route that should do nothing still completes |
## What's Next?
- Route on several things at once with [Conditions](/build/action-steps/conditions).
- Pick one of several with [Switch](/build/action-steps/switch).
- Split a list with [Filter](/build/action-steps/filter-items).
---
Source: https://docs.getglow.ai/build/action-steps/sort
# Sort
> Put a list in order by one of its fields, smallest first or largest first.
The **Sort** step puts a list in order. You name the field to sort by and the direction, and it returns the same items rearranged.
> Dock: Data · Lists · Takes: a list · Returns: the same list, reordered
Use it when order carries meaning: the highest-value orders first, the oldest tickets first, names in alphabetical order for a report someone will read.
> **Sorting inside a field?** You can sort or reverse lists directly inside field tokens using [Data Transformation](/build/core-concepts/data-transformation):
> - Sort alphabetically or by field: `{{ 2.records | sort:ascending:name }}`
> - Reverse ordering: `{{ 2.records | reverse }}`
>
> Use the **Sort** canvas step when you need multi-level tie-breaking rules (e.g. priority then date) or when dealing with large datasets (up to 100,000 items).
## Setting it up
### Choose the list
Pick it from the lists the field offers, which come from the steps before this one. Choose **Enter it myself** to type a reference such as `{{ 3.results }}` or paste a JSON list instead.
### Add a **Sort by** row
Name the field inside each item, such as `total` or `created_at`. Leave the field blank to compare each whole item, which suits a list of plain values.
### Choose the direction
Ascending puts the smallest first, descending the largest. **Type** starts as **Automatic**: Sort reads the values and works out whether they are text, numbers or dates. Pick **Text**, **Number** or **Date** yourself only when you want to override that.
### Add more rows if one is not enough
Up to ten, applied in the order they are listed. The second row only decides ties in the first.
## Breaking ties with a second rule
One rule sorts by one thing, and leaves entries that share that value in whatever order they arrived.
**Add a second row to decide those.** Sort support tickets by priority, then by date. The urgent ones come first, oldest of them at the top:
| Row | Field | Type | Direction |
| --- | ------------ | ---- | --------- |
| 1 | `priority` | Text | Ascending |
| 2 | `created_at` | Date | Ascending |
Rows are applied in order, so the first one is the one that matters most.
## Automatic works the type out for you
Text, numbers and dates sort differently, and the same list comes back in a different order depending on which one Sort uses.
Sorted as text, `100` comes before `20`, because text is compared character by character and `1` comes before `2`. Sorted as numbers, `20` comes first.
**Type** starts as **Automatic**: Sort reads every value in the column and picks the one type they all share. When the list has run data, the panel shows what it decided, such as _Automatic - Number_. If the values disagree, say dates mixed with plain text, the run stops and names the two items that conflict. Choose **Text**, **Number** or **Date** yourself and the run continues with your answer.
An explicit type is also how you override the guess, for example numeric product codes that should sort as text. **If the type you choose does not match what is in the list, Sort refuses rather than guessing.** It names the item it could not read, so you can open that entry and see what it holds.
## Capital letters affect text ordering
Sorting text is exact by default, and capitals sort before lower case, so `Zebra` comes before `apple`.
**Ignore capitalisation** turns that off, and the list orders the way a person would expect. Leave it off when case carries meaning, as it does in product codes.
## What it passes on
The same items in the new order:
```
{{ 5.$full_result }}
```
Nothing is added or removed. A list of ten comes back as a list of ten.
The step also counts the items for you: `{{ 5.resultCount }}` is how many it passed on, and `{{ 5.results }}` is the list as the data panel offers it.
## Examples to copy
### Highest value first
Orders from a shop, largest first, so a report can lead with them.
- **Field**: `total`
- **Type**: Number
- **Direction**: Descending
Follow it with a [Limit](/build/action-steps/limit) to keep only the top few.
### Oldest ticket first
A support queue, so the longest-waiting request is dealt with first.
- **Field**: `created_at`
- **Type**: Date
- **Direction**: Ascending
Automatic picks both of these types up on its own. Set the type explicitly when you want to pin it.
## Limits
Sort works on lists of up to 100,000 items and takes at most ten **Sort by** rows. Beyond either, it refuses and says so rather than returning a partial answer. Split the list first, or drop the least important rule.
## What's Next?
- 👉 **[Limit →](/build/action-steps/limit)**: take the first few items after sorting them.
- **[Filter](/build/action-steps/filter-items)**: remove entries before sorting the list.
- **[Summarize](/build/action-steps/summarize)**: count or total a list instead of reordering it.
---
Source: https://docs.getglow.ai/build/action-steps/split-text
# Split Text
> Cut one piece of text wherever a character appears, and take the piece you want or all of them.
Split Text cuts one piece of text wherever a character you choose appears, then hands back either one piece or the whole list.
> Dock: Data · Convert · Takes: text · Returns: one piece or a list of pieces
Use it when something arrives as one line, like `"enterprise, b2b, high-priority"`, and you need the parts separately. Or when you want one piece out of the middle: the domain from an email address, the surname from a full name.
> **Quick extractions without an extra step:** If you only need a single slice or quick domain/list split, you can do it directly inside field tokens with [Data Transformation](/build/core-concepts/data-transformation):
> - Domain from email: `{{ 2.email | extract_domain }}`
> - Surname: `{{ 2.name | after:" " }}`
> - Split to list: `{{ 2.tags | split:comma_space }}`
>
> Use the **Split Text** step when you need to pass an entire list of pieces to downstream canvas steps (like a [Loop](/build/action-steps/loops)).
**Keyboard shortcut:** `t+s`
## Setting it up
Three fields, all required.
### Input
The text you want to cut. Pick it from an earlier step with the data picker.
### Separator
The character or word to cut on. A comma, a single space, `\n` for line breaks.
It also accepts a **regular expression**, which is a pattern language for matching text. That is worth reaching for when the separator varies: a comma that sometimes has a space after it, say. If you do not write patterns, a plain character covers most cases.
### Segment Index
**Which piece you want back.** This is the field that decides whether you get one piece or all of them:
| Choose | You get |
| ------------------ | ------------------------------------- |
| **First** | Everything before the first separator |
| **Second** | The second piece |
| **Last** | Everything after the final separator |
| **Second to Last** | The piece before the last one |
| **All** | Every piece, as a list |
You can also type a number instead: `3` takes the third piece, `-2` counts back from the end.
> **Pick All when you want to loop over the pieces.** The named options each
> return a single piece of text, which is what you want for "the domain" or "the
> surname". For "do something with each tag", choose **All** and point a looping
> step at the result.
## What it passes on
The piece you asked for (or, with **All**, the list of pieces), nested under `ret`:
```
{{ 4.ret }}
```
Run it once and read the step's **Executions** tab for the exact shape before you build on it; that is quicker than reasoning it out.
## Examples to copy
### Every tag from one field
A CRM sends a contact's tags as `"enterprise, b2b, high-priority"` and you want to act on each.
| Field | Value |
| ----------------- | ------------------- |
| **Input** | the tags field |
| **Separator** | `, ` (comma, space) |
| **Segment Index** | All |
Cutting on comma-and-space rather than the comma alone keeps a leading space off every piece after the first. `" b2b"` and `"b2b"` are different text, and a later [Filter](/build/action-steps/filter-items) matching on `b2b` would miss the first form.
Then turn on **Run for each item** on the next step and point it at this one. See [Loops & Iteration](/build/action-steps/loops).
### A surname from a full name
A form gives you `"Jane Doe"` and the greeting needs the surname.
| Field | Value |
| ----------------- | ----------- |
| **Input** | `full_name` |
| **Separator** | a space |
| **Segment Index** | Last |
**Last** rather than **Second**, so a double-barrelled surname or a middle name does not break it.
### The domain from an email address
| Field | Value |
| ----------------- | ----------- |
| **Input** | the address |
| **Separator** | `@` |
| **Segment Index** | Last |
Useful in front of a [Conditions](/build/action-steps/conditions) step that routes by company.
## What's Next?
- Do something with each piece using [Loops & Iteration](/build/action-steps/loops).
- Cut the list down before you act on it with [Filter](/build/action-steps/filter-items).
---
Source: https://docs.getglow.ai/build/action-steps/stop-and-error
# Stop and Error
> End a run on purpose with a message explaining why, so it shows up as a failure rather than finishing quietly.
**Stop and Error** ends a run on purpose and marks it failed.
> Dock: Flow · Returns: nothing
Use it where a workflow has reached a situation it should not carry on from. Data that did not check out, a record that came back empty, a permission that is missing. The run then shows up as a problem rather than quietly finishing.
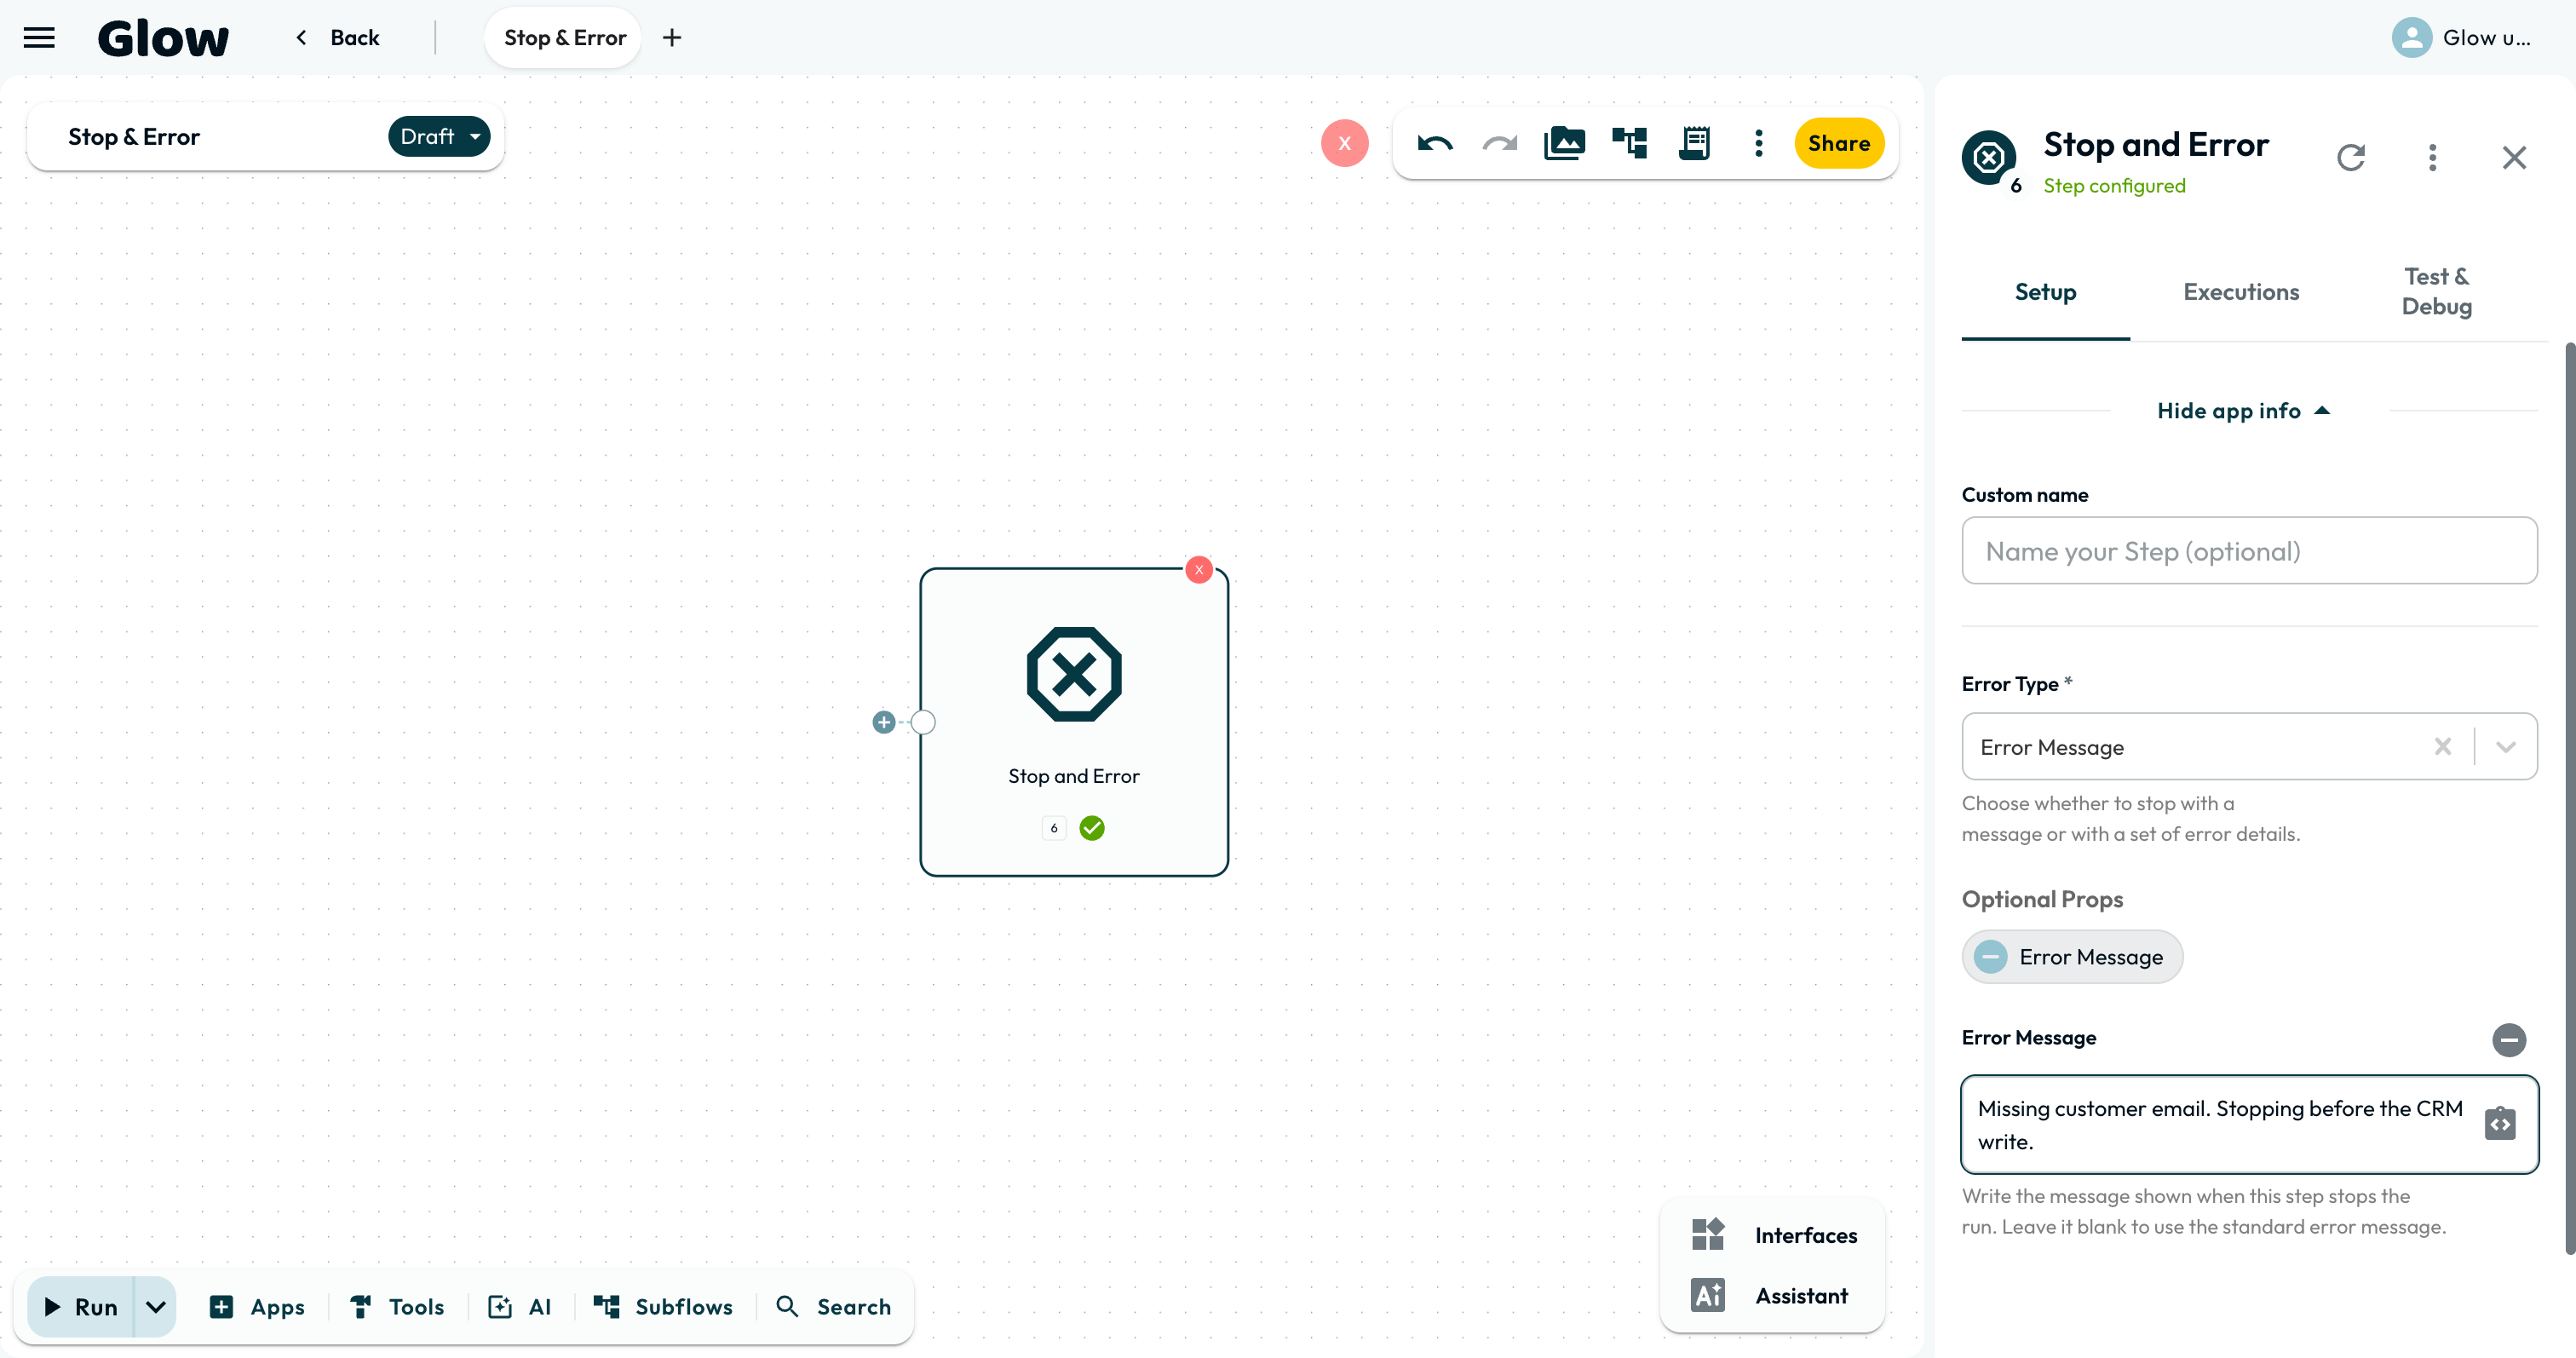
*Write the message the run stops with. Leave it blank and the step uses the standard one.*
```mermaid
flowchart LR
A[Receive Webhook] --> B{Data Valid?}
B -->|Yes| C[Process Data]
B -->|No| D[Stop and Error]
```
## Setting it up
When a run reaches this step, it stops immediately.
### Place the Step
Add the **Stop and Error** step at the end of a branch where execution should not continue: the ELSE route of a validating Condition, or a Switch's fallback.
### Configure the Error Message
Enter a descriptive error message. It appears in the workflow's Execution logs, so your team can see why the run was aborted.
### Attach the data that caused it
Optional. Add the values that made the run stop, such as the record ID, the amount, or the status code. They are stored on the failure. When you open the run a week later, the message says what went wrong and this says which record it happened to.
## An empty branch looks like success
Leave a branch empty and the run registers as **Completed** when it reaches the end of it. Add a Stop and Error step, and it registers as **Failed** instead. That matters because:
- Somebody gets notified. Failed runs raise workspace error notifications; completed ones do not.
- The run history tells the truth, so a week of quiet failures does not read as a week of clean runs.
- Your message is on the failure, so whoever opens it knows what went wrong without reading the canvas.
## What it passes on
Stop and Error returns no output. It records the message and any attached data on the failed run so your team can diagnose it from the execution log.
## Limits
The step ends the current branch immediately. Any downstream steps connected after it do not run, so place notifications or cleanup work before Stop and Error or on an error-handling path.
## Examples to copy
### Reject a record that fails validation
Place Stop and Error on the ELSE route of a Conditions step. Use a message that names the rule and include the record ID as attached data:
```text
Customer record failed validation: email address is missing
```
### Make a Switch fallback visible
Place Stop and Error on the fallback route when every expected value has its own case. Include the value that did not match so the execution log shows what needs a new route.
## What's Next?
- Decide which failures should retry before they halt in [Error Handling & Retries](/build/core-concepts/error-handling).
- Catch unhandled cases on a fallback branch with the [Switch Step](/build/action-steps/switch).
---
Source: https://docs.getglow.ai/build/action-steps/summarize
# Summarize
> Group a list and work out a count, total, average, smallest or largest for each group.
**Summarize** turns a list into grouped results. Pick what to group by, then say what to work out for each group: a count, a total, an average, the smallest or the largest.
> Dock: Data · Change · Takes: a list · Returns: a list of groups
It answers the questions that otherwise need code. Revenue per account manager, tickets per priority, orders per region.
> **Simple total or average without grouping?** You can calculate a single total, average, count, or min/max directly inside field tokens using [Data Transformation](/build/core-concepts/data-transformation):
> - Sum of record property: `{{ 3.deals | pluck:amount | total }}`
> - Average deal size: `{{ 3.deals | pluck:amount | average }}`
> - Largest sale: `{{ 3.deals | pluck:amount | largest }}`
> - Count of items: `{{ 3.deals | count }}`
>
> Use the **Summarize** canvas step when you need to group data by dimensions (e.g. revenue grouped by account manager or ticket counts per status).
## Setting it up
### Add the step
Open **Tools** in the dock and choose **Summarize**.
### Point it at a list
**List to summarize** takes a reference to a list an earlier step produced, for example `{{ 3.result }}`. Insert it from the data icon rather than typing it.
### Choose how to group
**Group by** takes the field whose values become the groups: `region`, `owner`, `priority`. Add more than one row to group by a combination.
Leave it empty to treat the whole list as one group. That is how you total a list without splitting it.
### Say what to work out
**Work out** takes one row per number you want. Each row picks an operation and what to work on: a field of each record, or each whole item. Count needs neither.
| Operation | What it gives you |
| ------------------- | ----------------------------------------------------------------- |
| **Count** | How many records are in the group |
| **Count unique** | How many different values a field has |
| **Sum** | The total of a numeric field |
| **Average** | The mean of a numeric field |
| **Smallest** | The lowest value |
| **Largest** | The highest value |
| **List the values** | Every value of that field in the group, as a list |
| **Join the values** | The same values as one piece of text, with a separator you choose |
The last two answer a different question from the rest. Instead of a number
about the group, they hand you back what is in it: every email address in a
region, say, or those addresses joined by a comma, ready for a To field.
## Summarizing a list of plain values
When the list holds plain values rather than records, a list of amounts, say, set **Work on** to **Each whole item**. The panel pre-selects it when the sample list holds plain values. Sum, Average, Smallest and Largest use numbers only; a blank or non-number item follows **If a field is missing**.
The output column is named after the operation alone, so a whole-item Sum arrives as `{{ N.groups.0.sum }}`.
**Group by** always takes a field. To total a list of plain values, leave Group by empty and work on each whole item.
## What it passes on
**The result is always a list under `groups`**, even when everything landed in one group. That way a reference written against one grouping still works when you change the grouping later.
| Reference | What it holds |
| -------------------- | ------------------------- |
| `{{ N.groups }}` | One entry per group |
| `{{ N.groupCount }}` | How many groups there are |
Each entry carries the fields you grouped by, plus one column per row of **Work out**. The column is named after the operation and the field, so a Sum of `amount` arrives as `sum_amount`:
```
{{ 5.groups.0.region }} first group's region
{{ 5.groups.0.sum_amount }} that group's total
{{ 5.groups.0.count }} how many records it holds
```
Because `groups` is a list, a [Repeater](/build/action-steps/loops) can run over it: one Slack message per region, for example.
**Groups come out in the order they first appear** in the input list, not sorted.
## How values are counted
This is the part worth reading before you trust a total.
**A missing value is missing, not zero.** Ten rows where one has no amount would average 10% low if the blank counted as zero, and nothing in the result would say so. The same applies to a value that is not a number after conversion: `"n/a"`, `true`, or an empty object.
**If a field is missing** decides what happens:
- **Report** flags it, so you find out.
- **Skip** leaves those records out of that calculation.
Both are defensible; the point is that you choose rather than the step choosing for you.
**Numbers written as text still add up.** A list arriving through `{{ 3.rows }}` often has amounts like `"1200"` rather than `1200`, because references are resolved as text. Summarize converts them, so a total is not silently zero.
**Money does not drift.** Totals accumulate exactly, so `0.1 + 0.2` is `0.3`.
**Decimal places** rounds the results. Set it to 2 for currency.
## Limits
- **Two rows cannot write the same column.** Two Sums of `amount` would both be `sum_amount`, so the step reports the clash instead of one silently overwriting the other.
- **A record missing its group-by field** never lands in a group called "undefined". It follows the same **If a field is missing** setting.
## Examples to copy
### Revenue per account manager
**List:** `{{ 3.deals }}` · **Group by:** `owner` · **Work out:** Sum of `amount`, and Count.
Gives one entry per owner with `sum_amount` and `count`. Follow it with a Repeater over `{{ N.groups }}` to send each manager their own figure.
### Tickets per priority, as one message
**List:** `{{ 2.tickets }}` · **Group by:** `priority` · **Work out:** Count.
Then reference the groups directly in a Slack message rather than looping.
### A single total, no grouping
**List:** `{{ 4.invoices }}` · **Group by:** empty · **Work out:** Sum of `total`.
One group, reached as `{{ N.groups.0.sum_total }}`.
## What's Next?
- Run over each group with [Repeater](/build/action-steps/loops).
- [AI Data Transform](/build/ai-features/ai-transform) — for pulling values out of text that has no fixed shape.
- Reshape records before summarising them with [Change fields](/build/action-steps/change-fields).
---
Source: https://docs.getglow.ai/build/action-steps/switch
# Switch Step
> Route a workflow to one of many named outputs, evaluated top to bottom, with a fallback for everything that matches nothing.
The **Switch** step routes a run to one of several outputs. You define ordered **routing cases**: the first case whose conditions are met sends the run down its route, and evaluation stops there.
> Dock: Flow · Returns: the case that matched
**Reach for Switch when the answer is one of several.** A ticket is a refund, a complaint or a question — not two of them. Where two things can be true at once, [Conditions](/build/action-steps/conditions) is the step, and both routes run. See [Choosing a Flow Step](/build/action-steps/routing) for the difference between the three routing steps.
Switch takes the first matching route only, and the run continues down that one.
> **Always assign the Fallback route.** It is where a run goes when no case
> matches. Without it, unmatched runs stop at the Switch and nothing downstream
> fires.
>
> The fallback sits behind the regular cases, so it needs at least one to sit
> behind: **a Switch configured with the fallback alone routes nothing.** For a
> single unconditional route, use a case with no conditions instead, since an
> empty case matches everything.
## Setting it up
The panel is the same rule builder the Conditions step uses, so a case is built the same way: pick the data, pick its type, pick an operator, give it a value.
### Add a routing case
Click **Add routing case**. New cases are added at the **bottom**, and since evaluation runs top to bottom, a new case is checked last. Reorder them if the priority is wrong.
### Build its rule
Pick the data to test, then choose its type: **Text**, **Number**, **Yes/no**, **Record**, **List**, or **Date & Time**. Then pick an operator from that type's list. The full catalogue is on the [Conditions](/build/action-steps/conditions#operators) page, and it is shared between the two steps.
Click **Rule** to add a second rule with **AND** or **OR**.
### Point the case at a step
Under **Then go to**, choose where the run continues when this case wins. Wire
the route as you build each case rather than at the end: the connection is what
anchors a case on the canvas, so a case that leads somewhere is one that stays. If the step
it should lead to does not exist yet, **Then go to** creates it for you.
### Assign the fallback
Under **Fallback**, choose where everything that matched no case should go.
> **A case with a blank rule matches everything.** That makes an empty case a
> useful catch-all when you put it last, where first-match-wins turns it into a
> default.
>
> Everywhere else, give each case data, an operator and a value before the first
> run. **All three, including the data on the left**, which you pick with the data
> button beside the field rather than typing. A rule with a value on the right and
> nothing on the left compares an empty value against it, so the case never
> matches and the run passes it by.
>
> Drawing a connection out of a Switch creates its case straight away, so check
> them if you wire the canvas before configuring it.
## Naming your outputs
Each case takes an optional output name, up to 50 characters. It is the **Output 0** field at the top of the case. The name is echoed on the case's result, so run history reads _"Enterprise leads"_ rather than _"case 2"_.
On a Switch with more than two or three cases this is the difference between a readable execution record and a puzzle.
## Capital letters matter here
> **`Active` does not match `active`.** The Switch compares text exactly as
> written, capitals included.
>
> **How matching works** is where you change that: it holds the choice of whether
> text ignores capitalisation, and whether one matching case runs or every one
> does. The [Filter](/build/action-steps/filter-items) step starts from the same
> rule, exact by default, so a comparison behaves the same way in both.
To match regardless of capitals, turn on **Ignore capitalization** under [How matching works](#how-matching-works).
## Sending to every matching branch
By default the first matching case wins and the rest are skipped. You can have the run go down **every** branch that matches instead.
That is what you want when your cases are labels rather than a choice, such as tagging an order as both _high value_ and _international_. It is not what you want when the branches are alternatives, because the work then happens more than once.
Turn on **Run every matching branch** under [How matching works](#how-matching-works).
## How matching works
**How matching works** holds two settings that apply to every case in the step.
| Setting | Default | What it does |
| ----------------------------- | ------- | ---------------------------------------------------------------- |
| **Ignore capitalization** | Off | Turn it on and `Active` matches `active`. |
| **Run every matching branch** | Off | Turn it on and every case that matches runs, not only the first. |
The fallback route is skipped whenever a case matched, whichever of these is on.
Workflows imported from another platform can carry extra options across. Those stay available in a collapsed section beneath these two, so an imported Switch keeps behaving the way it did before the move.
## Choosing a routing Mode
The **Mode** setting has two values. The default one is everything described above: the cases' rules decide where the run goes.
The other ignores the rules entirely and picks a branch by number. You supply the number, counting from zero. It is there so workflows moved over from other automation tools keep working.
**For anything you build in Glow, leave Mode alone.** Rules keep the routing readable on the canvas. A number computed somewhere else does not.
## What it passes on
The Switch does not pass data along a branch: the steps after it read the same
earlier steps they always would. What it publishes is the **decision**, which is
what you want when a run went somewhere you did not expect.
Open the **Execution log** from the toolbar and expand the Switch's entry:
```
{"mode":"rules","cases":[{"blocks":[{"conditions":[
{"data":"","value":"NEVER_MATCHES","result":false,"operator":"equals",
"conditionType":"string"}],"blockSuccess":false}],
"matched":false,"caseIndex":0}]}
```
Read it from the inside out. Each condition shows the two values it compared and
its `result`. A block passes when every condition in it passed. A case matches
when one of its blocks did, and `caseIndex` says which case it was, counting
from zero.
That is usually enough to settle a routing question in one look: a rule that
looks right but reads `result: false` is comparing something other than what you
meant, and the two values beside it say what.
## Examples to copy
### Route support tickets by topic
| Case | Output name | Data | Type | Operator | Value |
| ------------ | ----------- | ------------------- | ---- | ------------- | -------------- |
| 1 | `Billing` | `{{ 2.ret.topic }}` | Text | `is equal to` | `billing` |
| 2 | `Bugs` | `{{ 2.ret.topic }}` | Text | `is equal to` | `bug` |
| **Fallback** | — | — | — | — | general triage |
Name the outputs and the run history reads "Billing" rather than "case 1".
### One webhook, several event types
| Case | Output name | Data | Type | Operator | Value |
| ------------ | ----------- | ---------------- | ---- | ------------- | ------------ |
| 1 | `PR opened` | `{{ 1.action }}` | Text | `is equal to` | `opened` |
| 2 | `PR merged` | `{{ 1.action }}` | Text | `is equal to` | `closed` |
| **Fallback** | — | — | — | — | a Do Nothing |
A fallback pointing at [Do Nothing](/build/action-steps/no-operation) is the deliberate way to say "ignore anything else". It also looks different from having forgotten the fallback entirely.
### Score bands, where order is the whole design
| Case | Output name | Data | Type | Operator | Value |
| ------------ | ----------- | ------------------- | ------ | ----------------- | -------------------- |
| 1 | `Hot` | `{{ 3.ret.score }}` | Number | `is greater than` | `80` |
| 2 | `Warm` | `{{ 3.ret.score }}` | Number | `is greater than` | `50` |
| **Fallback** | — | — | — | — | the nurture sequence |
A score of 90 matches both cases. First match wins, so it goes to `Hot`. That is why the bands must run highest first. Reverse them and every hot lead lands in `Warm`.
## What's Next?
- Fire several routes at once, or use plain-language rules, with the [Conditions Step](/build/action-steps/conditions).
- Fail loudly on the fallback with the [Stop and Error step](/build/action-steps/stop-and-error).
- Merge branches back into one path using the [Do Nothing](/build/action-steps/no-operation).
---
Source: https://docs.getglow.ai/build/action-steps/trigger-workflow
# Subflows
> Run one workflow from inside another with the Subflow step: the caller waits, and the result comes back as ordinary step output.
The **Subflow** step runs another workflow from inside this one and waits for its answer. The calling run pauses, the called workflow runs start to finish, and its result comes back as this step's output like any other step's.
Reach for it when the same job appears in several workflows. Build "notify the on-call channel" or "create the ticket" once, then call it from everywhere it is needed.
**Any workflow in your workspace can be called.** There is nothing to publish or switch on first: you pick the workflow from a list, and it becomes a subflow because you called it.
```mermaid
flowchart LR
A[Calling Workflow] --> B[Subflow Step]
B -->|Runs & Waits| C[Child Workflow]
C -->|Returns Data| B
B --> D[Next Step]
```
## Why split a workflow
- **Reuse.** One copy of a routine, called from every workflow that needs it. Fix it once and every caller gets the fix.
- **Readability.** Five workflows of ten steps are easier to follow than one of fifty.
- **Isolation.** Sensitive work stays in its own workflow with its own connections.
## Setting it up
### Add the Subflow step
Open **Subflows** in the dock. It lists every workflow in your workspace, ready to drop onto the canvas.
### Pick the workflow to call
Click the one you want. No preparation is needed on the workflow you are calling: every workflow in the workspace can be called as a subflow.
A workflow that cannot be called is greyed out with the reason: it has no steps yet, or calling it would make a loop.
### Check what it does
The App drawer shows a small map of the workflow you picked, so you can see what it does without leaving the canvas.
### Pass the data it needs
Give the subflow the values it should work with, referencing the calling workflow's steps by number:
```
{{ 1.email }}
{{ 3.customer_id }}
```
Build these from the data picker rather than typing them. What sits after the step number is a path into whatever that step produced, so it changes with the step you read from.
### Use the result
The called workflow's output is available on this step like any other, referenced by this step's own number.
## The caller waits, and that is the point
This is the difference from calling a workflow over its webhook. A webhook call is posted and forgotten: the caller carries on immediately and never sees the outcome.
A Subflow step **suspends the calling run** until the called workflow finishes, then resumes it with the answer. A step after it can use the result, branch on it, or pass it further along.
## What it passes on
Two things:
```
{{ 5.output }} what the child workflow declared as its output
{{ 5.steps.3.ret.id }} any step inside the child run, by its number there
```
`output` is the child's declared result: the value its own output step returned. `steps` exposes the whole child run, so a field the child never declared can still be reached by naming the child step that produced it.
## Limits
- **Three levels deep.** A workflow can call a workflow that calls a workflow. Beyond that the step reports a configuration error rather than running.
- **A workflow cannot call itself**, and it cannot call anything that would loop back to it. Glow checks the whole chain before running and refuses a cycle, so a run cannot recurse forever.
- **The data passed in is capped at 64 KB.** Pass an identifier and let the subflow fetch what it needs, rather than passing a large record.
- **Same workspace only.** The list offers workflows on your own team.
> **A run's subflow steps appear in the parent's Execution log**, indented under
> the step that called them. One log tells the whole story, so you do not have
> to open the called workflow separately to see what it did.
## Calling over a webhook instead
Sending an [HTTP Request](/build/action-steps/http-request) to another workflow's [Webhook](/build/triggers/webhook) trigger still works, and it suits a genuinely independent job: something that should start and run on its own while the caller finishes.
Two differences decide which to use:
| | Subflow step | HTTP Request to a webhook |
| ------------------------------- | ------------------- | ------------------------- |
| Does the caller wait? | Yes | No |
| Does the caller get the result? | Yes | No |
| Where does it show in the log? | In the caller's log | In its own run |
If a later step needs the answer, use Subflow.
## What's Next?
- Read what a run records in [Executions](/build/core-concepts/executions).
- Send data to an outside service with [HTTP Request](/build/action-steps/http-request).
---
Source: https://docs.getglow.ai/build/action-steps/user-approval
# Human Review
> Pause a workflow until a person makes a decision. Define the outcomes, the form they fill in, and the branch each choice takes.
The **Human Review** step suspends a workflow and emails somebody for a decision. The run stays paused until they answer, then continues down the branch bound to the outcome they picked.
> Dock: Flow · Returns: the reviewer's decision
Use it as a checkpoint before anything irreversible, and before acting on AI output nobody has reviewed yet.
## When to Use It
- **Financial actions**: approving a refund or a large payment before it processes.
- **Publishing**: reviewing AI-drafted posts or replies before they go out.
- **Destructive operations**: confirming deletion of records flagged automatically.
## Setting it up
Add the step from **Tools** on the canvas dock. Only the first field is required.
| Field | Required | Description |
| -------------------------- | :------: | --------------------------------------------------------------------------------- |
| **Approver Email** | Yes | Who is emailed. One address; a list separated by commas is rejected. |
| **Email Subject** | No | Subject line. Defaults to "Action required: approve workflow". |
| **Message** | No | Instructions the reviewer reads. Takes references to earlier steps. |
| **Context Data** | No | Key and value pairs shown in the email and on the review page. |
| **Decisions** | No | The outcomes the reviewer can pick. Defaults to Approve and Deny. |
| **Expire after (seconds)** | No | Take the Expired branch if nobody answers in time. Blank or 0 waits indefinitely. |
| **Form Title** | No | Heading above the reviewer's form. |
| **Form Description** | No | Helper text under the heading. |
| **Form Fields** | No | Fields the reviewer fills in alongside their decision. |
> **Notifying somebody is not the same as authorising them.** The email goes to
> whatever address you enter, but responding requires a signed-in member of this
> workflow's team. To collect a decision from a customer or another outside
> party, use the [Wait](/build/action-steps/delay) step: its form and webhook
> modes accept an answer from outside Glow.
### Giving the reviewer what they need
The **Message** is where the decision gets made, so put the values it rests on into it rather than sending a bare "please approve":
```text
Refund request from {{ 1.customer_email }}
Amount: {{ 1.amount }}
Reason given: {{ 2.result }}
```
**Context Data** does the same job in a tidier shape. Each row is a label and a value, and the pairs are listed in the email and on the review page as a small table. A row named `Deal` with the value `{{ 2.dealName }}` reads better than the same reference buried in a paragraph.
Both are resolved when the step runs, so the reviewer sees the values as they were at that moment.
### Naming the outcomes
**Decisions** is where you set what the reviewer can choose. Leave it empty and they get the default pair, Approve and Deny.
Each row you add takes a **Value**, which is how the choice is recorded, and a **Button label**, which is what the reviewer clicks. One row can be flagged as the Expired branch. Every decision gets its own button in the email and its own output on the canvas. "Approve", "Send back for edits" and "Reject" become three branches you wire separately.
Connect each output to the steps that should follow that choice. A decision left unwired continues down the step's normal output, and a Deny-style outcome settles the run through its error path.
### Asking for a value alongside the decision
**Form Fields** puts a form on the review page. A reviewer can then supply a rejection reason or a corrected amount alongside their decision.
Each field takes a **Field name**, which is the key later steps read it by, plus a **Label**, a **Type**, whether it is **Required**, and optional **Help text**. The choice types take a comma-separated list of **Choices**. The types are short text, long text, number, date, dropdown, multi-select, checkbox, radio and file.
Answers arrive on the step as `formData`, keyed by the field names you chose. A field named `rejectionReason` is read by a later step as `{{ 5.formData.rejectionReason }}`.
### Setting a deadline
**Expire after (seconds)** decides how long the request stays answerable. Leave it blank or at 0 and the request waits indefinitely.
Set it, and mark one of your Decisions rows as the Expired branch, and an unanswered request continues down that branch. Set it without marking one and the timeout settles the run through the step's error path rather than being mistaken for approval.
## What the Approver Sees
An email with your subject, your message, any Context Data you supplied, and a button per decision. Each link belongs to that one run: once a decision is submitted, the others stop working and the workflow resumes. Approvers away from a desk can answer from a phone browser too, through [Mobile View](/build/the-canvas/mobile-view).
Where you configured a form, the button opens the review page with the form on it, and the decision is submitted together with the answers.
## What it passes on
While the workflow is paused, the step's output is:
```json
{
"status": "pending",
"approverEmail": "manager@example.com",
"subject": "Action required: approve workflow",
"message": "Refund request from …",
"reviewUrl": "https://…",
"context": [{ "key": "Deal", "value": "Acme renewal" }],
"decisions": [{ "id": "approved", "label": "Approve" }],
"expiresAt": "2026-08-10T09:00:00.000Z"
}
```
Glow emails the approver automatically. `reviewUrl` is also published so you can route it elsewhere. Post it to a Slack channel, for example, so whoever is on shift can act.
Once somebody answers, the step's own result carries the outcome:
| Reference | Contains |
| ------------------------- | ------------------------------------------------- |
| `{{ N.decision }}` | The Value of the decision that was picked |
| `{{ N.formData. }}` | What the reviewer filled in, where you set a form |
| `{{ N.answeredAt }}` | When the answer arrived |
Where several outcomes must do different things, wiring each decision's own output is the direct route. Reading `{{ N.decision }}` in a [Condition](/build/action-steps/conditions) after the step does the same job in one branch.
## Limits
An expiry runs to a maximum of **30 days**. The field refuses a larger number when you type it, so a run cannot end up waiting for a period the step never accepted.
Where a decision has to arrive sooner than anyone is likely to check email, set a short expiry and wire the Expired branch to a chaser. Posting the review link into a channel somebody is watching works too.
## Troubleshooting
> A workflow waiting for approval shows as **Running** in the execution log.
> That is expected. It is suspended, not stuck.
**The approver did not get the email.** Check the address in **Approver Email** for typos, and check spam. As a fallback, send `reviewUrl` yourself in a Slack or email step placed after the approval step.
**The email was rejected before it went out.** The field takes exactly one well-formed address. Two addresses separated by a comma fail the step rather than emailing both.
**The link no longer works.** Each link is valid for a single run, and only until the decision is made. Reopening it afterwards shows that it has already been answered.
**Nobody ever responded.** Set **Expire after (seconds)** and wire the Expired branch, so an unanswered request routes somewhere deliberate. A run that is no longer wanted can be cancelled from the **Executions** tab.
**Two people answered at once.** Only the first answer counts. The second is recorded as already answered and changes nothing.
## What's Next?
- Pause for a time, or until an outside system calls back, with [Wait](/build/action-steps/delay).
- Branch on the outcome with [Conditions](/build/action-steps/conditions).
- Halt a run deliberately with [Stop and Error](/build/action-steps/stop-and-error).
---
Source: https://docs.getglow.ai/build/ai-features/ai-agent
# AI Agent
> Hand one step of a workflow to an AI that works out its own approach, while the rest of the workflow runs by your rules.
The AI Agent step handles work that needs judgement rather than a rule, and that takes more than one move. You give it a goal and the accounts it may use, and it works out the steps itself.
That covers reading a company's website, deciding how urgent a message is, or making sense of input nobody formatted. For a single call with no tools (classify this, summarise that) the [AI Prompt](/build/ai-features/ai-prompt) step is simpler and faster.
*The agent's identity and goals are the whole brief. It knows nothing you do not write into these two fields.*
The rest of your workflow does not change. Everything before and after the agent still runs by your rules, in the order you drew. The agent is one step where the answer is worked out rather than looked up.
Two things define what it can do:
1. **Primary goals**: what you want it to achieve.
2. **Tools**: the accounts it is allowed to act through. It can use nothing else.
The AI Agent works in a loop: it reads the goal, picks a tool, reads the result, and repeats until it can answer.
## Setting it up
### Choose the model
Open the **Brain (model)** dropdown and pick the model that will drive the agent. It runs on Glow's managed infrastructure, so there is **no API key to configure**. See [Models](/build/ai-features/supported-models) for how to choose.
### Write the Primary goals
Say what the agent is for. This can be static text, data from earlier steps, or both.
_Example:_ "Research the company that just filled out our lead form, find their most recent product launch, and draft a personalised outreach email."
> **The agent sees only the text you put in these fields.** It has no view of
> the workflow around it. A reference to an earlier step must be written into
> the prompt as a placeholder, such as `{{ 3.ret.company }}`, for the agent to
> know that value at all. Nothing arrives implicitly.
### Give it an Identity
**Identity** says what the agent _is_, where Primary goals says what it should _do_. For example: "a customer support assistant for an accounting product", or "a research assistant that never speculates".
It is optional, and worth filling in whenever the same goal would be handled differently by different kinds of assistant.
### Equip Tools
Open **Tools** and switch on the accounts the agent may act through. Each one you turn on becomes a set of actions it can call. A Slack account lets it post messages, and a HubSpot account lets it read and update records.
*Every account is off until you turn it on. The agent can act through the ones switched on here and nothing else.*
The model may pick the wrong tool, or reach for one it should leave alone. **Tool Instructions** under Optional Props is where you tell it when to use which.
> **The agent cannot reach anything you have not listed here.** It acts through
> the same connections the rest of your workflow uses. It cannot create, delete,
> or re-authorise one.
Tools has two halves: the accounts you switch on here, and the workflows you have already built, listed below them under **Workflows**.
Three tools come with every agent as well, whether or not you connect an account:
- **Search the web** for something it does not know.
- **Run code** to calculate, reshape or check a value.
- **Read a URL you give it** — a web page, and also a PDF, an image, or a CSV or JSON file. The address has to be publicly reachable: a link behind a login or inside your private storage returns nothing, so pass the contents in through the prompt instead.
### Hand it a workflow you already built
Below the accounts, the Tools panel has a second section headed **Workflows**. It lists the reusable workflows in your workspace that the agent is allowed to run, and each one is switched on with the same toggle.
Each workflow you turn on gets its own free-text box, **When should the Agent use this?**, which tells the model when to reach for it. It arrives filled in with `Use this tool to run {name} and return its result.` Replace that with the actual trigger: "Use this when the customer asks about a refund and you need their order history."
This is the strongest way to constrain an agent. The judgement stays with the model, and the steps stay yours — drawn on a canvas, tested, and unchanged by whatever the agent decides. Where a rule is fixed, put it in a workflow rather than describing it in the prompt and hoping.
### Shape the behaviour
Everything else sits under **Optional Props**. Click **Show more** to see the full set. All of it is prompt material: what you write here reaches the model, and nothing else does.
| Field | What it does |
| -------------------------- | --------------------------------------------------------------------------------------------------------------------------------------------------------------------------------------------- |
| **Background information** | Context the agent should assume: your product, your customers, anything it cannot infer. |
| **Dos and Don'ts** | Behaviour it must always or never exhibit. |
| **Tool Instructions** | When to reach for which tool, rather than leaving the choice entirely to the model. |
| **Safety Constraints** | Hard limits it must not cross. |
| **Error Handling** | How to behave when it hits an error or something unexpected. |
| **Output Format** | The shape the answer should take. |
| **Style** | Tone, voice and register. |
| **Examples** | Sample inputs and the outputs you want for them. |
| **Step by Step** | A reasoning process to follow, when the order of work matters. |
| **Memory Enabled** | Off by default. Turn it on to carry context across runs. Reveals **Memory Instructions**, where you say what is worth remembering. |
| **Think Tool Enabled** | A dedicated reasoning pass before answering. **On unless you switch it off.** Better on ambiguous tasks, slower everywhere: turn it off for a narrow, well-specified agent running at volume. |
> **Memory belongs to the workflow, not to you.** Every run of this step reads
> and writes the same memory, whoever started it. A colleague who runs the
> workflow picks up what the agent already learned, and anything it learns on
> their run is there on yours. That is the point: an agent that forgot
> everything each time somebody else ran it would never get better at the job.
>
> Two workflows never share memory, even in the same workspace and even when one
> is a copy of the other. So a second agent built for a different job starts
> clean, and you can keep a sensitive workflow's memory away from the rest.
>
> Memory belongs to a saved workflow, so a run that is not attached to one — a
> step tried out on its own before the workflow exists — remembers nothing and
> leaves nothing behind. Save the workflow first if you are testing what the
> agent learns.
> **Running one workflow for several clients?** The memory follows the workflow,
> so every client's runs read and write the same store. That is what you want
> for one client's own automation, and not what you want for a workflow you
> operate across an entire book of business.
>
> Give each client their own copy of the workflow, and their agents keep their own
> memory. Where a single shared workflow is the right shape, leave **Memory
> Enabled** off and pass the context in through the step's fields instead: what a
> run needs is then explicit, and nothing carries between clients.
#### Output Format and Examples earn their keep
These two are what make an agent usable by the rest of your workflow. An agent whose answer is free prose forces the next step to pick it apart. Tell it instead to return `{"decision": "approve"|"reject", "reason": "..."}`, and show it an example of exactly that. You then have something a [Condition](/build/action-steps/conditions) can route on.
If you find yourself building fragile text-matching after an agent, the fix is usually these two fields rather than a cleverer step downstream.
## What it passes on
The agent hands back two values on the step:
| Reference | What it holds |
| ------------------ | -------------------------------------------------- |
| `{{ N.result }}` | The answer itself |
| `{{ N.thoughts }}` | Its reasoning along the way, useful when debugging |
Give it an Output Format that asks for JSON and you can reach inside the answer directly: `{{ N.result.urgency }}`. Run the step once and check the Executions tab to confirm the shape before you build on it.
> **Run the step once and read the Executions tab before wiring the next one.**
> A reference that finds nothing stops the run and names itself in the message,
> whether the step number is wrong or the path after it is. Checking the real
> path against a run catches both before they cost you a run.
## How the agent reaches your accounts
Every account you switch on opens its own connection when the step runs, acting as the same person who authorised it, and closes again when the step finishes. An agent can never reach further than the account you gave it.
The agent then asks each connection what it can do, rather than working from a list we ship. Two useful things follow from that.
**New actions arrive on their own.** When an app gains an action, your agent can use it. Nothing to update, nothing to re-connect.
**The choice is made during the run.** Which action the agent reaches for is decided as it works, not fixed in the settings beforehand. That is what **Tool Instructions** is for: it is where you say which to prefer.
You configure none of this. Switching the account on is the whole setup.
## Getting the same fields every time
The agent carries the same **Response shape** option as AI Prompt. You will find it in the main form, directly below Primary goals. Describe the structure you want and the agent's answer holds that shape on every run, so a later step can read `{{ 4.result.status }}` and know it is always there. See [Getting the same fields every time](/build/ai-features/ai-prompt#getting-the-same-fields-every-time).
## Approving what the agent does
Some actions cannot be taken back: an email to a customer, a refund, a record deleted. Put a [Human Review](/build/action-steps/user-approval) step between the agent and the action. The run pauses, someone approves it from the canvas, and only then does it go ahead.
Worth doing whenever being wrong costs more than waiting.
## Recovering from a failed run
An account may not connect, a service may be down, or the data may not be there. The agent then stops with an error rather than guessing.
You handle a failed agent like any other failed step. Draw an **Error Path** from the step to a fallback, such as a manual review task. The mechanics are ordinary [Error Handling](/build/core-concepts/error-handling); nothing about the agent changes them.
> This bounds what happens when the agent's *tools* fail. It does not guarantee
> the model's reasoning is correct. For decisions with consequences, put a
> [Human Review](/build/action-steps/user-approval) step between the agent and
> the irreversible action, as above.
## Limits
A workflow the agent calls has two minutes to answer. Keep a called workflow short, or move slow work behind its own trigger so the agent starts it and does not wait for it. See [Calling Another Workflow](/build/action-steps/trigger-workflow) for how subflows are built and what they return.
## Examples to copy
Use these configurations as starting points, then adapt the goals, constraints, and output to your workflow.
### Blueprint 1: B2B Company & Prospect Research
Equip the agent with the built-in **Search the web** and **Read a URL you give it** tools to perform deep prospect research before a sales outreach.
**Identity**
```
A meticulous B2B market intelligence researcher that extracts verified company information and never hallucinates facts.
```
**Primary goals**
```
Research the company with domain "{{ 1.email | extract_domain }}" using web search.
Find their primary value proposition, target customer profile, estimated headcount, and any notable product announcement from the last 90 days.
Email: {{ 1.email }}
Lead Name: {{ 1.name | title_case }}
```
**Output Format**
```json
{
"company_name": "string",
"industry": "string",
"value_proposition": "one clear sentence",
"target_market": "SMB | Mid-Market | Enterprise",
"recent_news": "string or null",
"recommended_outreach_angle": "string"
}
```
**Dos and Don'ts**
```
Do check the official company website before secondary directories.
Don't speculate on revenue or headcount if not publicly stated. If unknown, return null.
```
---
### Blueprint 2: Customer Support Triage & Sentiment Router
Triage incoming customer tickets, verify account tier using your connected CRM, and output clean JSON for downstream [Switch](/build/action-steps/switch) steps.
**Identity**
```
A technical customer support triage specialist for a SaaS platform.
```
**Primary goals**
```
Analyze the customer's message:
Customer: {{ 1.name }} ({{ 1.email | lower }})
Message: {{ 1.message | strip_html | trim }}
1. Look up the customer's domain ({{ 1.email | extract_domain }}) in HubSpot to verify their tier.
2. Determine urgency and issue classification.
3. Draft a resolution based on the issue description.
```
**Output Format**
```json
{
"urgency": "Critical | Normal | Low",
"category": "Billing | Authentication | Bug | Feature Request | How-To",
"tier": "Enterprise | Standard | Free",
"sentiment": "Frustrated | Neutral | Delighted",
"draft_reply": "string",
"requires_human_review": true
}
```
**Safety Constraints**
```
Never promise feature timelines, SLA credits, or custom contractual terms.
If the customer threatens legal action or churn, set urgency to "Critical" and requires_human_review to true.
```
---
### Blueprint 3: DevOps Incident & Log Analyzer
Equip the agent with your connected **GitHub** and **Jira** accounts to analyze error logs from production webhooks.
**Identity**
```
A Site Reliability Engineering (SRE) assistant that diagnoses stack traces and assigns bug severity.
```
**Primary goals**
```
Analyze the following error payload from our APM monitoring webhook:
Service: {{ 1.service_name }}
Error: {{ 1.error_message }}
Stack Trace: {{ 1.stack_trace | truncate:2000 }}
1. Identify the root cause module.
2. Search GitHub for open issues matching the error signature.
3. If an existing issue exists, provide the issue number; otherwise draft a Jira bug summary.
```
**Output Format**
```json
{
"severity": "P1 | P2 | P3",
"root_cause_module": "string",
"is_known_bug": true,
"jira_summary": "string",
"jira_description": "string",
"recommended_fix": "string"
}
```
---
## What's Next?
- 👉 **[Connect an App →](/manage/apps-and-integrations/connecting-an-app)**: connect the accounts the agent can use as tools.
- **[Human Review](/build/action-steps/user-approval)**: require approval before an irreversible action.
- **[AI Data Transform](/build/ai-features/ai-transform)**: reshape the agent's answer for later Steps.
---
Source: https://docs.getglow.ai/build/ai-features/ai-prompt
# AI Prompt Step
> Make a single AI call inside a workflow. Write instructions, reference the data you want the model to see, and get a result downstream steps can use.
The AI Prompt step makes one AI call and returns the result to the steps that follow. It is the building block for classification, summarisation, extraction, translation, and anything else that fits in a single call.
**It runs on Glow's managed infrastructure.** There is no API key to configure, no provider to connect and no model to choose: write the instructions and run it. Usage is billed through your Glow plan.
For tasks that need tools, multiple reasoning steps, or memory, use the [AI Agent](/build/ai-features/ai-agent) step instead. To pull several values out of one messy text without writing a prompt, [AI Data Transform](/build/ai-features/ai-transform) does it with one instruction per value.
> **The model sees only what you write.** Previous steps are never passed to the
> AI automatically. If you do not reference a value in your instructions, it
> does not exist as far as the model is concerned.
## Setting it up
### Add it to the canvas
Press **a+p**, or drag **AI Prompt** from the **AI** section of the dock.
### Write the instructions
Select the step to open the App drawer and fill in the **Instructions** field.
### The fields
| Field | Type | Description |
| --------------------- | ------- | ----------------------------------------------------------------------------------------------------- |
| **Instructions** | String | What the AI should do, including the data it should work with. Required. |
| **Response shape** | Editor | Off by default. Name the fields you want back and every run answers with the same fields. |
| **Parse JSON result** | Boolean | Off by default. Turn it on when your instructions ask for JSON but you have not set a Response shape. |
**Response shape** sits in the main form, directly below Instructions. **Parse JSON result** sits under **Optional Props**. There is no model dropdown. See [Models](/build/ai-features/supported-models) for how the AI steps differ on this.
## Getting the same fields every time
A model left to itself will phrase its answer differently from run to run, which is fine for a summary and a problem for anything a later step reads. **Response shape** fixes that: you describe the structure you want, and the model is held to it while it writes rather than checked afterwards.
Turning it on opens the shape editor. In the **Fields** view, add one row per value you want back. Name each field, pick its kind, and mark it required or optional. The kinds are text, number, yes/no, list, and group, where a group holds nested fields of its own.
If the step has already run successfully, Glow reads the last answer and offers its fields as a starting point. Click **Use this** to accept them, or **Set it up myself** to start from a blank shape.
Already have a schema written down? The **JSON** tab takes a JSON Schema directly. There, a shape for a support ticket might read:
```json
{
"type": "object",
"properties": {
"category": { "type": "string" },
"urgency": { "type": "string" },
"needsHuman": { "type": "boolean" }
},
"required": ["category", "urgency"]
}
```
Downstream steps then read `{{ 2.result.category }}` and `{{ 2.result.urgency }}` knowing both are always there.
Turning Response shape off keeps the shape you built. Turn it back on and it is there again, so you can pause enforcement without rebuilding anything.
**If the answer does not match the shape, the step fails** and says which part was wrong. A malformed answer stops the run rather than travelling on as something a later step misreads.
**Ask the AI to fix a wrong shape** changes that. Turn it on and a mismatched answer is sent back once, with the problem described, and the corrected answer is used. It costs one extra AI call on the runs that need it, so the better first move is to describe the shape in your instructions as well. The retry is then a safety net rather than part of the normal path.
## Referencing data
Include data from earlier steps by referencing their **step number** inside the instructions.
```text
Classify the following support ticket into one of these categories:
billing, technical, account, other.
Ticket subject: {{ 1.subject }}
Ticket body: {{ 1.content }}
Respond with only the category name.
```
To pass a step's entire output, reference the step number alone:
```text
Summarize this email: {{ 3 }}
```
> **Insert references with the data picker rather than typing them.** The path
> depends on the step: an HTTP Request puts its response under `ret`, so it is
> `{{ 3.ret.email }}` and not `{{ 3.email }}`. The picker fills in whatever is
> correct for that step and shows you the real value beside it.
>
> A reference that finds nothing (wrong path or wrong step number) stops the
> run there and names itself in the error, rather than sending the model a blank.
> Run the step once and read the Executions tab to confirm the real path before
> you build on it.
Full syntax is documented in [Variable Reference Syntax](/reference/variable-syntax).
## What it passes on
**`result` keeps the shape of what the AI returned.** Ask for a sentence and it
holds a sentence; ask for a list of objects and it holds a list of objects, ready
for a later step to walk into or loop over.
```text
Extract the following fields from the invoice text below. Return valid JSON
with keys: vendor_name, invoice_number, date, total_amount.
Invoice text:
{{ 1.invoice_text }}
```
A run asking for a joke comes back as:
```json
{ "result": "Why don't skeletons fight each other? They don't have the guts." }
```
and one asking for three people as:
```json
{
"result": [
{ "name": "Ann", "city": "Prague" },
{ "name": "Bob", "city": "Brno" }
]
}
```
so `{{ 2.result.vendor_name }}` and `{{ 2.result.0.name }}` both work when the
answer has that shape.
**When the shape matters, set Response shape.** The answer then always has the
fields you named, and later steps can read them with no parsing step. **Parse
JSON result** covers the other case: your instructions ask for JSON but you have
not set a shape. It tells the model to answer in clean JSON with no markdown
around it, and parses the text so later steps can select individual fields.
> **The AI Agent returns the same `result`, plus its reasoning.** Swapping one
> step for the other does not break `{{ N.result }}`. The agent also
> offers `{{ N.thoughts }}`, which the AI Prompt step has no equivalent of.
> Ask for the exact keys you want and state that the response must be valid
> JSON. Models follow an explicit schema far more reliably than an implied one.
## Limits
### Missing input
If a referenced value is empty, that part of the prompt arrives blank and the model works with what remains. That usually produces a confident but wrong answer. Add a [Condition](/build/action-steps/conditions) step before the AI Prompt to check that required data is present.
### The answer arrives in the wrong shape
Left to itself a model phrases things differently from one run to the next. Where the shape matters, set **Response shape** and the answer is held to it: see [Getting the same fields every time](#getting-the-same-fields-every-time).
### High-volume runs
Every run of the workflow is a model call. Before scaling a workflow to thousands of daily runs, check the effect on both cost and execution time, and see [System Limits](/reference/system-limits) for the ceilings that apply to your plan.
## Examples to copy
A webhook receives support tickets. The AI Prompt step classifies each one, and a [Switch](/build/action-steps/switch) step routes it to the right queue.
```text
You are a support ticket classifier. Read the ticket below and respond
with exactly one category: billing, technical, account, or other.
Subject: {{ 1.subject }}
Body: {{ 1.content }}
```
A [Scheduler](/build/triggers/scheduler) trigger runs each morning and fetches unread email. The AI Prompt step summarizes each one for a Slack briefing.
```text
Summarize the following email in two sentences. Focus on action items
and key decisions.
From: {{ 2.from }}
Subject: {{ 2.subject }}
Body: {{ 2.body }}
```
A webhook receives free-text invoices. The step extracts structured fields for a database write.
```text
Extract the following fields from the invoice text below. Return valid
JSON with keys: vendor_name, invoice_number, date, total_amount.
Invoice text:
{{ 1.invoice_text }}
```
Set **Response shape** with those four fields so the next step can map each one individually.
## What's Next?
- Need tools, memory, or multi-step reasoning? Use the [AI Agent](/build/ai-features/ai-agent) step.
- Look up reference syntax in [Variable Reference Syntax](/reference/variable-syntax).
---
Source: https://docs.getglow.ai/build/ai-features/ai-transform
# AI Data Transform
> Pull values out of messy text (an email, a receipt, a transcript) with up to three plain-language instructions.
**AI Data Transform** reshapes data into the format you need. Give it up to three plain-language instructions and it hands back one answer per instruction, in the order you wrote them.
It is at its most useful on text with no fixed shape, like a customer email, a scanned receipt or a meeting transcript. You do not need to know how the data is formatted underneath.
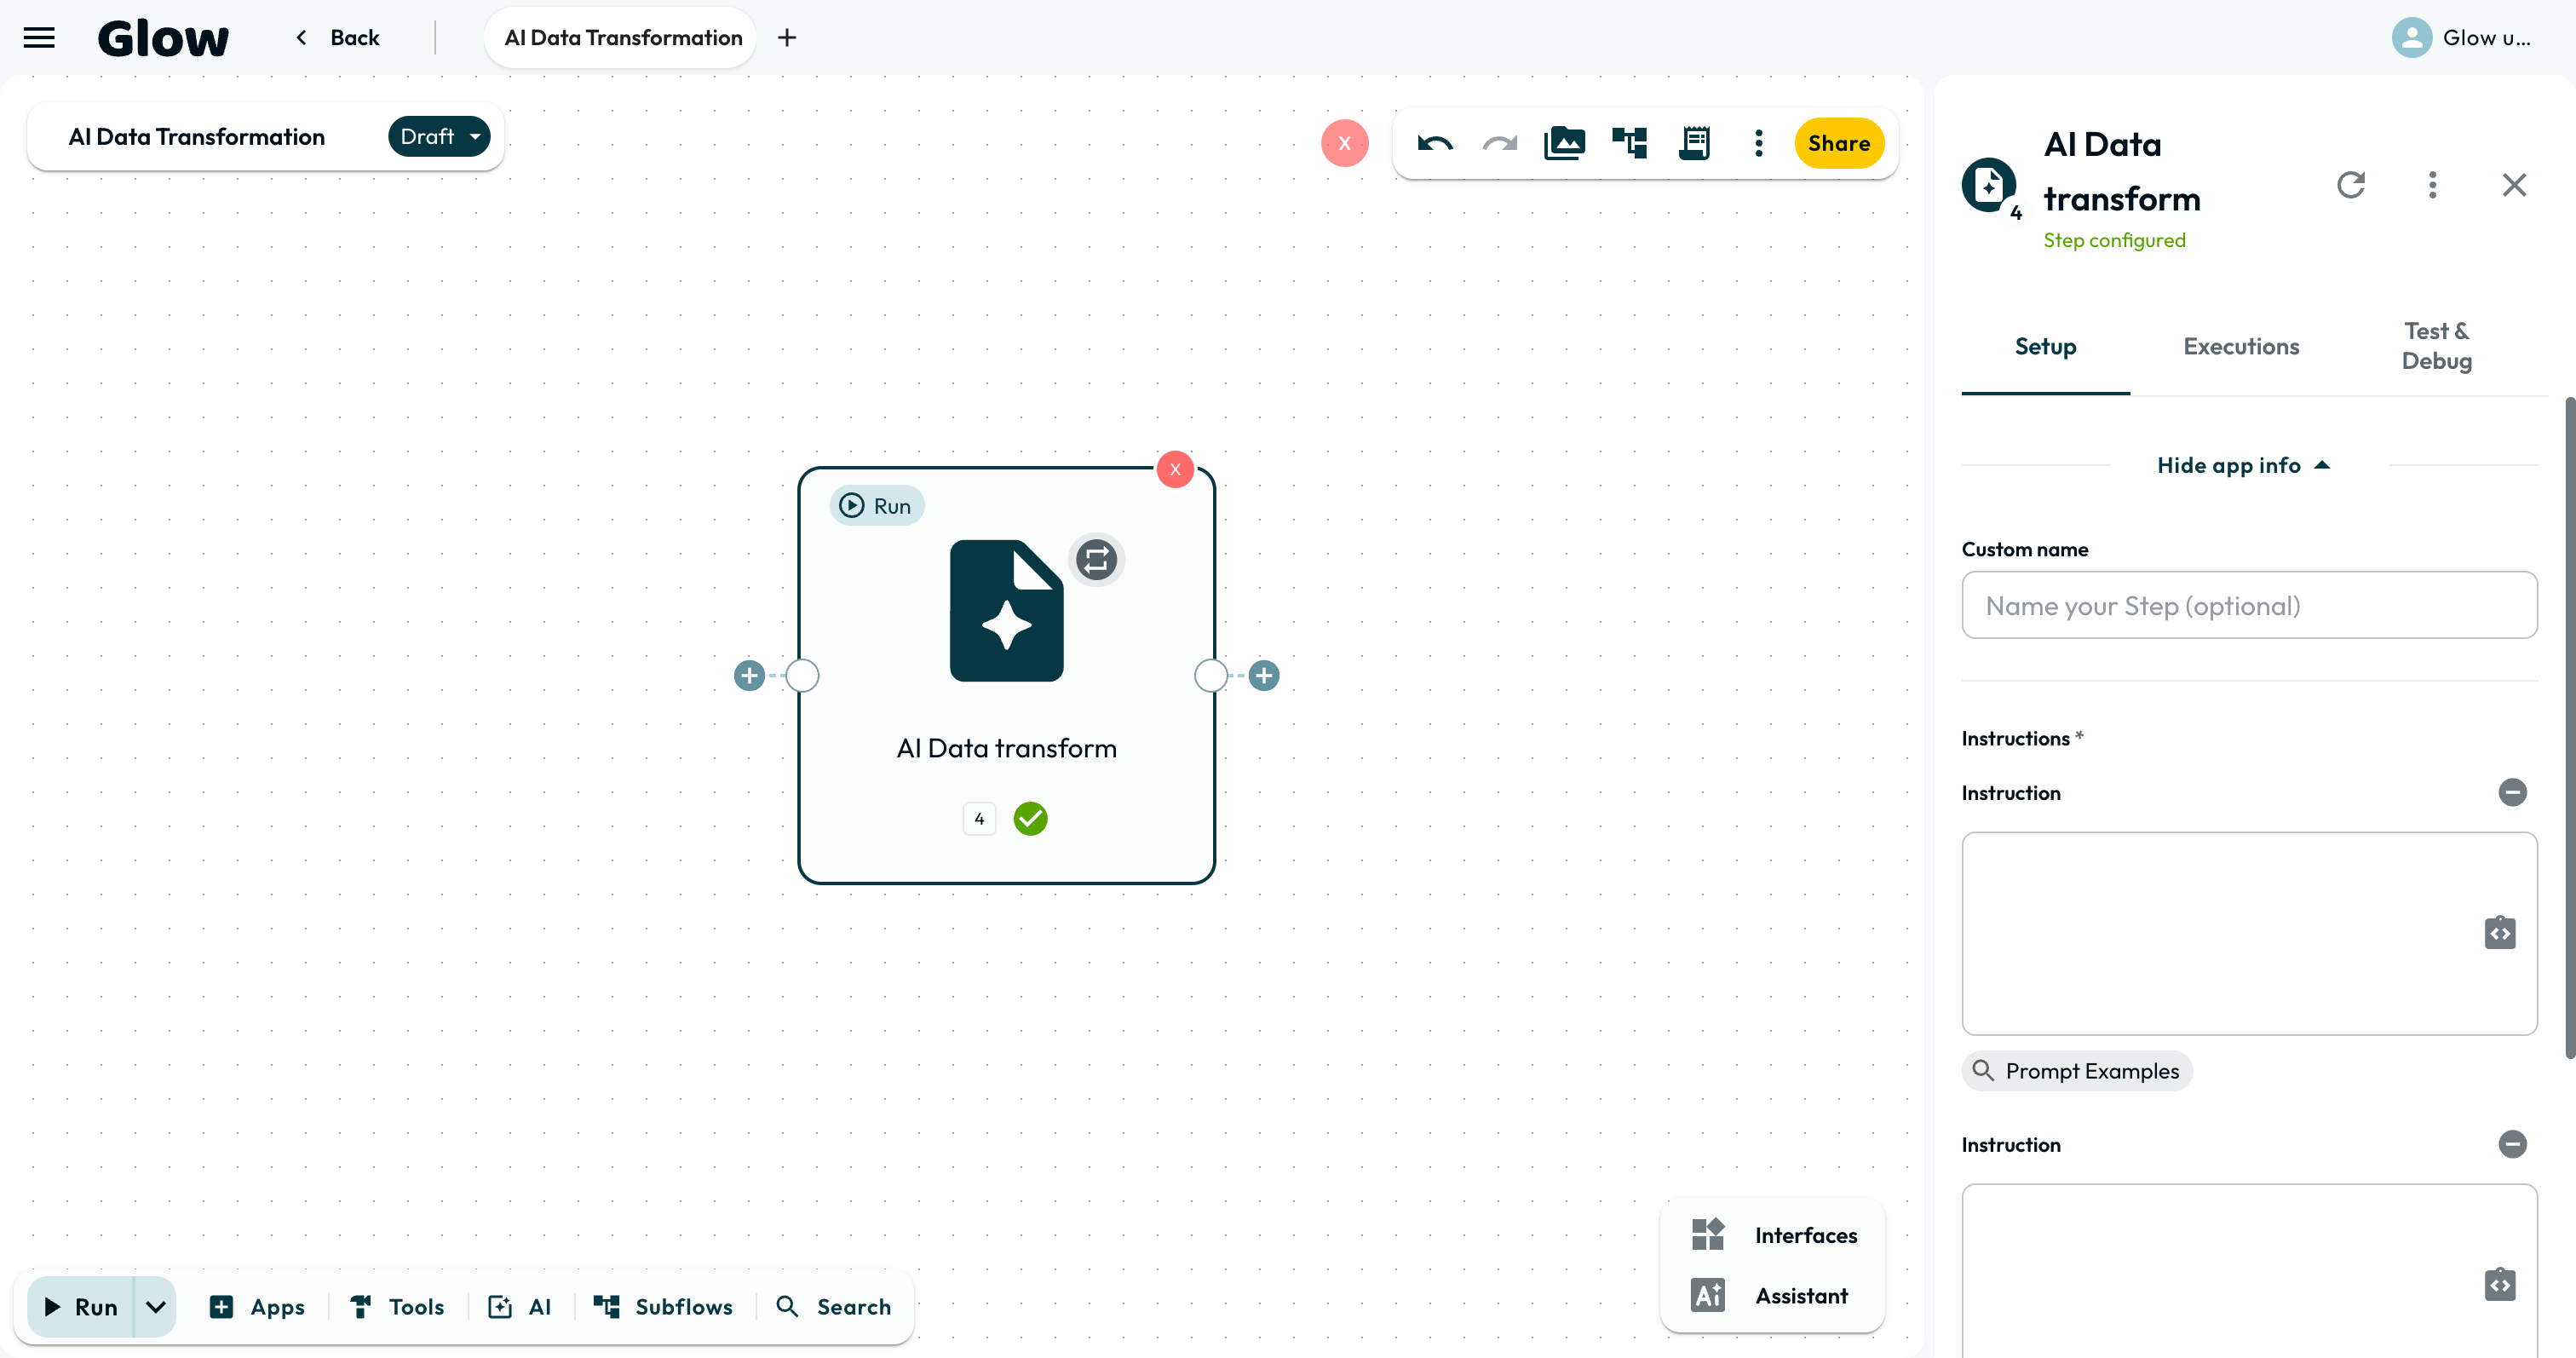
*Write one instruction per value you want. The step returns an answer for each, in the order you wrote them.*
## AI Data Transform or AI Prompt?
Both use Glow's managed models, and both see only the data you reference. AI Prompt makes one model call; AI Data Transform makes one concurrent call per instruction. The other difference is the shape of what comes back:
| You want | Use |
| ----------------------------------------- | ---------------------------------------------------------------------------------------- |
| Up to three ordered values from one text | **AI Data Transform**: one positional answer per instruction |
| One answer, worded or structured your way | [AI Prompt](/build/ai-features/ai-prompt): a single result you shape with Response shape |
For a single value, either works. AI Data Transform needs less setup; AI Prompt gives you control over the answer's wording and structure.
## Setting it up
### Add the step
Open **Tools** in the dock and choose **AI Data Transform**. On the canvas, right-click and pick it under **Data**.
### Write one instruction per value
The step has one field: **Instructions**, a list you can add up to three entries to. There is no separate input box. For a fourth value out of the same text, use [AI Prompt](/build/ai-features/ai-prompt) with **Response shape**, which takes one field per value you want back. You point each instruction at the text by step number, the same way you reference a value anywhere else:
> Extract the customer's order number from `{{ 2.ret.body }}`
The step sees only what your instruction references. Use the data picker to insert the reference rather than typing it: the path depends on which step produced the text.
## What it passes on
The step returns one answer per instruction, in the order you wrote them:
| Reference | What it holds |
| ------------------ | ---------------------------------- |
| `{{ N.result.0 }}` | the answer to your 1st instruction |
| `{{ N.result.1 }}` | the answer to your 2nd instruction |
| `{{ N.result.2 }}` | the answer to your 3rd instruction |
Because the answers are positional, reordering your instructions changes what every later reference points at. If you want values you can address by name, ask a single instruction to return JSON and use [Parse JSON](/build/action-steps/parse-json) on the result.
## Limits
You can add up to three instructions. For a fourth value from the same text, use [AI Prompt](/build/ai-features/ai-prompt) with **Response shape**, which returns named fields in one result.
> How accurate the answers are depends on how clear the source text is. Give it
> a smudged scan or an ambiguously worded email, and the answer may be
> confidently wrong.
>
> For anything that costs money or cannot be undone, put a
> [Human Review](/build/action-steps/user-approval) step between the extraction
> and the action. A person then sees the values before they are used.
## Examples to copy
Reach for AI Data Transform when the information you need is in there somewhere but never in the same place twice:
- **A receipt or invoice**: instruction 1 asks for the supplier, instruction 2 the total, and instruction 3 the due date. Read them as `{{ N.result.0 }}`, `{{ N.result.1 }}` and `{{ N.result.2 }}`.
- **An inbound email**: extract the sender's job title, their company size and what they are asking for.
- **A meeting transcript**: extract the owner, the agreed action and its due date.
If the text always arrives in exactly the same shape, [Split Text](/build/action-steps/split-text) or [Parse JSON](/build/action-steps/parse-json) will do the job faster and without an AI call.
## What's Next?
- Need one shaped answer instead of positional values? [AI Prompt](/build/ai-features/ai-prompt).
- Put a reviewer in front of important extractions with [Human Review](/build/action-steps/user-approval).
- For work that needs several steps of judgement rather than one extraction, use the [AI Agent](/build/ai-features/ai-agent).
---
Source: https://docs.getglow.ai/build/ai-features/choosing-a-step
# Choosing an AI Step
> What each AI step is good at, what it gives up, and how to tell which one your job needs.
Four steps in Glow use AI. Picking the wrong one is the most common reason an automation ends up slower, dearer or less predictable than it needed to be, so this page sets out the trade behind each.
The short version: **most jobs are an AI Prompt**. Reach past it only when you can say what the prompt cannot do.
## Start here
Answer these in order and stop at the first yes.
| Ask yourself | If yes |
| -------------------------------------------------------------------- | ----------------------------------------------------------- |
| Am I trying to build the workflow itself, rather than run something? | [Workflow Assistant](/build/ai-features/workflow-assistant) |
| Do I need up to three ordered values from one piece of text? | [AI Data Transform](/build/ai-features/ai-transform) |
| Does it have to act in another app, or decide its own next move? | [AI Agent](/build/ai-features/ai-agent) |
| Anything else | [AI Prompt](/build/ai-features/ai-prompt) |
## AI Prompt
**One question in, one answer out.** You write what you want in plain language, reference the data it should use, and the step returns a single result.
**What it is good at**
- **Text work.** Classifying, summarising, rewriting, drafting, translating.
- **Volume.** One model call, so it is the cheapest and fastest of the four.
- **Repeatability.** The same input gives the same shape of answer.
- **Structured output.** Describe the shape and a later step reads `{{ 2.result.status }}` knowing it is there.
**What you give up**
- **It cannot act.** No sending, no writing to a CRM, no fetching a page.
- **No second attempt.** It cannot check its own work or try another approach.
- **It sees only what you reference.** An earlier step's value has to be written in as a placeholder.
**Reach for it when** the job is one judgement on one piece of text. That covers far more than people expect.
## AI Agent
**A goal in, and it works out the steps.** You say what you want achieved and switch on the accounts it may act through. It decides its own next move, uses tools in sequence, and stops when it judges the goal met.
**What it is good at**
- **Unplannable work.** Research a company, triage against several sources, chase a thread.
- **Acting in other systems**, through the accounts you connect.
- **Several tools in one step.** Search the web, read a page, calculate, write a record.
- **Context across runs**, if you turn Memory on.
**What you give up**
- **Predictability.** Two runs on the same input can take different routes.
- **A forecastable bill.** It is the dearest of the four and the hardest to estimate.
- **Traceability.** More moves means more places to go astray, so put [Human Review](/build/action-steps/user-approval) in front of anything irreversible.
**Reach for it when** you cannot write down the steps yourself, or when the work has to touch another system to finish.
> **The most common mistake is starting here.** An agent looks like the powerful
> choice, so it gets picked for jobs a prompt would do more cheaply and more
> predictably. If you can describe the steps, you do not need something that
> works them out.
## AI Data Transform
**One text in, up to three ordered values out.** Write one instruction per value — "the customer's full name", then "the plan they asked about" — and read them by position as `{{ N.result.0 }}`, `{{ N.result.1 }}` and `{{ N.result.2 }}`.
**What it is good at**
- **Values out of mess.** A raw email, form or document becomes an ordered result you can use downstream.
- **No prompt to write.** One line per value, and no JSON shape to describe.
- **Speed.** The instructions run at the same time, so three is not three times the wait.
**What you give up**
- **Three instructions at most.** For a fourth value, use AI Prompt with a response shape.
- **No control over wording.** It returns the value, not a sentence you styled.
- **It is not in the AI group.** Find it under **Tools → Data → Change**.
**Reach for it when** you want fields rather than prose, and three of them will do.
## Workflow Assistant
**Describe the automation and it builds it.** This one is different in kind: it does not run inside a workflow, it writes one.
**What it is good at**
- **A working draft in minutes**, from nothing.
- **The fiddly configuration.** Field mappings, channel names, references between steps.
- **Explaining a canvas** somebody else built.
- **Working beside you.** The canvas stays yours while it builds.
**What you give up**
- **A draft, not a finished workflow.** Read what it made before you publish.
- **Precision.** It works from what you wrote, so a vague request gets a vague skeleton.
**Reach for it when** you are starting out, inheriting a canvas, or facing a screen of fields you would rather not fill in by hand.
## The comparison, side by side
| | AI Prompt | AI Agent | AI Data Transform |
| --------------------- | ----------- | --------------------- | ------------------- |
| **Model calls** | One per run | As many as it decides | One per instruction |
| **Cost** | Lowest | Highest | Low |
| **Predictable** | Yes | Less so | Yes |
| **Acts in your apps** | No | Yes | No |
| **Picks its model** | No | Yes | No |
| **Remembers** | No | Optional | No |
| **Main limit** | One answer | Time and cost vary | Three instructions |
## Two habits worth having
**Start simpler than you think you need.** Try the prompt first. If it gets you eighty per cent of the way, the remaining twenty is usually a better prompt rather than a bigger step.
**Test before you trust.** Run the step on five awkward real cases: the email with no signature, the form where somebody typed "n/a". Read the output rather than the green tick. See [Try it before you trust it](/build/ai-features/overview#try-it-before-you-trust-it).
## What's Next?
- [AI Prompt](/build/ai-features/ai-prompt) — write your first one and see how far it gets you.
- [AI Agent](/build/ai-features/ai-agent) — hand over a goal and the accounts to reach it.
- [Models](/build/ai-features/supported-models) — pick between Flash and Pro once you know which step you need.
---
Source: https://docs.getglow.ai/build/ai-features/overview
# AI & Agents
> The four AI steps, what each one decides, and why none of them needs an API key.
Glow's AI steps run on Gemini models, hosted and paid for by us. There is no API key to find and no contract to sign, so a step works the first time you drop it on the canvas. Prefer your own provider? The [AI connectors](#two-ways-to-run-ai-in-a-workflow) in the Apps menu take your key instead.
Four steps use AI, and they differ in how much you hand over.
- [Workflow Assistant](/build/ai-features/workflow-assistant): Describe the automation you want and it builds the workflow for you.
- [AI Prompt](/build/ai-features/ai-prompt): One question, one answer. Classify, summarise or rewrite.
- [AI Data Transform](/build/ai-features/ai-transform): Pull ordered values out of messy input, one instruction per value.
- [AI Agent](/build/ai-features/ai-agent): Give it a goal and the accounts it may use, and it works out the steps.
## Which one to reach for
The question is how much judgement the task needs, and whether the answer takes more than one move.
| If you want to | Use |
| ---------------------------------------------------------- | ----------------------------------------------------------- |
| Build the workflow itself | [Workflow Assistant](/build/ai-features/workflow-assistant) |
| Ask one question and use the answer | [AI Prompt](/build/ai-features/ai-prompt) |
| Get up to three ordered values from one piece of text | [AI Data Transform](/build/ai-features/ai-transform) |
| Let it decide its own next move, and act through your apps | [AI Agent](/build/ai-features/ai-agent) |
One step gets mistaken for an AI step because of its name. [Summarize](/build/action-steps/summarize) groups a list and works out a count, total or average for each group. It is arithmetic, not a model. To summarise a piece of writing, use AI Prompt.
### AI Prompt or AI Agent?
This is the choice that matters. Both take instructions in plain language, and they differ in how much you hand over.
| | [AI Prompt](/build/ai-features/ai-prompt) | [AI Agent](/build/ai-features/ai-agent) |
| ----------------------- | ----------------------------------------- | ----------------------------------------------------------------------------------- |
| **What it does** | One question in, one answer out | A goal in, and it works out the steps |
| **Model calls** | One per run | As many as it decides it needs |
| **Speed and cost** | Lowest | Highest, and hardest to predict |
| **Same input, twice** | Same shape of answer | Can take a different route each time |
| **Can act in an app** | No | Yes, through the accounts you switch on |
| **Pick the model** | No | Yes, **Brain (model)** |
| **Remembers** | Nothing between runs | Across runs, if you turn Memory on |
| **Ceiling to plan for** | None beyond the run's own limits | Bounded by your plan's step timeout — see [System Limits](/reference/system-limits) |
Start with AI Prompt. It is one call, it is quick, and the answer comes back the same shape every time. Move to the agent when the work genuinely takes several moves that cannot be planned in advance, or when it has to act in another system to finish.
A prompt that works is easier to fix in six months than an agent that mostly works. [Choosing an AI Step](/build/ai-features/choosing-a-step) sets out what each one gives up in exchange for what it is good at.
### And AI Data Transform, for pulling out values
[AI Data Transform](/build/ai-features/ai-transform) is narrower than either. Write one instruction per value you want — "the customer's full name", then "the plan they asked about" — and it returns an ordered list. Read the first as `{{ N.result.0 }}`, the second as `{{ N.result.1 }}` and the third as `{{ N.result.2 }}`.
Use it when a messy email or form has to become a few values. It takes **three instructions at most**, making one model call per instruction at the same time rather than one after another. For a fourth value, AI Prompt with a described response shape does the same job. Find it in the dock under **Tools → Data → Change**, not in the AI group.
### AI inside a routing step
Two routing steps can use a model for a single rule without being AI steps themselves. In [Conditions](/build/action-steps/conditions#writing-an-ai-condition) and [Filter](/build/action-steps/filter-items#describing-a-rule-in-words), a rule's type can be set to **AI Condition** and the test written in words: "the message sounds like a complaint".
Reach for it only where a comparison cannot express the test. It costs a model call each time it is evaluated: in Filter, that is once per item in the list. It is also a judgement rather than a comparison, so two runs on the same input can differ. [Switch](/build/action-steps/switch) is typed-only.
## Two ways to run AI in a workflow
The four steps above are Glow's own. There is also an **AI** group in the Apps menu holding connectors for the major providers, which you use with your own account. Both can sit in the same workflow.
| | Glow's AI steps | AI app connectors |
| ----------- | --------------------------- | ------------------------------ |
| **Model** | Gemini, chosen by us | Whatever your provider offers |
| **API key** | None | Yours |
| **Billing** | Your Glow plan | Your account with the provider |
| **Setup** | Drop the step on the canvas | Connect the account first |
Use Glow's own steps unless you have a reason not to: nothing to set up, and one bill.
Reach for a connector when you already pay for a provider, or when a particular model is written into how your team works.
### The providers you can connect
**OpenAI (ChatGPT)**, **Anthropic (Claude)**, **Google Gemini**, **Mistral AI**, **xAI**, **DeepSeek**, **Cohere**, **Llama AI** and **Ollama** all appear under **AI** in the Apps menu.
Each one authenticates with an API key you paste in once, the same as any other app connection. Usage is billed to your account with that provider and covered by your agreement with them. Keys are stored encrypted. See [Credentials](/manage/apps-and-integrations/credentials).
## Choosing a model
Among Glow's own steps, the **AI Agent** is the only one that lets you pick a model, from the **Brain (model)** dropdown in its settings. The rest run on a managed default.
Model names change with each generation, but they sort into families whose trade-off does not move. **Flash** is faster and cheaper; **Pro** reasons better over long or ambiguous input. A new agent starts on Pro, which is the safe choice rather than the cheap one. See [Models](/build/ai-features/supported-models) for which to use where.
## What a run actually uses
An AI step is charged as **model calls**, and the count is something you can read off the workflow before you build it.
- **AI Prompt** makes one call per run.
- **AI Data Transform** makes one per instruction, so three instructions is three calls, made at the same time.
- **An AI Condition** rule makes one call each time it is evaluated. Inside [Filter](/build/action-steps/filter-items#describing-a-rule-in-words) that is once per item, so a hundred-item list is a hundred calls.
- **The AI Agent** makes as many as it decides it needs, and that number varies between runs on the same input.
Volume multiplies all of it. A workflow running a thousand times a day makes the AI Prompt / AI Agent choice a thousand times over. Measuring one representative run before you go live is worth the ten minutes. See [System Limits](/reference/system-limits) for the ceilings on your plan.
## Try it before you trust it
A model gives you an answer whether or not it had enough to work with, so the useful question is never "does it run" but "is it right on the cases I care about".
### Run the step on its own
Select the step and open **Test & Debug**. It runs without the rest of the workflow, so you can iterate on the wording without waiting for a trigger.
### Feed it your awkward cases
Not the tidy example — the email with no signature, the form where somebody typed "n/a", the invoice in a second language. Five real cases tell you more than fifty clean ones.
### Read the output, not the tick
A step that shows green stored _something_. Open the result and check the values are the ones a later step will need, in the shape it expects.
### Then wire up what comes after
Once the answer is stable, connect the steps that read it. Building downstream on an unstable answer means changing both later.
> **Describe the shape you want and the guessing stops.** Both AI Prompt and the
> AI Agent take a **Response shape**, which turns free prose into named fields a
> [Condition](/build/action-steps/conditions) can route on. It is the single
> biggest thing you can do to make an AI step behave like the rest of your
> workflow.
## The wider AI catalogue
Glow's own steps are the start, not the limit. The app catalogue carries hundreds of AI services you connect the same way as Gmail or Slack, and a workflow can chain them: read a document with one, reason over it with a Glow step, store the result in another.
| To do this | Connect one of |
| ------------------------------------------- | -------------------------------------------------------------------------------------------- |
| **Semantic search over your own documents** | Pinecone, Weaviate, Qdrant, Milvus |
| **Turn speech into text** | AssemblyAI, Trint, IBM Cloud Speech to Text |
| **Turn text into speech** | ElevenLabs, Amazon Polly, Voicemaker |
| **Pull fields out of a scan or a PDF** | Mindee, PDF.co, OCR.space |
| **Search the web for an answer** | Perplexity, Exa, Tavily |
| **Generate an image or a video** | Runway, DreamStudio, Leonardo AI, HeyGen |
| **Run an open-source model** | Hugging Face, Replicate |
| **Call a provider with your own key** | OpenAI, Anthropic, Mistral and the rest of the [AI group](#two-ways-to-run-ai-in-a-workflow) |
Search the **[Integrations Directory](https://getglow.ai/integrations)** for the service you already use — it lists every trigger and action Glow supports for each one.
### Retrieval over your own documents
A vector database is the piece that makes "ask a question, get the right passage back" work, and Glow connects to the ones people already run. The shape is two workflows rather than one setting:
### Index what you have
A workflow triggered by a new file reads its text, sends it to your embedding provider, and writes the vector to Pinecone, Weaviate, Qdrant or whichever you use.
### Query it when you need an answer
A second workflow embeds the incoming question, queries the same database for the closest passages, and hands those to an [AI Prompt](/build/ai-features/ai-prompt) or [AI Agent](/build/ai-features/ai-agent) as context.
The reasoning is Glow's; the storage is yours, in a service you control and pay for directly.
For a document that is simply on the web, none of that is needed: point an [AI Agent](/build/ai-features/ai-agent) at the URL and it reads what is there, PDFs and images included, as long as the address is publicly reachable.
## What AI steps cannot see
An AI step reads only what you write into its fields. It has no view of the workflow around it, and nothing reaches it implicitly: a value from an earlier step has to be written in as a placeholder, such as `{{ 3.ret.company }}`.
That is worth knowing before you debug an answer that looks wrong. Nine times out of ten the model never had the information.
## What's Next?
- Start with a single call in [AI Prompt](/build/ai-features/ai-prompt).
- Hand a multi-step job to the [AI Agent](/build/ai-features/ai-agent).
- Pick the right model for the job in [Models](/build/ai-features/supported-models).
---
Source: https://docs.getglow.ai/build/ai-features/supported-models
# Models
> Which models power Glow's AI steps, how to choose between them, and why you do not need an API key to get started.
Glow's AI steps run on Gemini models, on infrastructure we host and pay for. You do not supply an API key, manage rate limits, or hold a contract with a model provider.
That is handled for you, and usage is billed through your Glow plan.
## Which step chooses a model
Only one of the two AI steps lets you pick a model.
| Step | Model selection |
| ----------------------------------------- | ------------------------------------------------------------ |
| [AI Prompt](/build/ai-features/ai-prompt) | None. Runs on a managed default tuned for single-call tasks. |
| [AI Agent](/build/ai-features/ai-agent) | **Brain (model)** dropdown in the App drawer. |
[AI Data Transform](/build/ai-features/ai-transform) runs on the same managed default as AI Prompt.
If you want control over the model, use the AI Agent step.
> The field is labelled **Brain (model)** on the canvas. New models appear in
> the dropdown as they ship, so it always shows the current list.
## Choosing a model
Model names change by generation, but they sort into three families and the trade-off between them does not move:
**Flash** is faster and cheaper. Use it for classification, routing, extraction, short summaries, and anything running at high volume.
**Pro** gives stronger reasoning over long or ambiguous input. Use it for multi-step agent work, complex tool use, careful document analysis, and drafting.
**Flash Lite** variants trade further capability for speed and cost. They suit narrow, well-specified tasks such as single-label classification.
A new AI Agent step starts on a **Pro** model, which is the safe default rather than the cheap one. For classification, routing and extraction, switch it to Flash and check the output against a handful of real cases. On a high-volume workflow that is usually the single biggest saving available. Move back to Pro when you can point at a specific output the smaller model got wrong.
### By Task
| Task | Start with |
| --------------------------------------- | ---------- |
| Classification, routing, tagging | Flash Lite |
| Summarization, field extraction | Flash |
| Multi-step agent reasoning and tool use | Pro |
| Long or unstructured document analysis | Pro |
### By Volume
High-volume workflows amplify both cost and latency. A workflow running 1,000 times a day makes the Flash/Pro choice roughly a thousand times over. Measure on a representative sample before committing a Pro model to a hot path.
## Setting it up
1. Select the **AI Agent** step on the canvas to open the App drawer.
2. Open the **Brain (model)** dropdown.
3. Pick a model.
Different steps in the same workflow can use different models. A common pattern is a cheap model for an initial triage decision and a stronger one only on the branch that needs it.
## API keys
You do not need one. Every Glow AI step runs on managed infrastructure, and there is no key to configure before your first workflow.
If you would rather use your own provider, the Apps menu carries connectors for [OpenAI, Anthropic, Mistral and the rest](/build/ai-features/overview#the-providers-you-can-connect). Those take your key and bill to your account with that provider.
## What's Next?
- Write single-call prompts with the [AI Prompt](/build/ai-features/ai-prompt) step.
- Build autonomous, tool-using logic with the [AI Agent](/build/ai-features/ai-agent) step.
---
Source: https://docs.getglow.ai/build/ai-features/workflow-assistant
# Workflow Assistant
> The Workflow Assistant builds and changes workflows from a plain-language description, without locking your canvas while it works.
The **Workflow Assistant** builds and changes workflows for you. Describe what you want in plain language and it places the steps, joins them up, and fills in their settings.
It works on an empty canvas and on one that already has a workflow on it, including one a colleague built.
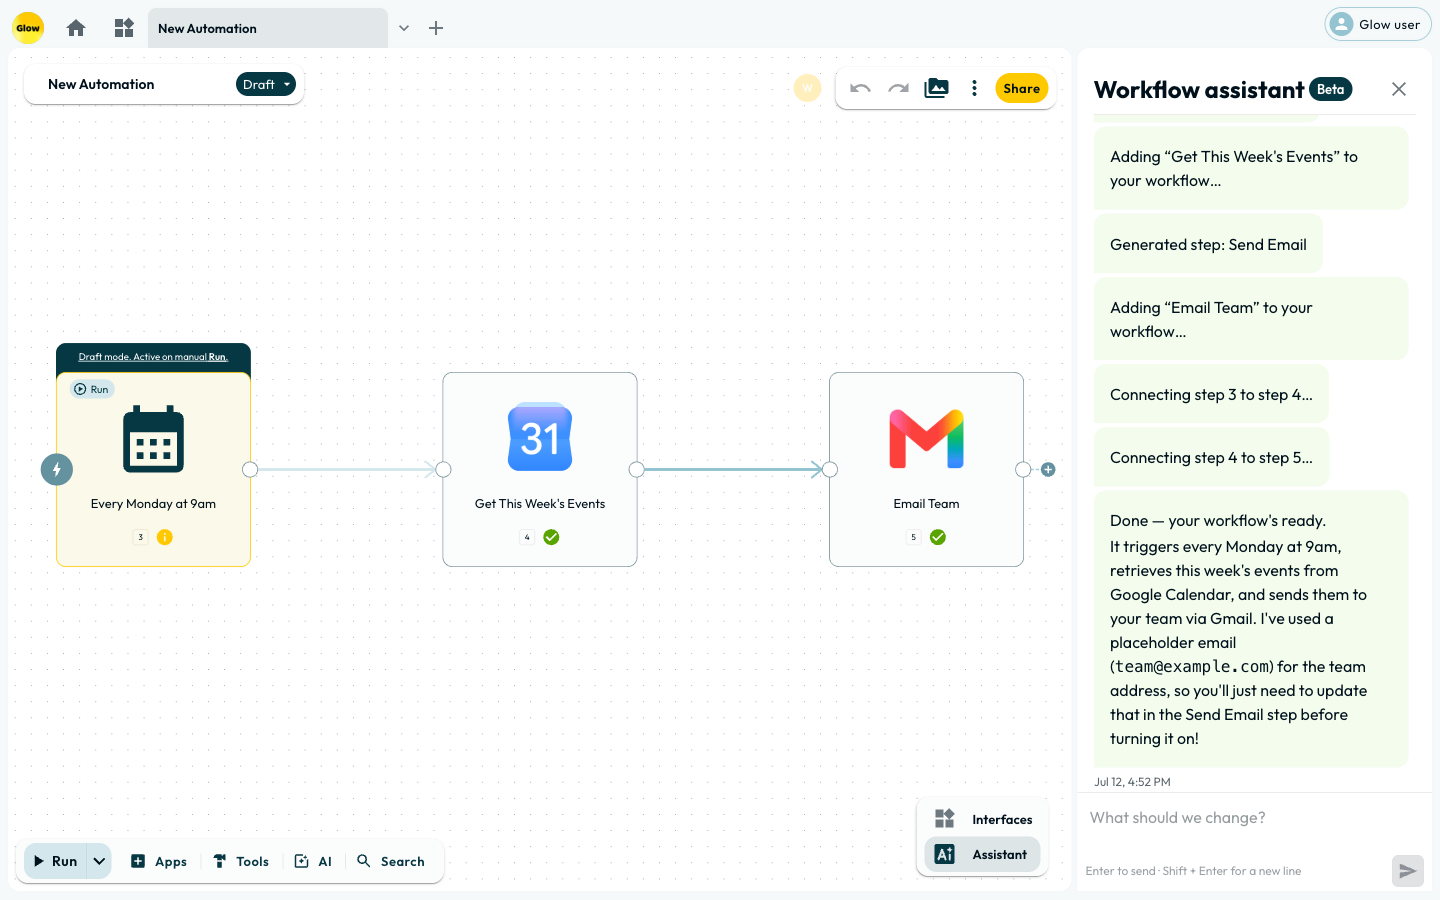
*The assistant reports each step as it places it, and finishes by saying what it built and what you still need to change.*
## It works beside you, not instead of you
The assistant runs alongside the canvas rather than taking it over. Building takes a minute or two — it reads each app's documentation before filling in a step — and **the canvas stays yours the whole time**. Drag a step, edit settings, draw a connection, start a test run. None of it waits for the assistant to finish.
That holds for your teammates too. The assistant works through the same live canvas everyone else is on, so a colleague watches the steps appear as they are placed.
What it does while you carry on:
| | |
| ---------------------------------------- | ------------------------------------------------------------------------------------------------- |
| **Places and connects steps** | Trigger, actions and the connections between them, in the order the work happens. |
| **Fills in the settings** | Channel names, field mappings, references to earlier steps. Ready to run, not ready to configure. |
| **Reads the app's documentation first** | Which is why it takes a minute, and why the fields come out right. |
| **Handles an unconnected app** | It asks you to link the account and keeps building everything else meanwhile. |
| **Leaves sticky notes** | Your prompt stays on the canvas, so the next person sees what was asked for. |
| **Explains a workflow it did not build** | Point it at an inherited canvas and ask how the routing works. |
## The conversation is shared
The assistant thread belongs to the workflow, not to you. Everyone on the team who can open that workflow sees the same conversation, including prompts your colleagues typed.
Each message shows who wrote it, and you can see when someone else is composing one. The panel behaves like the rest of the multiplayer canvas.
> Treat what you type here as visible to your teammates. If a workflow is set to
> **Me only**, its conversation is private to you; anything shared with the team
> is not.
While the assistant builds, its progress updates collapse into a single line you can expand. Questions it asks you, authorization requests, and its final answer always stay visible on their own. They are never folded away.
---
## Building from scratch
Describe the automation you want and the assistant builds a first draft. It places the trigger and the steps, joins them up, and fills in the settings it can work out. You review it and change what you want before going live.
### Open the Assistant
The assistant opens on its own with every new workflow. On one you already have, click **Assistant** in the panel at the bottom right of the canvas.
### Prompt your idea
Type a natural-language description and press **Enter**.
> _"When a new row is added to my Google Sheet, extract the email address, use AI to draft a welcome email, wait 2 hours, and then send it via Gmail."_
### Watch it build
The assistant places the trigger and the steps, joins them up, and fills in the settings it can work out. That prompt produces four connected steps: a Google Sheets trigger, an AI step to draft the email, a two-hour Wait, and a Gmail step to send it.
It also leaves your prompt on the canvas as a sticky note, so the next person can see what was asked for.
### Answer anything it asks
Where the request leaves room for interpretation, the assistant asks rather than guessing. "When a message arrives" could mean Slack, Gmail or a webhook, so it will ask which you meant before building.
## Modifying and explaining a workflow
The assistant can read a workflow that already exists and explain it, change it, or suggest what to do next. That is useful on one you inherited.
Open a workflow that already has steps and the box asks **"What should we change?"** rather than what to automate.
Open a workflow built by a colleague and you may not understand how it
works. Ask the assistant: *"Explain how this routing logic handles failed
payments."* It reads the entire canvas context and summarizes the logic for
you.
You can prompt the assistant to rewire existing steps. Say: *"Add a Slack
notification if the 'Check Status' condition fails."* The assistant knows
exactly which condition step you mean. It splices in the new action without
destroying your manual work.
Ask the assistant to review your workflow for edge cases. It might suggest
adding a loop for bulk processing, or placing a Human Review step before a
risky database update.
## It configures the steps, not just places them
The assistant does not drop a step on the canvas and leave the settings to you.
### It fills in the fields
Ask it to _"send a message to `#sales` and mention the person from the webhook"_. It places the Slack step, sets the channel to `#sales`, and points the message text at the person's name from the trigger. The step is ready to run rather than ready to configure.
### When the app is not connected yet
Ask it to add a row to Google Sheets before you have connected Google, and it does not guess or leave a broken step behind. A card appears in the chat naming the app and the action it needs (_"To use New Row Added (Instant) in this workflow, please authorize your account"_), with a **Link account** button.
It keeps building everything else in the meantime, so one unconnected app does not hold up the rest of the workflow. Connect the account and that step is ready.
---
## Sketch the plan in sticky notes, then ask for it
The canvas takes sticky notes (`N`), and the assistant reads what they say. That turns a planning session into a prompt. Sketch each stage of the process as its own note: "leads arrive by webhook", "score them with AI", "route hot ones to #sales". Then ask the assistant to _"build the workflow described in my sticky notes."_
Arrows between notes are for the people reading the sketch: draw them to show the order of the plan. The assistant works from the notes' text, so put the sequence in words too, by numbering the notes or saying in each what follows.
Notes never run and never hold data, so the sketch can stay on the canvas beside the finished workflow as its documentation. See [The Dock & App drawer](/build/the-canvas/the-dock) for what else the canvas takes besides steps.
## Prompt Library for Common Scenarios
Use these proven prompt patterns to build, refactor, and audit workflows quickly:
### 1. Inbound Lead Qualification & Routing
```
"When a new Typeform submission arrives, extract the email domain using data transformation, look up the organization in Apollo, and add a Condition: if employees > 500 route to Salesforce Enterprise AE queue, otherwise send a nurture email via Gmail and log to Airtable."
```
### 2. Multi-Channel Support & Incident Escalation
```
"Create a workflow triggered by Zendesk New Ticket. Add an AI Prompt step to classify sentiment as Positive, Neutral, or Angry. If Angry, post an urgent alert to the #support-escalations Slack channel with the ticket URL; otherwise update the Zendesk ticket tags."
```
### 3. Automated Document Processing with Human Review
```
"Trigger on new Gmail email with PDF attachment. Add an AI Agent to extract vendor name, invoice date, line items, and total amount as JSON. Insert a Human Review step displaying the extracted total, followed by a loop that inserts each line item into our Notion database."
```
### 4. Splicing Error Handlers & Fallbacks
```
"Add an Error Path to the 'HubSpot: Create Contact' step. If it fails, send a notification to #ops-alerts in Slack with the error message and the failed email payload."
```
---
## Best practices
**Ask for the shape first, then the detail.** Try "When a Typeform response arrives, add the person to HubSpot and post to #sales". That gets you a working skeleton faster than one prompt carrying every rule you have. Once it is on the canvas, ask for one change at a time: _"make the Slack message include their company name."_
**Hand it the fiddly configuration.** Draw the business logic yourself if you prefer having decided it. Then ask the assistant to fill in a step's fields, or to point each value from a webhook at the right field in your CRM. That is the part it saves you most on.
**Nothing it does is permanent.** If you don't like what it built, `Cmd+Z` reverts it. The whole generated branch goes in one press. Your undo history stays yours: it never reaches into a teammate's work. See [Undo & Redo](/build/the-canvas/undo-redo).
## What's Next?
The assistant builds a draft, not a finished workflow. Read what it produced before you publish, particularly any step that sends something outward.
- 👉 **[Quickstart: Your First Workflow →](/getting-started/tutorials/your-first-workflow)**: build a workflow by hand so you can assess what the Assistant drafts for you.
- **[Choosing an AI Step](/build/ai-features/choosing-a-step)**: decide whether the workflow needs AI Prompt, AI Data Transform or AI Agent.
- **[Undo & Redo](/build/the-canvas/undo-redo)**: understand how assisted changes fit into shared canvas history.
---
Source: https://docs.getglow.ai/build/core-concepts/data-transformation
# Data Transformation
> Format text, calculate numbers, parse dates, and reshape lists directly inside your step fields without adding extra canvas steps.
When building workflows, incoming data is rarely in the exact format your downstream apps expect. Customer names might have accidental spaces, prices might lack tax or currency symbols, and timestamps might be in UTC instead of your local timezone.
Instead of cluttering your canvas with intermediate code or formatting steps, **Data transformation** lets you clean, calculate, and reshape data **directly inside any step field**.
---
## The Core Concept
Whenever you reference data from an earlier step (like `{{ 2.email }}` or `{{ 3.total }}`), you can attach a chain of transformations to it. The transformations execute in-memory right when the step reads the token, without creating intermediate canvas steps or spending extra step credits.
---
## How to Use Data Transformation
You can configure transformations visually or write them inline using pipe syntax.
### 1. Visual Configuration (Workflow Data Panel)
You can configure transformations visually without writing formulas or syntax:
### Open the Workflow Data Panel
Click into any step input field on your canvas to open the **Workflow data** drawer/modal (where you select dynamic variables).
### Switch to the Data Transformation Tab
In the Workflow data top bar, click the **Data transformation** tab (next to **Data select** and **Data flow**).
### Add Transformations to Step Variables
All variables mapped in the current step appear here. Click **Add transformation** on any variable to add operations (such as **Trim spaces**, **To lowercase**, **Times**, **Format as currency**, or **Format the date**).
### Live In-Memory Execution
The transformations run in memory when this step resolves the field. The transformed value is used in that field, while the earlier step's stored output stays unchanged. If later steps need the changed value as a reusable result, use a dedicated canvas step instead.
### 2. Fast Inline Pipe Syntax
If you prefer writing directly inside text inputs, append a pipe (`|`) and the operation name inside any variable token:
```text
{{ 2.email | trim | lower }}
{{ 3.subtotal | times:1.21 | format_currency:"$" }}
{{ 1.created_at | format_date:date_medium:Europe/Prague }}
```
---
## Everyday Examples
| Common Goal | Original Data | Transformation | Result |
| :------------------------------- | :----------------------- | :---------------------------------------- | :------------------- |
| **Clean up customer name** | `" john doe "` | `Trim spaces` + `Capitalise Each Word` | `"John Doe"` |
| **Extract email domain** | `"alex@acme.com"` | `Take the domain` | `"acme.com"` |
| **Add 21% VAT and format price** | `100` | `Times: 1.21` + `Format as currency: "$"` | `"$121.00"` |
| **Format phone number** | `"777123456"` | `Format a phone number: CZ` | `"+420 777 123 456"` |
| **Human-readable date** | `"2026-09-01T12:00:00Z"` | `Format the date: 13 Aug 2026` | `"1 Sep 2026"` |
| **Join list into text** | `["Apple", "Banana"]` | `Join items (comma + space)` | `"Apple, Banana"` |
| **Fallback for missing value** | `null` or `""` | `If empty, use: "Unknown"` | `"Unknown"` |
---
## Operation Catalogue
### Text & Clean Up Operations
Use these operations to clean user input, change capitalization, slice text, and extract specific tokens.
| Operation | Inline Syntax | Description | Example |
| :---------------------------- | :----------------------- | :----------------------------------------------------------------------------------- | :-------------------------------------------------- |
| **Trim spaces** | `\| trim` | Removes leading and trailing whitespace. | `" hello "` → `"hello"` |
| **lower case** | `\| lower` | Converts all letters to lowercase. | `"Hello World"` → `"hello world"` |
| **UPPER CASE** | `\| upper` | Converts all letters to uppercase. | `"Hello World"` → `"HELLO WORLD"` |
| **Capitalise Each Word** | `\| capitalize` | Capitalizes first letter of each word; preserves hyphens. | `"john doe"` → `"John Doe"` |
| **Take the text out of HTML** | `\| strip_html` | Removes HTML tags while preserving line breaks and converting list items to bullets. | `"Hi"` → `"Hi"` |
| **Take the markdown out** | `\| strip_markdown` | Removes markdown headings, bolding, and links for plain text messaging. | `"**Important**"` → `"Important"` |
| **Remove the code fence** | `\| strip_fence` | Unwraps outer ` ``` ` markdown code blocks from AI outputs. | `"```json\n{}\n```"` → `"{}"` |
| **Replace text** | `\| replace:"old":"new"` | Replaces all occurrences of a search string. | `"cat" \| replace:"cat":"dog"` → `"dog"` |
| **Everything before** | `\| before:"@"` | Extracts text before the first occurrence of a delimiter. | `"user@glow.app"` → `"user"` |
| **Everything after** | `\| after:"@"` | Extracts text after the first occurrence of a delimiter. | `"user@glow.app"` → `"glow.app"` |
| **First line only** | `\| first_line` | Takes only the first non-empty line of text. | `"Line 1\nLine 2"` → `"Line 1"` |
| **Shorten to** | `\| limit:100` | Truncates text after a specified character count. | `"Long text" \| limit:4` → `"Long"` |
| **Split on** | `\| split:comma` | Splits text into a true list (by comma, space, newline, or tab). | `"a, b" \| split:comma` → `["a", "b"]` |
| **Take the domain** | `\| extract_domain` | Extracts clean domain from URL or email (removes `www.` and protocols). | `"https://glow.app"` → `"glow.app"` |
| **Take the email address** | `\| extract_email` | Finds and extracts the first valid email address from raw text. | `"Contact support@glow.app"` → `"support@glow.app"` |
| **Take the number** | `\| extract_number` | Extracts first numeric sequence (preserves leading zeros for SKUs). | `"Order #0042"` → `"0042"` |
| **Take the link** | `\| extract_url` | Finds and extracts the first web address from text. | `"Visit https://glow.app"` → `"https://glow.app"` |
| **Make safe for JSON** | `\| escape_json` | Escapes quotes and newlines so text can safely sit inside raw JSON. | `"A \"quote\""` → `"A \\\"quote\\\""` |
| **Make safe for web address** | `\| url_encode` | Encodes special characters for URL parameters. | `"Hello World"` → `"Hello%20World"` |
| **Count characters / words** | `\| count_characters` | Returns the total character or word count as a number. | `"Hello"` → `5` |
### Numbers & Arithmetic
Perform calculations, rounding, currency formatting, and phone number formatting.
| Operation | Inline Syntax | Description | Example |
| :---------------------------- | :--------------------------------- | :-------------------------------------------------------------------- | :----------------------------------- |
| **Plus…** | `\| plus:10` | Adds a number. | `15 \| plus:5` → `20` |
| **Minus…** | `\| minus:5` | Subtracts a number. | `100 \| minus:15` → `85` |
| **Times…** | `\| times:1.21` | Multiplies by a factor (e.g. calculate 21% VAT). | `50 \| times:1.21` → `60.5` |
| **Divided by…** | `\| divided_by:100` | Divides by a number (e.g. cents to dollars). | `2500 \| divided_by:100` → `25` |
| **Round** | `\| round:2` | Rounds to a fixed number of decimal places. | `3.14159 \| round:2` → `"3.14"` |
| **Round up** / **Round down** | `\| round_up` | Rounds to the nearest ceiling or floor integer. | `3.2 \| round_up` → `4` |
| **Drop the minus sign** | `\| absolute` | Returns positive absolute magnitude (`Math.abs`). | `-42` → `42` |
| **Cut off the decimals** | `\| truncate:2` | Truncates decimal digits without rounding. | `12.349 \| truncate:2` → `12.34` |
| **Format for reading** | `\| number_format:2:sep_comma_dot` | Formats numbers with thousands separators (`1,234.56` or `1 234,56`). | `1234567.89` → `"1,234,567.89"` |
| **Format as currency** | `\| format_currency:"$"` | Prepends currency symbol and applies number formatting. | `1499.5` → `"$1,499.50"` |
| **Format as a percent** | `\| format_percent:1` | Multiplies by 100 and appends `%`. | `0.125` → `"12.5 %"` |
| **Format a phone number** | `\| format_phone:CZ:international` | Normalizes phone strings with country prefix assumptions. | `"777123456"` → `"+420 777 123 456"` |
### Dates & Timezones
Parse, shift, and format dates across global timezones.
All date operations accept an optional IANA timezone (such as `Europe/Prague`, `America/New_York`, or `UTC`). If omitted, **UTC** is used.
| Operation | Inline Syntax | Description | Example |
| :-------------------------- | :----------------------------------------- | :--------------------------------------------------------------------------------------------------- | :----------------------------------------- |
| **Format the date** | `\| format_date:date_medium:Europe/Prague` | Formats date into readable presets (`date_medium`, `date_iso`, `date_day_first`, `date_time`, etc.). | `"2026-09-01T10:00:00Z"` → `"1 Sep 2026"` |
| **Add time** | `\| date_add:14:days` | Shifts date forward or backward (`days`, `weeks`, `months`, `hours`). | Add trial period days to signup date. |
| **Time from now** | `\| date_diff:days` | Calculates difference between now and target date. | Days remaining until subscription ends. |
| **Start of** / **End of** | `\| date_start_of:month` | Snaps timestamp to first (`00:00:00`) or final (`23:59:59.999`) millisecond of period. | Snapping invoices to end of billing month. |
| **Take a part** | `\| date_part:month_name` | Extracts specific component (`year`, `month_name`, `weekday_name`, `hour`). | `"2026-08-24"` → `"August"` |
| **Read a date written as…** | `\| parse_date:day_first` | Parses non-standard date strings (`24/08/2026`, Unix seconds/ms) into ISO format. | Standardizing user-typed dates. |
### Lists & Arrays
Extract, slice, join, and aggregate list data directly inside field tokens.
| Operation | Inline Syntax | Description | Returns |
| :----------------------------- | :--------------------------- | :------------------------------------------------------------------------------- | :---------- |
| **First item** / **Last item** | `\| first` / `\| last` | Takes the first or last element of a list. | Single item |
| **Item number…** | `\| item_at:3` | Takes an item by its 1-based index position. | Single item |
| **Take each item's field** | `\| pluck:email` | Extracts one specific property across all records in a list. | List |
| **Join items** | `\| join:comma_space` | Turns a list of text into a single string separated by commas, spaces, or lines. | Text |
| **Keep the first…** | `\| keep_first:5` | Slices list to keep only the first _N_ items. | List |
| **Remove duplicates** | `\| remove_duplicates` | Keeps only unique elements, preserving order. | List |
| **Reverse the order** | `\| reverse` | Reverses list ordering. | List |
| **Sort** | `\| sort:ascending:name` | Sorts items alphabetically, numerically, or by a record field. | List |
| **Total** / **Average** | `\| total` / `\| average` | Calculates sum or mean across a list of numbers. | Number |
| **Smallest** / **Largest** | `\| smallest` / `\| largest` | Returns the minimum or maximum numeric value. | Number |
---
## Fallback Values (`If empty`)
If an upstream field might be missing, `null`, or an empty string, append **`If empty, use`** (or `| default:"value"`) to provide a fallback:
```text
{{ 3.company | default:"Individual / Self-Employed" }}
```
> **Safe Defaults:** The `default` operation only replaces missing values or
> empty strings. Valid values such as `0` or `false` are preserved and will
> never be overwritten.
---
## Choosing Between In-Field Transforms and Canvas Steps
| Use In-Field Data Transformation | Use Dedicated Canvas Steps |
| :------------------------------------------------------------------------------------------ | :--------------------------------------------------------------------------------------------------------------------------------------------- |
| **Formatting & Cleaning:** Lowercase text, trim spaces, extract domains, format currencies. | **Branching & Logic:** Routing workflows based on complex condition branches ([Conditions](/build/action-steps/conditions)). |
| **Direct Field Aggregation:** Plucking emails from a list and joining with commas. | **Looping Over API Actions:** Calling an external API once per item ([Repeater](/build/action-steps/loops/repeater)). |
| **Dataset Size:** Up to **10,000 items**. | **Large Scale Datasets:** Sorting and filtering 100,000+ items ([Sort](/build/action-steps/sort), [Filter](/build/action-steps/filter-items)). |
## What's Next?
- 👉 **[Kinds of Data →](/build/core-concepts/data-types)**: Learn how records, lists, and files move between steps.
- **[Variable Reference Syntax](/reference/variable-syntax)**: Master expressions, nested paths, and system variables.
- **[Repeater Step](/build/action-steps/loops/repeater)**: Loop through arrays and execute actions per item.
---
Source: https://docs.getglow.ai/build/core-concepts/data-types
# Kinds of Data
> The shapes data arrives in, and what to do when a step is handed the wrong one.
Data moves between steps in a handful of shapes: plain values like text, numbers and yes/no, records (JSON), lists, and files. The shape decides what a later step can do with a value, and what to do when a step is handed the wrong one.
## Plain values
Text, numbers and yes/no values pass between steps without any handling on your part.
The one thing worth knowing: Glow keeps a number a number. Some services reject `"42"` in quotes where they accept `42` without. Pick a value with the data selector and it arrives in the form the earlier step produced it. You rarely have to think about this.
Yes/no values (booleans) show as `true` or `false`. Conditions steps compare against these directly.
## Records
A record (an object) is a bundle of labelled values that belong together — a
customer's name, email, company and plan, travelling as one thing:
```json
{
"name": "Ada Lovelace",
"email": "ada@example.com",
"company": "Analytical Engines",
"plan": "pro"
}
```
You reach a value inside it by naming the label after a dot. If that record came
from step 2, the email is `{{ 2.email }}`, and a record nested inside it needs
one more dot: `{{ 2.customer.email }}`.
**If a field shows the whole thing in braces**, you picked the record where the
field wanted one value. Dropping a whole customer into an email subject gives
Glow nothing single to print, so it writes the record out as text instead. Open
the data selector on that field again, click the arrow beside `customer`, and
pick `email` from inside it. **You want the leaf, not the branch.**
> A reference that finds nothing fails the step and names the reference in the
> message, so a hand-typed path never reaches the next step as an empty value.
> Picking from the data selector avoids the typo in the first place.
## Lists
A **list** (an array) is several items of the same kind — forty rows from a
spreadsheet, every email in a thread, the search results from an API:
```json
[
{ "name": "Ada Lovelace", "email": "ada@example.com" },
{ "name": "Alan Turing", "email": "alan@example.com" },
{ "name": "Grace Hopper", "email": "grace@example.com" }
]
```
Positions count from zero and use dots, never square brackets, so the second
name is `{{ 2.1.name }}`.
**An ordinary app action does not automatically repeat over a list.** Give a "Send Email" step a list of forty addresses and it does not send forty emails. List steps can work on the collection as a whole; for an action, decide what should happen instead:
- **Run the step once per item.** Set the step to **Run for each item** and point it at the list. Inside, `{{ item }}` is the one you are on. This is how you send forty emails.
- **Take one item out.** If you only want the first result, reference it by position: `{{ 1.results.0.name }}`.
- **Shrink the list first.** The [Filter](/build/action-steps/filter-items) step drops the items you do not want before the list reaches the step that cannot handle forty of them.
Which one you want depends on the job, and the wrong choice is usually visible immediately in the **Executions** tab.
## Files
A file is not a value you can print. It is a thing Glow holds on to and hands over intact.
A step can produce a file, such as a PDF pulled off an email. Glow stores it for the run and shows it in the data selector as a file rather than as text. You move it by picking it, the same as any other value:
1. In the step that produced the file, find the file in the data selector.
2. In the step that should receive it (Google Drive "Upload File", for instance), click the file field and pick it.
Nothing else is needed. You never convert it, encode it, or write code to move it between services.
## What's Next?
- 👉 **[Step-Level Executions →](/build/core-concepts/executions)**: inspect the real records, lists and files a step produced.
- Learn the expression syntax for reaching into nested fields in [Variable Reference Syntax](/reference/variable-syntax).
---
Source: https://docs.getglow.ai/build/core-concepts/error-handling
# Error Handling & Retries
> Build resilient workflows using automated retries and fallback logic.
Error Handling & Retries answers: **How should a Step retry, and where should the run go after retries are exhausted?** Both controls live in the Step's **Test & Debug** tab. For a failure that already happened, start in [Activity](/manage/workspace-settings/activity) and inspect the affected [Step execution](/build/core-concepts/executions).
Retries and error routing are off by default, so an untouched Step fails the whole run the first time it fails. This page covers both controls and the failures that are never retried.
## Retry on Fail
Any step can retry itself before giving up. Open the step, go to the **Test & Debug** tab, and turn on **Retry on fail**.
> **Retries are off by default.** Unless you turn this on, a step that fails
> once fails the whole run. Turn it on for anything that talks to a third-party
> API, where a transient failure is normal.
| Setting | Default | Range |
| ---------------------- | ------- | ------------ |
| **Max retries** | 10 | 0–10 |
| **Wait between tries** | 60 s | 0–60 seconds |
**The defaults are the ceiling.** Turn the toggle on and leave the fields alone and you have asked for ten retries a minute apart: ten minutes of a run held open. Most third-party APIs recover much faster than that, so it is worth lowering both before you save.
**Max retries counts retries, not attempts.** Set it to 3 and a failing step runs four times in total: the original, then three more. Budget accordingly.
The wait is a fixed interval, not an increasing backoff.
Each retry is marked in the step's execution history as **Attempt 2**, **Attempt 3**, and so on, with its own error message and timestamp. You can see whether a step succeeded first time and how far apart the tries were. See [Executions](/build/core-concepts/executions).
> This applies to **every** step, including [HTTP
> Request](/build/action-steps/http-request). A `429` or `5xx` from an API is
> not retried unless you turn **Retry on fail** on for that step. That is
> exactly the case worth turning it on for.
### Three things never retry
Even with the setting on, three failures are not repeated because repeating them cannot help:
- **An expired or revoked connection.** The account needs reconnecting; another attempt would fail identically. See [Managing Connections](/manage/apps-and-integrations/managing-connections).
- **[Stop and Error](/build/action-steps/stop-and-error).** That step fails deliberately, with the same message every time.
- **A step whose outward call may already have gone through.** If a step sent its email or created its ticket and the confirmation never came back, Glow declines to repeat the call. Trying again could send it twice. The step is marked failed and your [error path](#if-this-step-fails-stop-or-continue) still runs, so you can decide what to do about it.
### Retries do not read the reason a step failed
Those three are the only exemptions. Every other failure is retried on the same
schedule, whatever caused it.
So a request the other service rejected on its merits (a `400` from a
malformed body, a `404` on a record that does not exist, a `422` from failed
validation) is re-sent byte for byte on every attempt. It fails the same way
each time.
At the default settings that is **ten retries, sixty seconds apart**: eleven
runs in all, ten minutes before the run moves on. Where a rejection is final,
set **Max retries** to 0 on that step and let your error path handle it straight
away.
> Retries are the right tool for a **transient** failure: a rate limit, a
> timeout, a service having a bad minute. They are the wrong tool for a step
> that fails on its own input. If a step reliably fails the same way, fix the
> input or send it down an [error path](#if-this-step-fails-stop-or-continue)
> rather than turning retries up.
Inside [Run for each item](/build/action-steps/loops) this is handled for you. A
failed item is retried only when the failure looks transient. A rejection moves
straight to failed without consuming the retry budget.
## If This Step Fails: Stop or Continue
Alongside **Retry on fail**, the same tab has an **If this step fails** setting that decides what happens once a step has given up.
- **Stop Workflow** (default): _immediately stop execution and mark the workflow as failed_.
- **Continue**: _continue running and pass the error message through the output_, so you can handle the failure yourself.
Choosing **Continue** reveals a **Select Error Path** button just below the setting. Pick the step a failure should route to, and Glow draws that path on the canvas as its own line. The normal output carries on as before, and the error path runs only when the step fails.
Note what happens if you skip that second half. With **Continue** set and no error path chosen, a failed step simply carries on to the next step in sequence, passing its error message along as its output. That is a real choice for a step whose failure does not matter, but it is rarely what someone means by "continue".
That is the usual shape of a resilient workflow: the success path does the work, the error path tells somebody or parks the data for review.
The two settings work as one machine. Retries happen first; **If this step fails** only decides what happens when they run out:
```mermaid
flowchart TD
Run[Step Runs] --> Check{Outcome?}
Check -->|Pass| Next[Next Step]
Check -->|Fail| Retries{Retries Left?}
Retries -->|Yes| Wait[Wait & Retry] --> Run
Retries -->|No| Policy{Failure Policy}
Policy -->|Stop Workflow| Failed[Execution Marked Failed]
Policy -->|Continue| ErrorPath[Error Path / Next Step]
```
## Building fallback logic
When a step permanently fails, you decide how the workflow responds.
**Fallback Branches** When using a [Switch](/build/action-steps/switch) step
to route data, always configure a **Fallback** branch. If the incoming data
doesn't match any of your expected cases, the workflow routes to the
Fallback branch instead of crashing. This branch can send an alert to Slack
or queue the data for manual review.
**Manual Error Triggers** Sometimes you need to intentionally fail a
workflow (e.g., if a customer's email is missing). Use the [Stop and
Error](/build/action-steps/stop-and-error) step to halt execution and throw
a custom error message. This marks the run as `Failed` in
[Activity](/manage/workspace-settings/activity), so a handled error is not
recorded as a success. To be told about it, put a notification on the error
path first: see [Knowing When Something
Failed](#knowing-when-something-failed).
## Knowing when something failed
Every failed run is recorded in [Activity](/manage/workspace-settings/activity) with its Step timeline and error summary. Open the workflow on the canvas, then use [Step-Level Executions](/build/core-concepts/executions) for the failing Step's output and attempt details.
To be told the moment something fails rather than going to look, build the
notification into the workflow itself. That is what the error path is for:
### Set the step to continue on error
Switch **If this step fails** to **Continue** on the step that matters, so a failure routes
down the error path instead of ending the run.
### Send yourself the alert
Put a Slack, email, or [HTTP Request](/build/action-steps/http-request) step on that path. Format the alert clearly using [Data Transformation](/build/core-concepts/data-transformation):
```markdown
🚨 _Step Failure Detected_
• _Time:_ {{ $now | format_date:"YYYY-MM-DD HH:mm:ss" }}
• _Workflow ID:_ {{ $workflow.id }}
• _Execution ID:_ {{ $execution.id }}
• _Failing Step:_ Step {{ $error.stepNumber }} ({{ $error.stepName }})
• _Error Message:_ `{{ $error.message | truncate:300 }}`
```
### Stop deliberately
End the error path with [Stop and Error](/build/action-steps/stop-and-error) so the run is still recorded as failed. Without it, a handled error reads as a success.
A notification you build says exactly what you need to know, and arrives in the channel your team already watches. Worth doing for anything you cannot afford to have fail unnoticed.
## Diagnose a failure before changing the policy
This page owns the behavior you configure for future failures. For an incident that already happened, start in [Activity](/manage/workspace-settings/activity), inspect the affected Step in [Step-Level Executions](/build/core-concepts/executions), and use [Troubleshooting & Common Errors](/reference/troubleshooting) for the symptom or exact message.
## What's Next?
- 👉 **[Activity →](/manage/workspace-settings/activity)**: find the failed run and identify the affected Step.
- **[Step-Level Executions](/build/core-concepts/executions)**: inspect each attempt and the Step's recorded output.
- **[Troubleshooting & Common Errors](/reference/troubleshooting)**: diagnose a symptom or exact error message.
---
Source: https://docs.getglow.ai/build/core-concepts/executions
# Step-Level Executions
> Inspect the history, inputs, and outputs of individual steps using the Executions tab.
Step-Level Executions answers: **What entered and left this Step, and how did each attempt end?** Start in [Activity](/manage/workspace-settings/activity) for workspace-wide monitoring or the [Execution Log](/build/the-canvas/execution-log) for one workflow's run, then come here once you know which Step needs attention.
---
## Finding the Executions tab
When you want to see if a step ran successfully or inspect its data payload:
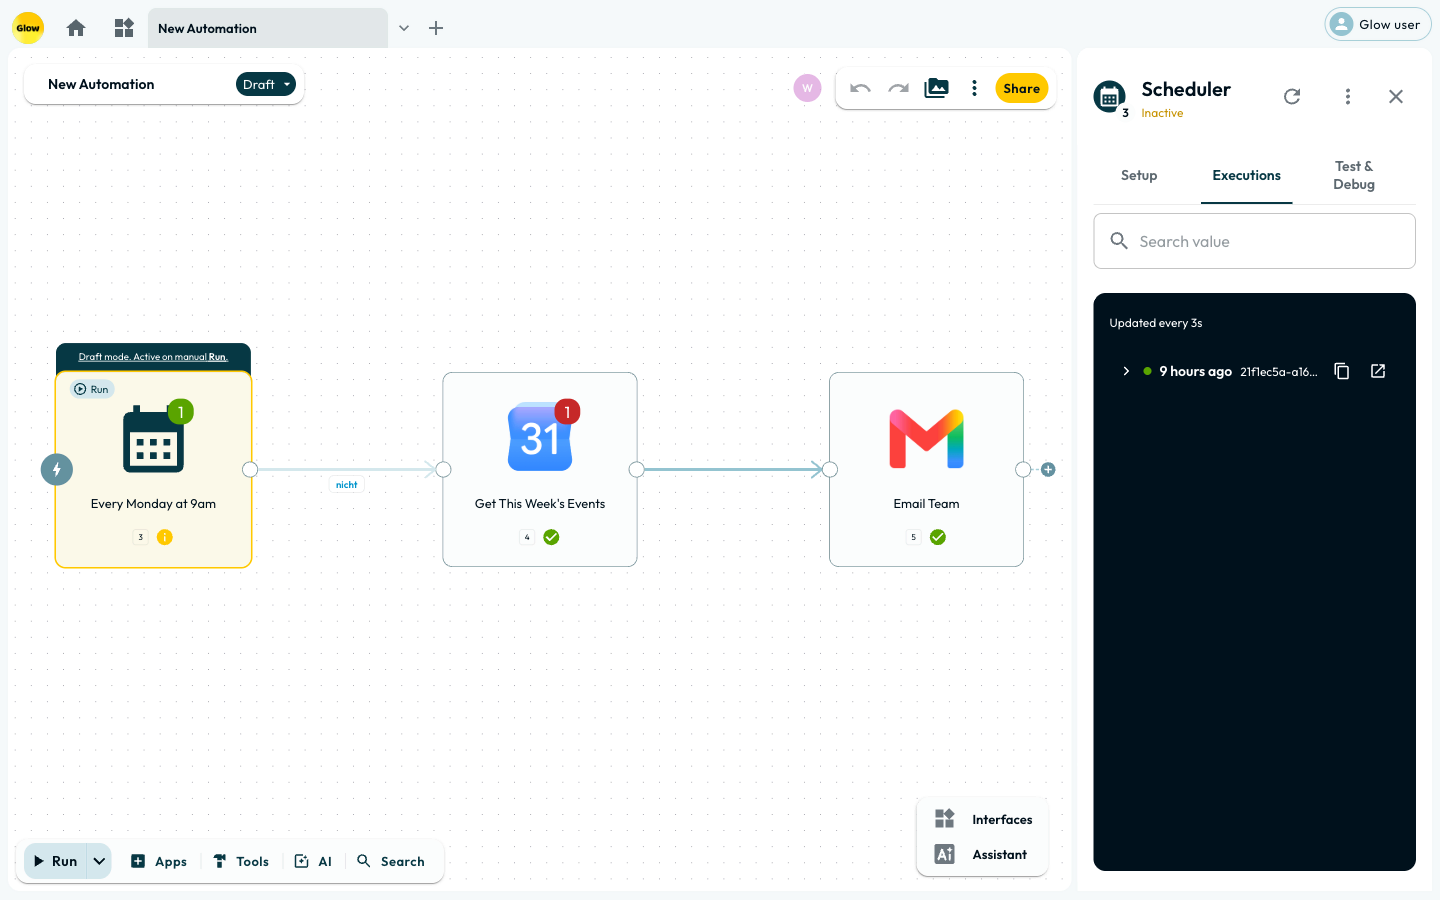
*Every run of the selected step, newest first. Expand one to see what went in and what came out.*
### Select the Step
Click on the step directly on the canvas.
### Open the App drawer
The drawer opens on the right side of the screen.
### Switch to Executions
At the top of the App drawer, click the **Executions** tab.
### Start from the whole run
If you do not yet know which Step needs attention, start in [Activity](/manage/workspace-settings/activity). It shows the whole-run timeline across workflows and lets you open the affected workflow on the canvas.
**Workflow data** answers a different question: where a value came from and where it goes. Use it when a field arrives empty downstream and you need to find the connection it stopped travelling along. See [Steps and Connections](/build/core-concepts/steps-and-the-canvas).
---
## Inspecting input and output
The Executions tab lists the history of every time that specific step was executed. Each entry shows a timestamp, the status (Success, Error, or Pending), the execution id, and the data the step produced. Expand an entry and the output is there as a JSON tree.
### Reading multiple entries for one run
A single run can legitimately produce several entries. A step in [Run for each item](/build/action-steps/loops) mode writes one per item. A step merging parallel branches writes one per incoming branch, and a loop writes one per iteration.
Entries that are genuinely **retries** carry an **Attempt 2**, **Attempt 3** marker, each with its own error and timestamp. Where Glow knows how many attempts the step is allowed, the marker names the total too: **Attempt 2 of 11**. A first attempt is never marked, so any entry without one ran on its own. See [Retry on fail](/build/core-concepts/error-handling#retry-on-fail) for how to enable retries.
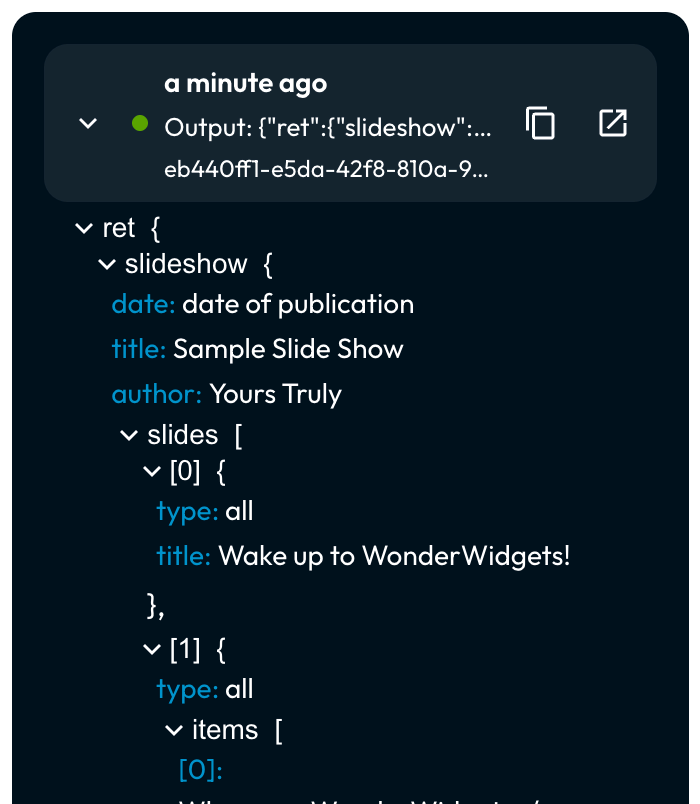
*A step with Max retries set to 3 runs four times in total. The gaps between the timestamps are the fixed wait, not a growing backoff.*
### How long a run is kept
Runs are kept for **30 days** after completion by default. One window covers:
- The workspace [Execution log](/build/the-canvas/execution-log).
- Step-level records and input/output payloads.
Each run preserves the retention policy active when it executed. The **Execution ID** on an entry identifies the run for debugging and support requests.
Thirty days covers debugging and a monthly review, not an audit trail. If a
workflow matters enough that you would want a record of it later, send what you
need out of Glow while the run is happening: an
[HTTP Request](/build/action-steps/http-request) step to your own logging, or a
message to the channel your team watches. A longer window for your workspace is
something to raise with your account team. See
[System Limits](/reference/system-limits#data-retention).
**The output you see is the shape you reference downstream**, wrapper and all.
An HTTP Request's response arrives under `ret`, so what you see is
`{"ret": {"id": 1}}` and the reference is `{{ 3.ret.id }}`. Reading it once beats
guessing the path from an API's own documentation. The **Test & Debug** tab shows
the same thing for a run you start by hand with test data.
**To see what went into a step**, look at the output of the step above it. An
upstream step's output is the downstream step's input, so a step that failed on
bad data shows its cause one step up. Where a value is built from several
references, a [Custom Variables](/build/action-steps/custom-variables) step
placed before it echoes the resolved value as its own output.
---
## Live data mapping
The Executions tab is not just for debugging. It is the engine that powers the Workflow data panel.
When a step runs, Glow keeps what it produced. Open the Workflow data panel in a later step and you pick from those real values, not a bare list of field names.
> **Run steps early and often.** Configure your trigger and hit **Run** to
> generate a real execution before you go further. As you add the steps after
> it, the Workflow data panel shows real values instead of a list of field
> names. An actual email subject line, an actual database row.
---
## Handling errors
If a step fails, its execution entry is marked in red.
Expanding the failed execution reveals the **Error Message** returned by the integration or the Glow engine. It is usually the remote service's own words:
```json
{ "message": "Request failed with status code 404 (Not Found) - {}" }
```
Compare that against what the step above it produced and the cause is usually obvious: a URL built from an empty variable, a field the API required and did not get. (For a list of common errors, see our [Troubleshooting Guide](/reference/troubleshooting).)
## What's Next?
- 👉 **[Activity →](/manage/workspace-settings/activity)**: return to the whole run and workspace alert queue.
- **[Error Handling & Retries](/build/core-concepts/error-handling)**: configure what happens after a Step fails.
- **[Troubleshooting & Common Errors](/reference/troubleshooting)**: look up the symptom or exact error message.
---
Source: https://docs.getglow.ai/build/core-concepts/mapping-or-transforming
# Mapping or Transforming Data
> Choose the smallest data operation that fits: map a value, transform it in place, parse structure, reshape a list, use AI, or write code.
Mapping passes an existing value into another field. Transforming changes its shape or content first. Start with mapping, then add the smallest transformation that makes the receiving step accept the data.
## Choose by what must change
| What you need | Use | Why |
| ------------------------------------------------------------ | ------------------------------------------------------------------- | --------------------------------------------------------------------------------------- |
| Put an existing value into a field unchanged | **Mapping** | No extra step or operation is needed. |
| Clean, calculate, format, or take part of one value | **[Data Transformation](/build/core-concepts/data-transformation)** | The change stays beside the field that needs it and does not add a canvas step. |
| Turn JSON text into selectable fields | **[Parse JSON](/build/action-steps/parse-json)** | It exposes the structure so later steps can map each field. |
| Filter, sort, limit, deduplicate, combine, or process a list | **List steps** | The list itself is the unit of work, and the result can be inspected and reused. |
| Extract meaning from inconsistent, unstructured text | **[AI Data Transform](/build/ai-features/ai-transform)** | Plain-language instructions handle text whose layout changes from one item to the next. |
| Apply bespoke calculations, reshaping, or business rules | **[Code editor](/build/action-steps/code-execution)** | Python covers logic that the visual operations do not express clearly. |
## Map when the value already fits
Click the data icon beside the destination field and pick the value from **Data select**. Glow inserts a reference to the earlier step, such as:
```text
{{ 2.ret.email }}
```
The path depends on the step that produced the value. App actions usually place their answer under `ret`; triggers and Glow flow steps often expose fields at the top level. Pick from the data panel instead of guessing the path.
Mapping can sit inside surrounding text when the destination expects text:
```text
Order {{ 2.ret.order_id }} is ready for collection.
```
Keep mapping when the source type and format already match the destination. Adding a separate step to rename nothing or copy one value makes the canvas harder to read without changing the result.
## Keep routine changes in Data Transformation
**Data Transformation is the default for changing one mapped value.** Use it for trimming text, changing capitalisation, extracting a domain, calculating a price, formatting a date, taking an item from a list, or supplying a fallback.
Open the field's data icon, switch to **Data transformation**, and add operations to the mapped value. Glow applies them from left to right when that field is resolved. The earlier step's output remains unchanged, so another field can still use the original value.
You can also write the same chain inside the placeholder:
```text
{{ 2.ret.email | trim | lower }}
{{ 3.subtotal | times:1.21 | number_format:2:sep_comma_dot }}
{{ 4.company | default:"Unknown" }}
```
| Chain | Result |
| ------------------------------------------------- | ---------------------------------------------------------------------------------------- |
| `trim` then `lower` | Removes outer spaces, then makes the text lowercase. |
| `times:1.21` then `number_format:2:sep_comma_dot` | Multiplies the number, then returns text such as `1,210.00`. |
| `default:"Unknown"` | Replaces a missing, null, empty, or whitespace-only value; it preserves `0` and `false`. |
A pipe belongs **inside** the braces. Operations run in the order written, so calculate before formatting a number as text.
> Prefer the visual **Data transformation** tab for day-to-day work. It offers
> operations that fit the current value and writes the pipe chain for you. The
> inline form is useful when reviewing, copying, or troubleshooting a field.
### Data Transformation can reshape a list inside one field
A list does not always need another canvas step. If one destination field needs a simple derivative, keep it local:
```text
{{ 3.results | sort:ascending:name | pluck:email | join:comma_space }}
```
That chain sorts records by `name`, takes each record's `email`, and joins the addresses into text. Use this approach when only that field needs the result.
Use a list step instead when the changed list should be visible in the execution history, reused by several later steps, split into routes, or processed item by item.
## Parse structure before mapping fields
Use **Parse JSON** when a value is text that contains JSON. Mapping can select the whole string, but it cannot select fields hidden inside that string.
Given this text:
```json
{ "customer": { "email": "ada@example.com" }, "total": 125 }
```
Map the text into a Parse JSON step. If Parse JSON is step 4, later steps can read:
```text
{{ 4.customer.email }}
{{ 4.total }}
```
Use dots for nested records and list positions: `{{ 4.items.0.sku }}` is valid; `{{ 4.items[0].sku }}` is not.
Do not add Parse JSON when the data picker already exposes the fields. In that case the value is structured already, so map it directly.
## Use list steps when the list is the result
Dedicated list steps make a changed collection available to the rest of the workflow:
| Need | Step |
| ------------------------------------------------------ | -------------------------------------------------------------------- |
| Keep only matching items and route the rest separately | **[Filter](/build/action-steps/filter-items)** |
| Put records in order, including tie-breaking rules | **[Sort](/build/action-steps/sort)** |
| Keep the first or last number of items | **[Limit](/build/action-steps/limit)** |
| Keep one copy of repeated values or records | **[Remove duplicates](/build/action-steps/remove-duplicates)** |
| Append two lists or match records by shared fields | **[Combine](/build/action-steps/combine)** |
| Run one action for every item | **[Run for Each Item](/build/action-steps/loops/run-for-each-item)** |
| Run several steps for every item | **[Repeater](/build/action-steps/loops/repeater)** |
List steps return a result you can inspect after a run. That makes them the clearer choice when the transformation is an important stage of the workflow rather than formatting for one destination field.
## Use AI only when rules cannot find the value reliably
**AI Data Transform** suits emails, receipts, transcripts, and other text whose wording or position changes. Write one instruction per value you need, up to three:
> Extract the purchase order number from `{{ 2.ret.body }}`.
If AI Data Transform is step 5, its answers are positional:
```text
{{ 5.result.0 }}
{{ 5.result.1 }}
{{ 5.result.2 }}
```
Reordering instructions changes what those references mean. For stable JSON, delimiters, dates, or arithmetic, use Parse JSON, Data Transformation, or a list step instead. Deterministic operations are easier to test and do not depend on model interpretation.
## Use Code editor for rules, not routine formatting
Choose **Code editor** when several values interact, the output needs a bespoke structure, or the rule is clearer as Python than as a long chain of visual operations.
References in Python must stand alone and remain unquoted:
```python filename="main.py"
import json
orders = {{ 3.results }}
tax_rate = {{ $var.TAX_RATE }}
total = sum(order["amount"] for order in orders)
print(json.dumps({"total_with_tax": round(total * tax_rate, 2)}))
```
The printed value is text under:
```text
{{ 4.result.executionOutput }}
```
To map fields from the printed JSON, follow Code editor with Parse JSON. Use Data Transformation instead for a short chain on one value; it keeps the intent visible beside the destination field.
## A practical order of preference
1. **Map it** if the value already fits.
2. **Use Data Transformation** if one field needs a deterministic change.
3. **Add Parse JSON or a list step** if the workflow needs a new reusable structure.
4. **Use AI Data Transform** for meaning hidden in inconsistent text.
5. **Use Code editor** when the rule genuinely needs code.
This order keeps simple workflows short without forcing complex work into an unreadable field.
## What's Next?
- 👉 **[Data Transformation →](/build/core-concepts/data-transformation)**: browse the complete operation catalogue and configure chains visually.
- Decide where persistent and run-scoped values belong in [Where Data Lives](/manage/workspace-settings/where-data-lives).
- Check output wrappers, nested paths and system references in [Variable Reference Syntax](/reference/variable-syntax).
---
Source: https://docs.getglow.ai/build/core-concepts/operating-workflows
# Operating Workflows
> Take a workflow from a controlled test to Live operation, then monitor, diagnose, and recover runs without repeating work blindly.
Operating Workflows answers: **How do I test a workflow, take it Live, and run it safely over time?** Use it for the operating loop; use the focused pages below for run evidence, failure behavior, versions, or a specific symptom.
## Choose the right operational page
| Question | Go to |
| ------------------------------------------------- | --------------------------------------------------------------- |
| What happened across workflows in this workspace? | [Activity](/manage/workspace-settings/activity) |
| What happened in one workflow's run? | [Execution Log](/build/the-canvas/execution-log) |
| What entered and left one Step? | [Step-Level Executions](/build/core-concepts/executions) |
| How do retries and error routes work? | [Error Handling & Retries](/build/core-concepts/error-handling) |
| How do Draft, Live, and saved versions relate? | [Versioning](/build/core-concepts/versioning) |
| What does this symptom or error message mean? | [Troubleshooting & Common Errors](/reference/troubleshooting) |
## The operating loop
| Stage | Decision to make | Use |
| ------------ | --------------------------------------------------------------------- | --------------------------------------------------------------- |
| **Test** | Does the workflow follow the intended path with realistic data? | [Testing & Debugging](/build/the-canvas/testing-and-debugging) |
| **Go Live** | Are its triggers ready to accept real events? | [Versioning](/build/core-concepts/versioning) |
| **Monitor** | Did the run start, and where is it now? | [Activity](/manage/workspace-settings/activity) |
| **Diagnose** | Which step first produced the wrong result or error? | [Step-Level Executions](/build/core-concepts/executions) |
| **Recover** | Is repeating the work safe, or did an external change already happen? | [Error Handling & Retries](/build/core-concepts/error-handling) |
## 1. Test the path in Draft
Draft disables automatic triggers but still allows manual runs. Use it to test the workflow without accepting scheduled, webhook, or app-triggered events.
### Save a version before a risky change
A saved version is the point you can restore later. Editing or switching to Live does not create one automatically. See [Versioning](/build/core-concepts/versioning).
### Test each uncertain step
Run the trigger or action on its own and read its **Executions** tab. For a trigger, **Run with test data** uses the saved Testing data. For an action, running the step performs that action, so use test accounts or records where a real write would matter.
### Run from the trigger
Set the trigger as the run point and press **Run** to exercise the whole path. A run point in the middle skips everything before it, which is useful for focused debugging but is not an end-to-end test.
### Check the values that leave the workflow
Open the destination and confirm the resulting message, row, ticket, or record. A green step means it completed; the destination confirms that it changed the right thing.
Use representative list sizes as well as representative fields. Plan limits and credit checks apply when the workflow runs, so a test with one item does not prove that a production batch of hundreds will fit.
## 2. Set the workflow Live
**Live enables the workflow's triggers.** For a Webhook trigger, the endpoint appears only after the workflow is Live. For a Scheduler trigger, confirm the previewed run times and timezone before enabling it.
Draft is not a separate copy of the workflow. Edits change the same workflow, including while it is Live, and affect the next trigger. For a controlled change:
1. Save the current version.
2. Switch the workflow to Draft.
3. Make the change and run an end-to-end test.
4. Switch it back to Live.
Events that arrive while the workflow is in Draft are not replayed. Decide whether pausing the trigger is acceptable before taking an active workflow out of Live.
## 3. Monitor the run
Open [Activity](/manage/workspace-settings/activity) to confirm that the run started and see its status, timing, Step timeline, attempts, and error summary. From there, open the workflow on the canvas when you need the in-workflow Execution Log.
Once you know which Step needs attention, use its [Executions tab](/build/core-concepts/executions) to inspect the recorded output and trace the input from the preceding Step.
## 4. Diagnose and recover
Start with the [Troubleshooting symptom index](/reference/troubleshooting) when a run did not start, remains waiting, or shows an unfamiliar message. It routes the symptom to the relevant check without repeating feature setup here.
For future runs, configure retry behavior and the route taken after retries are exhausted in [Error Handling & Retries](/build/core-concepts/error-handling). For the current run, confirm any external changes before repeating work.
## What's Next?
- 👉 **[Activity →](/manage/workspace-settings/activity)**: monitor whole runs and alerts across the workspace.
- **[Versioning](/build/core-concepts/versioning)**: save a known state and understand Draft versus Live before a controlled change.
- **[Troubleshooting & Common Errors](/reference/troubleshooting)**: start from a symptom or exact error message.
---
Source: https://docs.getglow.ai/build/core-concepts/steps-and-the-canvas
# Steps and Connections
> What a step is made of, how links between steps decide execution order, and how parallel branches merge back together.
A workflow is steps joined by links. This page covers what a step is made of and what a link decides: the model underneath the canvas, rather than the panels you click.
In Glow, **connection** can mean two different things. A **canvas connection** is the line that carries a run from one step to another. An **app connection** is the account a step uses to act in Slack, HubSpot or another service. This page is about canvas connections; [Connecting an App](/manage/apps-and-integrations/connecting-an-app) covers accounts.
For the panels themselves, see [The Dock & App drawer](/build/the-canvas/the-dock).
## Steps
Every step on the canvas carries a **number**, assigned as you add it. That number is its identity: it is how other steps refer to its output. Renaming the step does not change it. See [Variable Reference Syntax](/reference/variable-syntax).
A step has:
- **A type:** what it does, set by which dock entry created it. A Webhook, a Slack action, an AI Prompt.
- **Inputs:** terminals on its left edge, where incoming links arrive.
- **Outputs:** terminals on its right edge, where outgoing links leave.
A step can have several of each, which is what lets a workflow branch and merge.
## Links
A link joins one step's output to another's input. It settles two things at once: **what runs after what**, and **which data is available where**. A step can reference the output of anything upstream of it.
### Drag to connect
Drag from an output terminal towards the step you want to reach.
### Snap to input
Get close and the link snaps to the nearest input terminal. Release to confirm.
### Quick add
Or click the **+** on an output terminal. The dock opens inline, and the step you pick is placed and connected in one action.
### Working with an existing link
**Hover over a link** and its controls appear on the line:
| Control | What it does |
| ----------------------- | ---------------------------------------------------------------------------------------------------------------------------------- |
| **Data** | Opens what actually travelled along this link on the last run (see below). |
| **Edit label** | Name the link. The label sits on the line, so a branch can say _"high value"_ or _"needs review"_ on the canvas itself. |
| **Add step in between** | Insert a step into the link. Glow splits the connection and rewires both halves for you, rather than making you delete and redraw. |
| **Remove connection** | Delete the link, leaving both steps in place. |
Labelling links is worth the few seconds on anything with branches. Where every line is unnamed, the next person has to open each condition to work out which path is which.
#### Seeing what flows along a link
Click **Data** on a link and Glow shows the data that reached the step at its far end. It answers the question a canvas otherwise cannot: _what is actually passing between these two steps_. You never have to open either of them.
From there, **Open Data Flow** widens the view to the whole workflow. Follow a value from where it entered to where it is used. That is the fastest way to find out why a field arrives empty three steps later: you see which link it stopped travelling along.
Both read from the last run, so run the workflow at least once before expecting anything there.
## Merging parallel branches
A workflow that splits into parallel paths has to decide what happens where they come back together. In Glow that decision belongs to the step they meet at, and no separate merge or join step is needed.
A step with more than one incoming link carries a small **AND** / **OR** chip on the canvas. Click it and pick one of two options.
**AND (Data from all steps):** the step waits for *every* incoming branch to finish and deliver its data before it runs.
Use it when you need everything present at once. Two API calls fetch customer and billing data, and both must succeed before they merge into one record.
**OR (Data from any step):** the step runs as soon as *any one* incoming branch delivers.
Use it when the branches are alternatives. A lead is routed down the Europe, US, or Asia path, and a single logging step at the end runs whichever path was taken.
```mermaid
flowchart LR
A[Fetch Customer] --> C[Write Record
(AND: Waits for both)]
B[Fetch Billing] --> C
D[Europe Route] --> F[Log to Sheets
(OR: Runs on either)]
E[US Route] --> F
```
The two modes suit different shapes, and picking by shape is what keeps a merge predictable:
- **AND** is for branches that both always run — two steps you fanned out to work side by side, then brought back together. It waits for every incoming branch to deliver.
- **OR** is for branches that are alternatives, where only one is ever taken. That includes the two sides of a [Condition](/build/action-steps/conditions): merge those with OR.
[Combine](/build/action-steps/combine) always waits for both of its inputs, so give it two branches that both run.
### OR runs the step once per branch that arrives
This is the part worth knowing before you pick it. **OR does not run the step once and discard the rest.** It runs once for every incoming branch that delivers.
Where the branches are genuine alternatives, only one of them arrives, so the step runs once. That is the case OR is for.
Where both branches run and both arrive, the step runs twice. If it sends an email, two emails go out.
| Both branches can deliver | Choose |
| -------------------------------------- | ------- |
| Yes, and you want one result from both | **AND** |
| No, they are alternative routes | **OR** |
| Yes, and running twice is fine | **OR** |
If you want one run from branches that both deliver, that is **AND**, or a [Combine](/build/action-steps/combine) step when what you are merging is two lists.
## Error paths
A step can send failures somewhere other than its normal output. Set its **If this step fails** to _Continue_ and a **Select Error Path** button appears beneath the setting. Pick the step a failure should route to, either an existing one or a new one you add there, and Glow draws the error path on the canvas as its own line beside the normal output.
See [Error Handling](/build/core-concepts/error-handling).
## What's Next?
- 👉 **[Triggers and Actions →](/build/core-concepts/triggers-and-actions)**: learn what starts a run and what the later steps do.
- Learn where steps come from and how to configure them in [The Dock & App drawer](/build/the-canvas/the-dock).
---
Source: https://docs.getglow.ai/build/core-concepts/triggers-and-actions
# Triggers and Actions
> Triggers decide when a workflow runs. Actions are everything it does once it has started.
Every workflow begins with at least one trigger and carries out its work through one or more actions. Triggers define _when_ a workflow runs and actions define _what_ it does: the trigger-action pattern that underpins all automation in Glow.
## Triggers
A trigger is the first step in a workflow. It listens for a specific event and, when that event occurs, starts the workflow and passes incoming data to the next step.
The built-in triggers sit under **Tools → Start** in the dock:
### Webhook
A **Webhook** trigger gives the workflow its own web address. When another system sends data to that address, the workflow starts, and everything that arrived with it is available to the steps that follow.
Use a webhook when you want another service to start your workflow the moment something happens there. A form provider when somebody submits, a payment gateway when a charge clears, a build system when a deploy finishes.
### Scheduler
A **Scheduler** trigger fires on a recurring time-based schedule (for example, every hour, every weekday at 9 AM, or on the first of each month). Use it for periodic tasks such as syncing data, generating reports, or sending digest emails.
### Click to start
A **Click to start** trigger runs the workflow when a person presses its button: the shape for anything started on demand rather than by an event. See [Click to start](/build/triggers/click-to-start).
### Chat Trigger
A **Chat Trigger** starts the workflow from an incoming chat message and carries the message text in. See [Chat](/build/triggers/chat).
### App Triggers
Most triggers belong to an app rather than to Glow itself. Open **Apps** in the dock, pick the service, and choose its trigger: "New row in Google Sheets", "New Stripe charge", "New Jira issue". These are the bulk of what starts workflows in practice.
### Multiple triggers
A single workflow can have more than one trigger. For instance, you might attach both a Webhook trigger and a Scheduler trigger to the same workflow so it can be started on demand _and_ on a schedule. Each trigger feeds into the same downstream steps.
> **Tip:** Two triggers hand the workflow two different things. A Webhook passes
> on whatever the sender posted. A Scheduler carries no data of its own. A later
> step that needs the time uses `{{ $now }}`. Check that the steps below can
> cope with both.
## Actions
Actions are every step that comes after a trigger. They do the work: fetching a record, reshaping data so the next step can use it, deciding which way the workflow goes, and writing the result into whichever tool needs it.
### App Integrations
Glow connects to thousands of third-party apps through pre-built integrations, among them Slack, Google Sheets, Salesforce, HubSpot, Jira and Stripe. Each app brings its own set of actions: "Send a message", "Create a row", "Update a record".
### AI Steps
AI steps bring a language model (the AI that reads and writes text) into the workflow. Use one to classify a message, pull details out of a document, draft content, or summarize a report.
### Data
The dock's **Data** group (Change, Lists, Convert and Dev tools) reshapes, filters, merges and maps data between steps. Use them when the output of one step does not match the input format the next step expects.
### Flow
The **Flow** group handles branching, conditions, and loops. Use them to route data down different paths based on conditions, run steps in parallel, or iterate over lists.
### Human Review
A [Human Review](/build/action-steps/user-approval) step pauses a run part-way through and waits for a person to act. Use it where something needs a human decision before the workflow carries on, such as a manager signing off an expense. It sits in the middle of a workflow rather than at the start: the run has already begun, and approval decides whether it continues.
### Code and HTTP Requests
Data's **Dev tools** section covers the cases no app integration does: an [HTTP Request](/build/action-steps/http-request) to any API, and a [Code editor](/build/action-steps/code-execution) step for logic you would rather write out. It runs Python. You do not need either of these for most workflows.
## Two ways to configure a step
Every app action ends up configured the same way: a set of fields you can see and edit. How those fields get filled is up to you.
- **Fill them yourself.** Open the step and map each field, for precise control over what is sent to the external API.
- **Let the assistant fill them.** Describe what you want and the [Workflow Assistant](/build/ai-features/workflow-assistant) places the step and populates its fields from your description.
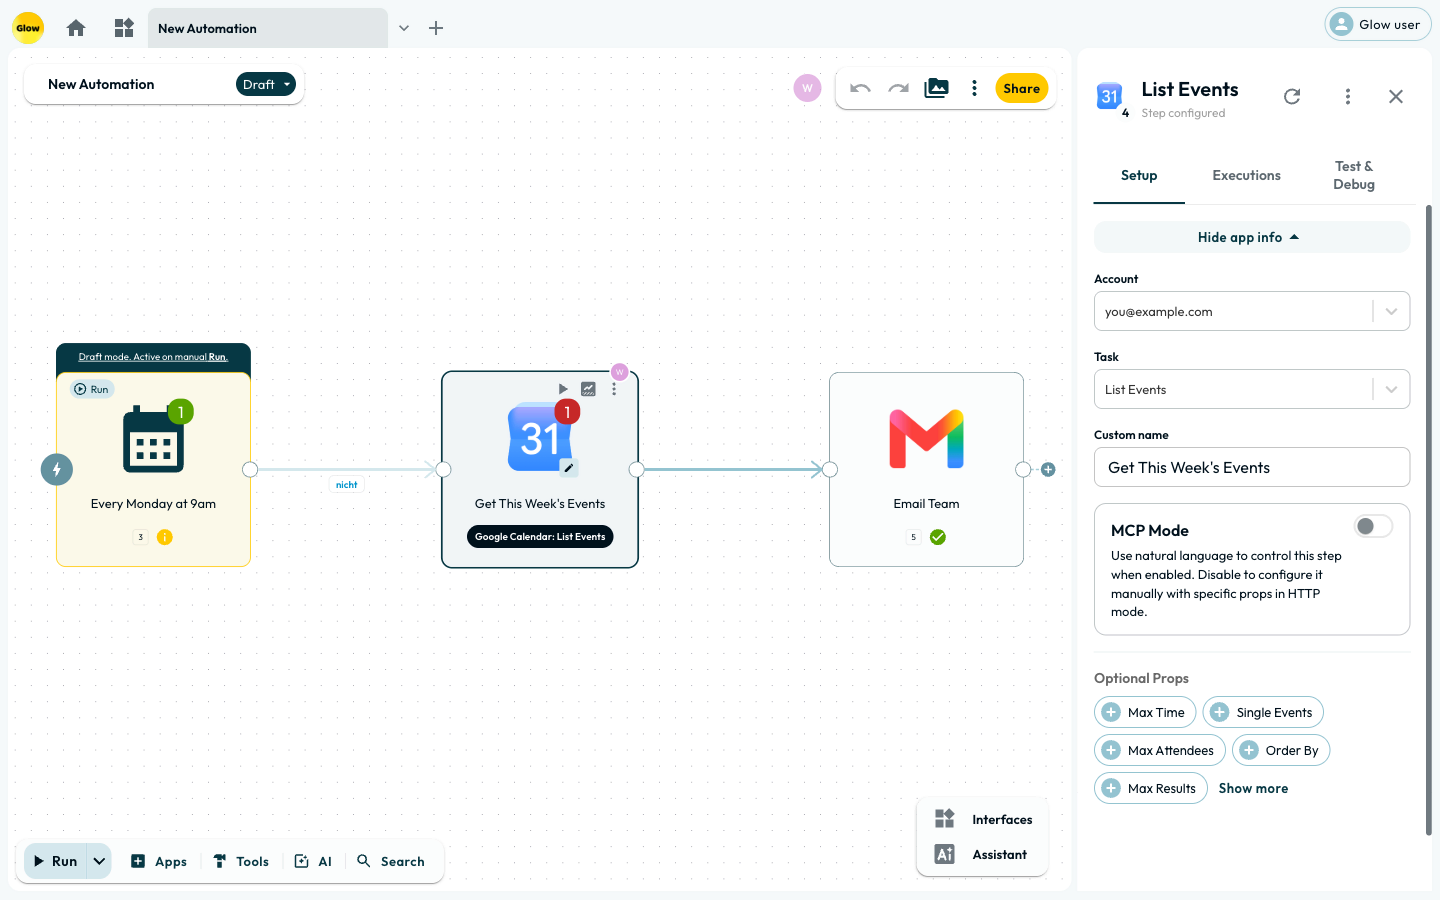
*The same panel either way: the account, the task, and the fields that task takes.*
Either way you end up with the same editable step. An assistant-built action is never a black box: open it and adjust anything it got wrong.
## What's Next?
- Set up your first trigger in detail with the [Webhook Trigger](/build/triggers/webhook) or [Scheduler Trigger](/build/triggers/scheduler).
- See how data flows from one step's output into the next in [Workflow Data](/build/core-concepts/workflow-data).
---
Source: https://docs.getglow.ai/build/core-concepts/versioning
# Versioning
> Save a version of a workflow before you change it, and restore an earlier one if a change goes wrong.
Versioning answers: **How do Draft, Live, and saved versions relate when I change a workflow?** Use it to preserve and restore known workflow states; use [Operating Workflows](/build/core-concepts/operating-workflows) for the full test-to-Live process.
Two things to know before you rely on versions: you save them yourself, and Draft controls whether triggers fire rather than holding a private copy of your edits.
## Saving a version
**You save a version when you want one.** Give it a title and a description,
and Glow snapshots the workflow as it stands. Editing a workflow or switching it
to Live does not create one.
There is one exception. A checkpoint is taken before the [Workflow
Assistant](/build/ai-features/workflow-assistant) generates into a workflow that
already has steps. An assisted change is recoverable even if you did not think to
save first.
> **Save a version before a change you would not want to redo by hand.** If you
> have not been saving them, there is nothing to go back to. This is the point
> people discover the hard way. Treat it like a commit: cheap to make, and only
> useful if you made it beforehand.
## Draft is a trigger switch, not a staging area
The status control offers two states. **Draft** is _triggers disabled, manual
runs only_. **Live** is where triggers fire.
That is all it does. **There is one copy of a workflow, and edits take effect
the moment you make them**, including while it is Live. Draft does not hold a
private copy for you to work on and release later. It stops the workflow being
triggered, nothing more.
> Editing a Live workflow changes what runs on the next trigger, immediately.
> There is no publish step between your edit and production. To change a busy
> workflow safely, save a version first. Switch to **Draft** so triggers stop
> firing, make the change, test it with **Run**, then switch back to **Live**.
> Events arriving while it is in Draft are not processed, so weigh that against
> the risk of editing in place.
## Restoring an earlier version
Open **Version history** from the canvas menu. Each entry shows its title,
description, author and date.
**Restore** replaces the current workflow with that version, in full. Restores
are themselves recorded, so the history shows what was rolled back and when.
> **Restore replaces the current workflow in full.** Save a version of the
> current state before restoring an older one. Even a throwaway titled "before
> rollback" makes the step reversible.
**Write descriptions that will still mean something to you in three months.**
The list is what you navigate by. The description is what tells one version
from another.
**To see an older version's canvas, restore it and look.** Save the current
state as a version first and you can come straight back, so restoring is a way
of browsing rather than a commitment.
## What's Next?
- 👉 **[Operating Workflows →](/build/core-concepts/operating-workflows)**: test a controlled change and take the workflow Live.
- **[Activity](/manage/workspace-settings/activity)**: monitor the whole run after a change or restore.
- **[Step-Level Executions](/build/core-concepts/executions)**: inspect what one Step received and produced.
---
Source: https://docs.getglow.ai/build/core-concepts/what-is-a-workflow
# What Is a Workflow?
> A workflow in Glow is a series of automated steps that move and transform data between apps, services, and systems.
A workflow in Glow is a series of automated steps that move and transform data between apps, services, and systems. You build it visually on a canvas, connecting triggers (events that start the workflow) to actions (tasks the workflow performs).
The result is a repeatable, automated process that runs whenever its trigger fires.
## The trigger-action pattern
Every workflow follows the same pattern:
### A trigger fires
Something happens: an HTTP request arrives, a schedule fires, or a person presses **Click to start**.
### Actions execute in sequence
Each subsequent step receives data from earlier steps, does its work, and passes its output forward.
### The workflow completes
The final step finishes, and the run is recorded for review.
This pattern scales from a two-step automation to a complex, branching process with dozens of steps.
## A Real-World Analogy
Think of a workflow like an assembly line. Raw materials arrive at one end (the trigger). Each station along the line adds or transforms something (the actions), and a finished product rolls off the other end.
If one station needs a part from an earlier station, it can reach back and grab it. Any step in Glow can reference the output of any previous step the same way.
```mermaid
flowchart LR
A[Raw Materials
Trigger] --> B[Station 1
Action] --> C[Station 2
Action] --> D[Finished Product
End]
A -.->|Reference Data| C
```
## Example: Lead Enrichment
Take a request like: "When a contact form is submitted, enrich the lead with AI, then add it to our CRM."
In Glow, that becomes three steps:
- [1. Webhook Trigger](/build/triggers/webhook): Listens for form submissions and captures the submitted data.
- [2. AI Step](/build/ai-features/ai-prompt): Takes the raw form data, enriches it (classifying intent or extracting key details), and outputs structured results.
- [3. CRM App Action](/manage/apps-and-integrations/overview): Receives the enriched data and creates a new contact record in your CRM.
You arrange these steps visually on the canvas, drawing connections to set execution order and data flow.
Glow connects to thousands of third-party apps, and [HTTP Request](/build/action-steps/http-request) and [Code editor](/build/action-steps/code-execution) steps cover services that have no dedicated integration.
> You do not need to plan the entire workflow up front. Start with a trigger and
> one action, test it, then extend the chain step by step.
## What's Next?
- 👉 **[Steps and Connections →](/build/core-concepts/steps-and-the-canvas)**: learn how steps, links and branches form the canvas.
- Build a working workflow end to end in [Quickstart: Your First Workflow](/getting-started/tutorials/your-first-workflow).
---
Source: https://docs.getglow.ai/build/core-concepts/workflow-data
# Workflow Data
> How to point a step at a value an earlier step produced, and how to see what a step actually produced.
Every step in a workflow takes in data, does something with it, and produces data of its own that any later step can use. This page covers how to reference an earlier step's value, and how to see what a step actually produced when the answer surprises you.
## How data flows
When a workflow runs, data travels step by step along the links you drew on the canvas.
The trigger captures whatever started the run and passes it to the first step. That might be data a webhook received or a person clicking Run. A schedule trigger carries no data of its own: a later step that needs the time uses `{{ $now }}`. The first step produces its own output, which passes to the next, and so on.
Each step's output is preserved for the duration of the run. This means a step near the end of the workflow can reference data from any earlier step, not just the one immediately before it.
```mermaid
flowchart LR
A[Trigger Payload] --> B(Step 1 Output)
B --> C(Step 2 Output)
C --> D(Step 3 Output)
B -.->|Reference upstream data| D
```
## Referencing Data (The Workflow Data Panel)
To use data from an earlier step, point at it with the **Workflow data** panel.
Click the data icon at the right of any field in a step's setup and the panel opens with three tabs:
| Tab | What it does |
| ----------------------- | ----------------------------------------------------------------------------------------------------- |
| **Data select** | Every earlier step and what it produced, as a tree you expand. This is where you pick a value. |
| **Data flow** | How data moves between steps, and when each connection last carried anything. |
| **Data transformation** | Tidy a value before this step uses it: see [Tidying a value](#tidying-a-value-before-a-step-uses-it). |
Data select also holds **System Variables** (`$now`, `$today`, the workflow creator's email) and **Team Variables and Secrets**.
### Open the panel
Click the data icon at the right of the field you are filling in. The panel opens on **Data select**.
### Pick the value
Expand the tree and click the value you want, for example `Step 1 (Webhook) > email`.
### Check the badge
The value appears in the field as a coloured badge. That badge is the sign it is mapped to live data rather than typed as text.
### Writing a reference by hand
**Steps are referenced by their number**, the one shown beside them on the canvas. A reference is that number, then the path into what the step produced, wrapped in double braces: `{{ 1.email }}`.
There is no name-based form. `{{ trigger.email }}` and `{{ webhook.email }}` do not work.
To reference everything a step produced rather than one field, use just the number, `{{ 1 }}`, or `{{ 1.$full_result }}`.
The path after the number depends on the step. Pick from the data selector rather than typing from memory: a reference that finds nothing fails the step rather than sending an empty value onward.
You can mix plain text with references. In an email subject field, for example:
`New lead received from: {{ 1.name }}`
Alongside step numbers, a few built-in references are always available:
| Reference | Meaning |
| :----------------------------------------------- | :------------------------------------------- |
| `{{ item }}` / `{{ item.field }}` | The current item in "Run for each item" mode |
| `{{ item.$index }}` / `{{ item.$total }}` | Position in, and size of, the current batch |
| `{{ $now }}` / `{{ $today }}` | Current UTC datetime / date |
| `{{ $var.KEY }}` / `{{ $secret.KEY }}` | Team variable / team secret |
| `{{ $file. }}` | Team file |
| `{{ $webhook.1.url }}` | Deployed URL of the webhook at step 1 |
| `{{ $workflow_url }}` / `{{ $workflow_footer }}` | Workflow canvas URL / markdown backlink |
> If you are not sure what a step produces, run the workflow once before mapping
> anything downstream. Data select then shows the values from that run instead
> of a list of field names: an actual email subject, an actual row.
## Tidying a value before a step uses it
The **Data transformation** tab lists every value the step reads from earlier steps, and lets you clean each one up on the way in: trim stray spaces, change capitalisation, format a number for reading, pull the domain out of an email address, reformat a date, or fall back on something else when a field arrives empty.
A value that arrives as a list has its own operations: take the first or last item, count the items, or join them into one piece of text. Take one item and the ordinary operations open up on it. The menu offers only the operations that fit the value it sees, so a number is offered rounding and a date is offered date arithmetic.
**Format for reading** adds thousands separators and fixes the decimal places. Its settings are **Decimal places** (2 by default) and a **Style** with three punctuation choices: `1,234.56`, `1 234,56` and `1.234,56`.
It happens where the value is used. Nothing is added to the canvas, and the step before it is unchanged, so tidying a value for one step does not affect any other step reading the same field.
**It only lists values from earlier steps.** A system variable such as `{{ $now }}` is generated fresh on every run, so there is nothing to tidy and it does not appear here.
**If a value shows as empty**, the step it comes from has usually not run yet. Run that step once and its data is available to transform.
> For the complete catalog of all math calculations, date snapping, timezone
> conversions, list operations, and text security tools available inside fields,
> see the full [Data Transformation](/build/core-concepts/data-transformation)
> guide.
## Variables
Variables let you store and reshape data inside a workflow. Use them to hold an in-between value, do a calculation, or assemble a piece of text before the next step needs it.
A variable lasts for one run and no longer. The next run starts without it.
## Inspecting data
Glow provides several ways to inspect data as it moves through a workflow:
- [Executions Tab](/build/core-concepts/executions): Select any step on the canvas, open the app drawer, and switch to the **Executions** tab to see input and output data.
- [Data Preview](#referencing-data-the-workflow-data-panel): Data select shows the value each field currently holds, so you can confirm you are referencing the right one before you pick it.
- [Code editor & HTTP Request](/build/action-steps/code-execution): Add a code or logging step mid-workflow to print intermediate data to the execution log for deeper inspection.
### Debugging with Executions
When debugging a failing workflow, the best approach is to work backwards.
### Start at the failure
Identify the step that failed or produced the wrong result.
### Inspect the input
Open the step above it and run it in **Test & Debug**: its output is what the failing step received.
### Trace upstream
If the input is wrong, move to the previous step and inspect its output. Keep going upstream until you find the step producing the unexpected value.
## What's Next?
- 👉 **[Mapping or Transforming Data →](/build/core-concepts/mapping-or-transforming)**: choose between direct mapping, an in-field transformation, a list Step, AI and code.
- **[Data Transformation](/build/core-concepts/data-transformation)**: tidy text, calculate numbers and format dates without extra Steps.
- **[Kinds of Data](/build/core-concepts/data-types)**: learn how records, arrays and file objects travel across the canvas.
---
Source: https://docs.getglow.ai/build/core-concepts/workflow-visibility
# Workflow Visibility & Sharing
> Manage workflow privacy, share workflows publicly, and handle access requests in Glow.
A new workflow is visible to your whole team. Its author can narrow that to themselves or widen it to anyone holding the link.
## Visibility states
Open **Share** on the canvas and pick one of three levels under **Who has access**.
*Three levels, set per workflow. Team is where a new workflow starts.*
| Level | Who can open it |
| ----------- | --------------------------------------- |
| **Private** | Only you |
| **Team** | Everyone in the workspace (the default) |
| **Public** | Anyone with the link |
**Private is genuinely private.** It hides the workflow from your own teammates, not just from outsiders. Use it for something half-built you would rather nobody adopted yet.
**Public gives read-only access.** Anyone with the link sees the steps, how they connect, and the shape of the logic.
> **A visitor sees the shape, not the contents.** Step names, the app each one
> belongs to, how they connect, and any sticky notes you left. Not the fields
> inside a step, not connected accounts, not variables or secrets, not run
> history. The one thing worth reading before you send a link is your sticky
> notes and step names, since those travel with the workflow.
The same panel carries **Publish to marketplace**, which is a different thing. It offers the workflow as a [template](/getting-started/templates/sharing-and-templates) others can copy, rather than a link to view this one.
## The public viewer experience
When a workflow is set to Public, external users opening the link see the **Public Workflow Viewer**.
They get the shape of the workflow, not its contents. They can move around the canvas and zoom, and they see each step's name, icon and number, plus the lines between them. What they cannot do is open a step: nothing a step was configured with is sent to a visitor at all.
- **Nothing can be edited.** No adding steps, no deleting them, no altering settings.
- **Step configuration never leaves your workspace.** A visitor does not receive the fields inside a step, the values you mapped into them, or the account it signs in with.
- **Run history is not shown.** Visitors see the workflow, never what it has processed.
The button at the bottom of the view depends on who is looking. Someone without a Glow account sees **Sign up for free**. A shared workflow doubles as a way in for the person you sent it to. Someone already signed in to Glow sees **Request access** instead, which asks to join your workspace. Worth knowing before you post a link somewhere public.
## Asking for Access
**Request access** appears on a **Public** workflow, to someone who is signed in to Glow but is not in your workspace. It asks to join the workspace rather than to see that one workflow, and there is no message box to fill in. Your admins see who asked and which workflow they were looking at.
If an admin approves, the person joins your workspace as a Member. There is no view-only guest role, and roles do not vary by plan. Everyone in a workspace can open and edit the workflows in it. Approving a request is a decision about the whole workspace, not about one canvas. If you want somebody to see a workflow without joining, send them a Public link and leave it there.
A **Private** or **Team** workflow offers an outsider nothing to ask with. The link behaves as though the workflow does not exist, which is deliberate: someone who guesses a URL learns nothing about what you have built.
## What's Next?
- See how account security, workspace roles, workflow visibility and delegation fit together in [Permissions and Access](/manage/workspace-settings/permissions-and-access).
- Manage members and workspace roles in [Team Management](/manage/workspace-settings/team-management).
- Package a workflow for reuse instead of sharing a link in [Publishing and Forking](/getting-started/templates/sharing-and-templates).
---
Source: https://docs.getglow.ai/build/the-canvas/canvas-context-menu
# Canvas Context Menu
> Add steps, apps, tools, and sticky notes at your cursor with the right-click context menu.
Right-click anywhere on empty canvas to open the same groups the Dock holds, at your cursor. It is the quicker route once you know what you are adding.
*Right-click to open the same catalogue the dock holds, wherever your cursor is.*
## Menu sections
The menu opens on a rail of sections mirroring the dock, including **Subflows**, with a **Sticky Note** entry beneath them. The main ones:
**Global Search** The fastest way to find anything. Start typing straight
after right-clicking to search all available triggers, actions,
integrations, and tools at once.
**Apps & Integrations** Browse the full library of native third-party apps
(like Slack, Google Sheets, or Salesforce). Selecting an app drops the
corresponding action step onto the canvas where you right-clicked.
**Tools**, the built-in steps that are not tied to an outside app:
- Conditions and Switch, for sending a run down one path or another
- Repeater and Wait
- HTTP Request and Webhook
- Code editor
**AI** Drop reasoning into your workflow. This section holds **AI Prompt**
and **AI Agent**. The AI-powered reshaping step, **AI Data Transform**, sits
under **Data**.
**Sticky Note** Drop a sticky note onto the canvas. Sticky notes do not
affect workflow execution. Use them for documentation, to-do lists, or
architecture explanations for your teammates.
## Step context menus
You can also **right-click any existing step** on your canvas to open a step-specific context menu.
This menu offers:
- **Edit:** Open the step's configuration, the same as clicking it.
- **Set run point:** Start **Run** from this step instead of the trigger. See [Testing & Debugging](/build/the-canvas/testing-and-debugging).
- **Duplicate:** Create an exact copy of the step, configuration included.
- **Run for each item:** Switch the step into loop mode, so it runs once per item in a list you point it at. See [Run for each item](/build/action-steps/loops).
- **Disable / Enable:** Leave the step in place but skip it on every run. Useful for narrowing down which step is causing a problem. The entry reads **Enable** once the step is off. It is not offered on the current run point, on loop steps, or on an empty placeholder. If the step you want to skip is the one **Run** starts from, move the run point first.
- **Unlink:** Remove the step's connections while leaving the step itself.
- **Delete:** Remove the step and its connections.
## What's Next?
- Find the rest of the canvas controls in the [Canvas Utilities Menu](/build/the-canvas/canvas-utilities).
- Skip the menu entirely with the shortcuts listed in [Keyboard Shortcuts](/reference/keyboard-shortcuts).
---
Source: https://docs.getglow.ai/build/the-canvas/canvas-tabs
# Canvas Tabs
> Navigate between multiple workflows using browser-like tabs inside the Glow canvas.
Workflows open in tabs along the top of the screen, the same way pages do in a browser. You can have several open at once and move between them without going back to the dashboard.
## Managing tabs
Right-click on any tab (or use the dropdown arrow on the active tab) to open the tab management options:
*Right-click any tab to manage your workspace efficiently.*
- **Rename:** Change the workflow's name without opening the settings panel.
- **Duplicate:** Create a copy of the current workflow in a new tab. Useful for testing a risky change, or for turning a working workflow into a template.
- **Pin tab:** Lock important workflows to the left side of the bar so they are always accessible and take up less horizontal space.
- **Copy link:** Grab a direct URL to the workflow to share with a teammate.
## Bulk closing
After a long building session, bulk actions clear the tab bar in one go:
- **Close:** Closes the current tab.
- **Close others:** Keeps only the active workflow open and closes everything else.
- **Close tabs to the right:** A quick way to clear out a batch of newly opened workflows.
- **Close all:** Clears your workspace entirely.
- **Reopen closed tab:** Brings back the last workflow you closed. Useful straight after a **Close others** you did not mean.
The browser keeps its own tab shortcuts, so Glow's sit one modifier along:
| Action | Shortcut |
| -------------------- | -------------------------- |
| Next tab | `Cmd/Ctrl + Alt + →` |
| Previous tab | `Cmd/Ctrl + Alt + ←` |
| Close active tab | `Cmd/Ctrl + Alt + W` |
| Reopen closed tab | `Cmd/Ctrl + Alt + T` |
| New workflow tab | `Cmd/Ctrl + Alt + N` |
| Jump to tab 1–8 | `Cmd/Ctrl + Alt + 1` … `8` |
| Jump to the last tab | `Cmd/Ctrl + Alt + 9` |
> Opening a workflow in a tab puts you straight onto the live canvas. If a
> colleague is editing it, you will see their cursor moving as soon as the tab
> loads.
## What's Next?
- See what happens when several people share a canvas in [Real-Time Editing](/build/the-canvas/real-time-editing).
- Move between tabs without the mouse using [Keyboard Shortcuts](/reference/keyboard-shortcuts).
---
Source: https://docs.getglow.ai/build/the-canvas/canvas-utilities
# Canvas Utilities Menu
> Helper tools to keep you organized, test logic, and manage workspace layout.
One menu on the canvas holds the things that act on the whole workflow rather than on a single step: its settings and saved versions, the form other people run it through, the comments left on it, the run counters and the view controls.
Open it with the **More (⋮)** icon in the controls at the top right of the canvas, alongside undo, the execution log and **Share**.
## What the menu holds
Eight entries, in the order they appear:
| Entry | What it does |
| ------------------- | ------------------------------------------------------------------------------------------------------------------------------- |
| **Settings** | The whole workflow's settings: name, description, categories, and how it is published as a template. Timeouts are not set here. |
| **Form interface** | Turns the workflow into a form other people fill in and run. See [Form Templates](/getting-started/templates/form-templates). |
| **Version history** | Browse the versions you saved for this workflow and restore one. See [Versioning](/build/core-concepts/versioning). |
| **Comments** | The [comment threads](/build/the-canvas/comments) on this canvas, with filters for resolved, unread and your own. |
| **Reset counters** | Sets every step's run count back to zero. Shortcut `u` then `r`. |
| **Fit view** | Zooms so the whole workflow fits on screen at once. |
| **Cleanup canvas** | Arranges every step and connection into a tidy layout, for a canvas that has grown into crossing lines. |
| **Help & Support** | Opens the support chat over the canvas, so you can ask without leaving the workflow. |
**Reset counters clears the stored counts permanently**, rather than hiding them
for your session. Use it when the numbers have stopped meaning anything, not as
a display tidy-up. Your workflows, their run history and their results are
untouched.
## What's Next?
- Understand what the Version History panel is restoring in [Versioning](/build/core-concepts/versioning).
- Add steps without leaving the canvas via the [Canvas Context Menu](/build/the-canvas/canvas-context-menu).
---
Source: https://docs.getglow.ai/build/the-canvas/comments
# Comments
> Leave a threaded comment on a step, a point on the canvas, or a region of it, and resolve it when the work is done.
Comments are threaded notes pinned to the canvas. Use them to ask why a step is built the way it is, flag something to a colleague, or leave yourself a note that survives closing the tab.
## Leaving one
Press `C` and click where the comment belongs. What you click decides what it is pinned to:
| Pin it to | By | Use it for |
| ------------ | ---------------------------------------- | ---------------------------------------------------------- |
| **A step** | Clicking the step | A question about that step's configuration |
| **A point** | Clicking empty canvas | A note about the area around it |
| **A region** | Dragging a box across part of the canvas | A remark about a branch or a group of steps taken together |
A pinned comment stays with what it is pinned to, so a step you move takes its comments along.
## The comments list
Open **Comments** from the **More (⋮)** menu to see every thread on this canvas rather than hunting for pins. Four controls shape the list:
| Control | What it does |
| ----------------------- | ----------------------------------------------------- |
| **Show resolved** | Includes threads somebody has closed. Off by default. |
| **Unread first** | Puts threads with new replies at the top. |
| **Only mine** | Narrows to threads you started or replied to. |
| **Show pins on canvas** | Hides the pins without closing the list. |
`Shift+C` toggles the pins on their own, for a screenshot or a screen share where the canvas should read clean.
## Replying and resolving
Anyone in the workspace can reply to a thread. A thread is marked read for you once you have opened it, which is what **Unread first** sorts on.
**Resolve a thread when the work it asked for is done.** It leaves the default list and stays findable under **Show resolved**, so the reasoning is kept rather than deleted.
## Who can change what
| Action | Who |
| -------------------------- | -------------------------------------------- |
| Reply | Anyone in the workspace |
| Edit a message | Whoever wrote that message |
| Delete a message | Whoever wrote that message |
| Resolve or delete a thread | Whoever started it, or a workspace **Admin** |
Editing is per message, not per thread: you can always correct your own reply, and never somebody else's.
## Examples to copy
**Ask about a step without breaking the flow.** Press `C`, click the step, and write the question. The next person to open the canvas sees the pin on the step it is about, rather than a message somewhere else describing which step you meant.
**Review a branch.** Drag a region across the branch and comment once on the whole thing. A point comment beside it would not say which steps you meant.
**Clear a canvas for a demo.** `Shift+C` hides every pin. The threads are still there afterwards.
## What's Next?
- See what else several people on one canvas can do at once in [Real-Time Editing](/build/the-canvas/real-time-editing).
- Find the rest of the canvas-wide controls in the [Utilities Menu](/build/the-canvas/canvas-utilities).
---
Source: https://docs.getglow.ai/build/the-canvas/execution-log
# Execution Log
> See every step a workflow ran, in order, with the result each one produced: the fastest way to find where a run went wrong.
The Execution Log answers: **What happened in this workflow's run, Step by Step?** Open it on the canvas to see which Steps ran, what each one produced and where the run stopped.
Use [Activity](/manage/workspace-settings/activity) to monitor runs and alerts across the workspace. Use a Step's [Executions tab](/build/core-concepts/executions) after the log has shown you which Step needs closer inspection.
## Opening it
The Execution Log is the notebook icon in the toolbar above the canvas, to the right of undo, redo and the workflow-data controls. It opens over the canvas and closes with the **X** in its corner.
Before a workflow has run, it says so: _"This workflow hasn't run yet. Run it to see each step's activity here."_ Press **Run** and the log fills as the workflow goes.
## Reading a run
Runs are grouped newest first, each with a heading summarising it:
```
Latest run · 1 step · All steps succeeded 18:18:36
```
The heading gives you three things at a glance: which run it is, how many steps it covered, and how it ended. Click it to collapse or expand that run.
Older runs are labelled by how far back they are: **Previous run**, then **2 runs ago** and so on, with anything further back under **Earlier activity**. A run still going says **Running…** until it settles.
### Each step appears when it starts, and again when it finishes
Inside a run, entries are events rather than a list of steps:
| Status | Means |
| --------------- | --------------------------------------------------------- |
| **Running** | The step started. |
| **Completed** | It finished, and its result is shown beneath. |
| **Failed** | It did not finish. This is where a stopped run ends. |
| **Skipped** | The run went down another branch, so this step never ran. |
| **Issue found** | The step ran but something about it needs your attention. |
So a step that ran normally shows twice, once as **Running** and once as **Completed**. The two timestamps tell you how long it took. In the run above, the Code editor step started at 18:18:36 and completed at 18:18:42, so it took six seconds.
### The result sits under the step
A completed step shows what it produced, so you can check the shape of the data without leaving the log:
```
{"result":{"text":"…","success":true,"executableCode":"…","executionOutput":"Total with VAT: 121.00\n", …
```
Each entry carries the step's number and name, and clicking it opens that step on the canvas. That is the quickest way to get from "this is wrong" to fixing it.
## Finding one thing in a long run
The **Search** box at the top filters the log to matching events. Useful for a workflow with many steps, or for finding every time one step ran across several runs. When nothing matches, it tells you: _"No events match your search."_
Searching reaches into runs that are collapsed, so a match in an older run opens that run to show you.
## What to do with a failed run
Start at the bottom of the failed run. The last entry before it stopped is the step that failed, and its message says why.
From there:
- **The step failed on data it did not expect.** Open it from the log and check the result of the step before it: the shape may not be what the step assumed.
- **The step failed on an external service.** Turn on **Retry on fail** for it, under **Test & Debug**. Retries are off until you turn them on. See [Error Handling & Retries](/build/core-concepts/error-handling).
- **The message matches none of these.** Look it up in [Troubleshooting & Errors](/reference/troubleshooting), which covers the common failures grouped by symptom.
## How long the log keeps things
Run records are kept for **30 days** after the run finishes, and each step's results on its [Executions tab](/build/core-concepts/executions) follow the same clock. The log states the window itself, in a note under its header. Each run keeps the retention policy in effect when it started. A workflow whose older runs have aged out says so in place of the list, so an empty log does not mean the workflow never ran.
That is short on purpose, since the payloads passing through a workflow can contain customer data. It also means the log is for debugging rather than for record-keeping: if you need a lasting trail of what an automation did, write it somewhere durable as part of the workflow — a spreadsheet row, or a record in your own system.
## What's Next?
- 👉 **[Step-Level Executions →](/build/core-concepts/executions)**: inspect the affected Step's input, output and attempts.
- **[Activity](/manage/workspace-settings/activity)**: monitor runs and alerts across the workspace.
- **[Error Handling & Retries](/build/core-concepts/error-handling)**: configure retries and failure routes for future runs.
---
Source: https://docs.getglow.ai/build/the-canvas/mobile-view
# Mobile View
> Check runs, approve Human Review steps, and pause or start workflows from a phone browser.
Approving a step, checking a run and pausing a workflow all work from a phone. Building one does not — the canvas needs a desktop.
## Approving a step from your phone
This is the job a phone is actually for. Somebody's workflow is paused waiting on
a decision, and you are not at your desk.
### The email arrives
A [Human Review](/build/action-steps/user-approval) step emails you the subject
and message its author wrote, whatever context they attached, and one button per
decision — usually Approve and Reject.
### Tap your decision
Each button belongs to that one run. Where the author built a form, the button
opens the review page with the form on it and your answers are submitted with
the decision.
### The run continues
The workflow resumes down the branch you chose, immediately. The other buttons
stop working, so a second person tapping later cannot change the answer.
Sign in as a member of the workflow's workspace before you answer. The email takes you straight to the review, so you do not need to find the workflow first.
Need a response from somebody outside the workspace? A [Wait](/build/action-steps/delay) form gives them a public link and resumes the run when they submit it.
## What else works on a small screen
Open `app.getglow.ai` in a phone browser — there is no app to install — and the
layout switches to one built for it.
- **Your dashboard**, with the state of every workflow and its recent runs.
- **Pausing a workflow, or setting it live**, when something needs stopping now.
- **Reading a canvas**, which is enough to work out what a run did.
Building and editing a workflow is desktop work: the canvas needs the room.
## What's Next?
- Add the approval steps you will respond to from your phone with [Human Review](/build/action-steps/user-approval).
- Learn what the mobile dashboard is showing you in [Navigating the Dashboard](/getting-started/navigating-the-dashboard).
---
Source: https://docs.getglow.ai/build/the-canvas/real-time-editing
# Real-Time Editing
> How several people edit one Glow workflow at the same time, what happens to simultaneous edits, and who is allowed to edit.
Several people can have the same workflow open and edit it at the same time. Nothing locks, and nobody waits for someone else to finish before making a change.
This page covers what you see when a colleague is on the canvas with you. It also covers what happens when two edits land on the same step, and who is allowed to edit.
## Collaboration you can see
When two people open the same workflow, each sees the other's cursor move. You can watch what a colleague is clicking, dragging, or configuring as they do it.
The canvas works as a shared room. Build a branch together, look at an API response side by side, or walk a client through a process without screen-sharing.
- Avatars in the top-right show who is currently online.
- Cursors are color-coded and labeled with your teammates' names.
- Changes appear on everyone's screen as they are made.
## Editing the Same Workflow at Once
Two people editing different parts of a workflow never overwrite each other. That holds inside a single step, because every field carries its own change: you edit the message while a colleague edits the schedule of the same step, and both land. Only when you both type into the same field does one value stand, the later one, just as if one person had typed twice.
- **No waiting.** Configure a CRM step on the left of the canvas while a colleague adjusts a webhook trigger on the right.
- **No merge prompts.** Simultaneous edits to one step are combined for you. There is nothing to review and nothing to accept.
- **A dropped connection is not a lost afternoon.** Your edits are held on your own machine while you are offline. They are sent to the rest of the team when the connection returns.
### Why there is nothing to merge
Most automation tools hold a workflow as one document that one person saves at a time. Two people editing it means one of them saves over the other, or the tool asks somebody to pick a winner.
Glow does not store a workflow that way. Every change, whether moving a step, typing in a field, or drawing a connection, is recorded as an operation. Each operation carries enough information to be applied in any order and still reach the same result. Two edits arriving at once are not a conflict to resolve; they are two operations, and both apply.
That is what makes the rest of it possible:
- **Your browser holds the whole workflow.** Edits apply on your screen the moment you make them, then travel to everyone else. Nothing waits for a round trip to a server.
- **Offline is just a slow connection.** Work carries on while the network is gone, and rejoins when it returns. There is no "reconnecting, do not touch anything" state.
- **Everyone converges.** Whatever order edits arrive in, every person's canvas ends up identical. Not usually, not after a refresh — always.
> **Tip:** Before a large structural change, like reorganizing the layout of the
> entire canvas, leave a **Sticky Note** or mention it to your team. Nobody
> wants to be surprised when steps start moving around.
> **The Workflow Assistant edits alongside you, but it replaces rather than
> merges.** It joins the canvas as **Glow AI**, with its own avatar and cursor,
> and you can keep working while it builds. What differs is how its changes
> land: it rewrites what it was asked to change, so if it is asked to rewrite a
> sticky note you are typing into, its version replaces yours. Worth knowing
> before running it on a canvas someone else is working on.
## Editing a workflow that is Live
A Live workflow keeps running while you edit it, and edits apply as you make
them. A run that has already started finishes on the version it started with, so
you never get half of one design and half of another. The next run picks up what
is on the canvas by then.
That is convenient for a small fix and risky for a large one. Before restructuring
something that fires often, either switch the workflow to **Draft** while you work,
or [save a version](/build/core-concepts/versioning) first so there is a known-good
state to restore.
## Who is doing what
Each person on the canvas has a colour, shown on their cursor and on the step
they have open. A step somebody else is configuring carries their colour, which
is usually enough to keep two people out of the same field without saying a word.
What you will not see is a history of who changed which field. [Versions](/build/core-concepts/versioning)
record the state of the whole workflow at a moment you chose, and
[Activity](/manage/workspace-settings/activity) records workspace-level events
such as people joining and workflows being created.
## Start collaborating with one click
Individual workflows need no permission setup. Copy the URL of your workflow, paste it to a team member in Slack or Teams, and start building together.
## Permissions overview
Everyone in the workspace can open and edit any workflow they can see, whether they are an Admin, a Manager or a Member. Your role decides what you can do around the canvas rather than on it. Inviting people, changing someone's role, and editing workspace variables are Admin and Manager work. All three roles can view usage and pricing in [Billing & Usage](/manage/billing/overview); only Admins can view invoices and payments or manage billing.
Who holds which role is set in [Team Management](/manage/workspace-settings/team-management).
## What's Next?
- Leave a note for whoever opens the canvas next with [Comments](/build/the-canvas/comments).
- See how each collaborator's history stays independent in [Undo & Redo](/build/the-canvas/undo-redo).
- Work across several live workflows at once with [Canvas Tabs](/build/the-canvas/canvas-tabs).
---
Source: https://docs.getglow.ai/build/the-canvas/testing-and-debugging
# Testing & Debugging
> Learn how to test your workflows and troubleshoot issues.
You test a workflow by running it and inspecting the data each step produced. The tools for both live on the canvas.
## Running a Workflow
**A manual run starts from a run point.** Every workflow has one: Glow picks the first eligible step for you and marks it on the canvas, so **Run** always has somewhere to begin.
To move it, right-click the step you want and choose **Set run point**. Or open the arrow beside **Run** in the dock and pick from the **Manual run starting step** list.
Where you put it is a real choice:
- **On the trigger** to exercise the whole workflow end to end, using the trigger's test data.
- **On a step in the middle** while you are building, so you skip the steps before it. Handy when the earlier ones are slow, cost money, or send real messages.
Glow prefers a trigger for the automatic run point. Add a trigger later and the run point moves to it. A step you chose yourself keeps the job until it is deleted or disabled; then Glow picks again. A disabled step cannot be the run point. Enable it first, or pick another step.
The run uses whatever **Testing data** the run-point step holds. A run is only as realistic as that data. **Load latest execution** in the step's **Test & Debug** tab fills it from a real run.
### Running a single step
Hover a step and two controls appear on it:
- **Run:** on a trigger, this tries to fetch live data from the service it watches. On an action step it executes the step.
- **Run with test data:** uses the step's saved **Testing data** instead of going out to the network.
The distinction matters on triggers. A trigger that has not finished deploying cannot poll for live data yet. Glow tells you so and points you at **Run with test data**, which works immediately and is usually what you want while building anyway.
## On-Canvas Setup Checklist & AI Repair
When building or testing a new workflow draft, the **Setup Checklist** sits directly on the canvas to track your progress:
- Connecting required app accounts
- Providing valid test trigger payloads
- Running single-step tests
- Publishing the workflow
### AI Debug Automation ("Use AI to fix")
If an assistant-generated draft or imported workflow fails validation (such as missing a trigger, broken port links, or unbound variable chips), the checklist displays a **Use AI to fix** button.
Clicking it runs an automated diagnostic pass:
1. **Identifies structural flaws:** Scans for orphaned steps, missing inputs, and broken type chains.
2. **Repairs canvas geometry and connections:** Rewires broken links and aligns data sources automatically.
3. **Supplies reasonable defaults:** Configures missing test values so you can run an instant verification test.
## Inspecting data with Executions
When debugging a failing workflow, the best approach is to work backwards from the point of failure.
> After running a workflow, check the **Executions** tab in the app drawer to
> see exactly what data each step produced. This is the fastest way to debug
> unexpected results.
In the Executions tab, you can view the exact JSON payload each step produced. What a step _received_ is the output of the step above it — read it on that step's own Executions tab.
## Visual step statuses
While a workflow runs, each step changes colour to show where the run has got to and how each step finished. You can follow a run on the canvas without opening the execution log.
Hover a step after a run and its tooltip tells you how it ended:
| Tooltip | Colour | What it means |
| :------------------------ | :----- | :--------------------------------------------------------------------------------------------------------------------------------------------------------------------------------------------- |
| **Execution in progress** | Blue | The step is still running. You will see this longest on steps that wait on somebody else, such as an HTTP Request. |
| **Execution succeeded** | Green | The step finished and passed its output to the next one. |
| **Execution failed** | Red | The step gave up: a 500 from an API, bad credentials, or a workspace out of credits. Unless the step is [set to continue on failure](/build/core-concepts/error-handling), the run stops here. |
| **Execution issue found** | Amber | Something went wrong without sinking the step. Typically some items in a loop failed while the rest succeeded. |
| **Execution skipped** | Grey | The step did not run, usually because a **Condition** or **Switch** sent the run down a different branch. |
Running out of credits shows as **Execution failed**, the same as any other failure, so the tooltip alone will not tell you which one you are looking at. The note below covers what to check.
> **After a credit block, verify recovery with a new event.** Restore the
> allowance, confirm the workflow is **Live**, then send one controlled webhook
> request or inspect the next scheduled occurrence. Confirm that a new run
> appears before treating the workflow as recovered. Missed events are not
> replayed automatically.
### The numbers on a step
Alongside the status, a step carries small counters summarising its history. One shows how many times it has run. When retries are configured, a separate marker shows the retry count. They are a quick read of which step is doing the most work, or failing the most often, without opening anything.
Clear them with **Reset counters** from the [canvas utilities menu](/build/the-canvas/canvas-utilities) once the numbers have stopped meaning anything.
## Debugging code and HTTP steps
If you are using **Code editor** or **HTTP Request** steps, they carry their own debugging aids:
- Use `print()` in a [Code editor](/build/action-steps/code-execution) step to see intermediate values. The step runs Python, and whatever it printed comes back under `result.executionOutput`. Reference it as `{{ 4.result.executionOutput }}`, or read it in the step's **Executions** tab.
- Inspect raw HTTP response headers and status codes directly in the drawer.
## What's Next?
- Follow a whole run, step by step, in the [Execution Log](/build/the-canvas/execution-log).
- Dig into the input and output payloads of a single step in [Step-level Executions](/build/core-concepts/executions).
- Look up an error message you cannot place in [Troubleshooting & Errors](/reference/troubleshooting).
---
Source: https://docs.getglow.ai/build/the-canvas/the-dock
# The Dock & App drawer
> The two panels you spend the most time in: the Dock for adding steps, the App drawer for configuring them.
Two panels do most of the work on the canvas. The **Dock** along the bottom is where steps come from. The **App drawer** on the right is where you configure the one you have selected.
## The dock

*Run sits on the left as its own control; the five groups to its right are where steps come from.*
The Dock holds everything you can add to a workflow, in five groups:
| Group | What is in it |
| ------------ | --------------------------------------------------------------------------------------------------- |
| **Apps** | The third-party integration library: both triggers and actions live here. |
| **Tools** | Every built-in step, grouped by what it is for — see below. |
| **AI** | Language-model steps such as AI Prompt and AI Agent. |
| **Subflows** | Your other workflows, ready to call as a step. See [Subflow](/build/action-steps/trigger-workflow). |
| **Search** | Find any app, trigger, or tool by name. |
### How Tools is organised
The Tools tab groups the built-in steps by the job they do, with a line under each group name saying what belongs there:
| Group | What it holds |
| --------- | ------------------------------------------------------------------------------------------------------------------------------------------------------------------------------------------------------ |
| **Start** | What sets the workflow running: [Scheduler](/build/triggers/scheduler), [Click to start](/build/triggers/click-to-start), [Webhook](/build/triggers/webhook) and [Chat Trigger](/build/triggers/chat). |
| **Flow** | Splitting the path, repeating steps, waiting for a person: Conditions, Switch, Filter, Repeater, Wait, Human Review, Stop and Error, Do Nothing. |
| **Data** | Everything that works on what the workflow carries, under four headings of its own. |
Data is the one group with sub-headings:
| Under Data | What it holds |
| ------------- | -------------------------------------------------------------------------------------------------------------------------------------------------------------------- |
| **Change** | Reshaping a record: Summarize, Change fields, Date, Custom Variables, AI Data Transform. |
| **Lists** | Working on a list as a whole: Sort, Remove duplicates, Limit, Combine. |
| **Convert** | Turning one format into another: Parse JSON, HTML to text, Split Text, plus the [Formatting and Helper Functions](/build/action-steps/helper-functions) collections. |
| **Dev tools** | Talking to something outside Glow: HTTP Request, Code editor. |
A search box under the groups finds any tool by name, so you never have to memorise the grouping.
> **A trigger from a third-party app**, such as starting when a Google Doc is
> created, lives under **Apps**, together with that app's actions. The **Start**
> group in Tools holds the built-in triggers only.
**Run** sits beside these rather than inside them: the button itself, plus a dropdown listing every step that can be the run point. See [Testing & Debugging](/build/the-canvas/testing-and-debugging).
The [right-click context menu](/build/the-canvas/canvas-context-menu) offers the same groups wherever your cursor is. That is usually quicker once you know what you are looking for.
## The App drawer
Click a step and the App drawer opens on the right. Most steps have three tabs:
- **Setup:** the step's parameters. Which account it uses, which action it performs, and how its inputs are mapped.
- **Executions:** what this step produced on previous runs. See [Step-level Executions](/build/core-concepts/executions).
- **Test & Debug:** run this step on its own, edit its test data, and set its retry and error behaviour. See [Error Handling](/build/core-concepts/error-handling).
The **Chat Trigger** replaces **Test & Debug** with **Chat**, where you send test messages and inspect the conversation. Flow-control steps that do not have independent test settings show **Test & Debug** as unavailable.
> After a run, **Executions** is the fastest way to work out why the result was
> not what you expected. It shows exactly what the step returned; what it
> received is the step above's output, on that step's own Executions tab.
## Annotations
The canvas is not only for steps. Three things can be dropped anywhere on it, none of which affect execution. They come from the **Sticky Note & Media** menu in the controls at the top right, or from the shortcut key:
| Annotation | Shortcut | Use |
| ----------------- | :----------: | -------------------------------------------------------------------------------- |
| **Sticky note** | N | Comments, open questions, or an explanation of awkward logic. Supports Markdown. |
| **Image** | I | Screenshots, architecture diagrams, reference designs. |
| **YouTube video** | Y | A walkthrough or recording, so context stays with the workflow. |
These are what make a workflow readable to whoever opens it next, including you, months later. Everyone on the team sees them live, as covered in [Real-Time Editing](/build/the-canvas/real-time-editing).
## What's Next?
- Learn what a step is made of in [Steps and Connections](/build/core-concepts/steps-and-the-canvas).
- Reach the same menus faster with the [Context Menu](/build/the-canvas/canvas-context-menu).
---
Source: https://docs.getglow.ai/build/the-canvas/undo-redo
# Undo & Redo
> What Cmd+Z takes back on a Glow canvas, how the history is scoped per tab, and how undo behaves when a colleague is editing with you.
`Cmd+Z` / `Ctrl+Z` takes back your last change, and `Cmd+Shift+Z` / `Ctrl+Shift+Z` puts it back again. That covers a deleted step, a mistyped field, or a whole branch the Workflow Assistant generated.
This page covers what undo reaches, how the history is kept separate per tab, and what happens when a colleague is editing the same canvas.
## What undo covers
Undo reaches further than moving and deleting steps.
You can undo and redo:
- **Canvas Movements:** Dragging steps, drawing connection links, or reorganizing the layout.
- **Drawer Configurations:** Typing into input fields, mapping variables, or changing step settings inside the right-hand App drawer.
- **Agentic Changes:** If the Workflow Assistant generates a 10-step branch you don't like, a single `Cmd+Z` reverts it. That covers the steps and the connections between them.
> **Check the settings on a step the Assistant configured for you.** Where it
> worked out a value on its own (picking the channel, selecting the sheet), that
> value can survive the undo. The step around it is still reverted. Undo takes
> back the structure reliably. Treat the contents of a step it configured as
> worth a look rather than assuming they went with it.
### One action, one press
Some actions touch several parts of a workflow at once. **Clear all props** on a step, for example, changes both its plain fields and any field you mapped a variable into. These are reversed as a single action: one `Cmd+Z` brings all of it back, not half of it.
Part of such an action may no longer be reversible, because you closed the drawer it belonged to, say. The whole action is then skipped rather than half-applied. The press falls through to the most recent action that can still run.
*The Undo and Redo controls are always accessible in the top right of the canvas, tracking changes from you, your team, and the AI.*
## Tab-Specific Context
Each tab keeps its own undo history, so workflows open side by side in [Canvas Tabs](/build/the-canvas/canvas-tabs) never share one.
Say you make three changes in "Workflow A", switch to "Workflow B" to edit a webhook, then switch back. Hitting `Cmd+Z` undoes _only_ the changes you made in "Workflow A".
An undo never reaches into a workflow open in another tab. Each tab keeps its own history while you move between them.
## Multiplayer safety
Your undo history is your own. Press undo and you take back _your_ last action, never one belonging to a colleague editing the other side of the canvas.
So an undo in a shared workflow only ever reverses something you did. You do not have to check who has touched the canvas since your last change.
## What's Next?
- Roll back further than the undo stack reaches with [Versioning](/build/core-concepts/versioning).
- See how per-user history works alongside teammates in [Real-Time Editing](/build/the-canvas/real-time-editing).
---
Source: https://docs.getglow.ai/build/triggers/chat
# Chat Trigger
> Give a workflow a chat page people can talk to: a hosted link you share, or an endpoint your own widget posts to.
The **Chat Trigger** turns a workflow into something people can hold a conversation with. Every message they send starts a run, and whatever the last step produces comes back as the reply.
Two ways to use it. **Hosted Chat** gives you a ready-made chat page on a link you share. **Embedded Chat** gives you a URL to POST to from your own widget, so the conversation lives inside your product.
## Setting it up
### Add the trigger
Open **Tools** in the dock and choose **Chat Trigger** under **Start**.
### Pick a mode
**Hosted Chat** is the quickest way to something usable: Glow hosts the page, you share the link. Choose **Embedded Chat** when you already have a chat interface and only want the workflow behind it.
### Decide who may talk to it
**Authentication** defaults to **None**, which means anyone holding the link can chat. **Glow User Auth** admits only members of the team that owns the workflow.
### Build the reply
Add the steps that decide what to say. An [AI Prompt](/build/ai-features/ai-prompt) reading `{{ N.chatInput }}` is the usual starting point, where `N` is the Chat Trigger's step number.
### Try it before anyone else does
The step's **Chat** tab holds a conversation with your own workflow. Ask it something and watch the reply come back, using a sample message it provides if you would rather not type one.
### Go live
The chat URL appears once the workflow is **Live**. In Draft the panel shows a **Go live** button instead of a link.
## What it passes on
| Reference | What it holds |
| --------------------- | ---------------------------------------------------------- |
| `{{ N.chatInput }}` | The message the visitor just sent |
| `{{ N.sessionId }}` | Identifies one visitor's conversation across messages |
| `{{ N.metadata }}` | Anything your own widget sent alongside the message |
| `{{ N.historyText }}` | The recent conversation as text, ready to drop in a prompt |
`historyText` is the one that makes a chat feel like a conversation rather than a series of unrelated questions. Put it in an AI step's instructions and the model can see what was already said.
## Giving it a memory
**Conversation memory (messages)** sets how many earlier messages of the same `sessionId` are handed to the workflow as history. Set it to 0 and every message is answered on its own, with no idea what came before.
A longer memory makes for better answers and a longer prompt. Start small and raise it if the model keeps losing the thread.
## Keeping the cost predictable
Every message runs the workflow and spends your team's credits, so an open link is a running cost as well as an open door.
**Messages per visitor per minute** caps how fast one person can send. A per-visitor rate limit is always applied when Authentication is **None**, and this setting is how you tighten it. For an internal tool, **Glow User Auth** is the stronger control: only your team can start a run at all.
## Making the page your own
Four settings shape the hosted page:
| Setting | What it does |
| --------------------- | --------------------------------------------------------------------------------------------------------------------- |
| **Chat title** | The heading at the top of the page |
| **Welcome message** | Shown before the visitor types. Display-only: it never reaches the workflow |
| **Input placeholder** | The grey text in the message box |
| **Response mode** | **When Last Step Finishes** holds the request open until the workflow completes, then returns the final step's output |
## Running Workflows from Slack
Beyond hosted chat links, team members can interact with workflows directly inside Slack channels:
1. **Natural Language Triggering:** Mention the Glow Slack Bot or Workflow Assistant with instructions (e.g. `@Glow summarize the latest Q3 pipeline leads`).
2. **Intent Matching:** The assistant matches the request to live published workflows in your workspace.
3. **Parameter Injection:** Key arguments mentioned in the message or thread (e.g., deal names, dates, or assignee emails) are parsed and mapped to the initial trigger fields.
4. **Execution & Reply:** The workflow runs in the background and posts the formatted output back into the Slack thread.
## Examples to copy
### A support bot over your own documentation
Chat Trigger → AI Prompt. In the instructions:
```text
Answer the question using our product documentation.
Conversation so far:
{{ 1.historyText }}
Question: {{ 1.chatInput }}
```
Set **Conversation memory** to 10 so follow-up questions like "and what about the Pro plan?" still make sense.
### An internal assistant, restricted to your team
Set **Authentication** to **Glow User Auth** and share the link internally. Only members of the workflow's team can open it, and no rate limit is needed for an audience you trust.
### A chat window inside your own product
Set **Mode** to **Embedded Chat** and POST each message as JSON to the URL from your widget. Put the message itself in a field (a key in the JSON body) called `chatInput`: it is the only field the endpoint requires. Send the same `sessionId` with every message from one visitor so their conversation continues; leave it out and each message starts fresh. Add a `metadata` object for your own fields, such as a customer id or the page they are on, and read them in the workflow as `{{ 1.metadata }}`.
## What's Next?
- [AI Prompt](/build/ai-features/ai-prompt): the step that usually writes the reply.
- [Webhook Triggers](/build/triggers/webhook): for starting a workflow from a system rather than a person.
- [Variable Syntax](/reference/variable-syntax): the full reference for `{{ }}`.
---
Source: https://docs.getglow.ai/build/triggers/click-to-start
# Click to Start
> Run a workflow by pressing its trigger on the canvas, using the testing data you saved on it.
**Click to start** runs the workflow when you press it on the canvas. There is no schedule, no incoming request and nothing to connect: the run begins because you asked for it.
Reach for it while you are building something, or for a job somebody runs now and then rather than on a timetable: a monthly export, a one-off tidy-up, a report somebody asks for.
## What the run receives
The workflow starts with the **testing data** saved on this step. That is the whole input, so whatever the rest of the workflow reads from step 1 comes from there.
Set it once and every press uses it, which is what makes this trigger useful for building. The input is the same each time, so a change in the result came from your edit rather than from the data.
## Setting it up
### Add the trigger
Open **Tools** in the dock and choose **Click to start**.
### Give it testing data
Open the step and fill in **Testing data** with the shape the workflow expects, for example:
```json
{ "email": "someone@example.com", "plan": "pro" }
```
### Build the rest of the workflow
Reference those fields by the trigger's step number, so `{{ 1.email }}` and `{{ 1.plan }}`.
### Press it
Click the trigger on the canvas. The run starts and the Execution log fills in as it goes.
## When to use something else
- **On a timetable:** use the [Scheduler](/build/triggers/scheduler).
- **When another system has something to tell you:** use a [Webhook](/build/triggers/webhook).
- **When somebody outside the workspace needs to start it:** use the [Chat Trigger](/build/triggers/chat), or have another workflow call this one with a [Subflow](/build/action-steps/trigger-workflow) step.
The difference that matters: Click to start needs somebody with access to the canvas. The others do not.
## What's Next?
- Put it on a timetable with the [Scheduler Trigger](/build/triggers/scheduler).
- Read what a run records in [Executions](/build/core-concepts/executions).
---
Source: https://docs.getglow.ai/build/triggers/scheduler
# Scheduler Trigger
> The Scheduler trigger starts a workflow on a repeating schedule you can type in plain words, such as Every Monday at 9:00 AM.
The Scheduler trigger starts a workflow on a repeating schedule. It is what you use for daily reports, hourly data syncs, and weekly cleanups.
You type the schedule the way you would say it: "Every Monday at 9:00 AM". It handles recurrences a rigid interval picker cannot express, such as "the last Friday of each month", and shows you the next few run times, so you can confirm it read you correctly.
**Schedule mode** offers a second way in: switch it from **AI Assistant**, the plain-language description, to **Manual Cron** and write a **cron or RRULE expression** by hand. It takes a 5-field cron like `0 9 * * 1-5`, a 6-field cron with leading seconds, or a raw RRULE. Reach for it when you already have the expression, or when the wording keeps being read as something else.
Both modes drive the same trigger, and it goes down to a **10 second** interval. Each firing spends a credit, as does every step the run then takes, so the interval you pick is what shapes the cost.
## How it works
You describe a schedule, for example "every day at 9:00 AM" or "every 15 minutes". Glow works out the recurrence and starts a new run of the workflow each time it comes round.
The trigger itself carries no data. It only says the schedule came round. When a later step needs a timestamp, use `{{ $now }}` for the full date and time or `{{ $today }}` for the date. Both resolve at the moment that step runs, not when the run started.
## Setting up a Scheduler trigger
1. Open your workflow in the editor.
2. Open **Tools** in the dock; Scheduler sits under **Start**.
3. Drag the **Scheduler** trigger onto the canvas, or click it to add it.
4. In the configuration panel, type the schedule into **Schedule description** in plain words. "Every weekday at 8:00 AM", "every 15 minutes", "the first of every month at midnight".
5. Open **Optional Props** and set **Timezone**, so the time means what you expect. Left empty, the schedule runs in UTC.
*The Scheduler accepts a plain-language schedule such as Every Monday at 9:00 AM. Use Examples for accepted phrasings, and add Timezone under Optional Props to pin the schedule to a region.*
## What you can type
The field takes plain language and works out the recurrence from it. Sentences like these all work:
- `Every day at 9:00 AM`
- `Every hour on the hour`
- `Every 15 minutes`
- `Every weekday at 6:00 PM`
- `The first of every month at midnight`
- `The last Friday of every month at noon`
Write the time as you would say it out loud, name the days you mean, and be explicit about AM or PM. The **Examples** button beside the field shows more accepted phrasings.
The panel shows the next few run times once it has read your sentence. Check them before you go live: if they are not what you meant, reword the sentence rather than hunting for a syntax.
## Time zones
**Leave Timezone empty and the schedule runs in UTC.** That is rarely what you want: "9:00 AM" then means 9:00 AM UTC, not 9:00 AM where you are.
Open **Optional Props** on the trigger and set **Timezone** to your region, such as `Europe/Warsaw` or `America/New_York`. Do it when you create the trigger, rather than after someone asks why the report landed at 4 AM.
> **Tip:** If your team spans multiple time zones, document which time zone each
> scheduled workflow uses so everyone knows when to expect the output.
## Practical examples
### Daily report generation
Set a Scheduler trigger to run every weekday at 8:00 AM. The workflow reads your database or analytics tool and compiles a summary. It then sends that to a Slack channel or an email list before the team's morning standup.
### Hourly data sync
Set a Scheduler trigger to run every hour. The workflow pulls new records out of one system, such as a CRM, and writes them into another, such as a data warehouse. That keeps both in sync throughout the business day.
### Weekly cleanup
Set a Scheduler trigger to run every Sunday at 2:00 AM. The workflow scans for stale records, archives completed items, and sends a summary of what was cleaned up to the operations team on Monday morning.
## Common pitfalls
### Overlapping runs
If a workflow takes longer to run than the gap between scheduled runs, the next run starts anyway. The previous one does not have to finish first. On short intervals such as every minute, keep the workflow fast. Or add a check early on that skips a run when one is already in progress.
### Confirming a Run Actually Happened
A scheduled run fires at its time or not at all. There is no catch-up replay for an occurrence that did not start. Where a skipped day matters, have the workflow write a line to a sheet or a Slack channel on each run. A missed day then shows up as a missing line. The run history on the workflow shows the same thing.
### Choosing the interval
The Scheduler goes down to **10 seconds**, which covers everything from a near-live sync to a monthly report. Since a credit is spent per step that runs, the interval is the main thing that decides what a schedule costs you: an hourly check does the same job as a per-minute one for a fraction of the allowance, whenever the data does not actually change that often.
Pick the longest interval that still meets the need. Confirm the downstream systems and any API rate limits can handle the load, and check your plan's allowance in [System Limits & Quotas](/reference/system-limits).
### Daylight Saving Time
Glow follows the time zone configured on the trigger. During daylight saving transitions (clocks moving forward or backward):
- Schedules falling within the **1:00 AM – 3:00 AM** window may run twice or be skipped depending on the local shift.
- **Best Practice:** Schedule critical automations outside the 1:00 AM – 3:00 AM window, or set the trigger timezone to **UTC** to avoid clock shifts entirely.
## What's Next?
- Start a workflow from an external event instead of a clock with the [Webhook Trigger](/build/triggers/webhook).
- Check your plan's run allowance in [System Limits & Quotas](/reference/system-limits).
---
Source: https://docs.getglow.ai/build/triggers/webhook
# Webhook Trigger
> The Webhook trigger gives your workflow its own web address. When another system sends data there, the workflow starts with that data attached.
The Webhook trigger gives your workflow its own web address. When another system sends data to that address, the workflow starts, with the data attached to the run.
That is how you connect form builders, payment processors, source control and CRMs. Each event starts your workflow the moment it happens, instead of waiting for the next check.
A webhook delivery in four stages: a sender posts JSON to the trigger's URL, Glow answers immediately, the run starts, and the posted fields are addressed as {{ 1.field }} — with no wrapper.
## How it works
1. You add a Webhook trigger to your workflow.
2. Glow generates a **unique webhook URL** for that trigger.
3. You configure an external system to send HTTP POST requests to that URL.
4. Each time a request arrives, Glow starts a new run of the workflow with the request body available as step data.
### Adding a Webhook Trigger
1. Open your workflow in the editor.
2. Open **Tools** in the dock (Webhook sits under **Start**), or right-click the canvas.
3. Select the **Webhook** trigger to add it to your workflow.
### The Webhook URL
**The URL only exists once the workflow is Live.** In Draft the panel shows _"Switch workflow to Live mode to access your Webhook URL"_ and a **Go live** button. There is no address to copy until you press it. That is deliberate. A Draft workflow does not accept deliveries, so an endpoint would only mislead the system you gave it to.
Once Live, the panel shows the URL under **Webhook endpoint**. Copy it into the external system (Typeform, Stripe, GitHub) that should send events to Glow.
> **Tip:** The URL is unique to each trigger, and it survives unpublishing and republishing the workflow. You do not have to re-paste it every time you edit.
>
> Sometimes it needs to change, because it leaked or a partner should no longer be able to post to it. Use the **Generate a new URL** button beside it. The old address stops working immediately, so update the sender first. Deleting and re-adding the trigger also produces a new URL, but rotating in place is cleaner.
### Testing Your Webhook
You usually want sample data on the trigger before you build the steps that follow it. Otherwise you are mapping fields you cannot see.
**Without leaving Glow.** Open the trigger's **Test & Debug** tab, edit the **Testing data** to match the shape you expect, and click **Run step**. The **Executions** tab then shows the output, and downstream steps can reference it immediately. Nothing is sent over the network, so this works while the workflow is still in Draft.
**With a real request.** To confirm the endpoint itself accepts traffic, send one:
```bash
curl -X POST https://your-glow-webhook-url \
-H "Content-Type: application/json" \
-d '{"name": "Test User", "email": "test@example.com"}'
```
Either way, the **Executions** tab is where you confirm what arrived.
## Reading what arrived
Whatever the other system sends (its payload) is read and handed to every step that follows. You reference its fields the same way you reference any other step's output.
For example, if your webhook receives:
```json
{
"customer_name": "Acme Corp",
"amount": 4500,
"currency": "USD"
}
```
The posted JSON is the trigger's stored output, with nothing wrapped around it. Reference each field directly by the trigger's step number:
```
{{ 1.customer_name }}
{{ 1.amount }}
{{ 1.currency }}
```
There is no `body` level to go through: `{{ 1.body.customer_name }}` resolves only if the sender actually posted a `body` key.
**Use the data selector rather than typing the path.** Click the data icon beside any field and pick the value from the trigger's output. Glow inserts the correct reference. The exact shape depends on what the sender posted, and one look at the **Executions** tab after a real delivery settles it for good.
## Locking the URL to one sender
Webhook URLs are unguessable, but they are not authenticated by default. If your use case requires verifying that requests genuinely come from a trusted source, Glow supports **Shared Secret / Signature verification** on the trigger itself.
The trigger has two fields for this, both optional:
| Field | What it does |
| -------------------- | ----------------------------------------------------------------------------------------------------------------------------------------------------------------------------------------------------------------------------------------------------------------------------------------------------------------------------------------------------------- |
| **Shared secret** | Leave empty and any request to the URL is accepted. Set it and every delivery must be signed with it. |
| **Signature header** | The header that carries the signature: a coded fingerprint (an HMAC-SHA256 hash) of the request body, in hex or base64. The provider usually names it for you, for example `X-Hub-Signature-256`. Leave it empty and Glow looks for `x-doflo-signature`, which is almost never what a third-party provider sends: if you set a secret, name the header too. |
An unsigned or wrongly signed request is rejected before anything runs, so your workflow never sees it and no run is created. Use this with any provider that signs its payloads.
## Examples to copy
### A form submission
Point Typeform, Webflow or your own form at the trigger's URL. A form with a
name and an email field arrives as `{{ 1.name }}` and `{{ 1.email }}` — the
field names are whatever the form sends, at the top level, with no wrapper.
**What to do:** add the form's URL as its webhook destination, submit the form
once, then open the trigger's **Executions** tab and read the real field names
before you build against them. Insert them from the Workflow data panel rather
than typing them.
### A payment
Set the trigger's URL as your payment provider's webhook endpoint. A provider
usually nests its data, so the amount is more likely `{{ 1.data.object.amount }}`
than `{{ 1.amount }}`.
**What to do:** follow the trigger with a [Conditions](/build/action-steps/conditions)
step on the event type — providers send many kinds down one URL, and you rarely
want all of them. Send one real payment in test mode first, so the Executions
tab shows you the shape rather than the provider's documentation.
### A repository event
Point a repository's webhook at the URL and choose which events it sends. A
pull request arrives with its own fields, so the title is `{{ 1.pull_request.title }}`.
**What to do:** set the **Shared secret** and **Signature header** together —
GitHub signs with `X-Hub-Signature-256`, and without the header named, Glow
looks for one GitHub never sends.
## What to expect when it runs
### What format to send
**Send JSON.** Glow reads other formats where it can, but the field names only
map reliably from JSON. If the sender lets you choose, choose JSON and set its
content type to `application/json`.
### How big a delivery can be
A single delivery can carry up to **1 MB**. Anything larger is turned away
before a run is created, and the sender sees an error saying so.
That is generous for an event notification and tight for a document. If the sender can be configured to post a link to the data instead of the data itself, do that and fetch it in a later step.
### What the sender gets back
**Glow accepts the delivery immediately, before your workflow runs.** The sender
sees a success in its log — code `202` — and never waits on your automation, so
a slow workflow cannot time out at their end.
That success only says the request arrived. **It says nothing about whether the
run worked**, which is on the **Executions** tab.
A request to an unknown or rotated URL gets the same `202 {"received": true}`, and no run is created. That is deliberate: it stops anyone probing the endpoint to discover which URLs are real. A current URL whose workflow is back in Draft is different. The sender gets an explicit error saying the workflow is not published. If deliveries stop appearing in **Executions**, check the sender's log: a `202` means a stale URL, and the not-published error means the workflow needs to go Live again.
### Duplicate deliveries
Some systems send the same delivery again if they do not hear back quickly
enough, and **Glow starts a run for every request it receives** — so the same
event can be processed twice.
Where that matters, put a [Conditions](/build/action-steps/conditions) step
early on, testing an id the sender includes with each event, and stop the run
if you have seen it before.
## What's Next?
- Turn the incoming payload into addressable fields with [Parse JSON](/build/action-steps/parse-json).
- Run on a recurring clock instead of an external event with the [Scheduler Trigger](/build/triggers/scheduler).
---
Source: https://docs.getglow.ai/build/which-step
# Choose the Right Step
> Start with the outcome you need, then choose the Step or workflow pattern that fits.
Start with the outcome you need. Most workflows combine four things: a trigger, data from earlier Steps, logic that routes or repeats the work, and an action in the destination app.
## Start with a workflow pattern
These five patterns cover much of what people build. Use one as the shape of your workflow, then open the linked guides for the exact settings.
- [Something arrives, put it somewhere](/build/which-step#something-arrives-put-it-somewhere): Receive a form, email or webhook, reshape its data and write it to another system.
- [Every morning, send a summary](/build/which-step#every-morning-send-a-summary): Collect recent data on a schedule, reduce it to what matters and send the result.
- [Do the same thing for a list](/build/which-step#do-the-same-thing-for-a-list): Apply the same action or group of actions to every item in a list.
- [Watch for something and raise the alarm](/build/which-step#watch-for-something-and-raise-the-alarm): Check a system, take the alert route when a condition matches and finish quietly when it does not.
- [Read something and decide](/build/which-step#read-something-and-decide): Ask AI for a structured answer, then route it with an exact rule.
### Something arrives, put it somewhere
[Webhook](/build/triggers/webhook) → Destination app
Use the arriving app's trigger when one is available, or a Webhook when another system sends the request directly. [Mapping or Transforming Data](/build/core-concepts/mapping-or-transforming) helps you prepare the incoming fields for the destination.
### Every morning, send a summary
[Scheduler](/build/triggers/scheduler) → Fetch the data → [Sort and Limit](/build/action-steps/sort) → [Summarize](/build/action-steps/summarize) → Send it
Use [AI Prompt](/build/ai-features/ai-prompt) instead of Summarize when the result should be prose rather than a count, total or average.
### Do the same thing for a list
Fetch the list → [Repeat the work](/build/action-steps/loops) → Write or send the result
Repeat one Step for each item when only one action changes. Use a Repeater when several Steps must run together for every item. [Loops & Iteration](/build/action-steps/loops) compares the two models.
### Watch for something and raise the alarm
[Scheduler](/build/triggers/scheduler) → Check the system → [Conditions](/build/action-steps/conditions) → Alert or Do Nothing
Use one Conditions route for the alert and another for [Do Nothing](/build/action-steps/no-operation). A check that finds no problem can then finish successfully without sending anything.
### Read something and decide
Trigger → [AI Prompt](/build/ai-features/ai-prompt) → [Switch](/build/action-steps/switch) → One route per answer
Ask the AI Step for a fixed category or structured value when a later Step must route its answer. Use [Switch](/build/action-steps/switch) to map each expected value to its route.
## Choose by goal
| I need to… | Start with | Read next |
| ------------------------------------------------- | -------------------------------------------------------------------------------------------------------------------------------------------------------------------------- | -------------------------------------------------------------------- |
| Run on a schedule | [Scheduler](/build/triggers/scheduler) | [Scheduler](/build/triggers/scheduler) |
| Receive data from another system | [Webhook](/build/triggers/webhook) | [Webhook](/build/triggers/webhook) |
| Test manually while building | [Click to start](/build/triggers/click-to-start) | [Operating Workflows](/build/core-concepts/operating-workflows) |
| Choose one route from exact rules | [Conditions or Switch](/build/action-steps/routing) | [Choosing a Flow Step](/build/action-steps/routing) |
| Split a list into matching and non-matching items | [Filter](/build/action-steps/filter-items) | [Choosing a Flow Step](/build/action-steps/routing) |
| Repeat work for every item | [Run for Each Item or Repeater](/build/action-steps/loops) | [Loops & Iteration](/build/action-steps/loops) |
| Rename, convert or reshape data | [Mapping or Transforming Data](/build/core-concepts/mapping-or-transforming) | [Data Transformation](/build/core-concepts/data-transformation) |
| Sort, limit, deduplicate or combine lists | [Sort](/build/action-steps/sort), [Limit](/build/action-steps/limit), [Remove Duplicates](/build/action-steps/remove-duplicates) or [Combine](/build/action-steps/combine) | Open the guide for the operation you need |
| Call a service without a dedicated app Step | [HTTP Request](/build/action-steps/http-request) | [Connecting an App](/manage/apps-and-integrations/connecting-an-app) |
| Classify, summarize or draft with AI | [Choosing an AI Step](/build/ai-features/choosing-a-step) | [Choosing an AI Step](/build/ai-features/choosing-a-step) |
| Wait for a person's decision | [Human Review](/build/action-steps/user-approval) | [Human Review](/build/action-steps/user-approval) |
| Pause or stop a run deliberately | [Wait](/build/action-steps/delay) or [Stop and Error](/build/action-steps/stop-and-error) | [Error Handling & Retries](/build/core-concepts/error-handling) |
## Four decisions worth comparing
### Conditions, Switch or Filter?
Use **Conditions** for a small number of rule-based routes, **Switch** when one value can lead to several named routes, and **Filter** when you need to divide the items inside a list. See [Choosing a Flow Step](/build/action-steps/routing) for the full comparison.
### Run for Each Item or Repeater?
Use **Run for Each Item** when one Step should run once per item. Use **Repeater** when a group of connected Steps must repeat together. See [Loops & Iteration](/build/action-steps/loops).
### Map or transform?
Map a value when the next Step can use it unchanged. Transform it when the value needs formatting, calculation or reshaping first. See [Mapping or Transforming Data](/build/core-concepts/mapping-or-transforming).
### AI Prompt, AI Data Transform or AI Agent?
Use **AI Prompt** for one generated answer, **AI Data Transform** when you want described data outputs, and **AI Agent** when the Step must choose among enabled tools while the workflow runs. Compare their inputs and trade-offs in [Choosing an AI Step](/build/ai-features/choosing-a-step).
## When no dedicated Step fits
Search **Apps** in the dock before building a custom integration. A dedicated app Step handles its supported authentication and operations. If the service exposes an API but has no suitable Step, use [HTTP Request](/build/action-steps/http-request). Use the [Code editor](/build/action-steps/code-execution) when the workflow needs custom Python logic rather than another network request.
## Still not sure?
Describe the outcome to the [Workflow Assistant](/build/ai-features/workflow-assistant). It can draft the Steps and connections on the canvas; review the structure, connect the required accounts and test the result before switching the workflow to Live.
You can also begin from a complete [cookbook recipe](/getting-started/cookbook/overview) or a [public template](/getting-started/templates/overview).
## What's Next?
- 👉 **[Build Your First Workflow →](/getting-started/tutorials/your-first-workflow)**
- Compare Conditions, Switch and Filter in [Choosing a Flow Step](/build/action-steps/routing).
- Learn how earlier output reaches later Steps in [Workflow Data](/build/core-concepts/workflow-data).
---
Source: https://docs.getglow.ai/changelog
# Changelog
> Glow ships several times a week. Explore notable features, improvements and fixes, month by month.
Glow ships several times a week. This page collects the notable features, improvements and fixes from each release, grouped by month and newest first.
24 releases in August, 85 release highlights, 5× a week on average.
## August 2026
Aug 31, 2026
Accurate unacknowledged alert counts
Dashboard notification badges now count only new, unacknowledged alerts and clear instantly when items are reviewed or assigned.
Activity actions fit smaller screens
Activity feed links have been replaced with compact destination and acknowledgment buttons, preserving space on smaller screens.
Product Improvements
Connecting or disconnecting app accounts updates the setup checklist status instantly without page reload.
Quick test runs that finish immediately are accurately recorded by the setup checklist.
Bug Fixes
Setup checklist synchronizes progress when returning from background tabs or reconnecting.
Failed assistant workflow drafts no longer trigger erroneous debug checklist items.
Aug 30, 2026
Repair generated drafts in one click
When generated drafts contain missing triggers or broken connections, Debug Automation offers one-click AI repair to fix the canvas.
Unified Dashboard Activity feed
Dashboard combines executions and Needs Attention alerts into a single chronological feed with streamlined filtering.
Canvas comments appear in Activity
Workflow canvas comments and thread replies surface in the workspace activity feed with direct jump links to pins.
Open Team Settings on its own page
Team Settings is now a bookmarkable full page for managing members, invitations, governance, and workspace ownership.
Product Improvements
Flattened sidebar navigation displays Deployment, Files, and Variables directly in the root list.
Partner dashboard links adapt dynamically based on the active workspace context.
Draft workflows undergo comprehensive integrity checks before completing assistant generation.
Bug Fixes
Workflow tab preview cards render accurate canvas snapshots with proper theme contrast.
Canvas editor connections maintain live WebSocket connections without intermittent drop warnings.
Assistant replies created during canvas navigation remain in chat history.
Steps with expired app credentials show Reconnect required instead of failing with generic errors.
Aug 29, 2026
Stop a Repeater when a condition is met
Repeater now supports Until a condition is met mode with configurable stop rules and an automatic 50-pass safety cap.
Fourteen new data shaping operations
Extract single fields across lists, split text into lists, measure word counts, and sanitize strings for JSON payloads directly.
Time-zone aware date transformations
Snap dates to the start or end of time periods, extract specific parts, and specify custom time zones across all date utilities.
Consistent plain language data types
Rule builders and variable configurations now use unified terms like Text, Number, Yes/no, Record, and List everywhere.
Product Improvements
App connections display four cards per row on wide screens and collapse into compact action buttons.
Setup checklist minimization state persists across sessions and device reloads.
Data Transformation menu dynamically offers valid operations based on chained output types.
Bug Fixes
Adding images from team files places the image directly on the canvas without errors.
Workspace Archive restore and permanent delete actions function reliably.
Workflow duplication preserves AI Agent connected accounts and variable references.
Assistant requests that stall are cleanly timed out and reset the input field.
Step execution records populate dynamically when runs complete in the background.
Aug 28, 2026
Deploy workflows from one guided flow
Publish workflows to the Marketplace or client workspaces with AI-generated descriptions, category tags, and clean version tracking.
Run workflows directly from Slack
The Workflow Assistant recognizes incoming parameters in Slack threads, maps variables automatically, and triggers isolated test runs.
See runs and alerts side by side
Inspect run execution logs on the left alongside a dedicated Needs Attention feed on the right with teammate issue assignment.
Build and preview forms in one place
Build public forms from the editor menu with multi-step field selection, real-time live preview, and instant publishing.
Product Improvements
Automations page features an updated natural language prompt box with starter templates.
New workspaces automatically initialize MSP or Consultant dashboards when selected during onboarding.
Deployment tab lists all team templates with interface indicators and destination badges.
Bug Fixes
Slack instant trigger correctly loads and displays accessible channel lists.
Copied AI Prompt steps accept new text immediately without locking the input.
Workflows that fail to open display clear error guidance and retry options.
Slack-initiated runs correctly execute trigger and variable initializations.
Aug 27, 2026
Math and number formatting without code
Add, subtract, multiply, or divide values straight in Data Transformation. Format currency, percentages, and phone numbers in one click.
Build Filter rules visually
Filter automatically detects input lists and adopts the visual rule builder, matching the experience of Conditions and Switch.
Live canvas previews on tab hover
Hover over any background workflow tab to view a visual preview of its canvas and switch between workflows faster.
Custom Variables preserve native types
Numbers, booleans, lists, and records entered in Custom Variables retain their native data types when passed to downstream steps.
Product Improvements
Refreshed sidebar navigation with rounded icons and clear active state indicators.
Updated Glow wordmark across navigation bars with dynamic theme adapting colors.
The setup checklist moved onto the workflow canvas, where progress stays in view.
Connections view displays four app cards across wide screens for faster navigation.
Bug Fixes
Test runs immediately apply values modified right before pressing Run.
Cursor stays precisely where clicked inside instruction fields containing variable chips.
Conditions step shows a single remove button when only one rule is present.
The admin console now ends below the last client card without extra empty space.
Aug 24, 2026
Pick fields from dropdowns in list steps
Summarize, Filter, Sort, and Combine now list item fields in a dropdown. Type to search or select nested properties in one click.
Automatic type detection for Sort
Sort defaults to Automatic, ordering numbers as numbers and dates as dates. Manual type overrides remain untouched.
Run history now lasts 30 days
Full run history and step payloads are now retained for 30 days instead of two, giving you time to inspect weekly workflows.
Quick list reads and number formatting
Extract first, last, or total items without loops, and format numbers for display directly inside the Data Transformation panel.
Product Improvements
Open workflows appear as pill tabs with a searchable overflow menu.
The first added step is automatically marked as the run starting point.
List steps return items under a standardized results field with resultCount.
Manual list inputs now support full-width validation with instant syntax feedback.
Bug Fixes
Conditions step reliably preserves the Else branch after saving and reloading.
Canvas connections draw as smooth curves and persist cleanly after deletion.
Combine step now writes exactly one execution record per run.
Limit step field stays blank when cleared instead of resetting to 10.
Finished runs update their status immediately rather than staying on Running.
Aug 23, 2026
Combine two lists into one
Join two branches by appending their lists or matching a shared field.
Choose how unmatched records and duplicate fields are handled.
Three new ways to tidy a list
Sort with up to ten rules, keep only the items you need with Limit, or
remove repeated values with Remove duplicates.
Watch a loop as it runs
A step running once per item now counts up on the canvas, so a long
fan-out shows visible progress.
Sort works out the type itself
Automatic detects numbers and dates. If values conflict,
the run identifies the two items so you can choose a type.
Find the step you need by what you want to do
A new page starts from the job rather than the step name, with the five
shapes most automations turn out to be. See{" "}
I Want To….
Product Improvements
Sort shows the type it worked out from your values before you run it, so
Automatic is not a guess you have to take on trust.
Workflow tabs load what they need when you open them, so a canvas with
several tabs opens faster.
Bug Fixes
The Else branch of a{" "}
Condition keeps its own
behaviour when you connect a step to it, instead of turning into an
ordinary rule.
Sort's Automatic preview now shows the same type the run will
actually sort by.
Combine guides you through
picking the branch and the field, rather than leaving both blank.
The Execution log keeps
live runs authoritative while they finish, so a run no longer appears
to change state twice.
Aug 22, 2026
Numbers formatted for reading
Format for reading adds thousands separators, your
choice of decimal punctuation and the number of decimal places you set.
Summarize whole items
Summarize can now work on whole items, not only record fields. Sum a list
of amounts or join a list of names.
Product Improvements
A new Sort rule starts on
Automatic rather than asking you to pick a type first.
Combine guides you through choosing
the branch and the field instead of leaving both blank.
The Workflow Assistant in
Slack keeps its place in a conversation across a deployment.
Bug Fixes
A step's settings stay yours while a colleague edits the same
workflow, rather than briefly showing theirs.
The shape you define for an AI answer survives two people saving at
once.
A step opened just as somebody else deletes it now says so instead
of showing an empty panel.
The Execution log keeps
a run's final state through a reconnection.
Aug 21, 2026
Read a list where you use it
Transform lists where you use them: take the first or last item, count
items, or join them into text. There are now 27 operations.
Design the shape of an AI answer
Turn on Response shape to define named, typed fields.
Later steps can select those fields directly.
Pick a list, or paste one
List steps show available lists and item counts. Choose one, enter a
reference, or paste a JSON list such as [1,2,3].
See how long history is kept
The Execution Log names your workspace's retention at the top, so how
long runs stay is never a guess. See{" "}
Execution Log.
Date operations offered only on dates
Add time and Format the date now appear only when the value really is a
date, so an email address is never offered date arithmetic.
Product Improvements
Every step that works on a list asks which one with the same label
and the same control.
Where only one list is available it is chosen for you; where there
are several you pick by what each holds, such as "Orders from step
3".
The list picker offers only lists, so you cannot pick a single record
by mistake and get one pass where you wanted one per item.
AI Prompt opens with a
worked example and points you to the data picker.
Once an AI Prompt has run, you can accept the shape it came back with
in a single click.
Paste an example answer into the shape editor and the step offers to
build the shape from it.
Response shape sits with your instructions instead
of among the optional settings, and collapsing the section keeps what
you entered.
A variable you have defined but not yet run reads as waiting for a
value, rather than showing a question mark.
Answering the assistant's clarifying question carries straight
through to a finished set of steps.
Every workflow the Workflow Assistant lists in Slack can be started
by name.
Bug Fixes
A field holding a list keeps it through a run that produces a single
value.
Signing in works with credentials your browser filled in for you.
Losing the network and getting it back no longer leaves the canvas
waiting: it reconnects on its own.
The Execution log keeps
its history when you refresh the page.
Aug 20, 2026
Loop over items in batches
Set Items per batch to process a list in groups instead
of one item at a time. This suits APIs that accept several records per
call.
A redesigned way in
Signing in and creating an account now use one clear screen each, with
Google and GitHub beside the email form.
Product Improvements
A loop can be the step your workflow starts from, so a{" "}
Repeater over your own list is
a workflow you can build and run on its own.
Repeater results stay available after When finished,
so you can set up the next step without rerunning the loop.
Repeater's two outputs have swapped places, with{" "}
When finished above Each time, so
the lines leaving a loop no longer cross.
Output labels sit beside their connection points, so Error, Else and
renamed branches are easier to follow.
Each entry in Custom Variables sits on one line under Name and Value
headings, with its own remove button.
After you create a team, Glow asks which role fits you best, so your
workspace suits the way you work.
The setup checklist stays grey until the workflow exists, so a new
page shows no progress you have not made.
Bug Fixes
A Human Review answer
is bound to the exact run that asked for it, so a reply can never
resume the wrong one.
Combine refuses inputs it
cannot join at the moment you connect them, rather than at run time.
Aug 19, 2026
Folders for your workflows
Group workflows into coloured, nested folders on the dashboard. Use
breadcrumbs to move back through the folder tree.
Product Improvements
The Tools tab is down to three groups — Start, Flow and Data — each
with a line saying what it holds.
HTTP Request and the{" "}
Code editor sit
under Tools, so a developer heading is no longer in the way.
Anything needing an account sits under Apps, alongside every other
service.
A built-in step shows only the fields the option you picked actually
uses, so a five-minute Wait never asks about form submissions.
Every field on a built-in step says what to put in it and what
happens next, in a sentence or two.
Signing in, signing up and entering a two-factor code have been
redrawn, and the code boxes accept a pasted code in one go.
The MCP tab puts your workspace ID beside the endpoint and token,
with a Copy button for each.
Dragging a connection shows the route the finished line will take
before you release it.
Bug Fixes
A Condition branch keeps
its identity when the canvas reloads, so the steps after it stay
attached to the branch you drew them on.
The Chat trigger's guidance and the Tools fields are written in plain
language rather than field names.
Aug 18, 2026
A new way to get around Glow
A collapsible sidebar gathers automations, the marketplace, your files
and variables in one place. See{" "}
Navigating the
Dashboard.
Describe an AI answer's shape in words
As well as JSON, you can now say what shape you want back. The answer
still arrives with the same fields in the same places every time.
The setup checklist keeps up with you
Drafting, connecting, testing and going live tick themselves off as you
do them. Shrink it to a bar when you are done, or close it.
Product Improvements
Signing in, or clicking the Glow logo, takes you to your dashboard.
The sidebar tucks itself away when you open an automation, and slides
back the moment you want it.
A team switcher moves you between teams, or to your subscription, in
one click.
A step that ran successfully no longer reads as Skipped.
Bug Fixes
New steps show their proper names immediately, including Wait and{" "}
Stop and Error.
You can point a per-item step at a list held in a custom variable
without running the workflow first.
Conditions: branch names
were hidden behind the add button, and removing the step attached to
Else left a stray line and an extra branch.
The dashboard sits inside the window instead of scrolling off into
empty space.
Aug 17, 2026
A guided start, built around what you want to automate
Start with automations matched to your role and tools. Pick one, then the
assistant helps you connect, test and go live.
Tell an AI step what shape to answer in
AI Prompt and{" "}
AI Agent stop and say why if the
answer does not match, rather than passing on something unreadable.
Running a step per item is one plain question
Once with everything, or once per item. Your answer sticks when you close
the panel, and the panel itself is much shorter.
One time zone, everywhere
Set it once in your account settings — detected at sign-up — and every{" "}
schedule uses it, with a
per-workflow override.
Colour your folders
Twelve colours for workflow and file folders, so you can pick the one you
want at a glance.
Product Improvements
The Code editor ships
with numpy and pandas ready to import, and says what else it carries.
Text conditions can ignore capitalisation, so "Active" matches
"active" without altering the value.
Add, rename or delete a step inside a{" "}
Subflow and the
parent reflects it straight away.
Undo and redo move the canvas to what changed and select it, so
nothing happens off-screen.
A step's error message sits over the bottom of the step instead of
stretching it out of shape.
The account picker inside a step lets you switch account or remove a
connection without leaving the step.
Bug Fixes
Text passed into a Subflow arrived letter by letter instead of as
text.
Every branch on a branching step has its own add button and heading.
The Executions list shows the newest result at the top as runs
finish, keeping your filter and anything expanded.
Chat Trigger replies come back as
readable text, and the whole conversation stays in view while
testing.
Aug 14, 2026
Tidy a value where you use it
Trim spaces, fix capitalisation, extract an email domain or reformat a
date in place. Preview the result before saving.
A dashboard for the workspace
See how automations are running, what needs attention and who is on your
team. Every number links to its detail.
Every alert and run in one place
Your team can filter Activity, acknowledge or resolve alerts, and open
any run to see what happened.
Bug Fixes
Workflows waiting to run pick themselves back up after an
infrastructure interruption, instead of sitting in the queue.
Aug 13, 2026
Any workflow can be called by another
Subflows have their
own dock section, and nothing needs turning on first.
A subflow's steps show in the run that called it
They appear indented in the parent's log, so a failure inside one no
longer means opening a second run.
Every branch is visible on the canvas
A step that splits a run shows all its paths the moment you place it,
each named. No more guessing where work goes.
Talk to a chat workflow while you build it
The Chat Trigger has a Chat tab for
testing your own workflow, with a sample message ready.
Product Improvements
The loop step is called Repeater — one name in the
dock and on the canvas.
Deleting a workflow moves it to Archive, and
restoring brings it back switched off.
Workflows can be grouped into folders.
Searching the catalogue shows each step once, under its own name.
With several triggers, the one you press is the one that starts the
run.
The Chat Trigger animates for as long as the agent is working.
Bug Fixes
Secrets are kept out of logs and error messages.
Rate limits cover more of the surface.
Canvas connections survive more kinds of interruption.
Nothing to change in your workflows.
Aug 12, 2026
A faster, lighter canvas
Live progress updates more efficiently, and dragging steps around a busy
canvas is smoother.
One event starts one run
A source sending the same event twice no longer turns into duplicate
messages or records. Deleting a trigger stops it firing immediately.
Cursors leave when people do
A teammate's cursor disappears as they leave instead of lingering, and
their selection highlight follows the step as it moves.
Product Improvements
Clicking Run on a large workflow responds faster.
Moving between workflows in one window stays fast right through the
day.
A run that hits a brief internal interruption picks up where it left
off and finishes.
A workflow that loops many times holds its pace to the end of the
run.
Browsing the integrations catalogue, the step library and your
Connections page is quicker.
Disconnecting a connected app is dependable, and you can try again if
it does not go through.
A step using many custom variables opens faster, because its preview
values arrive together.
A sticky note frees up straight away when a teammate's browser
reloads mid-edit.
A teammate's initials match wherever their avatar appears, so one
person no longer looks like two.
Starting a workflow from a template always lands you on the new
workflow.
Sign-in, sign-up and the template gallery arrive fully styled,
without a flicker as the page loads.
Bug Fixes
A run that failed behind the scenes could sit on the dashboard as
still running for up to an hour.
A Switch or{" "}
Filter that matched a
branch but could not start it now marks the run failed.
The AI Agent hands back its
full answer, not just the closing section.
HTTP Request has a
ceiling on the response it will pull down, with a clear error beyond
it.
A brief connection drop no longer clears the screen — the offline
message appears over your work.
Closed workflow tabs stay closed after a refresh.
Pinch-to-zoom works throughout the app on a phone.
Aug 11, 2026
Run a workflow from Slack
Mention the assistant in a channel, pick a workflow, and it runs and
reports progress in the thread.
Choose what a Subflow hands back
Tick which inner steps return their results, and each one becomes
available to the steps that follow. See{" "}
Subflow.
Every path is visible as soon as you add a step
Conditions shows IF and ELSE, Filter shows Kept and Discarded, Switch
shows its first case and fallback. Branch labels are editable.
Large workflows open in one go
Every step's status appears at once instead of trickling in, and
restoring, duplicating or applying a template is much quicker.
Product Improvements
Tidy up lays every step out at its true size, and leaves your sticky
notes where you put them.
Undo takes effect on the first press.
The workflows dashboard loads faster once a team has built up a lot
of workflows.
The assistant chat panel opens quickly however much history a
workspace holds.
Changing which task a step performs keeps that step's settings and
app connection.
An AI step that cannot reach a connected app fails clearly and
retries, instead of finishing as though the work were done.
Every step run appears in your history, including runs that finished
with nothing to pass on.
Connecting a new account updates your Apps list straight away,
without a reload.
Your monthly credit allowance stays correct through a plan change.
Bug Fixes
The model chosen for an agent step now applies to everything that
step does.
An AI step that ran out of time passed on a partial answer instead of
failing.
Switch and Filter could send items down the wrong branch when the
data they point at could not be filled in.
Scheduled workflows always pick up a run that is due, even across a
brief interruption.
Opening a step's settings at the same moment as a teammate could
double the text in a field.
A live Chat Trigger shows its
shareable link ready to copy.
Aug 10, 2026
A failed step now fails the run
AI Transform, Switch and Filter could fail while the run still finished
as successful. The run is now marked failed and retried.
An interrupted agent does not redo its work
An AI Agent step no longer
starts over after an interruption, so no duplicate emails or records.
Bug Fixes
Overnight maintenance could remove a saved app connection when an app
briefly reported no actions.
Opening a template preview while editing left your steps, zoom and
selection alone.
Aug 9, 2026
Subflows behave like any other step
Drop a workflow in from the dock, map data into it as usual, and see its
inner steps in the run log instead of one opaque entry.
The Chat trigger shows its live address
A dedicated Chat tab means testing and sharing your chatbot no longer
means hunting through a drawer. See{" "}
Chat Trigger.
A workflow opens ready to read
Opening one fits the whole thing on screen, so you see every step
immediately rather than zooming out to find them.
Product Improvements
The Loops step is called{" "}
Repeat everywhere it appears,
matching how people describe it.
On a phone or a narrow screen, opening a workflow fits it a little
more loosely so the steps stay readable.
Reopening a workflow tab you had closed works every time.
An empty folder shows you what to do next instead of an embedded
video, and the Workflows page loads quicker for it.
Bug Fixes
Steps could drift vertically out of position after a workflow was
left open. Positions are saved properly.
Workflow tabs showed "New Automation" instead of the workflow's name.
Reloading replayed the connection animations as though the workflow
had just run.
Some comment pins would not respond to a click, and the unread dot
floated away from its pin.
Turning a webhook address on or off now updates for everyone viewing
that workflow, not only the person who changed it.
The workflow assistant shows when it is thinking, and short
follow-ups like "make it daily" are no longer blocked by a minimum
length.
Aug 8, 2026
Build workflows from your own AI client
Glow speaks MCP, so a client that supports it can build on your canvas
directly. Describe what you want where you already work.
Code execution is deterministic everywhere
The Code editor's
runtime is now the default. The same code and input produce the same
result every time.
Finding your way around Trash
Trash has breadcrumbs, so you know where you are and can get back in one
click.
Product Improvements
Deleted workflows are easier to list, restore and remove for good.
Describing a workflow in words reports what it actually built, rather
than calling a sticky note a finished workflow.
The canvas moves to a new sticky note as the assistant creates it, so
you can watch it work.
Validation messages are clearer, and a short follow-up message is no
longer blocked by a minimum length.
The Click trigger picks up a set of refinements based on how people
use it.
Connection animations hold still when you refresh or open a workflow
that has already run.
Bug Fixes
Importing a workflow from JSON had stopped working entirely. It
works again.
Creating a folder failed with an error.
Canvas comments could not be typed into at all, among several other
fixes.
A workflow could add itself as a subflow, which could never have run.
The step picker offered two different HTTP steps, and cleared your
search instead of keeping it.
AI steps appear when you search the dock.
You can click through from the{" "}
Execution log to the
step involved.
Aug 7, 2026
Comment on the canvas
Pin a note to a step or anywhere on the board, reply in a thread, and see
which conversations you have not read.
Folders, and a Trash you can recover from
Organise workflows into folders instead of one long list. Deleted ones go
to Trash rather than vanishing.
Click to Start is back
Run a workflow by hand with a single click — for the ones you run on
demand rather than on a schedule. See{" "}
Click to Start.
Full screen for code and test results
The Code editor and the
test view expand, so a long script no longer means a narrow panel.
Product Improvements
Your email address is available in workflow data, so approvals and
notifications no longer need it typed in.
Steps missing a required field say which one on hover, instead of
only when the workflow runs.
Execution errors show what failed and why without digging.
A Generate button writes a template description from the workflow
itself.
Bug Fixes
A Wait set to "On webhook
call" continued after five seconds instead of suspending the run.
The step is called Wait everywhere; the catalogue still said Delay in
places.
Switch no longer silently
discards a run that matched no case.
Aug 5, 2026
Build a workflow once and reuse it
Subflows let one
workflow call another as a single step. Change it once and everything
using it follows.
Reshape a record without code
Change fields renames,
adds, removes and sets values — useful for tidying an API response.
Every branch has its own handle
You can see which path leads where and wire each outcome to a different
step, without opening a panel to check.
Told before credits stop a workflow
Banners warn when credits run low or a payment needs attention, rather
than a run failing without explanation.
Product Improvements
Dropping Repeat on the canvas
gives you the loop shape ready to fill in, rather than leaving you to
build it.
Repeat's settings panel reads as a set of controls instead of
documentation.
The Date step's output field
names keep their meaning across operations, so a reference you set up
survives a change to the step.
Deleting an account that administers a shared workspace completes
instead of rolling back.
Bug Fixes
Running out of credits mid-run could execute the same workflow
twice. Runs now stop once and resume after a top-up.
Opening a workspace that was not your most recent could show the
wrong role and permissions.
The Execution log could
come back empty after a refresh and claim nothing had run.
Restoring an earlier version could switch a trigger off without
saying so. Restore now leaves the trigger as it found it.
Starting from someone else's template no longer carries their
connection details into your copy.
Workflow cards show when the last run failed, with the details.
Aug 4, 2026
Working with dates without code
The new Date step formats, shifts
and compares dates, or pulls out the year, month or weekday.
Repeater hands back what the loop produced
Repeater runs steps once per item
and collects the results, so later steps can use them.
Turn a long list into an answer
Summarize groups a list by
any field, then counts, sums or averages it.
Code runs exactly as written
The Code editor now runs
your program directly. Values from earlier steps are data, never part of
the program.
Bug Fixes
Select-all and Backspace inside a code step could delete every step
on the canvas. Shortcuts now stay inside the editor you are typing
in.
Expanding a branch in the data picker no longer inserts a reference
to it. Browsing and choosing are separate again.
Searching the dock finds Glow's own steps, not only connected apps.
Aug 3, 2026
Large workflows stay fast
Every edit used to re-save the whole workflow. Now only what changed is
saved, so a long session no longer slows down.
Start a workflow by chatting to it
The new Chat trigger gives you a page
you can share, or embed on your own site. Each conversation is kept as a
transcript.
Delay is now Wait, and does more than pause
Wait for a length of time, a
date, a webhook, or a form submission. The run picks up where it left
off.
Approvals get a proper review page
Reviewers decide, fill in a form and attach files. Unanswered requests
expire down the Expired branch. See{" "}
Human Review.
See when a schedule will actually run
The Scheduler previews its next
runs before you save. One with no runs left says
Expired rather than looking healthy.
See a step's output before you run it
Steps show the shape of what they will produce, so you can build the next
one without running first. See{" "}
Workflow Data.
Product Improvements
After the{" "}
Workflow Assistant
{" "}
builds something, it offers to help you run it rather than leaving
you at the canvas.
Signing in takes you to your workspace instead of the admin console.
Bug Fixes
People already in a team are no longer asked to create another. A failed team list now reports the error.
Your profile picture appears once, not once per browser tab.
Apps you had already connected no longer ask to be reconnected. A
manually chosen account stays chosen.
Steps distinguish settings that failed to load from actions that
genuinely need no setup.
Loops read their state as it changes, and a plain list is treated as
a list.
## July 2026
Jul 31, 2026
Form templates can arrive pre-filled
Turn on Default values to give any field a starting
value. See{" "}
Form Templates.
Jump from the log to the step
Every entry shows its step number, and clicking one opens that step's
settings. Long runs collapse to stay readable.
Clone a workflow to another team
"Move to team" is now "Clone to team": your original stays live and
untouched, and the copy starts as a draft.
Filter works out its own list
Filter no longer needs a
separate Items field — it reads the list from your rules.
Product Improvements
A retried step is labelled with its attempt number, so retries are
easy to tell from separate runs.
The assistant chat groups related messages, shows who wrote what, and
indicates when a teammate is typing.
Clear all props resets every property while keeping
your connected account.
Parse JSON has its own
icon instead of sharing one with Custom Variables.
Bug Fixes
Step settings load as soon as you open or add a step.
Workflow data and recent step data appear without a workaround.
Duplicating a workflow copies only the steps in the original.
The Run button stops when the workflow finishes.
Workflow access requests always notify the owner.
Jul 30, 2026
Try Glow without an account
Describe an automation and watch it take shape before signing up. Create
an account to keep that workflow.
A clearer execution log
Rows show step numbers and open the step when clicked. Runs group
together, and retries are marked Attempt 2 of 3.
Form templates carry your default values
Turn on Default values to ship a pre-filled template.
Check what you publish; credentials never travel.
The Workflow Assistant reads like a conversation
Shared threads show who wrote each message and who is typing. Build
progress collapses into one line.
Product Improvements
"Move to team" is now Clone to team — the original
stays live.
One Cmd+Z now undoes actions that span several
parts of a workflow.
The execution log no longer hides behind a step's settings panel.
MSP console gained a Create workflow action beside
the renamed Push workflow pill.
MSP operators can open the console during an impersonation session.
A workspace can no longer be left with no admins — another member is
promoted automatically.
Bug Fixes
Clear all props asks first, keeps your connected
account, and undoes in one press.
Deleted steps can always be brought back with undo.
Apps that claimed no settings required while requiring them
are fixed. A catalogue re-scan is still running, so give it a few
hours.
Workspace access requests always reach someone who can act on them.
A workflow's Draft/Live state on the canvas now always matches the
homepage.
Running-execution indicators no longer flicker or end a run early
when updates arrive out of order.
Jul 29, 2026
Attach files to AI Prompts
Send a file, image, or screenshot straight to an AI Prompt. It is read
at run time and never stored in your file library.
Push workflows to clients without impersonating
Deploy straight into a client's workspace. Impersonation sessions can
now be scoped to one workflow and set from 5 minutes to 30 days.
Webhooks moved to our own infrastructure
Faster event processing, with unguessable tokens. Existing webhook URLs
keep working — nothing to change.
Execution logs stream live
Watch events arrive step by step as a workflow runs, with search and
auto-scroll.
Steps tell you what they still need
Required fields are marked, and an incomplete step carries a{" "}
Setup required badge. Recommended fields nudge without
blocking.
See how data moves between steps
The Data Flow tab shows every connection and when it last carried
anything. See{" "}
Workflow Data.
Spot a step that had to retry
A badge appears on any step that needed retries during a run, with the
number it took.
Product Improvements
Failed and retrying steps are badged on the canvas.
A Data-Flow tab shows where each variable comes
from.
Paste a value onto a field and it becomes a variable chip.
Edge labels are editable on the line itself.
The Admin Console gained annotations.
Workspace secrets are validated before they save.
New workflow system variables — see the{" "}
syntax reference.
One-click unsubscribe and marketing consent records.
Bug Fixes
Duplicating a workflow from the tab menu works again.
Filter and Condition builder fixes.
YouTube embeds and sticky notes render in the public share viewer.
No more 404 when ending an impersonation session.
Jul 28, 2026
Four new steps for routing a workflow
Filter,{" "}
Switch,{" "}
Stop and Error and{" "}
Do Nothing, under Tools →
Flow.
Conditions gets rule-based branching
Pick a data type and an operator, and send each outcome down its own
route. Or describe it in words and let{" "}
Conditions decide.
Manage client workspaces from one console
Request consent-based access to a client's workspace, and revoke it in
one click — all from the{" "}
Admin Console.
Loops you can see
Connect a step to a Loop and it
iterates over the data. Blue chips reference the current item in any
field.
Sticky notes connect to steps
Draw an arrow from a note to the step it explains — the Workflow
Assistant reads them as context.
Product Improvements
Switch steps label their own connecting lines.
Condition steps know what data type they are comparing.
Run on a polling trigger checks the app
immediately.
Move a workflow from one workspace to another.
Load real execution data into a step's test payload in a click.
The HTTP step remembers your last imported cURL command.
Quieter loading states across the canvas.
Intercom chat moved under Help & Support.
Bug Fixes
Deployed several under-the-hood security updates to our core
execution infrastructure.
Resolved over a dozen minor UI rendering bugs on the canvas.
## What's Next?
- See what the platform can do today in [What Is a Workflow?](/build/core-concepts/what-is-a-workflow).
- Check the ceilings a change might affect in [System Limits & Quotas](/reference/system-limits).
---
Source: https://docs.getglow.ai/getting-started/account-and-authentication
# Account & Authentication
> Create an account, sign in, reset a password, and set up the profile your teammates see.
Sign in to Glow with an email and password, with Google or GitHub, or through your company's SSO. This page covers creating an account, signing in, resetting a password, and what your profile controls.
**Go straight to:** [create an account](#creating-your-account) · [sign in](#signing-in) · [reset a password](#password-reset) · [set up your profile](#setting-up-your-profile) · [understand teams and workspaces](#your-account-your-team-your-workspace)
## Trying Glow before you sign up
You can watch Glow build a workflow without an account. Describe what you want on [getglow.ai](https://getglow.ai). You land on a canvas where the Workflow Assistant assembles it in front of you, step by step.
The canvas is read-only. You are watching a workflow being built, not editing one. Signing up keeps it: the workflow moves into your new workspace and you carry on from there.
> **An unclaimed workflow does not wait indefinitely.** Sign up in the same
> session to keep what was built; leave it a day and it is cleared. You can
> describe it again any time, but the workflow the assistant built is gone.
## Creating your account
The signup process takes about two minutes and requires only an email address.
### Create your account
Go to [app.getglow.ai](https://app.getglow.ai) and click **Create account** on the sign-in screen.
### Enter credentials
Enter your email address and create a password. You can also sign up with Google or GitHub. Creating an account means you agree to the Terms of Service, Privacy Policy and Data Processing Policy, linked below the Sign up button.
### Verify your email
Glow verifies your email with a one-time code. Check your inbox for a message from Glow and enter the code on the screen that follows.
### Name your workspace
**Set Up Your Workspace** asks for a **Team or Workspace Name** and how many
people are in your team: Only Me, 2–50, 51–250, 250–1k, 1k–5k or 5k+. This
creates the team your work belongs to, so pick the name your colleagues would
recognise. You can create more teams later, and rename this one whenever you
like.
### Say how you work
**Choose your role** offers three cards, and your answer shapes the workspace we
prepare for you:
| | For |
| --------------------- | ------------------------------------------------------------------- |
| **Individual / Team** | Automations for yourself or for your own company. |
| **Consultant** | Automations you build and deliver for clients. |
| **MSP** | A practice that builds and manages automations across many clients. |
Pick the one that describes your practice rather than the middle option: it is
recorded against your account, and it is what your account team works from when
they set up client workspaces with you. See [Working With Clients](/msp/overview).
Select **Get Started** and you land in your new workspace.
*The last step of signing up. Your answer is recorded against your account, so it carries across every team you belong to.*
*The sign-in screen. Use Continue with Google or Continue with GitHub, or sign in with your email and password.*
---
## Signing in
You can log in to your account at [app.getglow.ai/login](https://app.getglow.ai/login).
The sign-in and sign-up screens run a quick automatic security check. The Google and GitHub buttons activate once it finishes, usually within a second or two.
### Signing in through your company
Where your company signs in through its own identity provider, your account team
sets that up with you and tells everyone how to sign in. See
[Signing In and SSO](/manage/workspace-settings/enterprise-sso).
### Two-Factor Authentication (2FA)
If you have 2FA enabled, Glow prompts you for the 6-digit code from your authenticator app right after you submit your password. Turn it on under [Personal Settings](/manage/workspace-settings/personal-settings).
*With 2FA on, these six boxes take the code from your authenticator app once your password is accepted.*
---
## Password reset
If you forget your password, you can reset it without contacting support.
### Request reset
On the login screen, click **Forgot password?** (or navigate directly to `/password`).
### Submit email
Enter the email address associated with your Glow account. If the account exists, Glow sends a password reset link to your inbox.
### Create new password
Click the link in your email, enter your new password twice, and save. Then click **Go back to Login** and sign in with the new password.
> **Note for SSO Users:** If you log in via Google, GitHub, or a corporate
> Identity Provider (SSO), you cannot reset your password through Glow. You must
> manage your credentials directly with your provider.
---
## Signing out
To sign out, click your name in the top right and choose **Sign out**.
If you signed in through your company's SSO, signing out of Glow signs you out of that session too. Signing back in means going through your provider again.
---
## Setting up your profile
After you sign in, click your avatar in the top right and open **User settings** to set the name and photo your teammates see.
| Field | Description |
| ---------------- | ------------------------------------------------------------------------------------ |
| **Display Name** | The name shown to teammates and in workflow history |
| **Avatar** | Upload a profile photo or image |
| **Social Links** | Links to your personal website, GitHub, LinkedIn, YouTube, X, Facebook and Instagram |
Fill in at least your display name so teammates can identify you in shared workspaces.
## Your account, your team, your workspace
Three words that sound alike and mean different things. Getting them straight
now saves confusion later.
| Term | What it is |
| ------------- | ----------------------------------------------------------------------------------------------------------------------------------------------- |
| **Account** | You. One email, one sign-in, one profile. It follows you across every team you belong to. |
| **Team** | The group your work belongs to. Workflows, connected accounts and secrets live here, not on your account, so a colleague can pick up your work. |
| **Workspace** | The team you are looking at right now. Switch between them from your workspace name at the top of the sidebar. |
You can belong to several teams at once. Anything you build in one is invisible
from the others, which is what makes a separate workspace per client work for
consultants and MSPs.
### What you can do in a team depends on your role
You are the **Admin** of any team you create yourself. When somebody invites
you, they choose your role:
| Role | Workflows | Can invite | Team settings and billing |
| ----------- | --------- | -------------------- | ------------------------- |
| **Admin** | Full | Anyone, at any role | Yes |
| **Manager** | Full | Managers and Members | Change roles only |
| **Member** | Full | Members | No |
Every role, Members included, can create, edit and run workflows. What changes
is who may invite people, change roles and see billing. [Team
Management](/manage/workspace-settings/team-management) has the full grid.
### How long you stay signed in
A sign-in lasts across browser restarts, so you rarely have to sign in twice on
the same machine. Glow refreshes the session quietly in the background while you
work. Signing out ends it deliberately, and where your company uses SSO, it ends
the session at your provider too.
## What's Next?
- [Set up your team](/getting-started/setting-up-your-team) to invite colleagues and choose their roles.
- [Build your first workflow](/getting-started/tutorials/your-first-workflow) if you are working alone.
---
Source: https://docs.getglow.ai/getting-started/cookbook/ai-customer-support-router
# AI Support Router with Tools
> Process customer inquiries, verify enterprise status with CRM tools, draft AI responses, and escalate urgent issues to Slack.
**The full picture · about 25 minutes · 5 steps**
Turn raw inbound customer inquiries into structured, resolved tickets. An AI Agent equipped with CRM and knowledge tools checks the customer's account status, drafts a grounded resolution, and routes enterprise or urgent issues directly to your on-call team in Slack.
[Webhook trigger](/build/triggers/webhook) → [AI Agent](/build/ai-features/ai-agent) → [Switch](/build/action-steps/switch) → Slack escalation → Zendesk reply
## What you will use
- A **Webhook** trigger to capture submissions from contact forms or support inboxes.
- In-field **[Data Transformation](/build/core-concepts/data-transformation)** to clean and normalize text without extra steps.
- An **[AI Agent](/build/ai-features/ai-agent)** equipped with **Search the web** and **HubSpot** tools to look up account tier and relevant docs.
- A **[Switch](/build/action-steps/switch)** step to split standard resolutions from VIP escalations.
## Prerequisites
- A connected **Slack** workspace (for alert notifications).
- A connected **Zendesk** or **Intercom** account (or your primary ticketing tool).
- A connected **HubSpot** or **Salesforce** account (to look up account tier).
---
## Building the Workflow
### 1. The Trigger: Form or Webhook Submission
Add a **Webhook** trigger to receive inbound support submissions. Each payload delivers the user's name, email address, subject, and message.
Sample incoming JSON:
```json
{
"name": "Ada Lovelace",
"email": "ada@example.com",
"subject": "SSO login issue after SAML certificate rotation",
"message": "We rotated our Okta cert and our team is locked out. Urgent help needed!
"
}
```
### 2. The AI Agent: Triage and Solution Drafting
Add an **AI Agent** step.
1. **Brain (Model):** Select `Gemini 2.5 Flash` for fast, cost-effective reasoning.
2. **Tools:** Turn on **Search the web** (or a workflow tool that searches your internal docs) and toggle on your **HubSpot** account.
3. **Primary goals:** Write instructions that leverage in-field token transformations to sanitize the input:
```markdown
You are an expert technical support engineer for our SaaS platform.
Customer: {{ 1.name | trim | title_case }}
Email: {{ 1.email | trim | lower }}
Company Domain: {{ 1.email | extract_domain }}
Subject: {{ 1.subject | trim }}
Issue: {{ 1.message | strip_html | trim }}
Instructions:
1. Use the HubSpot tool to check if the company domain belongs to an Enterprise or VIP customer tier.
2. Search the knowledge base for resolutions matching the subject and issue.
3. Classify urgency: "Critical" if Enterprise customer or system outage; otherwise "Normal".
4. Draft a courteous, accurate response.
5. Return a strict JSON object with:
- "urgency": "Critical" | "Normal"
- "tier": "Enterprise" | "Standard" | "Unknown"
- "category": "Authentication" | "Billing" | "Bug" | "General"
- "draft_reply": "string"
- "summary": "one-sentence summary of issue"
```
4. Toggle on **Parse JSON result** in the agent settings so downstream steps can read `{{ 2.result.urgency }}` directly.
### 3. The Logic: Switch Step
Add a **Switch** step after the agent to determine the handling path:
- **Case 1 (Escalate):** `{{ 2.result.urgency }}` equals `Critical` OR `{{ 2.result.tier }}` equals `Enterprise`.
- **Fallback (Automated Reply):** Standard tickets that do not require immediate on-call escalation.
### 4. Branch A: Urgent Escalation (Slack + Zendesk)
On the **Case 1 (Escalate)** route, connect two parallel or sequential actions:
1. **Slack: Send Message**
- Channel: `#urgent-support`
- Message:
```markdown
🚨 _VIP Customer Incident Escalated!_
• _Customer:_ {{ 1.name | title_case }} ({{ 1.email | lower }})
• _Company:_ {{ 1.email | extract_domain }} [Tier: {{ 2.result.tier }}]
• _Category:_ {{ 2.result.category }} | _Urgency:_ {{ 2.result.urgency }}
• _Summary:_ {{ 2.result.summary }}
_AI Suggested Resolution:_
> {{ 2.result.draft_reply }}
```
2. **Zendesk: Create Urgent Ticket**
- Priority: `Urgent`
- Tags: `vip`, `ai-triaged`, `{{ 2.result.category | lower }}`
- Internal Note: Include `{{ 2.result.draft_reply }}` so the assigned engineer can review and send with one click.
### 5. Branch B: Standard Resolution
On the **Fallback** route:
1. **Zendesk: Create & Respond**
- Status: `Pending`
- Public Reply: `{{ 2.result.draft_reply }}`
- Tags: `ai-automated-reply`, `{{ 2.result.category | lower }}`
> **Human in the Loop:** For sensitive categories (such as Billing refunds),
> place a **[Human Review](/build/action-steps/user-approval)** step before
> sending the public reply so an agent can review the draft before it reaches
> the customer.
## Test and go live
### Send the sample payload
Use the Webhook trigger's test URL and send the JSON above. Confirm the agent's stored `result` contains all five fields from the requested response shape before you wire the Switch or either destination.
### Prove both routes
First use an urgent outage message and confirm **Escalate** creates the urgent ticket and Slack alert. Then change the message to a routine question and confirm **Fallback** creates the standard pending response without notifying the urgent channel.
### Review what the agent used
Read the agent execution and the records it found through its tools. A successful step means it returned an answer; verify the account tier, category and suggested resolution against the source records before allowing an automatic public reply.
### Set the workflow Live
Switch the workflow to **Live**, send one controlled request to the Live webhook URL and confirm one ticket reaches the intended branch. Keep Human Review in front of public replies until your test set consistently produces acceptable drafts.
---
## What's Next?
👉 **[Continue to AI Invoice Processing →](/getting-started/cookbook/ai-invoice-processing)**
- Explore autonomous AI capabilities in **[AI Agent](/build/ai-features/ai-agent)**.
- Sanitize and format data effortlessly with **[Data Transformation](/build/core-concepts/data-transformation)**.
- Learn about branching and fallback routes in **[Switch Step](/build/action-steps/switch)**.
---
Source: https://docs.getglow.ai/getting-started/cookbook/ai-invoice-processing
# AI Invoice Processing
> Have an AI Agent read line items off PDF invoices, put the total in front of a person to approve, then write the rows to your database.
**The full picture · about 30 minutes · 4 steps**
An AI Agent reads line items off PDF and image invoices, whatever the vendor's layout. The extracted total goes to a person to approve, and only after approval do the line items reach your database.
The AI does the reading. The approval and the writing are ordinary steps, so nothing reaches your database that a person has not seen.
This is the most involved recipe here, and it brings together everything the earlier ones introduced. Work through one of those first if any piece is unfamiliar.
Gmail trigger → [AI Agent](/build/ai-features/ai-agent) → [Human Review](/build/action-steps/user-approval) → Airtable
## What you will use
- An **AI Agent**, for reading documents no fixed parser could handle.
- A **Human Review** step, which pauses the run until a person decides.
- **Run for each item**, to write one database row per line item.
## Prerequisites
- A connected **Gmail** or **Google Drive** account (to catch the inbound invoices).
- A connected **Notion**, **Airtable**, or **SQL Database** (to store the data).
---
## Building the Workflow
### 1. The Trigger: New Email with Attachment
Add a **Gmail** trigger. Set it to listen for new emails in your `billing@acmecorp.com` inbox that contain attachments.
### 2. The AI: Glow Agent (Extraction)
Standard parsing steps fail on unpredictable PDFs. Instead, drag an **AI Agent** step onto the canvas.
In the agent's **Primary goals**, reference the attachment from the trigger and say what to pull out of it:
> _"Read the attached invoice and return strict JSON with this shape: `{ \"vendor_name\": \"string\", \"total\": 0, \"due_date\": \"YYYY-MM-DD\", \"line_items\": [{ \"description\": \"string\", \"price\": 0 }] }`. Use numbers for total and price. Do not add fields that are not present on the invoice."_
Turn on **Parse JSON result** in the same step, so the steps that follow get an object rather than a block of text.
Insert the attachment from the Workflow data panel rather than typing a path: the field name comes from your trigger, not from us. The snippets here write the trigger as `1` and the agent as `2`; read the real numbers off your own steps.
### 3. The Safety Net: Human Review
You do not want AI blindly paying invoices or writing unverified data to your ERP.
Drag a **Human Review** step after the Agent.
Configure it to display the vendor name, due date, and formatted total using [Data Transformation](/build/core-concepts/data-transformation): `{{ 2.result.total | format_currency:"$" }}`. The workflow now pauses until someone on your finance team clicks **Approve** in the Glow dashboard.
### 4. The Loop: Process Line Items
Once approved, each line item needs to be saved to your database.
Add your database action step (e.g., **Airtable: Create Record**).
Open that step's repeat badge and switch it to **Each item**, then choose the list of line items the agent extracted: `{{ 2.result.line_items }}`.
**Every AI step stores its answer under `result`**, the Agent included, so the path is `2.result.…`. With **Parse JSON result** on you can reach inside it directly, as here. Open the agent's **Executions** tab and read the real shape before you map it: the field names come from the invoice, so they are whatever you asked the agent to return.
Map the current item's description and price into the Airtable fields with `{{ item.description }}` and `{{ item.price }}`.
**What this costs.** Each item spends one credit, so a 40-line invoice is 40 credits at this step alone. The number of items one step may process is capped by your plan: 50 on Free, 1,000 on Pro, 10,000 on Enterprise. Over the cap, the step is refused rather than quietly processing part of the invoice. For an invoice longer than your cap, split the extracted list into smaller batches before the loop, or move up a plan.
> **Why it is built this way.** The AI does one job: reading the invoice (Step
> 2). The approval (Step 3), the loop and the database write (Step 4) all run
> the same way every time. A misread total is caught by the person approving it,
> not by the model.
## Test and go live
### Use a known invoice
Send a test invoice with a vendor, total, due date and two line items you can check by eye. Run through the Gmail trigger's test flow and select its attachment from the Workflow data panel when configuring the agent.
### Check the structured result
Open the agent's stored output. Confirm `vendor_name`, `total`, `due_date` and `line_items` match the document, and that `line_items` is a list with exactly two records. Stop here if the shape or values differ; later steps depend on both.
### Approve and verify the writes
Open the Human Review email while signed in as a member of the workspace. Compare its summary with the source invoice, approve it, then confirm Airtable contains exactly two new rows with the expected descriptions and prices. Reject a second test run and confirm it writes no rows.
### Set the workflow Live
Switch the workflow to **Live**, send one controlled invoice from an approved sender and follow it through the review and database. Confirm the final run writes each line once before routing real invoices through it.
---
## What's Next?
👉 **[Build a workflow for your own process →](/build/which-step)**
You have completed the cookbook sequence. Start from the job you need to automate, and the guide will point you to the right steps.
Go deeper on the concepts this recipe uses:
- **[AI Agents](/build/ai-features/ai-agent)**: give an AI Step goals and tools.
- **[Human Review](/build/action-steps/user-approval)**: pause a workflow before an important action.
---
Source: https://docs.getglow.ai/getting-started/cookbook/github-jira-sync
# GitHub & Jira Sync
> Automatically create and link Jira tickets when a new GitHub issue is opened, ensuring product and engineering stay aligned.
**Starting point · about 15 minutes · 3 steps**
Mirror every new GitHub issue into Jira, then comment back on the GitHub issue with the Jira key so each side carries a link to the other.
This recipe builds on the earlier mapping work. The final action writes back to the system that started the run, using a value the Jira action produced.
GitHub trigger → Jira → Back to GitHub
## What you will use
- Two connected apps in one workflow.
- A reference to an earlier step's output, to carry the new Jira key back to GitHub.
## Prerequisites
- A connected **GitHub** account.
- A connected **Jira Cloud** account.
---
## Building the Workflow
### 1. The Trigger: GitHub (Issue Opened)
Drag a **GitHub** trigger onto the canvas. Authenticate and select your target repository. Choose the "Issue Opened" event.
### 2. The Action: Jira (Create Issue)
Add a **Jira** action step and select "Create Issue".
Map the incoming GitHub data into the Jira fields:
- **Summary:** `{{ 1.issue.title }}`
- **Description:** `Reported by @{{ 1.issue.user.login }} in GitHub: {{ 1.issue.html_url }}`, then press **Enter** for a blank line and add `{{ 1.issue.body }}`
- **Issue Type:** Bug (or Task)
A trigger's fields sit at the top level, which is why every path here starts `1.` with no wrapper. Insert them with the Workflow data panel rather than typing them.
### 3. The Loop-Back: GitHub (Add Comment)
Link the new Jira ticket back to GitHub so the engineer who opened the issue can see it was picked up.
Add a second **GitHub** action step and select "Create Issue Comment".
The paths below are the shape a Jira **Create Issue** step typically returns. Confirm yours before you rely on them: run step 2 once, open its **Executions** tab, and read the actual field names. What sits after the step number is decided by the step, not by Glow, so there is no wrapper you can assume beyond `ret`.
> _"Tracking this internally as `{{ 2.ret.issue.key }}`. You can view the Jira ticket here: `{{ 2.ret.issue.url }}`"_
> **Want true bidirectional sync?** You can build a second workflow in Glow that
> does the exact opposite. Trigger on **Jira (Issue Transitioned)**, use a
> **Conditions** step to check if it moved to "Done", then use a **GitHub**
> action to close the corresponding GitHub issue.
## Test and go live
### Create one unmistakable test issue
Open a GitHub issue titled `Glow sync test — safe to close` with a short body. Run the trigger, then inspect the Jira step's stored output before configuring the final comment. Insert the returned issue key and URL from the Workflow data panel; do not rely on the example paths if your connector returns another shape.
### Check both systems
Confirm Jira contains one issue with the GitHub title, body and source link. Return to GitHub and confirm one comment links to that same Jira issue. If Jira succeeds but the comment fails, check the repository and issue number mapped into **Create Issue Comment** as well as the Jira output fields.
### Set the workflow Live
Close or label the test records according to your team's convention, switch the workflow to **Live**, then create one final controlled GitHub issue. Confirm one Jira issue and one GitHub comment are created.
## What's Next?
👉 **[Continue to Support Ticket Triage with AI →](/getting-started/cookbook/zendesk-sentiment-triage)**
- Build the reverse-direction branch described above with the [Conditions Step](/build/action-steps/conditions).
- Map fields between the two systems confidently using [Workflow Data](/build/core-concepts/workflow-data).
---
Source: https://docs.getglow.ai/getting-started/cookbook/hubspot-slack-alerts
# HubSpot to Slack Alerts
> Automatically notify your sales team in Slack when a high-value deal is created in HubSpot.
**Starting point · about 10 minutes · 3 steps**
Post a Slack message when a deal worth over $5,000 is created in HubSpot, and stay quiet about the rest.
This is the simplest recipe here: one trigger, one decision, one action. Everything that follows builds on this shape.
HubSpot trigger → [Conditions](/build/action-steps/conditions) → Slack
## What you will use
- A **Conditions** step, to route on the deal's value.
## Prerequisites
- A connected **HubSpot** account.
- A connected **Slack** account.
---
## Building the Workflow
### 1. The Trigger: HubSpot (New Deal)
Open **Apps** in the dock at the bottom, search for **HubSpot**, and add its trigger. In the App drawer, select the **New Deal** event. The workflow then wakes up the second a deal is created in your CRM.
### 2. The Logic: Condition Step
You only want to alert the team when a deal is worth more than $5,000, so the channel does not fill with noise.
Drag a **Conditions** step onto the canvas and connect it to your trigger.
- **Condition A:** `{{ 1.amount }}` is `Greater Than` `5000`.
**Insert variables from the Workflow data panel rather than typing them.** The panel shows the exact output fields from prior steps (e.g. `{{ 1.amount }}`).
> If your trigger step is numbered differently on the canvas (e.g. `2`), use
> your actual step number instead of `1`.
### 3. The Action: Slack (Send Message)
Open **Apps** in the dock, search for **Slack**, and pick **Send Message**. In the step's Account field, choose your connected Slack account, then select the `#sales-alerts` channel. Back in the Conditions step, set **Then go to** on your amount condition to point at the Slack step.
Deals under $5,000 match nothing, so they take the **ELSE** route. Leave it empty to end the run there.
In the message field, use dynamic variable references and in-field [Data Transformation](/build/core-concepts/data-transformation) to format values cleanly:
```markdown
🚨 _New High-Value Deal Created!_
• _Deal:_ {{ 1.dealname }}
• _Amount:_ {{ 1.amount | format_currency:"$" }}
• _Owner:_ {{ 1.deal_owner | default:"Unassigned" }}
• _HubSpot Link:_ {{ 1.portal_url }}
```
> **Want to build this instantly?** Open the **Workflow Assistant** in your Glow
> workspace and enter: *"When a new deal is created in HubSpot, check if the
> amount is over $5,000. If true, format the currency and send an alert to the
> #sales-alerts Slack channel."*
## Test and go live
### Prove both routes
Create one test deal worth `6000` and one worth `4000`. Run each through the trigger. The first should take the named Conditions route and reach Slack; the second should take **ELSE** and finish without a message.
### Check the destination
Open `#sales-alerts` and confirm the deal name, formatted amount, owner fallback and link all match the HubSpot record. If a value is blank, reopen the trigger's stored output and insert that field from the Workflow data panel instead of guessing its path.
### Set the workflow Live
Switch the workflow from **Draft** to **Live**. Create one final controlled deal above the threshold, then confirm both the successful run in Glow and exactly one new Slack message.
---
## What's Next?
👉 **[Continue to GitHub & Jira Sync →](/getting-started/cookbook/github-jira-sync)**
Go deeper on the concepts this recipe uses:
- **[Conditions (If/Else)](/build/action-steps/conditions)** - Learn how to build complex branching logic.
- **[Data Transformation](/build/core-concepts/data-transformation)** - Format currencies, numbers, and dates directly in tokens.
- **[Workflow Data & Mapping](/build/core-concepts/workflow-data)** - Understand how data from the trigger becomes available in downstream steps.
---
Source: https://docs.getglow.ai/getting-started/cookbook/lead-enrichment-apollo
# B2B Lead Enrichment (Apollo & CRM)
> Automatically enrich new inbound leads with Apollo.io data and route them based on company size.
**Building on the basics · about 20 minutes · 4 steps**
Catch a form submission carrying only a work email, look the company up in Apollo, and route the lead by headcount. Over 1,000 employees goes to an enterprise AE; everything else goes to the automated sequence.
Where the earlier recipes reacted to an app's own trigger, this one starts from a webhook. That means it works with any form that can send a web request, not only the ones Glow has a trigger for.
[Webhook](/build/triggers/webhook) → Enrichment call → [Conditions](/build/action-steps/conditions) → Your CRM
## What you will use
- A **Webhook** trigger, so any form can start the run.
- An enrichment call, whose response the routing then reads.
- A **Conditions** step, to split the lead by company size.
## Prerequisites
- A form that can send a web request to a URL (Typeform, Webflow, or your own site).
- A connected **Apollo.io** or **Clearbit** account.
- A connected **CRM** (e.g., Salesforce, HubSpot, or Pipedrive).
---
## Building the Workflow
### 1. The Trigger: Form Submission (Webhook)
Add a **Webhook** trigger to your canvas. Point your lead form (Typeform, Webflow, or your own site) at this URL, so every submission posts the visitor's email to the workflow.
### 2. The Enrichment: Apollo
Add an **Apollo.io** action step, or any other enrichment app you use. Open **Apps** in the dock, pick Apollo.io, and choose its organization enrichment action from the list.
Map the domain of the incoming email into the action's domain field. Instead of adding an extra text-splitting step, use [Data Transformation](/build/core-concepts/data-transformation) directly in the token:
```
{{ 1.email | extract_domain }}
```
Apollo returns a large record covering the company's headcount, industry, annual revenue and headquarters location. Run the step once and read its **Executions** tab to see the real field names before you map them.
### 3. The Logic: Condition Step (Routing)
Enterprise leads go to a senior AE; everything else goes to the automated sequence.
Add a **Conditions** step.
- **Enterprise:** `{{ 2.ret.estimated_num_employees }}` is `Greater Than` `1000`.
- **Everything else:** leave this to the step's **ELSE** output. You do not write a condition for it. ELSE fires only when none of the conditions above matched, so no lead can take both paths. A second condition testing for _fewer_ than 1,000 employees is not the same thing.
Apollo is an app step, so its output sits under `ret`. Insert the path with the Workflow data panel rather than typing it.
### 4. The Action: CRM Update
At the end of the Enterprise path, add a **Salesforce** (or HubSpot) step.
Select the "Update Lead" action.
Map the enriched Apollo data (Industry, Headcount, Revenue) into the corresponding fields in your CRM. Assign the lead owner to your Enterprise AE queue.
Off the **ELSE** output, add the step that handles SMB leads: the same CRM update with a different owner, or a step that drops them into a nurture sequence. Leave it unconnected and those leads simply stop there.
> **Pro-Tip:** If Apollo cannot find the company, you can add an **Error Path**
> to the Apollo step. Route the red error terminal to a **Glow AI Agent**
> equipped with a "Search the web" tool to scrape the prospect's company website
> as a fallback.
## Test and go live
### Send a controlled webhook
Use the Webhook trigger's test flow to send an address at a company domain you are allowed to look up. Keep the payload small, for example `{ "email": "ada@example.com" }`, and replace the address with a domain that produces a known enrichment result in your account.
### Confirm the enrichment shape
Open the enrichment step's stored output. Insert its employee-count field into Conditions from the Workflow data panel, then run once with data above your threshold and once with data below it. Confirm the first takes **Enterprise** and the second **ELSE**.
### Check the CRM
Open the destination record and confirm industry, headcount, revenue and owner match the enrichment result. If enrichment returns no company, verify the error path or your chosen fallback handles it without creating a misleading CRM record.
### Set the workflow Live
Replace the form's test URL with the Live webhook URL, set the workflow **Live**, and submit one controlled form entry. Confirm one run and one correctly routed CRM update.
## What's Next?
👉 **[Continue to AI Support Router with Tools →](/getting-started/cookbook/ai-customer-support-router)**
- Build the same routing logic step by step in the [Branching](/getting-started/tutorials/lead-routing-tutorial) tutorial.
- Clean and normalize inbound values with [Data Transformation](/build/core-concepts/data-transformation).
- Wire up the fallback path described above using [Error Handling & Retries](/build/core-concepts/error-handling).
---
Source: https://docs.getglow.ai/getting-started/cookbook/overview
# Cookbook & Use-Cases
> Worked workflows you can adapt, each explaining why it is built the way it is.
Six worked workflows you can copy. Each one explains why it is built the way it is, not only which steps to drag.
They are ordered below by how much they ask of you. The first needs a trigger, a decision and an action; the last combines an AI Agent, connected tools, a Human Review step and a loop. Working through them in order means every recipe uses one idea you have already met.
| Recipe | Level | Time | What it adds |
| ------------------------------------------------------------------------------------ | ---------------------- | ------ | ------------------------------------- |
| [HubSpot to Slack Alerts](/getting-started/cookbook/hubspot-slack-alerts) | Starting point | 10 min | Conditions, currency transforms |
| [GitHub & Jira Sync](/getting-started/cookbook/github-jira-sync) | Starting point | 15 min | Writing back with an earlier result |
| [Support Ticket Triage](/getting-started/cookbook/zendesk-sentiment-triage) | Building on the basics | 20 min | AI Prompt, Switch, HTML cleanup |
| [B2B Lead Enrichment](/getting-started/cookbook/lead-enrichment-apollo) | Building on the basics | 20 min | Webhook triggers, domain extraction |
| [AI Support Router with Tools](/getting-started/cookbook/ai-customer-support-router) | The full picture | 25 min | AI Agent, CRM tools, token transforms |
| [AI Invoice Processing](/getting-started/cookbook/ai-invoice-processing) | The full picture | 30 min | AI Agent, Human Review, loops |
New to Glow? [Quickstart: Your First Workflow](/getting-started/tutorials/your-first-workflow) builds a running automation in about five minutes and needs no connected accounts at all.
---
## By team
The same six recipes, grouped by who usually wants them.
---
## Sales & CRM Operations
- [B2B Lead Enrichment](/getting-started/cookbook/lead-enrichment-apollo): Catch a webhook from a form submission, extract domains with Data Transformation, and use Apollo.io to enrich company data and route leads.
- [HubSpot to Slack Alerts](/getting-started/cookbook/hubspot-slack-alerts): Automatically notify your sales team in Slack when a high-value deal is created in HubSpot. Learn how to use **Conditions** to filter out noise.
---
## Customer Support & Operations
- [AI Support Router with Tools](/getting-started/cookbook/ai-customer-support-router): Equip an AI Agent with web search and CRM tools to triage customer inquiries, draft grounded responses, and escalate urgent incidents to Slack.
- [Support Ticket Triage with AI](/getting-started/cookbook/zendesk-sentiment-triage): Analyze incoming Zendesk tickets with AI, tag them by urgency and sentiment, and escalate angry enterprise customers in Slack.
---
## Engineering & Product
- [GitHub & Jira Sync](/getting-started/cookbook/github-jira-sync): Automatically create and link Jira tickets when a new GitHub issue is opened, so product and engineering stay aligned.
---
## Finance & Operations
- [AI Invoice Processing](/getting-started/cookbook/ai-invoice-processing): Safely extract line items from unstructured PDF invoices using an AI Agent. Route them to a person for review, then loop through the data to sync with Airtable.
## What's Next?
👉 **[Start with HubSpot to Slack Alerts →](/getting-started/cookbook/hubspot-slack-alerts)**
New to workflow building? Complete [Quickstart: Your First Workflow](/getting-started/tutorials/your-first-workflow) before starting the recipes.
---
Source: https://docs.getglow.ai/getting-started/cookbook/zendesk-sentiment-triage
# Support Ticket Triage with AI
> Analyze incoming Zendesk or Intercom tickets with AI, tag them by sentiment, and escalate urgent cases in Slack.
**Building on the basics · about 20 minutes · 6 steps**
Read every incoming support ticket with AI, decide its sentiment and urgency, and route the angry-and-critical ones straight to a person. The worked steps use Zendesk; you can apply the same pattern to an Intercom new-ticket trigger and its ticket actions.
This is the first recipe with AI in it, and the first that routes on an AI's answer rather than a true/false check.
Zendesk trigger → [AI Prompt](/build/ai-features/ai-prompt) → [Switch](/build/action-steps/switch) → Zendesk and Slack
## What you will use
- An **AI Prompt** step, told to return JSON so the next step can route on it.
- A **Switch** step, for routing to one of several branches rather than only true or false.
## Prerequisites
- A connected **Zendesk** account with permission to read and update tickets, plus an Escalation Team ready to receive critical tickets. To adapt the recipe, connect Intercom and select its corresponding ticket trigger and actions instead.
- A connected **Slack** workspace with the person or channel that should receive escalation alerts. Your company may require an administrator to approve the connection.
The AI Prompt step needs nothing connected. It runs on Glow's managed models, with no provider account or API key to set up.
---
## Building the Workflow
### 1. The Trigger: Zendesk (New Ticket)
Drag a **Zendesk** trigger onto the canvas. Select the "New Ticket Created" event. This ensures Glow wakes up the second a customer sends an email or submits a form.
### 2. The AI: AI Prompt Step
A classification this narrow does not need a full agent. Add an **AI Prompt** step.
In the **Instructions** field, tell the model what to decide and in what shape:
> _"Analyze the following support ticket. Determine the sentiment (Positive, Neutral, Angry) and the urgency (Low, High, Critical). Return the result as a strict JSON object."_
Reference the sanitized ticket body inside those instructions: `{{ 1.ticket.description | strip_html | trim }}`. Using [Data Transformation](/build/core-concepts/data-transformation) removes raw HTML tags from incoming emails before feeding them to the AI, saving token budget and improving classification accuracy.
Switch on **Parse JSON result** in the same step. It is off by default, and without it the answer comes back as a block of JSON _text_ rather than fields you can read. With it on, `{{ 2.result.sentiment }}` and `{{ 2.result.urgency }}` work as written below. Skip it and every ticket takes the Fallback path, because the Switch is reading text rather than the fields it expects.
### 3. The Logic: Switch Step (Escalation)
Add a **Switch** step to route the ticket based on the AI's analysis.
- **Case 1 (Angry):** `{{ 2.result.sentiment }}` equals `Angry` AND `{{ 2.result.urgency }}` equals `Critical`.
- **Fallback:** everything else. This is the step's own fallback output, not a case you write.
Switch compares case-sensitively by default, so `Angry` and `angry` are different values. That is why the instructions above name the exact words the model must return.
### 4. The Actions: Tagging & Alerts
On the **Fallback** path, add a **Zendesk** action to update the ticket. Put `{{ 2.result.sentiment }}` and `{{ 2.result.urgency }}` in the tags field, so every ticket carries what the AI decided.
On the **Angry** path, add two steps:
1. **Zendesk:** Update the ticket priority to `Urgent` and assign it to the Escalation Team.
2. **Slack:** Send an alert to the person or channel you prepared, including the ticket link.
## Test and go live
### Test the escalation route
Create a ticket with an unmistakably urgent message, such as `Production login is down for every user and we need help now`. Run it and inspect the AI Prompt result. It should contain the exact `Angry` and `Critical` values the Switch expects before the escalation branch runs.
### Test the fallback route
Create a neutral request, such as `Please send me a copy of last month's invoice`. Confirm it takes **Fallback**, receives the classification tags and does not post the urgent Slack alert.
### Check the destinations
Open both Zendesk and Slack. Confirm the critical ticket is urgent, assigned to the expected team and represented by one Slack alert. If the Switch cannot read `sentiment` or `urgency`, check that **Parse JSON result** is on and read the AI step's stored output before changing the cases.
### Set the workflow Live
Switch the workflow to **Live**, submit one controlled ticket from your test requester and confirm its live execution reaches the expected destination exactly once.
## What's Next?
👉 **[Continue to B2B Lead Enrichment →](/getting-started/cookbook/lead-enrichment-apollo)**
- Tune the classification call itself in the [AI Prompt Step](/build/ai-features/ai-prompt).
- Clean and prepare incoming text payloads with [Data Transformation](/build/core-concepts/data-transformation).
- Add more triage lanes than angry and default with the [Switch Step](/build/action-steps/switch).
---
Source: https://docs.getglow.ai/getting-started/learning-path
# Learning Path
> A compact route from your first Glow workflow to testing and operating it with confidence.
Use this optional curriculum when you want one route through the documentation. If you prefer to learn by solving a specific problem, start with [Choose the Right Step](/build/which-step) or a [cookbook recipe](/getting-started/cookbook/overview).
### Build and run your first workflow
Follow [Quickstart: Your First Workflow](/getting-started/tutorials/your-first-workflow). In about five minutes, you will place a trigger and an AI Step, run the workflow and inspect the result.
**After this you can** build a short workflow and read what a Step returned.
### Connect an app and map real data
Follow [Build It Yourself](/getting-started/tutorials/tutorial-basics), then use [Mapping or Transforming Data](/build/core-concepts/mapping-or-transforming) when the destination needs a different value or shape.
**After this you can** connect an account, inspect test data and pass earlier output into a later Step.
### Add routing
Follow [Branching](/getting-started/tutorials/lead-routing-tutorial). You will create alternative paths, configure exact rules and test where the data goes.
**After this you can** choose a route and bring alternative branches back into the workflow.
### Build a workflow for your own outcome
Choose the [cookbook recipe](/getting-started/cookbook/overview) closest to your work, or use [Choose the Right Step](/build/which-step) to assemble a different pattern.
**After this you can** adapt a complete workflow shape to a process in your organization.
### Test it, switch it to Live and watch it
Read [Operating Workflows](/build/core-concepts/operating-workflows) before relying on the result. It covers controlled testing, checking the destination, switching from Draft to Live and monitoring the first automatic runs.
**After this you can** move from a successful manual run to a Live workflow and verify its real behavior.
## Optional: build with someone else
[Working Together](/getting-started/tutorials/collaborating-on-a-canvas) shows how to share a workflow and edit the same canvas in real time. Nothing else in the learning path depends on completing it.
## What's Next?
- 👉 **[Build Your First Workflow →](/getting-started/tutorials/your-first-workflow)**
- Building for another company? Start with [Working With Clients](/msp/overview).
- Already know the outcome? Use [Choose the Right Step](/build/which-step).
---
Source: https://docs.getglow.ai/getting-started/migrating-to-glow
# Migrating to Glow
> Plan, rebuild, test and cut over an automation from another platform without carrying across the wrong assumptions.
Use this checklist to move an existing automation into Glow, validate its behavior and switch it over safely. Import is available for n8n and Make; migrations from other platforms start with the same plan but use a manual rebuild.
## Migration Checklist
### 1. Record the current behavior
Before changing tools, capture what the automation must preserve:
- how it starts, including schedules, webhook callers and app triggers;
- the app accounts and permissions it uses;
- its branches, loops, delays and failure paths;
- custom code or platform-specific steps;
- representative inputs, expected outputs and external side effects.
This becomes the acceptance checklist for the Glow version. Focus on behavior rather than reproducing the old canvas step for step.
### 2. Choose the migration route
- **From n8n or Make:** follow [Importing a Workflow](/getting-started/templates/import-and-export) for the supported file format, import procedure and what requires attention afterward.
- **From another platform:** rebuild from the outcome backward. [Choose the Right Step](/build/which-step) maps common workflow shapes and goals to Glow Steps.
Treat an imported workflow as a starting point. Review it with the same care as a manual rebuild.
### 3. Complete the Glow workflow
- Reconnect every app account used by the workflow.
- Open each Step and confirm its operation, fields and mapped data.
- Replace custom code and platform-specific actions with the appropriate Glow Steps.
- Rebuild routing and repeated work using the patterns in [Choose the Right Step](/build/which-step).
- Review retry and failure settings for Steps that call external services.
### 4. Test against known cases
Run representative inputs through the Glow workflow and compare the results with your acceptance checklist. Include every route, empty or missing values, lists with more than one item and a controlled failure.
Use test destinations where a run sends messages, creates records or changes external data. Inspect the output of each Step before testing the workflow end to end.
### 5. Cut over
1. Keep the original automation available while you validate the Glow version.
2. Switch the Glow workflow to **Live** only when its trigger, connections and outputs are ready.
3. Confirm a real run completes as expected.
4. Disable the original automation so both platforms cannot process the same event.
5. Review the first live runs and keep the previous configuration available until the migration is accepted.
## Platform Differences
| Area | What changes in Glow | What to do during migration |
| ---------------------- | ----------------------------------------------------------------------------------------------------------- | ----------------------------------------------------------------------------------------------------------------------------------------------------------------------------------- |
| Terminology | Familiar concepts may use different names, including **Step**, **Workflow Assistant** and **App drawer**. | Use the [Glossary](/reference/glossary) instead of translating terms from memory. |
| Workflow shape | Routing and repeated work may need a different canvas structure rather than a one-to-one Step replacement. | Start with the patterns and decision tables in [Choose the Right Step](/build/which-step). |
| Data mapping | Fields can include data selected from earlier Steps alongside typed text. | Reinsert each dynamic value and inspect the producing Step's output rather than copying expressions from the old platform. See [Workflow Data](/build/core-concepts/workflow-data). |
| Testing and activation | You can test while the workflow is in **Draft**. Switching it to **Live** activates its configured trigger. | Test with controlled inputs and destinations before the cutover. See [Operating Workflows](/build/core-concepts/operating-workflows). |
| Failure handling | Retry and failure behavior is configured on the Step. | Review these settings explicitly instead of assuming the previous platform's policy carries over. See [Error Handling & Retries](/build/core-concepts/error-handling). |
## What's Next?
- 👉 **[Import Your Workflow →](/getting-started/templates/import-and-export)**
- Rebuilding from another platform? Start with [Choose the Right Step](/build/which-step).
- Need to translate a product term? Keep the [Glossary](/reference/glossary) open.
---
Source: https://docs.getglow.ai/getting-started/navigating-the-dashboard
# Navigating the Dashboard
> Where everything lives in Glow: the workspace tabs, the workspace menu, and how to get from one to the other.
Signing in puts you in a workspace, on its dashboard. Everything else is one click away in the sidebar down the left.
On a brand-new workspace the dashboard opens with a box to describe the workflow
you want, alongside templates to browse and a short tour. Once your automations
have run a few times, that gives way to the panel below: what ran, what needs
attention, and what is live.
*The dashboard. The sidebar holds everything in the workspace; the panel shows what has been running.*
## The sidebar
The sidebar down the left holds everything in the workspace. Your workspace name sits at the top; clicking it switches to another.
*The five main entries sit at the top, with Team Assets, Support and Community grouped below them.*
| Item | What it holds |
| --------------- | ------------------------------------------------------------------------------------------------------------------------------------------------------------------------------------------------------------------------------------------------------- |
| **Dashboard** | Runs over the last few days, how many workflows are live, and what ran recently. |
| **Automations** | Your workflows, as cards or a list. Each shows its run count and whether it is Draft or Live. At the top, **"What would you like to automate today?"** takes a plain-language sentence and drafts the workflow for you, often the fastest way to start. |
| **Marketplace** | The public [template gallery](/getting-started/templates/sharing-and-templates). |
| **Activity** | Alerts needing attention and every run in the workspace, with a count on the item when alerts are waiting. See [Activity](/manage/workspace-settings/activity). |
| **Connections** | The apps this workspace has connected, and the full library you can connect. |
Below those, three groups that fold away:
| Group | What is in it |
| --------------- | ------------------------------------------------------------------------------------------------------------------------------------------------------------------------------------------------------------------------------------------------------------------------------------------------------------ |
| **Team Assets** | **[Deployment](/getting-started/templates/deployment)**, every workflow you have published and where it is live; **Files** your workflows read at run time; and **Variables**: team variables and secrets, sharing one table. See [Secrets and Variables](/manage/workspace-settings/secrets-and-variables). |
| **Support** | This documentation, video tutorials, and a way to send feedback. |
| **Community** | The forum and the Discord server. |
## The header
Two things live along the top:
- **Open workflows**: tabs for the workflows you have open, so you can move between them without going back to the list.
- **Your name**, top right, which opens your [account settings](/manage/workspace-settings/personal-settings).
## The workspace menu
Clicking your workspace name at the top of the sidebar opens a short menu.
| Item | What it does |
| ------------------- | ------------------------------------------------------------------------------------------------------------------------------------------------- |
| **Manage team** | Invite people, set roles, and see who is in the workspace. See [Team Management](/manage/workspace-settings/team-management). |
| **Billing & Usage** | Usage and pricing for every workspace role; financial details and billing management for Admins. See [Billing & Usage](/manage/billing/overview). |
| **Other teams** | Every workspace you belong to, and **Create new** to start another. |
## Finding your way around
| Task | Where to go |
| --------------------------- | ------------------------------------------------------------------ |
| Create a workflow | **Workflow** on the dashboard, or **Create new** under Automations |
| Import from n8n or Make | **Import JSON** under Automations |
| Group workflows together | **Create new → New Folder** under Automations |
| Find a deleted workflow | **Filter → Archive** under Automations |
| Connect an app | **Connections** |
| Store an API key | **Team Assets → Variables** |
| Upload a file a flow uses | **Team Assets → Files** |
| See what you have published | **Team Assets → Deployment** |
| See what needs attention | **Activity** |
| Export a list of runs | **Activity** → Download CSV |
| Invite a teammate | **Invite** on the dashboard, or workspace menu → **Manage team** |
| Check credit usage | Workspace menu → **Billing & Usage → Usage** |
| Switch workspace | The workspace name at the top of the sidebar |
| Browse templates | **Marketplace** |
| Change your password | Your name, top right |
## Keeping the list manageable
### Folders
Group workflows under **Automations**:
1. Click **Create new → New Folder**, choose a name, and select a color.
2. Drag workflow cards onto the folder to move them in.
3. Open any folder and create nested folders as needed.
_Note: Folders organize your view; they do not change workspace permissions._
### Archive
**Deleting a workflow moves it to Archive** with a **30-day** recovery window.
- Restoring brings the workflow back **switched off** to prevent unintended executions.
- Deleting directly from Archive is permanent.
**Deleting a workflow moves it to Archive** rather than removing it, and you can restore it from there for **30 days**. Each card shows the date it will be removed on. A restored workflow comes back **switched off**, so it does not start running the moment it returns. Deleting from Archive yourself is immediate and permanent. Archive is a way back from a mistake, not a place to keep something — to hold a workflow indefinitely without it running, leave it in Automations switched off.
## What's Next?
- Set up who can do what in [Setting Up Your Team](/getting-started/setting-up-your-team).
- Build something with the [step-by-step tutorials](/getting-started/tutorials/your-first-workflow).
---
Source: https://docs.getglow.ai/getting-started/setting-up-your-team
# Setting Up Your Team
> Create a team, invite people to it, and choose what each role can do.
A team is a shared workspace. Your workflows, app connections, secrets and files all belong to one, even when you work alone.
**You already have one.** Signing up walks you through **Set Up Your Workspace**,
so the team you are working in now was created with your account. This page is
about the rest: adding more teams, inviting people, and deciding what each of
them can do.
## Create another team
One team is enough for most companies. A second is worth having when the work
should not mix: a workspace per client if you build for other companies, a
separate one for a side project, or one for experiments you do not want beside
production automations.
1. Click your workspace name at the top of the sidebar and choose **Create new** under **Other teams**.
2. Enter a **Team Name**. This will appear in your sidebar and URLs.
3. Optionally add a description so members know the team's purpose.
4. Click **Create Team** to finish.
Switching between teams switches the whole view: each one has its own workflows,
connections, variables and run history, and nothing is shared between them.
> **Your role is on your account, not on a team.** The Individual / Team,
> Consultant or MSP answer you gave when you signed up describes how you work,
> so it carries across every team you belong to and is not asked again here. It
> is not a permission level either: what you and your teammates may do is set by
> [Team Roles](#team-roles) below.
>
> **Building for other companies?** Consultant and MSP accounts get the
> multi-tenancy platform: a workspace per client, delegation grants your client
> consents to, and one console across every client you work with. Your account team
> turns it on with you. See [Working With Clients](/msp/overview).
You are automatically assigned the **Admin** role for any team you create.
> **Tip:** You can create multiple teams to separate projects or departments.
> For example, you might have one team for marketing automations and another for
> engineering ops.
## Invite team members
Once your team is created, you can invite collaborators.
1. Open the team and click **Invite Members** to open the invite modal.
2. Enter one or more email addresses.
3. Select a role for each invitee (see roles below).
4. Click **Send Invites**.
Invitees receive an email with an invite code. They can accept the invitation by entering the code when prompted, which adds them to the team immediately.
## Team roles
Glow provides three roles. They control **team administration**: who can bill, who can manage people, who can change shared values.
| Role | Can |
| ----------- | ------------------------------------------------------------------------------------------------------------------------------------------------------------------ |
| **Admin** | Everything below, plus billing management, invoices and payments, team settings, inviting and removing anyone, changing any role, and deleting the team. |
| **Manager** | Everything below, plus inviting Managers and Members, changing Manager and Member roles, and managing team variables. |
| **Member** | Build, edit and run workflows. View usage and pricing. Manage team files. View team variables. Invite further Members, and cancel or remove invitations they sent. |
*The role picker shown when you invite someone to the team.*
> **Roles govern team administration, not workflow access.** Every role, Member
> included, can create, edit and run any workflow in the team. To limit who can
> open a particular workflow, set that on the workflow itself. See [Workflow
> Visibility and Sharing](/build/core-concepts/workflow-visibility). Assigning
> someone Member will not give you read-only access.
Two things worth knowing before you assign roles:
- **Members can invite other Members.** Bringing one person in lets them bring in others at the same level.
- **Team files are open to everyone.** Any role can upload, rename and delete them, so a shared configuration file can be removed by anyone on the team. Secrets and team variables are the ones genuinely restricted. Members can see variable keys but not change them, and only Admins and Managers manage them.
Choose roles based on each person's responsibility. You can change a member's role at any time from the team settings.
## Removing someone
Admins and Managers remove people from team settings. Removing someone takes away their access to the workspace; it does not delete the workflows they built or the connections they authorised, since those belong to the team rather than to them.
Worth checking before someone leaves: any connection they authorised under a personal account of their own. The connection stays, but it points at an account the team no longer controls, and the steps using it fail once that account is closed. Re-authorise those under an account the team owns.
## What teams contain
Each team workspace holds four types of resources:
- **Workflows**: the automations you build on the canvas
- **Connections**: authenticated links to third-party apps (e.g., Slack, Google Sheets, Stripe)
- **Secrets**: API keys, tokens, and other sensitive values used by your workflows
- **Files**: uploaded assets that workflows can reference or process
All of these resources are shared across the team according to each member's role permissions.
## What's Next?
- 👉 **[Navigate the Dashboard →](/getting-started/navigating-the-dashboard)** to find workflows, settings and the control for creating an automation.
- Ready to build already? Head to [Your First Workflow](/getting-started/tutorials/your-first-workflow).
---
Source: https://docs.getglow.ai/getting-started/templates/deployment
# The Deployment Page
> Manage every workflow you have published from one table: whether it runs as a step or a form, and who it is deployed to.
**Deployment** is your workspace's central command center for packaging, versioning, and distributing automations. From a single unified ledger, you choose whether a workflow runs as an editable **Step template** or a standalone **Form interface**, create semantic snapshots, and deploy versions to the public Marketplace or managed client workspaces.
Navigate to **Team Assets → Deployment** in the left sidebar to manage all published automations across your workspace.
> **Deploying to Clients?** If you manage multi-tenant clients as a consultancy
> or MSP, [Choose a Deployment Method](/msp/choosing-a-deployment-method)
> compares this versioned deployment route with the one-client direct Admin Push
> flow.
---
## Understanding the Deployment Table
The Deployment table lists every publishable workflow in your workspace alongside its active interface type and distribution status:
| Column | What it tells you | Operational Actions |
| :-------------- | :-------------------------------------------------- | :------------------------------------------------------------------------- |
| **Interface** | How the workflow is consumed: **Step** or **Form**. | Click the dropdown to switch interfaces or configure form fields. |
| **Automations** | The workflow name and internal identifier. | Click the workflow title to open the visual canvas. |
| **Author** | The workspace member who authored the automation. | Identifies team ownership and maintainers. |
| **Last edited** | Relative timestamp of the most recent change. | `2h ago`, `yesterday`, `3d ago`. |
| **Deployed to** | Where the workflow is actively published. | Shows **Deploy** (unpublished), Marketplace badge, or client tenant logos. |
> **Audit Unpublished Workflows:** Read down the **Deployed to** column to
> identify completed automations displaying a blue **Deploy** link. These are
> workflows that have been built but not yet distributed to users or clients.
---
## Selecting an Interface: Step vs. Form
The **Interface** control defines how end-users interact with your workflow:
- [Step Interface (Default)](/getting-started/templates/step-templates): The workflow is distributed as a modular building block. Users fork the full canvas to customize logic or call it as a child Subflow.
- [Form Interface](/getting-started/templates/form-templates): The workflow is packaged as a standalone web form. Users input parameters and click Run without seeing canvas steps or credentials.
### Switch Interface Mode
Click the **Interface** chip in the table row and select **Form** or **Step**.
### Configure Form Fields (Form Mode)
If selecting **Form** on a workflow without configured inputs, click the yellow **Settings (⚙️)** icon. The form builder drawer opens beside the table, allowing you to select canvas fields, set custom labels, and define validation rules without leaving the Deployment page.
---
## The Versioned Deployment Flow
Clicking **Deploy** on any workflow row (or selecting **Share → Deploy** on the visual canvas) opens the two-step deployment modal:
### 1. Basic Info & Interface Selection
Verify the workflow title and category. Click **✦ Generate descriptions** to have Glow analyze your canvas steps and automatically draft a summary using your Glow AI token allowance. Confirm whether the workflow deploys as a **Step** or **Form** interface.
### 2. Version & Target Destination
Select an existing version snapshot or click **+ New version** to create an immutable version tag (e.g. `v1.2.0`) with release notes. Choose your destination: publish publicly to the **Marketplace** or push independent draft copies to up to **50 client workspaces**.
---
## Credential Isolation During Deployment
Glow's multi-tenant architecture strictly enforces zero-trust credential boundaries during all deployment operations:
> **Zero-Trust Credential Isolation:** - **Zero credential leakage:** Host
> templates never export third-party API tokens, passwords, or OAuth secrets. -
> **Client-owned execution:** Target client workspaces receive independent
> unconfigured steps that execute using the client's own credentials. - **Safe
> account rebinding:** Automatic connection binding happens only when exactly
> one healthy matching account exists in the target workspace. -
> **Pre-activation review:** Workflows arrive in **Draft** mode so client Admins
> can review connections before going Live.
- **No Credential Leakage:** API keys, OAuth tokens, and workspace secrets configured in your agency workspace are stripped automatically during packaging.
- **Client Account Binding:** When a client workspace activates a deployed workflow, steps automatically bind to existing client connections if exactly one healthy account exists for that service; otherwise, the client Admin selects the appropriate connected account.
## What's Next?
- 👉 **[Form Templates →](/getting-started/templates/form-templates)**: Customize input fields, validation, and pre-filled default values.
- **[Step Templates](/getting-started/templates/step-templates)**: Publish editable canvas blueprints to the Marketplace.
- **[Choose a Deployment Method](/msp/choosing-a-deployment-method)**: Compare workspace version deployment with direct MSP Admin Push.
---
Source: https://docs.getglow.ai/getting-started/templates/form-templates
# Form Templates
> Turn complex workflows into simple, executable interfaces for non-technical users.
A **Form Template** turns a visual workflow into an interactive, standalone form. Non-technical colleagues, clients, or external partners simply fill in the defined input fields and click **Run**.
The runner never sees the underlying canvas, intermediate logic steps, or sensitive connected credentials. Use a Form Template whenever an automation should be operated by people who need the result without having to learn or modify the workflow.
- [Form Interface](#how-the-form-interface-works): Single-submission web forms for structured intake (lead forms, onboarding, invoice processing).
- [Chat Interface](/build/triggers/chat): Multi-turn conversational interfaces for AI assistants, customer support bots, and Slack helpers.
- [Step Templates](/getting-started/templates/step-templates): Full editable canvas templates for builders to fork, customize, and extend in their own workspace.
---
## Comparing Deployment Interfaces
| Feature | Form Template (Form Interface) | Chat Interface (Chat Trigger) | Step Template (Canvas Fork) |
| :-------------------- | :------------------------------------------ | :--------------------------------------------- | :---------------------------------------- |
| **User Interaction** | Structured web form submission | Interactive multi-turn chat | Full visual canvas editor |
| **Best For** | Data intake, HR requests, report generation | Support bots, documentation Q&A, Slack helpers | Reusable workflow patterns & blueprints |
| **Canvas Visibility** | Completely hidden | Completely hidden | Full canvas visible & editable |
| **Credentials** | Uses builder's secure workspace connections | Uses builder's secure workspace connections | Requires forker to connect own accounts |
| **Entry Point** | Form link or workspace Deployment | Hosted chat page or Slack bot | Marketplace or workspace template library |
---
## How to Build a Form Interface
You build the automation on the multiplayer canvas as normal, then choose which fields across your steps should be exposed on the public form:
### Open the Form Interface Drawer
On your workflow canvas, click **More (⋮)** in the top-right toolbar and select **Form interface** (or click the **Interfaces** icon in the bottom-right dock).
### Select Fields from Canvas Steps
Click **Add fields**. The drawer displays all steps on your canvas. Click any step to inspect its configurable parameters, then check the fields you want the form runner to provide.
### Configure Labels, Descriptions & Validation
For each exposed field, customize the presentation:
- **Field Label:** Give the field a clear, non-technical title (e.g. `Customer Email Address` instead of `cust_email`).
- **Placeholder & Helper Note:** Add instructions or format hints (e.g. `e.g. jane@company.com`).
- **Required toggle:** Mark whether the field is mandatory before the runner can submit the form.
### Enable Pre-filled Default Values (Optional)
Toggle on **Default values** to populate the form with initial values derived from your current canvas step configuration. This lets runners submit standard requests with a single click while still allowing customization when needed.
### Preview and Test
Test the form directly inside the drawer preview. Enter sample inputs and confirm that values map correctly into your canvas steps before deploying.
---
## Supported Form Field Types
Glow automatically renders the appropriate UI control based on the underlying step parameter type:
| Field Type | Form Control | Examples & Use Cases |
| :----------------------- | :----------------------------------- | :----------------------------------------------------------- |
| **Short Text** | Single-line text input | Customer names, email addresses, order IDs |
| **Long Text / Markdown** | Multi-line textarea | Support ticket descriptions, feedback comments |
| **Numeric** | Number input with increment controls | Invoice amounts, item quantities, threshold caps |
| **Single Select** | Dropdown selection menu | Priority tiers (`Low`, `Medium`, `High`), department choices |
| **Date & Time** | Calendar date/time picker | Appointment dates, report start/end dates |
| **File Upload** | Drag-and-drop file uploader | PDF invoices, CSV datasets, image receipts |
---
## Deploying and Sharing the Form
Once your form interface is configured, you have several ways to distribute it:
**Generate a standalone hosted web URL:**
1. Switch your workflow from **Draft** to **Live** in the top navigation bar.
2. In the canvas header, click **Share → Form Link**.
3. Choose access permissions:
- **Public:** Anyone holding the link can submit the form.
- **Workspace Members Only:** Requires signing in with an authenticated workspace account.
**Distribute across client workspaces:** 1. Open **Team Assets → Deployment**
in the left sidebar. 2. Locate your workflow row and confirm the **Interface**
column is set to **Form**. 3. Click **Deploy** to snapshot a version and push
independent copies to up to 50 client workspaces. 4. See [The Deployment
Page](/getting-started/templates/deployment) for full versioning details.
**Share with the global Glow community:**
1. Open **Workflow Settings → Templates**.
2. Click **Publish to Marketplace**.
3. Add a descriptive overview, select domain tags, and submit your version.
---
## Runner Experience and Result Delivery
When an end-user opens your Form Template link:
1. **Clean Branded View:** They see a clean, distraction-free interface displaying only your configured input fields, descriptions, and a prominent **Run** button.
2. **Real-Time Validation:** Required fields and format constraints (e.g. valid email syntax or file upload size limits) are validated client-side before submission.
3. **Execution Delivery:**
- **Synchronous Workflows:** If the workflow produces an immediate output (such as a generated summary or calculated score), the result displays directly on the completion screen.
- **Asynchronous Workflows:** For background automations (such as updating Salesforce records or sending Slack notifications), the runner receives a confirmation receipt while work completes in the background.
---
## Real-World Use Case Patterns
| Template Pattern | Canvas Workflow | Runner Experience |
| :------------------------------- | :---------------------------------------------------------------------------------- | :---------------------------------------------------------------------------------------- |
| **Client Onboarding Intake** | Form Intake → Create HubSpot Contact → Generate Google Drive Folder → Alert Slack | Client account manager enters customer details and uploads contract PDF. |
| **AI Expense Receipt Processor** | Form Intake (File Upload) → AI Prompt (Extract JSON) → Validate → Quickbooks Write | Employee uploads photo of receipt; total amount and category are extracted and submitted. |
| **Custom Data Query Generator** | Form Intake (Date Range & Filters) → Database Query → Format CSV → Email Attachment | Operations team selects date range and receives automated CSV export in their inbox. |
## What's Next?
- 👉 **[The Deployment Page →](/getting-started/templates/deployment)**: Manage published versions and deploy forms across client workspaces.
- **[Chat Trigger & Interfaces](/build/triggers/chat)**: Create multi-turn conversational AI interfaces and Slack bots.
- **[Step Templates](/getting-started/templates/step-templates)**: Share editable canvas blueprints with workflow builders.
---
Source: https://docs.getglow.ai/getting-started/templates/import-and-export
# Importing a Workflow
> Bring a workflow into Glow from n8n or Make by importing its exported JSON.
Glow imports workflows exported from other automation platforms, so moving an existing automation across does not mean rebuilding it step by step.
**Supported sources: n8n and Make.**
## How to import
1. Export the workflow from your current tool as JSON. From n8n, that is the workflow's JSON. From Make, it is the scenario blueprint.
2. In Glow, open your workflow list and choose **Import JSON**.
3. Upload the file.
The dialog carries instructions for exporting from each supported platform, so you do not need to look them up separately.
Glow builds the canvas from the file: the steps, how they connect, and the configuration it can map. Anything without a direct equivalent in Glow is left for you to complete. That is normal when moving between platforms that model things differently.
> **Credentials never travel in an exported file**, from any platform. Every
> connection the workflow uses has to be authorised again in Glow before it will
> run. See [Connecting an App](/manage/apps-and-integrations/connecting-an-app).
## Sharing a workflow inside Glow
Inside Glow, a workflow moves as a template or a saved version rather than as a file. Use the route built for the job:
- **[Templates](/getting-started/templates/sharing-and-templates)**: publish a workflow so others can fork their own copy. This is how to share a pattern with your team or the wider community.
- **[Version history](/build/core-concepts/versioning)**: save a version before a risky change and restore it if the change goes wrong. This is what to reach for if you were thinking of exporting as a backup.
## What's Next?
- Plan a move from another platform with [Migrating to Glow](/getting-started/migrating-to-glow).
- Reconnect the credentials an import leaves empty in [Connecting an App](/manage/apps-and-integrations/connecting-an-app).
---
Source: https://docs.getglow.ai/getting-started/templates/overview
# Templates and Reuse
> Understand the difference between Marketplace Step Templates, Form Interfaces, and Workspace Deployments in Glow.
Glow provides distinct mechanisms for reusing, sharing, and executing automations depending on who will operate the workflow:
- [1. Step Templates (Marketplace)](/getting-started/templates/step-templates): Pre-built workflow blueprints from the Marketplace. Fork the full editable canvas into your workspace and customize steps.
- [2. Form Interfaces](/getting-started/templates/form-templates): Standalone form execution wrappers. End-users fill in input fields and run workflows without touching the canvas or credentials.
- [3. The Deployment Hub](/getting-started/templates/deployment): Centralized table to manage workflow interfaces, snapshot semantic versions, and push updates to client workspaces.
---
## Templates vs. Interfaces: Key Distinctions
It is important to understand the fundamental difference between **Marketplace Templates** and **Workflow Interfaces**:
| Concept | What It Is | Who Uses It | Canvas & Credentials |
| :-------------------------------------------------------- | :-------------------------------------------------------------------- | :------------------------------------------------------------------------------------- | :-------------------------------------------------------------------------- |
| **Step Template** (Marketplace) | A cloneable workflow blueprint in the public or team library. | **Workflow Builders:** Users who want to fork, edit, and maintain the automation. | Full canvas copied; forker connects their own app credentials. |
| **Form Interface** (Canvas / Deployment) | A front-end form runner built on top of an active workspace workflow. | **End-Users / Clients:** People who simply submit requests or data to trigger the run. | Canvas completely hidden; securely uses the author's workspace connections. |
| **Chat Interface** ([Chat Trigger](/build/triggers/chat)) | A conversational assistant interface (hosted web page or Slack bot). | **Chat Visitors & Teammates:** People who converse with the workflow interactively. | Canvas hidden; uses workspace connections and returns AI responses. |
> **Zero Credential Sharing:** When publishing a template to the Marketplace or
> deploying to a client workspace, third-party API keys and OAuth credentials
> are never exported. Deployed workflows run securely using the destination
> workspace's authorized connections.
---
## The Public Marketplace
Explore pre-built workflows designed by the Glow community and certified partners:
> **Public Template Gallery:**
> [https://app.getglow.ai/templates/](https://app.getglow.ai/templates/)
*A template's page previews its steps, category, required app connections, and interface type before you fork it.*
## What's Next?
- 👉 **[Step Templates →](/getting-started/templates/step-templates)**: Browse, fork, and publish editable canvas blueprints.
- **[Form Templates](/getting-started/templates/form-templates)**: Turn any workflow into an interactive form runner for non-technical users.
- **[The Deployment Page](/getting-started/templates/deployment)**: Manage semantic versions and distribute workflows across client workspaces.
- **[Importing & Exporting Workflows](/getting-started/templates/import-and-export)**: Import existing automations from n8n or Make.
---
Source: https://docs.getglow.ai/getting-started/templates/sharing-and-templates
# Publishing and Forking
> Publish a workflow as a reusable template on the Marketplace, and keep the published copy in step with your edits.
Glow lets you publish workflows as reusable templates that anyone can fork and adapt. Publish one to the Marketplace and the wider Glow community can find it.
A workflow you created from a blank canvas can be published. A workflow forked from another template cannot be republished; start a new workflow if you intend to share an adapted version.
## Publishing a workflow as a template
To publish a workflow as a template, use either the direct Marketplace route below or open the broader modal from **Share → Deploy**. Both publish a selected workflow version to the same Marketplace; the modal also exposes client deployment in an MSP workspace.
1. Open the workflow you want to share.
2. Open **Workflow Settings** and find the version section.
3. Choose **Publish to Marketplace**.
4. Fill in the details others will browse by: a title, a description of what it does and when to use it, who it is for, how it works, what setting it up takes, and what it needs. **Generate descriptions** drafts all of these from your canvas and suggests categories, so you edit rather than start from blank.
Once published, the template appears in the gallery for others to use.
**Generate descriptions reads the canvas in front of you**, including edits you have not saved, so a workflow you have just reshaped is described as it is now rather than as it was. It reads the steps, their names and how they connect — never the values you configured them with.
Changing the workflow afterwards does not update what you published. The same button now reads **Publish new version**. Press it when you want the marketplace copy to catch up with the workflow.
> **Tip:** Read the generated description as somebody who has never seen the
> workflow. It knows what the steps are, not why you built them — the problem it
> solves and what the person running it needs to know are yours to add.
## Forking a template
*The template gallery. Search or filter by category, then use Use template to fork a copy into your own workspace.*
When you find a template you want to use:
*A template's detail page previews the actual workflow before you fork it, and lists the connections it will need under Requirements.*
1. Open the template detail page.
2. Click **Use template**.
3. Select the team where you want to create the new workflow.
4. Glow creates a full copy of the workflow in your team. You can edit it freely, and your changes do not affect the original template.
Forking is non-destructive. The original template and your copy are completely independent after forking.
> A workflow you forked from a template cannot itself be published as a
> template. If you want to share an adapted version, build it in a workflow that
> did not start as a fork.
## When the original template is updated
If the template you forked from is published again with changes, your workflow shows a banner saying a new version is available. **Show details** compares the two so you can see what changed.
You apply the changes yourself: read the comparison and make the ones you want by hand. Your copy is never modified without you doing it, so a template that changes underneath you cannot break a workflow already running.
## Creator profiles
Your name and picture appear on every template you publish, and each card links through to a creator page.
The name and picture on your [account settings](/manage/workspace-settings/personal-settings) are what a reader sees attributed to your work, so those are the pair worth filling in.
## Best practices for templates
- **Keep templates self-contained.** Avoid referencing team-specific secrets or files that a new user would not have. If your workflow needs credentials, document that clearly in the description.
- **Use descriptive step names.** When someone forks your template, clear naming helps them understand the workflow without needing to ask you.
- **Version your templates.** If you significantly update a workflow, consider publishing a new version of the template rather than overwriting the old one.
## What's Next?
- Keep the logic hidden and give end-users a simple interface with [Form Templates](/getting-started/templates/form-templates).
- Track template revisions properly using [Versioning](/build/core-concepts/versioning).
- See everything you have published in one table on [The Deployment Page](/getting-started/templates/deployment).
---
Source: https://docs.getglow.ai/getting-started/templates/step-templates
# Step Templates
> Browse, fork, and publish classic workflow blueprints to share working automations across your team.
A Step Template shares a workflow as a full, editable copy. Using one clones the whole canvas into your own workspace: triggers, steps, connections, and logic.
This gives you full freedom to dissect how the automation was built and customize it to fit your needs.
## Choosing the Right Template Type
Two settings decide how a workflow reaches other people, and they live in different places. **Form interface**, under **More (⋮)** in the canvas controls, sets the shape: leave it alone and the workflow is a **Step template** others fork onto their own canvas, or build a form and it becomes a **Form template** they run by filling it in. **Workflow Settings** is where you actually publish it. See [Publishing and Forking](/getting-started/templates/sharing-and-templates).
- **Use a Step template when:** whoever you are sharing with will maintain the workflow. They get the canvas and can change how it works.
- **Use a Form template when:** whoever runs the automation is not the one maintaining it. They see a form, fill it in, and click Run. They never open the canvas.
The **Marketplace** in the sidebar is your catalog of pre-built workflows. Each template includes a name, description, category, and an overview of the apps it uses. That lets you scan quickly for what you need.

*Each card previews the apps a template connects, so you can judge at a glance what credentials you'll need.*
You can filter templates by category (e.g., Sales, Marketing, Engineering) and search by keyword.
## Forking a Template
When you find a template that fits your use case, click **Use template** to create a copy in your own workspace.
Forking gives you a fully editable version of the workflow. The original template is not affected by any of your changes. You own this new copy entirely.
> **Tip:** After forking a template, review each step's configuration before
> hitting Run. Templates are built for general use, so you will need to
> authenticate your own app connections, signing in to your Slack or Gmail
> account for example. Check that the data mapping matches your environment too.
## Publishing your workflows as templates
A workflow you created from a blank canvas can be published as a Step Template. A workflow forked from another template cannot be republished; start a new workflow if you intend to share an adapted version.
When you publish a workflow, you fill in the details others browse by:
- **Name**: A clear, descriptive title.
- **Description**: A summary of what the workflow does and the problem it solves.
- **Category**: The business domain (e.g., Operations, Support).
- **Icon**: A visual identifier for the gallery.
> **Check what your fields hold before you publish.** Glow removes two things
> for you: credential fields, and the account each step is connected to. Whoever
> forks the template reconnects their own accounts.
>
> Everything else you typed travels with the template. A key pasted into an
> ordinary text field, an internal hostname, a real customer's name in a sample
> message. All of it is copied verbatim into a stranger's workspace. Read
> through your steps and clear anything you would not publish deliberately.
## Best practices for builders
If you are publishing a template for your team or the community, follow these guidelines to ensure it's easy to adopt:
- **Use descriptive step names:** Rename generic steps like `HTTP Request 1` to `Fetch User Data`. This helps the person forking the template understand your logic instantly.
- **Leave Sticky Notes:** Since Glow has an infinite canvas, drop sticky notes next to complex branching logic to explain _why_ you built it that way.
- **Test End-to-End:** Before publishing, run the workflow with test data to ensure there are no dead ends or broken references. A template that works out of the box earns trust.
## What's Next?
- Give non-technical users a form instead of the canvas with [Form Templates](/getting-started/templates/form-templates).
- Walk through the publishing details in [Publishing and Forking](/getting-started/templates/sharing-and-templates).
---
Source: https://docs.getglow.ai/getting-started/tutorials/collaborating-on-a-canvas
# Working Together
> Invite a colleague onto the canvas and edit the same workflow at the same time.
This optional tutorial shows how two people can edit the same workflow at once, see each other's cursors and divide the work without creating separate copies. It continues from the workflow built in Tutorial 3, but nothing else in the learning sequence depends on completing it.
> **What you will learn:** Sharing a workflow, editing alongside someone in real
> time, and who can see what.
> **This one needs a second person.** If you are working alone, read it now to
> know what is available and come back when you have someone to build with —
> nothing later in the docs depends on having done it.
---
## Step 1: Check they can get in
Your colleague needs to be in this workspace already. **The link alone does not grant access**: it opens the workflow for someone who is already a member, and shows nothing to anyone else.
If they are not a member yet, invite them from the workspace menu → **Manage team**. See [Setting Up Your Team](/getting-started/setting-up-your-team) for the roles available and what each one may do.
If you have restricted this particular workflow, check its visibility too — see [Workflow Visibility and Sharing](/build/core-concepts/workflow-visibility).
---
## Step 2: Share the link
Copy the URL of your workflow from your browser's address bar and send it to your colleague.
When they open it, their avatar appears in the top right corner and you will see their cursor moving across the canvas in real time. Anything either of you changes shows up for the other without a refresh.
---
## Step 3: Split the work
The lead router from Tutorial 3 divides neatly between two people, which is the point of building it together rather than describing it afterwards.
### Take the routing yourself
Configure the **Conditions** step: the rules that decide which region a lead belongs to. That is the part that needs to know how the workflow is wired.
### Give the copy to whoever owns it
Your colleague clicks the four **Slack** steps and writes the message for each. That is the part that needs to know what Sales actually wants to say, which is rarely the same person.
You are both editing the same workflow at the same time, so there is no copy to merge afterwards and no screenshot to describe.
---
## Step 4: Save a version before you leave it
Once the two of you are happy with it, save a named version. That gives you a point to return to if the next round of edits goes wrong — see [Versioning](/build/core-concepts/versioning) for how restoring one behaves.
---
## What's Next?
That covers the tutorials. The next step is building something for your own work.
- **[Cookbook](/getting-started/cookbook/overview)** — worked recipes covering real business scenarios, with settings to copy.
- **[Real-Time Editing](/build/the-canvas/real-time-editing)** — what multiplayer does when two people change the same step at once.
- **[Glossary](/reference/glossary)** — look up any term these tutorials used.
---
Source: https://docs.getglow.ai/getting-started/tutorials/lead-routing-tutorial
# 3. Branching
> Split a workflow into routes with a Conditions step, then merge them back into one record.
A branching workflow sends each record down one of several routes and then brings them back together. You will build a lead router that sorts incoming leads by region and records every one of them in the same spreadsheet.
Instead of placing every step by hand, you will use the **Workflow Assistant** to generate the structure, then wire the merge yourself.
> **What you will learn:** Using AI for the first draft of a structure,
> conditional branching, and merging branches back into one step.
> **Before you start:** connect Slack and Google Sheets, create four Slack
> channels for the routes, and prepare a Google Sheet with columns for name,
> email, and region. If your company manages app approvals centrally, ask an
> administrator to approve either connection before you begin.
---
## Step 1: Generate the Architecture
Say you want to catch incoming leads from a Webhook and split them into four Slack channels by geographical region.
### Prompt the Assistant
Start a fresh workflow, as in Tutorial 2: in the sidebar open **Automations** and click **Create new**. Then open the Workflow Assistant: click **Assistant** in the panel at the bottom right of the canvas, and type:
> *"Create a webhook trigger. Then add a Conditions step with three routes (US East, US West and Europe), plus an Else route for everything else. Connect a Slack notification step to the end of each route."*
### Watch it Build
Hit **Enter**. The assistant lays out the multi-branch structure on your canvas.
### Give the Webhook test data
As in Tutorial 2, click the Webhook step, open **Test & Debug**, and edit the Testing data (the pencil icon, then Cmd+Enter to apply). Give it a sample lead so there is something to route:
```json
{ "name": "Ana Silva", "email": "ana@example.com", "region": "Europe" }
```
`region` is the field the Conditions rules will test.
## How a Conditions Step Routes
A Conditions step is not a yes/no fork. You give it a list of named conditions and it checks **every one of them**, firing the branch of each that is true. Anything matching none of them takes the **ELSE** branch.
That matters here. If a lead could satisfy both "US East" and "US West", both branches fire and the lead is announced twice. Write the rules so only one can match. And "Other" is not a fourth rule you write. It is the ELSE branch, which fires precisely when the other three did not.
---
## Step 2: Set the Rules
Click the **Conditions** step to configure each route.
A route's rule reads the field from the test data: the "Europe" route tests that the webhook's `region` equals `Europe`, picked from the data icon rather than typed. Do the same for the two US routes. The Else route needs no rules of its own — it fires only when none of the other three matched.
While you are here, click each **Slack** step and write the message for its route.
---
## Step 3: Merge the Branches
Whichever region a lead goes to, you want to record _all_ of them in a single Google Sheet at the end.
### Add Google Sheets
Open **Apps** in the dock, search for Google Sheets, and pick the **Add Single Row** action. Place it on the far right side of your canvas.
### Configure it
Click the step: choose your account (**Connect new account…** if none is connected yet), then the spreadsheet and the worksheet. Map each column from the webhook's fields with the data icon (name, email and region), the same move as Tutorial 2's message field.
### Merge the Branches
Click the output terminal (the dot on the right side) of the "US East" Slack step, and drag a line to the input terminal of the Google Sheets step. Repeat this for the other three Slack steps.
### Set the merge mode
Click the input terminal on the Google Sheets step and set it to **OR (Data from any step)**. The Google Sheets step then runs as soon as _any_ one of the Slack branches finishes, so every lead is recorded whichever route it took.
**OR is the right choice whenever the branches are alternatives**, as they are here: a lead takes one route, so the step runs once. The other option, **AND (Data from all steps)**, is for branches that all run every time — a fan-out you deliberately split and want to bring back together once each side has finished.
---
## Step 4: Test & Deploy
You have built a routing workflow that branches four ways and merges back to one record.
Hit **Run** to test the logic. If you run into unexpected issues or missing data, see the [Error Handling Guide](/build/core-concepts/error-handling).
Once it works, switch the workflow from **Draft** to **Live** so its trigger starts firing on its own.
---
## What's Next?
👉 **[Choose a Cookbook Workflow →](/getting-started/cookbook/overview)**
- Building with a colleague? Continue with the optional [Working Together](/getting-started/tutorials/collaborating-on-a-canvas) guide.
- Before relying on the workflow, read [Operating Workflows](/build/core-concepts/operating-workflows).
---
Source: https://docs.getglow.ai/getting-started/tutorials/tutorial-basics
# 2. The Basics: Build It Yourself
> Build the same kind of workflow by hand: placing steps, connecting them, and mapping data between them.
**About ten minutes.** This time you pass data from one step into another. Use Slack to send the result to a real app, or follow the no-account path with AI Prompt.
> **What you will learn**
>
> - Placing steps on the canvas and connecting them
> - Connecting an app so a workflow can act on your behalf, if you use Slack
> - Mapping data from one step into another
> **Before you start:** this tutorial connects Slack. In many companies
> installing a Slack app needs an administrator's approval, so it is worth
> checking first. If you cannot connect Slack, follow the **AI Prompt path** in
> Steps 2–4. It needs no connected account and teaches the same mapping skill.
---
## Step 1: Add a trigger
Start a fresh workflow for this: in the sidebar open **Automations** and click **Create new**, as in Tutorial 1. Every workflow starts with a trigger: the event that wakes it up.
### Replace the trigger placeholder
On the empty canvas, click **+ Add Trigger** on the left-hand placeholder. The dock's catalogue opens.
### Add a Webhook
Under **Tools → Start**, click **Webhook**. It takes the placeholder's spot on the canvas.
### Give it test data
Click the step and open the **Test & Debug** tab. **Testing data** shows a
sample object as a small structured editor. Hover over its top line and click
the pencil icon: the object turns into editable text. Replace it with:
```json
{
"visitor_name": "Alice",
"message": "I would like a demo!"
}
```
Press **Cmd+Enter** (Ctrl+Enter on Windows) to apply. The editor folds back
into the structured view with your two fields.
### Run it
Click **Run step**, then open the **Executions** tab. You will see the two fields you just entered. Glow now knows the shape of the data this trigger produces. That is what makes the next step possible.
> A trigger with no data is hard to build against. You would be mapping fields
> you cannot see. Giving it test data first is the normal way to work, not a
> shortcut for tutorials.
---
## Step 2: Add an action
A trigger on its own does nothing. Choose the path that fits what you can connect.
### Add a Slack step
Open **Apps** in the dock at the bottom, search for **Slack**, and pick **Send Message**. It lands on the canvas; place it to the right of your Webhook.
### Connect the steps
Drag from the dot on the right edge of the Webhook step to the dot on the left edge of the Slack step. That line is the execution order: Webhook first, Slack second.
### Connect your account
Click the Slack step and choose **Connect new account…** in its Account field. After authorising, pick the channel the message should go to.
### Add an AI Prompt step
Open **AI** in the dock and choose **AI Prompt**. It needs no connected account. Place it to the right of your Webhook.
### Connect the steps
Drag from the dot on the right edge of the Webhook step to the dot on the left edge of the AI Prompt step.
---
## Step 3: Map the data
This is the part worth slowing down for. You will make the action use what arrived at the trigger rather than fixed text.
Click the data icon beside the field you are editing to open the **Workflow data** panel, then pick `visitor_name` under the Webhook step. Glow inserts the reference with the Webhook's step number in front.
The snippets below write that number as `1`. **Read the real number off your Webhook step** and use it instead, exactly as Tutorial 1 taught.
In the Slack step, put this in the **Message** field:
```text
New inbound request from {{ 1.visitor_name }}:
{{ 1.message }}
```
In the AI Prompt step, put this in the **Instructions** field:
```text
Write a one-line greeting for {{ 1.visitor_name }} that responds to this message:
{{ 1.message }}
```
> **Why a number and not a name?** Because renaming a step never breaks
> anything. `{{ 1.message }}` keeps working however you label step 1. Full
> syntax in [Variable Reference Syntax](/reference/variable-syntax).
---
## Step 4: Run it, then set it Live
### Run the whole workflow
Click **Run** in the dock. Glow executes both steps using the test data from Step 1.
- **Slack path:** confirm the message arrived in your chosen channel.
- **AI Prompt path:** open the AI Prompt step, select **Executions**, expand the latest run, and read its `result`.
### Set it Live
Click the status control on the workflow (it currently reads **Draft**) and choose **Live**.
In **Draft** the workflow only runs when you run it: _triggers disabled, manual runs only_. Once it is **Live**, anything that sends a request to the Webhook's URL starts it automatically. See [Webhook Triggers](/build/triggers/webhook) for how to point a real system at it.
---
## What's Next?
You can now build a workflow by hand and move data through it. If you used Slack, you also connected an app that acts on your behalf. Next: branching, so a workflow can take different paths depending on what arrives.
👉 **[Continue to Tutorial 3: Branching →](/getting-started/tutorials/lead-routing-tutorial)**
---
Source: https://docs.getglow.ai/getting-started/tutorials/your-first-workflow
# 1. Quickstart: Your First Workflow
> Build a working automation in about five minutes, using nothing but the browser. No accounts to connect, no code.
**About five minutes.** By the end of this page you will have built an automation, all inside Glow. It runs on a schedule, asks AI to write something, and shows you what it wrote.
You need nothing but a Glow account. No apps to connect, no command line, no code.
> **What you will learn**
>
> - How a workflow is put together: a **trigger** and the **steps** that follow it
> - How to place a step and open its settings
> - How to run a workflow and read what it produced
> - How steps are numbered, and why that matters
Some of those words may mean nothing to you yet. That is fine. Each one is explained where you first need it, and the [Glossary](/reference/glossary) has the rest.
## The idea in three sentences
A **workflow** is a sequence that starts when something happens and then does things in order.
The thing that starts it is a **trigger**: a schedule, an incoming message, a new row in a spreadsheet. Everything after it is a **step**. Each step can use whatever the steps before it produced.
That is the whole model. Everything else in Glow is a variation on it.
---
## Step 1: Create the workflow
In the sidebar open **Automations** and click **Create new**, the yellow button above your workflows. (The **Create new** in the workspace menu makes a new workspace, which is not what you want here.) If you have not been in the app before, [Navigating the Dashboard](/getting-started/navigating-the-dashboard) shows where these are. A new canvas opens, ready for a trigger and a first action.
The **Workflow Assistant** opens along the right-hand side. It can build workflows from a description, and Tutorial 3 uses it. For now close it with the **X** in its top right, so you have the whole canvas to work with.
> Everything you place lands on the **canvas**. You find things to place in the
> row of buttons along the bottom: **Apps**, **Tools**, **AI**, **Subflows**,
> **Search**. That row is called the dock.
## Step 2: Add the trigger
You will use **Scheduler**, which starts the workflow at a time you choose. It is the one trigger that needs nothing set up: no account, no address, no incoming message.
### Open the trigger placeholder
Click the grey **Click to Add Trigger** placeholder on the canvas. The catalogue opens over it.
### Choose Scheduler
Under **Start**, click **Scheduler**. It takes the placeholder's spot, already wired to the action placeholder beside it, and its settings open on the right.
### Look at the schedule
**Schedule mode** is set to **AI Assistant**, and **Schedule description** already reads `Run everyday at 8:00 AM`. Leave both alone: that is a perfectly good schedule, and you will not wait for 8am to test it.
> There is a **Manual Cron** mode beside it for people who already know cron
> expressions. You will not need it today: describing the schedule in plain
> words does the same job. **Next runs** shows you the times it worked out, so
> you can check it means what you meant before you rely on it.
## Step 3: Add the AI step
### Open the action placeholder
Click the grey **Click to Add Action** placeholder, and in the catalogue that opens pick the **AI** section.
### Choose AI Prompt
The top group is **Glow AI**, marked _no API keys required, zero token costs_. Click **AI Prompt** there. It takes the placeholder's spot, wired to your Scheduler.
The providers listed below it (OpenAI, Anthropic, and the rest) each need an API key of your own. You do not need one today.
### Write the instruction
The **Instructions** field arrives with a sample in it. Replace it with:
```text
Write a two-sentence motivational note to start the working day.
```
> **Instructions is the whole of the step.** Whatever you write there is what
> the AI is asked to do. Vague instructions produce vague results, which is the
> single most common reason an AI step disappoints.
## Step 4: Notice the step numbers
Look at the number on each step. They may well not be 1 and 2.
That surprises everybody the first time. A step's number is fixed when the step is created and stays with it: it is the step's name, not its position in the run. Numbers are not handed out again once used, so gaps are normal and the first step is not always 1.
This matters because **steps refer to each other by number**. To use the AI step's answer somewhere later, you would write `{{ 4.result }}`, where `4` is whatever number is actually on the step.
> **Read the number off the step rather than assuming it.** Pointing at a step
> number that does not exist stops the run, and the reason is recorded on the
> step: _"Placeholder 99.nothing didn't find data"_. Copying the number from the
> step avoids it, as does the data icon beside every field, which lists earlier
> steps' output to pick from (Tutorial 2 uses it).
## Step 5: Run it
Click **Run** at the left of the dock. Glow runs the workflow once, immediately, without waiting for 8am.
Each step picks up a small counter showing how many times it has run.
## Step 6: Read what it wrote
This is the part everybody gets stuck on, so it is worth being precise.
### Open the step
Click the **AI Prompt** step to open its settings.
### Switch to Executions
Click the **Executions** tab. You will see one row per run: a relative time like _"a few seconds ago"_ and a long identifier.
### Expand the run
**Click the small arrow at the left of the row.** The row expands to show what the step produced:
```text
result: Embrace this new day with renewed energy, knowing that your
unique skills and dedication make a real difference…
```
**That is the moment.** A model you never configured and never gave a key to wrote that, inside a workflow you built in about five minutes.
> Note the word **`result`**. That is the name the answer is stored under, which
> is why a later step would reach it as `{{ 4.result }}`. Every AI step in Glow
> returns its answer the same way.
Run it a second time and expand the new row. The note is different: same instruction, new wording. If you want it shorter, or warmer, or signed off in your name, edit the Instructions and run it again. Getting a prompt right by iterating on it is most of the work in any AI step.
## What you just built
A trigger that fires on a schedule, and a step that produces something new each time. Every workflow in Glow is that shape, with more steps in between.
Three things are worth carrying forward:
- **You never left the browser.** No terminal, no connected accounts, no API keys.
- **Steps are referenced by number**, and the number comes off the step itself rather than from counting.
- **A run's output lives in Executions**, behind the arrow on the row.
## Making it real
Right now this workflow writes something and stops, and it only runs when you click **Run**. Two changes make it live:
- **Set it to Live.** A new workflow starts in **Draft**: the schedule is off and it runs only when you run it yourself. Click the status control next to the workflow's name (it currently reads **Draft**) and switch it to **Live**. The trigger starts firing on its own.
- **Send the result somewhere.** A note nobody reads is not much use. Add a step after the AI one that posts to Slack or sends an email, and reference the answer as `{{ 4.result }}`.
That second change needs a connected account, which is exactly what the next tutorial covers.
## What's Next?
👉 **[Continue to Tutorial 2: Build It Yourself →](/getting-started/tutorials/tutorial-basics)** to connect a real app and pass data between steps.
- Unsure about a term? The [Glossary](/reference/glossary) defines everything used here.
- Know the outcome but not the Step? Use [Choose the Right Step](/build/which-step).
---
Source: https://docs.getglow.ai/getting-started/welcome
# Welcome to Glow
> Build reliable workflows with your team, use AI where judgement helps and operate client automation in separate workspaces.
**Build together in real time. Operate every client in a separate workspace.** Glow is visual workflow automation where your team can design, test and operate on one shared canvas. Keep exact work deterministic and add AI where the input needs judgement.
## The Glow difference
- [Build together in real time](/build/the-canvas/real-time-editing): Mia Route priority leads Sam · to Sales AI Prompt Adding Step… Teammates edit the same workflow at the same time and see each other's changes as they happen.
- [Operate every client in a separate workspace](/msp/how-multi-tenancy-works): Consultants and MSPs can build, deploy and monitor across governed client workspaces without mixing workflows, accounts or run history.
- [Build together while the Assistant works](/build/ai-features/workflow-assistant): Describe the process in plain language. The Workflow Assistant builds on the live canvas while you and your teammates keep working.
- [Combine rules with AI Steps & Agents](/build/ai-features/overview): Deterministic AI Keep exact work deterministic. Drop AI Prompts, data transforms or an autonomous AI Agent Step onto the canvas wherever a task needs judgement.
For the full product model, continue to [What Is Glow?](/getting-started/what-is-glow).
## Choose your starting point
- [Build your first workflow](/getting-started/tutorials/your-first-workflow): **New to Glow? Start here.** Build, run and inspect a workflow in about five minutes. You do not need to connect an app or write code.
- [Start from an outcome](/build/which-step): Choose a workflow pattern, then find the trigger, logic and action Steps that fit the result you need.
- [Move an existing automation](/getting-started/migrating-to-glow): Map concepts from your current platform onto Glow, import what you can and finish the workflow safely.
- [Build for clients](/msp/overview): Set up governed access, work inside separate client workspaces and follow the first-client runbook.
## Learn by building
The core tutorial sequence moves from a blank canvas to a tested workflow:
1. **[Quickstart: Your First Workflow](/getting-started/tutorials/your-first-workflow)** — place a trigger and an AI Step, run them and inspect the result.
2. **[Build It Yourself](/getting-started/tutorials/tutorial-basics)** — connect a real app and map data between Steps.
3. **[Branching](/getting-started/tutorials/lead-routing-tutorial)** — add routing, test each path and switch the workflow to Live.
Building with a colleague? **[Working Together](/getting-started/tutorials/collaborating-on-a-canvas)** is an optional guide to sharing and editing the same workflow in real time.
## Go further
- **[Cookbook & Use Cases](/getting-started/cookbook/overview)** contains complete business workflows — from [AI Support Router with Tools](/getting-started/cookbook/ai-customer-support-router) to [HubSpot Alerts](/getting-started/cookbook/hubspot-slack-alerts).
- **[Public Templates](/getting-started/templates/overview)** gives you a starting canvas instead of an empty one.
- **[Operating Workflows](/build/core-concepts/operating-workflows)** covers controlled testing, switching to Live and checking the first automatic runs.
- **[Troubleshooting](/reference/troubleshooting)** starts from the symptom when a route or output differs from what you expected.
## What's Next?
- 👉 **[Build Your First Workflow →](/getting-started/tutorials/your-first-workflow)**
- Coming from another platform? Follow [Migrating to Glow](/getting-started/migrating-to-glow).
- Building for several companies? Start with [Working With Clients](/msp/overview).
---
Source: https://docs.getglow.ai/getting-started/what-is-glow
# What Is Glow?
> How Glow connects triggers, logic and actions on a shared canvas, with selective AI and separate client workspaces.
Glow is a visual workflow automation platform for teams that build together. It connects the apps and data behind a business process, runs the work automatically, and gives consultants and MSPs a separate governed workspace for each client.
A workflow might start when a form is submitted, on a schedule, or when a record changes in a connected app. On the canvas, a [trigger](/build/core-concepts/triggers-and-actions) starts the run, the steps after it make decisions and take action, and each step can use data produced earlier.

*A workflow on the canvas. The trigger is on the left; each step is numbered, and the numbers are how one step refers to another's output.*
,
},
{
value: "Trigger → action",
label: "A model that stays visible",
note: "Add logic between the two",
icon: ,
},
{
value: "Selective AI",
label: "For judgement and assistance",
note: "Keep exact rules deterministic",
icon: ,
},
{
value: "Per client",
label: "Workspaces for service teams",
note: "Separate data and governed access",
icon: ,
},
]}
/>
---
## The shape of every workflow
Every automation in Glow starts with a trigger and continues through steps that do the work. Add logic between them when the process needs to transform, route or repeat data:
A workflow stays readable because that model remains visible on the canvas. You can inspect what each step received, what it returned and which route the run took.
---
## What makes building in Glow different
### Your team works on the same live canvas
Several people can open and edit one workflow at the same time. Their cursors show where they are working, and changes appear for everyone as they happen. Different fields can be edited without one person waiting for another to finish.
That makes the canvas useful for more than initial construction. A team can investigate a run together, explain a process to its owner, or divide a larger workflow into branches without passing files around. See [Real-Time Editing](/build/the-canvas/real-time-editing).
### The Workflow Assistant builds where you build
Describe an automation in plain language and the [Workflow Assistant](/build/ai-features/workflow-assistant) places, connects and configures steps on the same canvas. You can keep editing while it works, then review and test what it produced before switching the workflow to Live.
The Assistant is for creating and changing the workflow. AI steps inside the workflow are different: they make a judgement each time a run reaches them.
### AI is one part of a reliable workflow
Use regular steps when the rule can be written down and the same input should produce the same result. Use an AI step when the work requires interpretation, such as classifying a support request or extracting fields from an unfamiliar document.
The common design uses both. AI interprets the uncertain input; ordinary steps route the answer and perform the final action. Add [Human Review](/build/action-steps/user-approval) before an important write or send when a person should approve the result.
### Client work stays in the client's workspace
Consultants and MSPs can work across separate client workspaces rather than combining every customer's automation and credentials in one account. Each workspace holds its own workflows, connected accounts, secrets, files and run history.
Access is governed through a grant the client can review, narrow or end. When you deploy a workflow to clients, each selected workspace receives an independent Draft copy for its own accounts and review. See [How Multi-Tenancy Works](/msp/how-multi-tenancy-works).
---
## The building blocks you will use
- **Triggers** start a workflow from a [webhook](/build/triggers/webhook), [schedule](/build/triggers/scheduler) or event in a connected app.
- **Actions** send messages, update records and call the services where work happens.
- **Control flow** uses [Conditions](/build/action-steps/conditions), [Switch](/build/action-steps/switch) and [loops](/build/action-steps/loops) to choose and repeat work.
- **Data mapping** carries a value from one step into another. [Data Transformation](/build/core-concepts/data-transformation) changes that value as it moves.
- **Draft and Live** separate manual testing from automatic triggers. [Versions](/build/core-concepts/versioning) give you a known state to restore.
- **Execution details** show the route, input and output of each run so you can verify and troubleshoot it.
## Where AI belongs
A useful rule is to ask whether the decision can be written down.
For example, an AI step can classify an incoming support ticket. A Conditions step then applies an exact routing rule, Slack alerts the right team, and the help desk record is updated. Only the classification needs AI; the rest stays predictable.
---
## What you can build
- [Lead Routing](/getting-started/tutorials/lead-routing-tutorial): Receive a lead, route it by an exact business rule and bring the branches back into one record.
- [Support Ticket Triage](/getting-started/cookbook/zendesk-sentiment-triage): Use AI to classify the request, then apply exact rules to update the ticket and alert a person when needed.
- [Invoice Processing](/getting-started/cookbook/ai-invoice-processing): Extract structured fields from a document, pause for approval and write each approved line to its destination.
- [Client Automation](/msp/first-client-workflow): Work inside a client's separate workspace, test with their accounts and leave the workflow ready for the client to own and operate.
---
## What's Next?
- 👉 **[Build Your First Workflow →](/getting-started/tutorials/your-first-workflow)**
- Choose a workflow shape or Step family in [Choose the Right Step](/build/which-step).
- Learn the underlying model in [What Is a Workflow?](/build/core-concepts/what-is-a-workflow).
---
Source: https://docs.getglow.ai/manage/apps-and-integrations/connecting-an-app
# Connecting an App
> Create a connection to a third-party service, so its steps can act on your account without you handling credentials in the workflow.
A connection stores your credentials for a third-party service securely, so Glow can call that service's API on your behalf. You create one before a workflow can use the service.
## Navigating to the Connections Page
Open **Connections** from the left sidebar of the Glow dashboard.
The page shows one card per app, so an app you have already signed in to sits alongside the ones you have not.
*Each card shows the app, its category, and whether an account is connected. Use the My connections filter to narrow the list to apps you already use.*
## Adding a New Connection
1. On the **Connections** page, type the app's name into the search box (for example, "Google Sheets").
2. Click **Connect** on that app's card.
3. Complete the authentication flow in the window that opens. The method depends on the app: see below.
4. Glow tests the credentials as you finish. On success the card shows the account you signed in with.
## Authentication Types
Glow supports several authentication methods depending on the app you are connecting.
### Signing in to the service (most apps)
Most major platforms (Google, Slack, Salesforce, etc.) use OAuth. When you select one of these apps:
1. A popup window opens, directing you to the app's sign-in page.
2. Sign in with your credentials for that service.
3. Review and approve the permissions Glow is requesting.
4. The popup closes automatically and your connection is confirmed.
> **Tip:** If the popup is blocked by your browser, check your popup blocker
> settings and try again.
### API Key
Some services authenticate via API key. When prompted:
1. Log in to the third-party service's dashboard.
2. Navigate to the API or developer settings to generate or copy your API key.
3. Paste the key into the Glow connection form.
4. Click **Save**.
### Username and Password
A small number of services use basic authentication:
1. Enter your username and password for the service.
2. Click **Save**.
### Custom Authentication
Some integrations require additional fields such as subdomain, region, or token. Glow displays the required fields dynamically based on the app you selected. Fill in all required fields and click **Save**.
## Selecting an Account in the App drawer
When you add an app step to a workflow, its App drawer includes an **Account** dropdown. This dropdown lists all connections you have created for that app.
1. Click the **Account** dropdown in the App drawer.
2. Select the connection you want to use for this step.
3. To sign in to another account without leaving the editor, choose **Connect new account…** from the same dropdown. It is always offered, so this is also how you add a second account for an app you have already connected.
## Practical Example: Connecting Google Sheets
1. Open **Connections** and search for "Google Sheets".
2. Click **Connect** on its card.
3. An OAuth popup opens. Sign in with your Google account.
4. Review the permissions (Glow will request access to read and write your spreadsheets).
5. Click **Allow**.
6. The popup closes, and the Google Sheets card now shows the address you signed in with.
7. In your workflow, add a Google Sheets step. In the step configuration, select your Google account from the **Account** dropdown.
## From Connected to Configured: One Full Action
Authentication is half the job. Here is the same Google Sheets connection carried through a working **Add Single Row** step, which is the pattern every app action follows:
1. Open **Apps** in the dock, search for **Google Sheets**, and pick **Add Single Row**. It lands on the canvas; connect it after the step whose data it should record.
2. Click the step. Choose your account, or **Connect new account…** if none is connected yet.
3. Pick the **Spreadsheet**, then the **Worksheet**. Both dropdowns read from your account, so what you see is what exists.
4. Map the columns. Each column of the sheet appears as a field: click the data icon beside one to open the **Workflow data** panel and pick the value from an earlier step. Mixing picked values with typed text is fine: a field can read `{{ 1.name }} ({{ 1.email }})`.
5. Run it once and open the step's **Executions** tab. The output shows what was written, and the row is in your sheet.
The names change per app: a Slack step wants a channel where Sheets wants a worksheet. The sequence is always account, then target, then field mapping with the data icon.
## Reading Data Instead of Writing It
The same connection reads as well as writes. Where **Add Single Row** puts a row in, **Get Values in Range** takes rows out, and it is the step to reach for when a workflow starts from what is already in a sheet:
1. Open **Apps**, search for **Google Sheets**, and pick **Get Values in Range**.
2. Choose your account, then the **Spreadsheet** and the **Worksheet**, exactly as above.
3. Leave **Range** empty to get everything, or narrow it with A1 notation such as `A1:E50`. The field is optional.
4. Run the step once, then open its **Executions** tab and read the output. The values arrive under `{{ N.ret }}`, where `N` is the step's number, and the Executions tab shows the real field names to build against.
Reading first is what makes a "go through the rows and do something with each" workflow possible: feed the output into a step set to **Each item**, or into a [Repeater](/build/action-steps/loops) if each row needs several steps.
**Looking for one specific row** rather than a range? **Find Row** searches a column for a value and returns the match, which saves pulling the whole sheet in and filtering it afterwards.
## Testing a Connection
After creating a connection, Glow runs an automatic test to verify that the credentials are valid. If the test fails:
- Double-check that you entered the correct credentials.
- For OAuth connections, ensure you approved all required permissions.
- Verify that the third-party service is not experiencing downtime.
There is no separate re-test action. To inspect a connection, click **Details** on its card. If the stored credentials have stopped working, the step that uses the connection reports it on its next run.
## Edge Cases and Troubleshooting
### Expired tokens
OAuth tokens can expire. Glow refreshes them automatically using the stored refresh token. A refresh can still fail, for example when you revoke Glow's access from the service itself. You then find out in the workflow rather than on the Connections page. Open the step that uses the account, and the App drawer names the broken connection, with a **Reconnect** button beside it. Clicking it re-runs the sign-in and re-points the step at the refreshed connection.
### Re-authentication
You may need to re-authenticate a connection if:
- You changed your password on the third-party service.
- You revoked Glow's access from the third-party service's settings.
- The third-party service rotated or invalidated your API key.
- Your organization's security policy requires periodic credential rotation.
To re-authenticate, open a step that uses the account and click **Reconnect** in the App drawer. That walks you through sign-in again and points the current step at the refreshed connection. Open the other workflows that depend on the account and confirm their connection before returning them to service.
### Popup issues
If the OAuth popup fails to open or closes prematurely:
- Disable your browser's popup blocker for the Glow domain.
- Try a different browser.
- Clear your browser cache and cookies, then try again.
## What's Next?
- Keep your connections healthy over time with [Managing Connections](/manage/apps-and-integrations/managing-connections).
- Understand what Glow stores and how it is protected in [Credentials & Authentication](/manage/apps-and-integrations/credentials).
---
Source: https://docs.getglow.ai/manage/apps-and-integrations/credentials
# Credentials & Authentication
> How to securely connect your apps to Glow using OAuth and API keys.
A **connection** gives Glow permission to act on your behalf in a third-party service such as Slack, Google Drive, or your own internal API. It stores the credentials that service requires.
Glow encrypts your tokens at rest with AES-256. Once a key is saved, it can never be read back through the interface.
---
## Types of Connections
Most connections use one of two methods, depending on the service you are connecting. [Connecting an App](/manage/apps-and-integrations/connecting-an-app) lists the full set, including username/password and custom fields.
### 1. OAuth 2.0 (Recommended)
Most modern SaaS apps use OAuth. Connect an app via OAuth and you are redirected to the app's website, such as Google or Microsoft. There you log in and grant Glow specific permissions.
- **Advantage:** You never hand over your actual password to Glow. Instead, Glow receives a secure "token" that it uses to authenticate.
- **Management:** Glow automatically handles token expiration and background refreshing for you.
### 2. API Keys
For developer-focused tools or custom HTTP requests, you may need to provide an API key.
When creating a credential of this type, you paste the key from the third-party service into Glow.
---
## How to Add a Credential
You can add a new credential in two ways:
### From the Canvas While Building
Add an action step to the canvas, such as **Send Slack Message**, and open the App drawer. Open the **Account** dropdown and choose **Connect new account…** to complete authentication without leaving the canvas.
### From Connections
If you want to pre-configure connections for your team:
1. Open **Connections** in the workspace sidebar.
2. Search for the service you want and click **Connect** on its card.
---
## Security & Encryption
When you save an API key or when Glow receives an OAuth token, the data is encrypted immediately before being stored in our database.
- **AES-256 Encryption:** All sensitive credential data is encrypted at rest using industry-standard AES-256 encryption.
- **No Plaintext Access:** Once an API key is saved, it can never be viewed in plaintext again, not even by you or your workspace admins. It is only used by Glow when a workflow runs.
- **Least permissions:** When using OAuth, Glow only requests the minimum permissions (scopes) needed for the actions in our integration catalog.
---
## Managing and Revoking Access
If an API key is compromised, or an employee leaves your organization, you can revoke access straight away.
1. Open **Connections** in the workspace sidebar.
2. Find the app's card.
3. Click **Disconnect** and confirm.
Disconnecting takes effect on the next run. A step that used the account fails at that step, and the App drawer flags the account as no longer authorized with a **Reconnect** button. Point each affected step at a replacement account, or reconnect with fresh credentials. See [Managing Connections](/manage/apps-and-integrations/managing-connections).
## What's Next?
- Store non-OAuth API keys outside your step configuration in [Secrets and Variables](/manage/workspace-settings/secrets-and-variables).
- Find and repair the workflows a revoked credential breaks in [Managing Connections](/manage/apps-and-integrations/managing-connections).
---
Source: https://docs.getglow.ai/manage/apps-and-integrations/managing-connections
# Managing Connections
> Monitor, update, and organize every app you have connected to Glow, from one central page.
The **Connections** page is the central place to find apps, add your own accounts and manage the connections you created.

*Connected apps show the account in use; unconnected ones show Not connected. Use My connections to filter down to just the apps you have set up.*
## Viewing All Connections
Open **Connections** from the left sidebar. The page shows one card per app. A card gives you the app's name, its category, and either the connected account's email address or **Not connected**.
Three controls narrow the page down. **My connections** filters to the apps you have already set up, the search box finds one by name, and the view toggle switches between grid and list.
## Connection Status
A card reads one of two ways: the connected account, shown in green, or **Not connected**.
The card names the account; whether its access still works is checked where it matters, at the step that uses it. A step whose account has lapsed names it and offers a **Reconnect** button in the App drawer.
## Disconnecting a Connection
Only the person who created a connection can disconnect it. Other workspace members can use an available connection in a workflow, but they do not see its lifecycle actions.
1. Find the app's card on the **Connections** page.
2. Click **Disconnect**.
3. Confirm.
> **Tip:** Before disconnecting, check which workflows use this account.
> Disconnecting causes any step that references it to fail on its next run.
## Reconnecting
Glow does not flag a dead connection on the Connections page. You find it in the workflow instead. Open the step that uses the account, and the App drawer names the broken connection, "<account> is no longer authorized", with a **Reconnect** button beside it.
Clicking it re-runs the sign-in and re-points the step at the refreshed connection.
## Multi-Account Support
Glow allows you to connect multiple accounts for the same app. This is useful when:
- You manage workflows for different clients, each with their own Google Workspace.
- Your team uses separate Slack workspaces for internal and external communication.
- You need to read from one Salesforce org and write to another.
### Adding a Second Account
The quickest route is from inside a step. Open the **Account** dropdown in the App drawer and choose **Connect new account…**, which is offered whether or not you already have one. Sign in with the second account, and the step points at it straight away.
### Selecting Between Accounts in a Workflow
Configure a step for an app with multiple connections and the **Account** dropdown lists every one of them. Select the one appropriate for that particular step.
For example, say you have two Google Sheets connections, one for `operations@company.com` and one for `marketing@company.com`. One step can read from an operations spreadsheet while another writes to a marketing spreadsheet, all within the same workflow.
## Where Connections Appear in the App drawer
When you add or edit an app step, its App drawer includes:
1. **Account**: a dropdown listing all connections for the selected app. This is where you choose which account to use.
2. **Action**: the specific operation to perform (for example, "Add Single Row" in Google Sheets).
3. **Configuration fields**: the inputs required by the selected action, which may reference data from previous steps.
The **Account** dropdown always offers **Connect new account…** at the bottom, so you can sign in to a new account without leaving the workflow editor.
## Best Practices
- **Know which account is which before you connect it.** A connection is labelled with what the provider returns, usually the account's email address. Signing in with an address that makes its purpose obvious (`billing@`, `alerts@`) is what tells two connections apart later. Where a provider returns no address at all, the card reads "Connected". That is another reason to connect accounts one at a time, in an order you will recognise.
- **Review connections periodically.** Remove connections that are no longer in use to keep your Connections page clean and keep the list to what you actually use.
- **Coordinate with your team.** A connection can be selected in workflows across the workspace, but only its owner can reconnect or disconnect it. Disconnecting affects every workflow that references it.
## What's Next?
- Add a service you have not authenticated yet in [Connecting an App](/manage/apps-and-integrations/connecting-an-app).
- See how workspace roles, workflow visibility and delegated access fit together in [Permissions and Access](/manage/workspace-settings/permissions-and-access).
---
Source: https://docs.getglow.ai/manage/apps-and-integrations/overview
# Apps & Integrations
> The pre-built connections, what each one can do, and how to authorise the account a step acts through.
An app connection lets a step act inside another service, using an account you have signed in to: it sends the Slack message, or adds the spreadsheet row. You sign in once, and every step that needs that service can use it.
Glow provides a broad catalogue of pre-built business app connections. The [Integrations Directory](https://getglow.ai/integrations) is the current list of available apps, triggers, and actions.
## The Integrations Directory
To see what a given app can do before you build with it, search the **[Integrations Directory](https://getglow.ai/integrations)**. It lists every trigger and action Glow supports for each service.
> **Search the Directory:** 👉
> **[https://getglow.ai/integrations](https://getglow.ai/integrations)**
### How to use the directory:
- **Search any app:** Type the name of the tool you use (e.g., Salesforce, Slack, Notion).
- **View available actions:** Click on any app to see the exact triggers and actions Glow supports out of the box for that specific tool.
- **Request an app:** If the app you need is not listed, submit a request from the search bar.
## Using your own API keys
Most apps connect over OAuth, and Glow stores and refreshes those tokens for you.
Where a service authenticates with an API key instead, you supply your own key in the connection settings. That usage is billed to your account and covered by your own agreement with the provider. Keys are stored encrypted. See [Credentials](/manage/apps-and-integrations/credentials).
Glow's [AI steps](/build/ai-features/supported-models) are the exception: they run on managed infrastructure and need no key at all.
## How apps work in Glow
When you drag an app onto the canvas, Glow provides two layers of functionality:
1. **Authentication Handling:** Glow securely stores your OAuth tokens, API keys, and passwords, handling token refreshes automatically.
2. **Pre-built Actions:** You get a clean UI with dropdowns and input fields specific to that app, rather than raw HTTP requests. Examples: "Send Slack Message", "Update CRM Record".
## What's Next?
- Sign in to your first app in [Connecting an App](/manage/apps-and-integrations/connecting-an-app).
- See what to do when an account stops working in [Managing Connections](/manage/apps-and-integrations/managing-connections).
- Call a service Glow has no integration for with the [HTTP Request](/build/action-steps/http-request) step.
---
Source: https://docs.getglow.ai/manage/billing/credits-and-allowances
# Step Credits, Tokens & Storage
> Detailed consumption rules for workflow Step credits, hosted Glow AI model tokens, and persistent file storage.
Every automation in Glow draws from three transparent meters: **Step credits**, **Glow AI tokens**, and **Retained storage**. Understanding how these meters operate allows you to accurately forecast costs and design efficient automations.
---
## 1. Step Credits
Step credits measure standard workflow execution. Each step reserves capacity before execution and settles based on the actual work performed.
1. Step Triggered → 2. Atomic 1-Credit Reservation → 3. Execution & Settlement
### Execution outcomes and fair charging
Glow uses a state-safe reservation lifecycle so you are charged only for actual work performed:
**Outcome: Success (`pass`) · 1 Step Credit Deducted**
The step completed all work successfully. The initial 1-credit reservation is settled and deducted from your monthly allowance.
- **Charge:** **1 Step credit**.
- **Settlement state:** `Settled`.
- **Real-world scenario:** A Slack message, CRM update, or HTTP Request sent and acknowledged with `200 OK`.
**Outcome: Pre-Work Error (`FailedUncharged`) · 0 Credits (Free)**
The step failed before performing external chargeable work (e.g. invalid input mapping, unconfigured connection credentials). The reservation is released immediately.
- **Charge:** **0 credits (Free)**.
- **Settlement state:** `Released`.
- **Real-world scenario:** An API step with an invalid authentication token fails validation before dispatching to the external service.
**Outcome: Partial Batch Execution (`FailedChargeable`) · Proportional Settlement**
For batch loops ([Run for each item](/build/action-steps/loops/run-for-each-item) or [Repeater](/build/action-steps/loops/repeater)), credits settle based on the exact number of item passes initiated before an error stopped the loop.
- **Charge:** **Actual completed item invocations**.
- **Settlement state:** `Proportionally settled`.
- **Real-world scenario:** In a 100-item loop, 45 items successfully run before an external rate limit (429) halts the run → 45 credits settled.
**Outcome: Allowance Exhausted · 0 Credits (Free)**
If your monthly balance reaches 100%, the step is not admitted to the execution queue. It halts safely with `out_of_credits` without consuming any credits.
- **Charge:** **0 credits (Free)**.
- **Settlement state:** `Halted without charge`.
- **Real-world scenario:** A webhook fires when monthly credits are depleted → the step halts safely with 0 charge.
---
### Loops and batch processing
Workflows that iterate over collections of items meter each item pass individually:
**Single-step loop execution:** - The step reserves credits equal to the
total item count. - Upon completion, credits settle based on the actual
items processed. - **Worked example:** A Slack step sending messages to 150
customer rows uses **150 Step credits**.
**Multi-step loop body execution:** - Each step inside the loop body meters
its executions per iteration. - **Worked example:** A loop body with 3 steps
(Enrich Data → AI Prompt → Update CRM) running over 20 items consumes up to
**60 Step credits** (3 steps × 20 passes), plus any tokens used by the AI
step.
**Modular child workflow execution:** - The parent step consumes **1 Step
credit** to initiate the child execution. - The child workflow executes
independently, with its internal steps metered normally. - Returning data
back to the parent workflow incurs no additional charge.
> **Batch admission protection:** Before starting a large batch, Glow verifies
> that your workspace has sufficient remaining credits for the full list. If a
> batch exceeds your available monthly balance, the step pauses safely rather
> than partially executing and draining your account.
---
## 2. Glow AI Tokens
Hosted AI features—including **AI Prompt**, **AI Agent**, **AI Data Transform**, and **Workflow Assistant**—draw from your workspace's **Glow AI tokens** balance.
```text
Total Billable AI Tokens = Input Tokens + Generated Output Tokens + Reasoning Tokens
```
- **Input tokens:** Prompt instructions, schema definitions, and context documents sent to the model.
- **Output tokens:** The generated response, JSON object, or text produced by the model.
- **Reasoning tokens:** Internal step-by-step thinking tokens generated by advanced reasoning models.
- **Autonomous agent loops:** In multi-step agent executions, every reasoning turn and tool-decision call meters its individual token consumption.
### Hosted Glow AI vs. Custom Provider Keys
**Managed Glow AI:** - **API Keys:** None required; fully managed by Glow. -
**Metering:** Token usage deducts directly from your workspace's **Glow AI
tokens** allowance. - **Step Credits:** Consumes standard Step credits for
canvas execution + tokens for model generation.
**Third-Party API Keys (OpenAI, Anthropic, etc.):** - **API Keys:** You
provide your own external API key in the step configuration. - **Metering:**
Consumes **1 standard Step credit** in Glow. - **Token Costs:** Token
consumption is billed directly to your third-party account by the model
provider (0 Glow AI tokens deducted).
---
## 3. Retained File Storage
Workspaces store uploaded attachments, CSV datasets, generated PDFs, and integration assets in **Retained file storage**.
| Model Attribute | Policy | Operational Behavior |
| :-------------------- | :------------------------- | :------------------------------------------------------------------------ |
| **Standing Quota** | Measured in Gigabytes (GB) | Continuous workspace storage allocation. |
| **Reset Schedule** | Never resets | Retained capacity persists across billing cycles. |
| **Quota Checks** | Pre-upload verification | Validates available disk quota before storing files. |
| **Capacity Handling** | Fail-safe retention | Existing files remain accessible; new uploads pause until space is freed. |
- **Standing Capacity:** Unlike Step credits and AI tokens, file storage represents physical cloud disk volume and does not reset each month.
- **Persistent Files:** Stored files remain permanently available until deleted by workspace team members.
- **Upload Quota Checks:** Before committing a new file upload or file-generation step, the system verifies that the resulting total size fits within your allocated storage.
- **Over-Capacity Behavior:** If storage reaches capacity, existing files remain safe, readable, and downloadable. New uploads pause until unused files are deleted or storage capacity is increased.
---
## Real-world calculation examples
| Workflow Scenario | Configuration | Monthly Runs | Estimated Resource Consumption |
| :------------------------------ | :---------------------------------------------- | :----------------- | :--------------------------------------------------------------------- |
| **Lead Routing & CRM Alert** | 4 steps (Webhook → Filter → HubSpot → Slack) | 5,000 leads / mo | **20,000 Step credits**0 AI tokens · < 0.1 GB storage |
| **AI Customer Support Triage** | 3 steps (Webhook → AI Prompt → Zendesk Reply) | 2,500 tickets / mo | **7,500 Step credits**~3.5M Glow AI tokens · < 0.5 GB storage |
| **Daily CSV Report Processing** | Scheduler → Fetch CSV (500 rows) → Loop 2 steps | 30 days / mo | **30,060 Step credits**0 AI tokens · ~2.0 GB storage |
## What's Next?
- 👉 **[Purchasing & Changing Amounts →](/manage/billing/subscription-plans)**: Select tailored resource amounts for your team.
- **[Invoices & Payment Methods](/manage/billing/invoices-and-payments)**: Download past invoices, receipts, and manage billing contacts.
- **[Usage Controls & Recovery](/manage/billing/usage-controls-and-recovery)**: Configure automated alerts, safeguards, and recovery workflows.
---
Source: https://docs.getglow.ai/manage/billing/invoices-and-payments
# Invoices & Payment Methods
> How to manage corporate payment methods, update billing contact details, download invoices and receipts, and pay outstanding balances.
Workspace Admins can manage corporate payment methods, verify billing notification contacts, review detailed invoice breakdowns, and export operational usage logs from the **Billing** tab.
> **Strict Administrative Privacy:** Financial details, payment instruments, tax
> registrations, and invoice documents are restricted to workspace **Admins**.
> Workspace Members and Managers can view operational usage metrics but cannot
> access financial records.
---
## Managing payment methods
Glow processes credit card and corporate payment methods through an encrypted, PCI-compliant billing portal.
### Open Plan & Payment
Navigate to **Billing & Usage → Billing** as an Admin and locate the **Plan and payment** section.
### Access the secure billing portal
Select **Manage payment method**. You will be redirected to the secure portal where you can:
- Add a new primary corporate credit card.
- Update expiration dates and billing addresses.
- Remove outdated payment cards.
### Return to Glow
Once updated, the portal automatically returns you to Glow, and your refreshed card brand and last four digits will display immediately.
---
## Updating the billing contact
Billing receipts, payment confirmations, renewal notices, and invoice alerts are automatically dispatched to the registered billing contact.
### Open billing contact dialog
In **Billing & Usage → Billing**, select **Change billing contact**.
### Enter updated contact details
Provide the new contact's full name and email address (for example, `accounting@yourcompany.com`).
### Verify email address
Select **Send verification**. Glow sends an authentication link to the new address. Once the recipient confirms the link, the billing contact is updated across all future invoice communications.
---
## Invoice history and receipts
The **Invoices and exports** section maintains a complete historical ledger of every subscription payment, capacity adjustment, and renewal transaction.
| Invoice Date | Period Covered | Status & Amount | Available Documents |
| :------------------- | :------------------- | :-------------- | :-------------------------------------- |
| **Current Period** | Active Billing Cycle | Paid | PDF Invoice, Payment Receipt, Usage CSV |
| **Previous Periods** | Historical Months | Paid | Downloadable Archive & Historical Logs |
For each transaction, Admins can access:
- **Invoice breakdown:** An itemized modal displaying the exact breakdown of Step credits, Glow AI tokens, and storage capacity, alongside applicable taxes and discounts.
- **Hosted invoice:** An interactive web invoice suitable for online accounts payable workflows.
- **PDF invoice:** A formal downloadable PDF document complete with company name, address, and registered tax identifier (VAT/GST).
- **Payment receipt:** Instant confirmation receipt verifying the successful card transaction.
- **Usage CSV export:** A detailed CSV log of the billable events and operations processed during that billing cycle.
---
## Paying outstanding invoices
If a renewal charge or capacity expansion payment fails (for example, due to an expired card or bank hold):
1. Invoice Due → 2. 7-Day Grace → 3. Alert Banner → 4. Pay Now → 5. Active
1. The affected invoice displays an **Open** or **Action Required** badge in your invoice list.
2. A prominent alert banner appears across **Billing & Usage** indicating the outstanding amount and the payment deadline.
3. Select **Pay now** next to the affected invoice to open the payment dialog.
4. Confirm payment using your stored payment method or enter a new card. Once processed, the invoice transitions to **Paid** and active service continues without interruption.
---
## Sponsored and agency workspaces
For agencies, IT consultants, and Managed Service Providers (MSPs) operating under Glow's multi-tenant architecture:
- **Client privacy:** When an MSP sponsors or manages a client workspace, the client team sees operational meters on the **Usage** tab.
- **Payer isolation:** The **Billing** tab in the sponsored workspace confirms that billing is managed by the provider, ensuring provider payment details, credit cards, and master invoices are never exposed to the client.
## What's Next?
- 👉 **[Usage Controls & Recovery →](/manage/billing/usage-controls-and-recovery)**: Configure budget alerts, storage caps, and service recovery steps.
- **[Step Credits, Tokens & Storage](/manage/billing/credits-and-allowances)**: Review how step execution, AI tokens, and storage are metered.
- **[Administer a Workspace](/manage/overview)**: Explore complete workspace administration, team management, and governance.
---
Source: https://docs.getglow.ai/manage/billing/overview
# Billing & Usage Overview
> How Glow bills workspace resources, tracks monthly allowances, and separates operational usage from financial management.
Glow uses a transparent prepaid resource model where each workspace purchases and tracks monthly allowances in advance. Instead of complex point conversions or surprise overage charges at the end of the month, your team manages three independent resources: **Step credits**, **Glow AI tokens**, and **Retained storage**.
> **Role-based visibility:** All workspace members (Admins, Managers, and
> Members) can open **Billing & Usage** to monitor live consumption meters and
> review published pricing. Financial controls—including payment methods,
> invoices, subscription changes, and budget safeguards—are strictly reserved
> for **Admins**.
## The three workspace resources
Every workflow action in Glow draws from one of three distinct meters:
- [Step Credits](/manage/billing/credits-and-allowances#1-step-credits): Standard triggers, app actions, logic gates, and custom code executions. 1 credit per executed step.
- [Glow AI Tokens](/manage/billing/credits-and-allowances#2-glow-ai-tokens): Hosted AI prompts, structured data transformation, and autonomous agent loops. Input, output, and reasoning tokens.
- [Retained Storage](/manage/billing/credits-and-allowances#3-retained-file-storage): Standing workspace capacity in Gigabytes for uploaded assets, spreadsheets, attachments, and generated files.
> **Strict Resource Isolation:** Glow AI tokens do not convert into Step
> credits, and Step credits cannot be spent on hosted AI model generation. Each
> balance operates independently so an intense AI task never exhausts your
> routine operational triggers.
---
## The four billing views
Access billing at any time by clicking your workspace name in the top-left sidebar and selecting **Billing & Usage** (or navigating directly to `/app/subscription`).
The interface organizes consumption and administration into four dedicated tabs:
- [1. Usage Tab](/manage/billing/overview#tab-breakdown-and-permissions): **All Workspace Roles:** Live meter gauges for Step credits, AI tokens, and storage with billing cycle reset dates.
- [2. Pricing Tab](/manage/billing/overview#tab-breakdown-and-permissions): **All Workspace Roles:** Interactive calculators to estimate capacity rates and review commercial terms.
- [3. Controls Tab](/manage/billing/overview#tab-breakdown-and-permissions): **Admins Only:** Token safeguards, storage hard caps, threshold alerts (80%, 90%, 100%), and webhooks.
- [4. Billing Tab](/manage/billing/overview#tab-breakdown-and-permissions): **Admins Only:** Subscription plans, payment methods, billing contacts, and downloadable PDF invoices.
### Tab breakdown and permissions
| Tab | Key information and actions | Who can access |
| :----------- | :-------------------------------------------------------------------------------------------------------------------- | :------------------------ |
| **Usage** | Live meter gauges for Step credits, AI tokens, and storage; current billing cycle dates; upcoming monthly reset date. | Admins, Managers, Members |
| **Pricing** | Interactive sliders to calculate rates for additional capacity and review commercial terms. | Admins, Managers, Members |
| **Controls** | AI token safeguards, storage limits, custom notification thresholds (80%, 90%, 100%), and alert webhook endpoints. | **Admins only** |
| **Billing** | Current plan summary, payment card management, tax/VAT details, invoice history, PDF downloads, and plan adjustments. | **Admins only** |
> **Client & Agency Workspaces:** For client workspaces managed under an MSP or
> agency sponsorship, the **Usage** tab shows live operational metrics. The
> **Billing** tab informs the client that billing is centrally managed by the
> agency, keeping agency payment instruments and master invoices completely
> private.
---
## How allowances and resets work
Glow aligns resource replenishment with your workspace's billing anchor date:
- **Step credits**: Refills to full allowance monthly.
- **Glow AI tokens**: Refills to full allowance monthly.
- **Retained storage**: Standing capacity (never resets).
- **Monthly replenishment:** On your monthly reset date, your workspace receives its fresh allowance of Step credits and Glow AI tokens. Unused consumable credits from the previous cycle do not roll over.
- **Standing storage:** Retained storage represents active cloud disk capacity and does not reset. Your files remain permanently stored and accessible across billing cycles.
- **Annual billing:** Choosing an annual subscription bills twelve months in advance while continuing to grant your full consumable allowance every month on schedule.
---
## Predictable operations without unexpected overages
Glow never silently runs into surprise debt or automatically charges unapproved overage fees.
1. **Graceful step pausing:** If your monthly Step credits or AI tokens reach 100%, subsequent steps requiring that specific resource pause with an informative status (`out_of_credits` or `glow_ai_token_limit`).
2. **Unaffected workflows continue:** Workflows that do not require the exhausted resource (for example, non-AI automations when AI tokens run low) continue executing normally.
3. **Trigger preservation:** Inbound webhooks and scheduled triggers remain deployed and active. Once your allowance resets or capacity is adjusted, runs resume automatically.
## What's Next?
- 👉 **[Step Credits, Tokens & Storage →](/manage/billing/credits-and-allowances)**: Detailed consumption rules across all step types, loops, and AI models.
- **[Purchasing & Changing Amounts](/manage/billing/subscription-plans)**: Select custom resource amounts and manage monthly or annual terms.
- **[Usage Controls & Recovery](/manage/billing/usage-controls-and-recovery)**: Set automated safeguards, email alerts, and webhook notifications.
---
Source: https://docs.getglow.ai/manage/billing/subscription-plans
# Purchasing & Changing Amounts
> How to customize your workspace resource amounts, switch between monthly and annual terms, and manage subscription upgrades or cancellations.
Glow allows workspace Admins to customize resource capacity to match exact operational requirements. You choose your allowances for **Step credits**, **Glow AI tokens**, and **Retained storage** independently, with no compulsory base platform fees or rigid bundled tiers.
---
## Choosing your monthly amounts
To configure or change your workspace plan, navigate to **Billing & Usage → Usage** (or **Pricing**) as a workspace Admin.
| Resource Option | Self-Service Range | Metering Basis |
| :------------------- | :------------------------ | :---------------------------------- |
| **Step Credits** | 1,000 to 100,000+ credits | 1 credit per executed non-AI step |
| **Glow AI Tokens** | 1M to 50M+ tokens | Input, output, and reasoning tokens |
| **Retained Storage** | 1 GB to 100 GB+ | Standing file volume (GB) |
### Adjust resource sliders
Select the required capacity for each resource independently:
- **Step credits:** Monthly execution allowance for standard triggers and workflow steps.
- **Glow AI tokens:** Monthly token allowance for hosted AI prompts, transforms, and agent reasoning.
- **File storage:** Standing workspace storage volume for files, attachments, and datasets.
### Select your billing interval
- **Monthly:** Billed on your monthly anchor date, renewing automatically every month.
- **Annually:** Billed once for a 12-month period, providing twelve consecutive monthly allowance grants. Annual pricing is calculated as exactly twelve times the monthly rate (no base platform fee).
### Review quote and checkout
Select **Continue to checkout** to review the itemized summary before tax, submit your payment details through the secure provider checkout, and return to your refreshed workspace.
> **High-Volume & Enterprise Requirements:** If your team requires capacity
> beyond the standard self-service ranges, the interface will present a **Talk
> to us** option to configure a custom allocation with our solutions team.
---
## How changes take effect (Upgrades vs. Downgrades)
As your automation workload evolves, you can adjust your resource amounts at any time:
1. In **Billing & Usage → Billing**, select **Change amounts** (or click **Change amounts** on the **Usage** tab).
2. Move the sliders to your desired new amounts and select **Review changes**.
3. The confirmation modal itemizes the exact financial and timing impact before you confirm.
Select a scenario below to see how Glow handles consumable allowances (Step credits & AI tokens) vs. persistent infrastructure (file storage):
### Immediate Capacity Upgrades
**When to use:** Your team is running high-volume workflows and needs additional Step credits or Glow AI tokens before the next monthly reset.
- **Activation:** **Immediate**. The additional allowance is credited as soon as payment is confirmed.
- **Billing calculation:** You are charged only the **prorated difference** for the remaining days in your current billing period.
- **Workflow impact:** Paused workflows resume execution immediately.
> **Example:** Upgrading from 1,000 to 5,000 Step credits halfway through a monthly billing cycle charges half of the monthly price difference and immediately expands your available balance by 4,000 credits.
### Scheduled Consumable Reductions
**When to use:** You want to lower your monthly Step credit or AI token allowance starting with your next billing cycle.
- **Activation:** Takes effect at your **next subscription renewal date** (monthly or annual).
- **Current term retention:** You retain full access to your existing higher allowance through the end of the paid period.
- **Billing calculation:** No mid-cycle refund is issued; your new lower subscription rate automatically applies on your next invoice.
> **Example:** Lowering your allowance from 10,000 to 2,500 credits on day 10 of a monthly cycle keeps your 10,000 allowance active until day 30. The 2,500 allowance and lower price take effect on day 1 of the next cycle.
### Real-Time Storage Adjustments
**When to use:** You want to expand or reduce the disk storage available for uploaded assets and generated files.
- **Activation:** **Immediate** in both directions.
- **Increasing storage:** Immediately raises your team upload ceiling.
- **Decreasing storage:** If your stored files exceed the new lower storage capacity, existing files remain completely safe, readable, and downloadable. However, new file uploads will pause until space is freed or capacity is expanded. The review dialog requires acknowledging this condition before confirming.
---
## Managing scheduled changes
When an allocation decrease or interval adjustment is scheduled for renewal:
- The **Billing** overview displays the pending configuration alongside the effective renewal date.
- If your requirements change before that date, selecting **Change amounts** and confirming a new configuration will replace the previously scheduled change.
---
## Cancellation and resumption
Workspace Admins can cancel an active subscription at any time:
### Open cancellation dialog
In **Billing & Usage → Billing**, select **Cancel subscription**.
### Confirm term-end cancellation
Review the cancellation summary and select **Cancel at term end**.
- Your subscription will not renew at the end of the current paid period.
- Your workflows and purchased allowances remain fully active through your displayed period end date.
- Existing workspace files, automations, and credentials are kept intact.
### Resuming a subscription
If you decide to keep your subscription before the term ends, select **Resume subscription** from the **Billing** tab to clear the scheduled cancellation and maintain continuous service.
> **Transition to Free tier:** When a cancelled subscription reaches its term
> end date, the workspace automatically transitions to standard Free allowances.
> If stored files exceed Free storage capacity, files remain intact, but new
> file uploads pause until storage is managed.
## What's Next?
- 👉 **[Invoices & Payment Methods →](/manage/billing/invoices-and-payments)**: Update corporate payment cards, download receipts, and manage billing contacts.
- **[Usage Controls & Recovery](/manage/billing/usage-controls-and-recovery)**: Configure automated alerts, safeguards, and recovery workflows.
- **[Permissions & Access](/manage/workspace-settings/permissions-and-access)**: Review team roles and administrative privileges.
---
Source: https://docs.getglow.ai/manage/billing/usage-controls-and-recovery
# Usage Controls, Alerts & Recovery
> How to configure automated usage safeguards, email and webhook alerts, manage payment grace periods, and restore paused workflows.
Glow provides granular operational controls to help engineering leads and financial administrators prevent runaway usage, receive proactive alerts before allowances deplete, and quickly recover workflows if a limit or payment issue occurs.
---
## Managing budgets, caps, and alerts
Workspace Admins can configure custom usage thresholds and notification channels from **Billing & Usage → Controls** by selecting **Manage budgets, caps and alerts**.
| Setting Field | Example Configuration | Purpose |
| :-------------------------- | :------------------------------- | :------------------------------------------------------------------------ |
| **AI-token safeguard** | `5,000,000 tokens` | Custom ceiling for hosted Glow AI token consumption in the active period. |
| **Retained-storage cap** | `25.0 GB` | Disk volume cap for stored and generated workspace files. |
| **Alert thresholds** | `80, 90, 100 %` | Percentage milestones that trigger email and webhook alerts. |
| **Additional email alerts** | `ops@company.com` | Extra notification recipients alongside workspace Admins. |
| **Billing webhook URL** | `https://api.example.com/alerts` | Webhook destination for signed real-time alert JSON payloads. |
> **Immediate Enforcement:** Lowering a safeguard or hard cap below current
> usage blocks new applicable operations immediately. Work that has already been
> admitted to the execution queue completes normally.
### Available safeguards
| Control | Function | What happens when reached |
| :---------------------------- | :------------------------------------------------------------------------------------------ | :---------------------------------------------------------------------------------------------- |
| **AI-token safeguard** | Sets a custom ceiling on hosted Glow AI token consumption for the current period. | Hosted AI steps pause with `glow_ai_token_limit`. Standard non-AI steps continue executing. |
| **Retained-storage cap (GB)** | Restricts the maximum disk volume allocated to uploaded and generated files. | New file uploads and file-creation steps pause. Existing files remain available and accessible. |
| **Alert thresholds (%)** | Defines percentage marks (defaults: **80%**, **90%**, **100%**) that trigger notifications. | Dispatches email alerts and webhook payloads as consumption crosses each threshold. |
---
## Notification channels
When consumption reaches configured thresholds or an account event occurs, Glow dispatches notifications across two channels:
### 1. Email notifications
- **Automatic recipients:** All workspace **Admins** and the verified **billing contact** are always notified.
- **Additional recipients:** Admins can specify extra team distribution lists (such as `finops@example.com` or `devops@example.com`) in the controls dialog.
### 2. Billing webhooks
You can connect an automated monitoring pipeline by supplying a **Billing webhook URL** (HTTPS):
- When a threshold is crossed, Glow posts an HMAC-signed JSON payload containing the workspace identifier, resource kind, threshold reached, and current usage.
- Updating or adding a webhook URL automatically generates and displays a unique signing secret for verification.
---
## Understanding pause states
When workflow execution stops for a billing-related reason, the cause falls into one of two distinct categories:
- [1. Resource Exhaustion](#1-resource-exhaustion): **Allowance Depleted:** Only steps requiring the exhausted balance pause. Recovers on monthly reset or capacity upgrade.
- [2. Payment Grace Period](#2-payment-issues--seven-day-grace-period): **Unpaid Renewal Invoice:** Workflows run normally during a 7-day grace window. Resolved immediately via **Pay now**.
### 1. Resource exhaustion
- Occurs when monthly Step credits or AI tokens reach 100% of the purchased allowance.
- Steps requiring that resource pause with clear status codes (`out_of_credits` or `glow_ai_token_limit`).
- Steps that do not require the exhausted resource (for example, standard webhook ingestion when only AI tokens are depleted) continue running.
### 2. Payment issues & seven-day grace period
- Occurs if an automated renewal payment fails or requires customer action.
- The workspace enters a **seven-day payment grace period**. During grace, workflows continue running normally while alert banners notify Admins to update payment details.
- If payment is not completed before grace expires, workflow execution pauses until the outstanding invoice is cleared.
---
## Restoring service and recovering workflows
Restoring active service is straightforward and maintains full operational continuity:
### Restore allowance or resolve invoice
If an allowance is exhausted, navigate to **Billing & Usage → Usage** and increase your resource amounts, or wait for the scheduled monthly reset date. If an invoice is outstanding, open **Billing & Usage → Billing**, select **Pay now**, and confirm payment of the open balance.
### Service resumes without resetting usage
Once payment or capacity expansion is confirmed, active service resumes immediately. The current billing period continues with its recorded history intact; usage counters are never wiped or reset prematurely.
### Verify live workflows
Confirm that your workflows display **Live** status in the workflow editor. For webhook-triggered workflows, triggers remain deployed at their URLs during pauses; sending a test payload confirms the restored execution path. For scheduled automations, check the **Next runs** indicator to verify the upcoming execution time.
> **Missed events during exhaustion:** Events sent to a paused workflow during
> an exhaustion window are not automatically queued or replayed. Verify external
> sender logs if historical events need manual reprocessing.
## What's Next?
- 👉 **[Billing & Usage Overview →](/manage/billing/overview)**: Review the complete workspace billing architecture.
- **[Step Credits, Tokens & Storage](/manage/billing/credits-and-allowances)**: Detailed consumption rules across all step types.
- **[Activity & Workflow Monitoring](/manage/workspace-settings/activity)**: Monitor live workflow health, execution logs, and alert queues.
---
Source: https://docs.getglow.ai/manage/overview
# Administer a Workspace
> Manage access, connections, shared data, workflow operations and governance across a Glow workspace.
Run a Glow workspace through its full lifecycle: give people the right access, connect the services they need, protect shared values, monitor workflows and keep changes recoverable.
- [People and access](/manage/workspace-settings/permissions-and-access): Understand the access model, then invite members and assign workspace roles.
- [Apps and connections](/manage/apps-and-integrations/overview): Connect accounts, understand credential ownership and repair connections that need attention.
- [Secrets and shared values](/manage/workspace-settings/secrets-and-variables): Keep reusable configuration and sensitive values outside individual Step fields.
- [Monitor workflow health](/manage/workspace-settings/activity): Review runs across the workspace and work through alerts in the shared Needs Attention queue.
- [Control data and files](/manage/workspace-settings/where-data-lives): See where connections, variables, secrets, files and run data live before you decide how to manage them.
- [Security and governance](/manage/workspace-settings/security-compliance): Review access controls, data handling and the settings used to govern the workspace.
- [Billing and usage](/manage/billing/overview): Monitor Step credits, AI tokens, and storage capacity, and manage team plan amounts.
## A practical operating order
### Before people build
Start with [Permissions and Access](/manage/workspace-settings/permissions-and-access), then use [Team Management](/manage/workspace-settings/team-management) for invitations and role changes. Set workflow visibility separately when only part of the workspace should open a workflow.
### Before a workflow goes Live
Confirm who owns each [connection](/manage/apps-and-integrations/managing-connections), keep reusable configuration in [Secrets and Variables](/manage/workspace-settings/secrets-and-variables), and save a version before a risky change. [Operating Workflows](/build/core-concepts/operating-workflows) provides the test-to-Live checklist.
### Once workflows are running
Use [Activity](/manage/workspace-settings/activity) for workspace-wide runs and alerts. Open the [Execution Log](/build/the-canvas/execution-log) for the path through one workflow, then inspect [Step-Level Executions](/build/core-concepts/executions) for the input and output of one Step.
### When somebody leaves
Remove their workspace access, review workflows and connections they owned, and transfer any operational responsibility before disconnecting an account. Use [Where Data Lives](/manage/workspace-settings/where-data-lives) to identify the workspace resources involved.
## What's Next?
- 👉 **[Review Permissions and Access →](/manage/workspace-settings/permissions-and-access)**
- Managing allowances and plans? Start with [Billing & Usage](/manage/billing/overview).
- Connecting your first service? Start with [Apps & Integrations](/manage/apps-and-integrations/overview).
- Investigating a problem? Open [Activity](/manage/workspace-settings/activity).
---
Source: https://docs.getglow.ai/manage/workspace-settings/activity
# Activity
> Alerts that need attention and every run across the workspace, in one place your whole team shares.
Activity answers: **What happened across the workspace, and which runs or alerts need attention?** Use it for workspace-wide monitoring and ownership. For the run history of one open workflow, use its [Execution Log](/build/the-canvas/execution-log); open a [Step's Executions tab](/build/core-concepts/executions) only when you need recorded input and output.
Open Activity from the sidebar. When alerts are waiting, the number appears beside it, so you can see there is something to deal with without opening the page.
*Two-column Activity layout: execution runs on the left and the shared Needs Attention queue on the right.*
## Two-Column Activity Layout
The Activity page presents a unified two-column dashboard:
- **Executions (left column):** Recent workflow runs across the workspace, with status, start time, duration and step progress.
- **Needs Attention (right column):** Open operational alerts that your team can acknowledge, assign or resolve.
## Smart Alert Counting
The red badge beside **Activity** shows how many new alerts have not yet been acknowledged. Acknowledging an alert clears its unread state, but the alert remains **Open** until somebody marks it resolved.
## Alerts & Needs Attention
Filter alerts by **Open**, **Resolved** or **All statuses**, then narrow them by **High**, **Medium** or **Low** severity. Open includes both new and acknowledged alerts.
| Action | What it does |
| :------------------- | :---------------------------------------------------------------------------------------------------------------------------------- |
| **Acknowledge** | Records that somebody has reviewed a new alert. It remains in the Open queue. |
| **Assign** | Gives the alert to you or another workspace member. Assignment also acknowledges it; choose **No one assigned** to clear ownership. |
| **Open in canvas** | Opens the affected workflow when the alert points to a workflow, trigger or scheduler problem. |
| **Mark as resolved** | Removes the alert from the Open queue. Filter by **Resolved** to review it later. |
Other alert types take you to the setting that needs attention, such as **Connections**, **Team Settings** or subscription management. If the same condition occurs again after resolution, Glow can create or reopen an alert for the new occurrence.
## Executions Table
The executions table lists recent runs for workflows you can access. Filter by **All runs**, **Running**, **Failed**, **Completed** or **Canceled**, or search for an exact execution ID or correlation ID.
Open a row to see its workflow, timing, step timeline, attempts, error summary and related runs. Use **Open in canvas** when you need the step inputs and outputs.
**Download CSV** exports the current page of 25 rows, after applying the active status filter or ID search. It does not download every page of workspace history or the Needs Attention queue. Execution history follows the workspace retention policy, and each run keeps the policy that was active when it started. See [Data Retention](/reference/system-limits#data-retention).
## From a run to one Step
Activity owns the whole-run view across the workspace. Open **Open in canvas** for the affected workflow, then select the relevant Step and use its [Executions tab](/build/core-concepts/executions) for Step input, output, and attempt details.
## What's Next?
- 👉 **[Step-Level Executions →](/build/core-concepts/executions)**: inspect the input and output of the Step that needs attention.
- **[Error Handling & Retries](/build/core-concepts/error-handling)**: configure future retry and error-route behavior.
- **[Troubleshooting & Common Errors](/reference/troubleshooting)**: look up a symptom or exact error message.
---
Source: https://docs.getglow.ai/manage/workspace-settings/developer-settings
# Developer Settings
> Trigger workflows from your own systems and read back execution history over the REST API.
Glow gives you two programmatic surfaces: **webhook triggers** to start a workflow from your own code, and a **REST API** to read back what happened during a run.
## Triggering a Workflow
Workflows are started by sending a request to a webhook trigger's URL.
### Add a Webhook trigger
Add a [Webhook](/build/triggers/webhook) trigger to your workflow and switch the workflow to **Live**: the URL exists from that moment. Copy it from the trigger's endpoint field. A test-data run sends nothing over the network and mints no URL.
### Send your payload
`POST` your JSON to that URL.
### Add a correlation ID
Include a `headers` object in your JSON body, carrying `x-glow-correlation-id` with a value unique to this one request: an order ID, a request ID, or a UUID (a randomly generated unique code). You look the run up by it afterwards. The ID travels inside the body, not as an HTTP header.
That `headers` object is stored with the rest of the payload, so it sits alongside your own fields in the trigger's output and reads as `{{ 1.headers }}`. Pick a top-level field name other than `headers` for your own data. When you later **read the results back**, the same name is a real HTTP header on that request — inside the body to start a run, as a header to fetch it.
```bash
curl -X POST https:// \
-H "Content-Type: application/json" \
-d '{
"customer_email": "ada@example.com",
"total": 129.00,
"headers": { "x-glow-correlation-id": "order-4815" }
}'
```
> **Use a fresh value every time.** Sending the same correlation ID twice does
> not replace or deduplicate anything: each `POST` starts its own run. The
> lookup then returns the first run that ever used that ID, so reusing one means
> you keep reading back the oldest run rather than the one you just started. If
> your own system retries, add the attempt to the ID: `order-4815-2`.
The webhook acknowledges with `202 Accepted` immediately and the workflow continues asynchronously. A slow workflow never times out the caller.
## Reading execution history
Once a run is underway, the REST API returns its step-by-step history: a list with one record per step execution.
```
GET /api/v1/flows/{flowId}/executions
```
`flowId` is the workflow's id: the UUID in its canvas URL, between `/workflows/` and the trailing slash. Run records follow the workspace retention policy, which is 30 days by default. Read or forward what you need while the record is available; see [System Limits](/reference/system-limits#data-retention).
Each record carries the step's output under `result`, its `status`, and when it started and finished. For a step inside a loop, it also carries which iteration it was.
```json
[
{
"elementKey": "trigger",
"status": "pass",
"start": "2026-07-30T20:00:01.533Z",
"end": "2026-07-30T20:00:02.811Z",
"result": { "customer_email": "ada@example.com" },
"error": null,
"runCount": 1,
"iterators": []
}
]
```
The shape of `result` depends on the step, and maps onto the canvas path after the step number: this webhook record is read as `{{ 1.customer_email }}`, an HTTP Request's record carries `ret` inside `result`, an AI step's carries `result` again. See [Variable Reference Syntax](/reference/variable-syntax). A step that failed carries the reason under `error` and a `status` of `error`; a step that never ran reports `ignored`. `runCount` tells you which attempt a record is: `1` is the first, `2` the first retry.
There is no field holding the input a step received. To see what went into a step, read the `result` of the step it drew from.
### Authentication
| Header | Required | Description |
| ----------------------- | -------- | -------------------------------------------------------------- |
| `x-glow-api-key` | Yes | The API key for this specific workflow. |
| `x-glow-correlation-id` | Yes | The same correlation ID you sent when triggering the workflow. |
API keys are **per workflow**, not per workspace. Find a workflow's key in the **Webhook** step's settings in the App drawer, alongside the trigger URL.
### Query Parameters
| Parameter | Description |
| ---------------- | -------------------------------------------------------------------------------------------------------------------------------------------------------------------------- |
| `limit` | Caps how many step records come back. Omit it and you get the run's full history. |
| `elementNumbers` | Comma-separated step numbers, e.g. `1,3`. These are the same numbers you reference on the canvas with `{{ 3.field }}`, so you can pull back only the steps you care about. |
### Example
```bash
curl "https://api.getglow.ai/api/v1/flows/clwyo3ggd000008l353t02aig/executions?elementNumbers=1,3" \
-H "x-glow-api-key: " \
-H "x-glow-correlation-id: order-4815"
```
### Responses
| Status | Meaning |
| ------ | ------------------------------------------ |
| `200` | Execution history returned. |
| `400` | A required header or parameter is missing. |
| `401` | The API key is invalid. |
| `404` | No matching flow or execution was found. |
> A `404` usually means the correlation ID does not match any run. Check that
> you sent the same value when triggering the workflow, and that the run has
> actually started.
## API Reference
The complete, always-current API specification is published as OpenAPI:
- Interactive browser: `https://api.getglow.ai/api`
- Machine-readable spec: `https://api.getglow.ai/api/swagger.json`
Use the spec to generate a typed client in your own language rather than hand-writing request code.
## Securing inbound webhooks
For webhooks that receive data from third parties, configure a shared secret. Glow then verifies the HMAC signature of each request — a cryptographic proof that the sender knew the shared secret — and drops anything unsigned or tampered with. See [Webhook Triggers](/build/triggers/webhook) for setup.
## What's Next?
- Configure trigger URLs and signature verification in [Webhook Triggers](/build/triggers/webhook).
- Check the ceilings that apply to your plan in [System Limits](/reference/system-limits).
---
Source: https://docs.getglow.ai/manage/workspace-settings/enterprise-sso
# Signing In and SSO
> Signing in to Glow with your company identity provider, and turning on two-factor authentication.
SSO lets your employees sign in to Glow with their corporate credentials, so there is no separate Glow password to manage or revoke.
## Single Sign-On (SSO)
**Setup is done with you, not from a settings screen.** Talk to your account
team or support to start, and bring two things: your identity provider's
metadata URL or XML, and the attribute names carrying email and display name.
They confirm what is involved for your particular provider before anything is
connected, so the configuration is checked against your environment rather than
assumed. Ask early rather than late — what a provider needs varies, and it is
worth settling before it sits on a launch plan.
### Managing roles
Members are invited and assigned roles under
[Team Management](/manage/workspace-settings/team-management), whether or not
SSO is connected. Automatic group-to-role mapping from your IdP is in
development, and your account team can tell you where it stands.
---
## Two-Factor Authentication (2FA)
Even if you are not using an external Identity Provider, you can add a second factor to your Glow account.
Turn it on under **[Personal Settings](/manage/workspace-settings/personal-settings)**. Glow uses standard Time-based One-Time Passwords (TOTP), so any authenticator app works: Google Authenticator, Authy, or 1Password.
### Workspace 2FA Enforcement
Each member turns 2FA on for their own account. To require a second factor
across the whole workspace today, connect SSO and let your identity provider's
policy cover everyone at once. Workspace-level enforcement inside Glow is in
development, and your account team can tell you where it stands.
## What's Next?
- Assign roles to SSO-provisioned members in [Team Management](/manage/workspace-settings/team-management).
- Review the controls and data-handling behind these features in [Security & Compliance](/manage/workspace-settings/security-compliance).
---
Source: https://docs.getglow.ai/manage/workspace-settings/file-management
# File Management
> Upload files to your team workspace and reference them from any workflow: templates, configuration files, data sets, and other assets your automations need.
Upload files to your team workspace and reference them from any workflow. Store templates, configuration files, data sets, or any other assets your automations need.
## Accessing the files page
Open the **Files** tab in your workspace to view and manage your team's uploaded files.
*The Files tab. The storage meter shows how much of your team's quota is in use, alongside the Upload and New folder actions.*
## Uploading files
1. Open the **Files** tab in your workspace.
2. Click **Upload** or drag and drop files into the upload area.
3. Select one or more files from your local machine.
4. Files are uploaded and available immediately.
**One file can be up to 100 MB.** That ceiling is the same on every plan: what your plan sets is the total storage quota shown in the meter, not the size of any single file. A file over the ceiling is rejected rather than truncated. For anything larger, leave it in the service that owns it and have the workflow fetch it at run time with an HTTP Request step.
## Organizing with folders
You can create folders to keep your files organized:
1. On the **Files** page, click **New Folder**.
2. Enter a folder name.
3. Click **Create**.
### Working with a file or folder
Each file carries its own overflow menu (⋯) on its row or card, offering **Download**, **Rename**, **Duplicate**, **Move to…** and **Delete**. Use **Move to…** and pick the destination folder; files move one at a time. Folders carry the same menu with **Rename** and **Delete**.
### Deleting a folder
Deleting a folder does not delete the files inside it. They move back to the top level of the Files page, so nothing a workflow reads stops resolving. Any folders nested inside the one you delete go with it. To remove the files themselves, delete them individually.
## Referencing files in workflows
Once a file is uploaded, you can reference it from workflow steps. When configuring a step that accepts file inputs, browse and select from your team's uploaded files.
Common use cases include:
- **HTTP steps:** attach files to outbound API requests.
- **Code steps:** read file contents for processing.
- **AI Prompt steps:** include file content as context for AI operations.
> **Tip:** Use a consistent folder structure such as `templates/`, `data/`, and
> `config/` to keep your file library manageable as it grows.
## Permissions
**Every role can manage team files:** Admin, Manager and Member alike.
| Role | View files | Upload/edit/delete files |
| ------- | ---------- | ------------------------ |
| Admin | Yes | Yes |
| Manager | Yes | Yes |
| Member | Yes | Yes |
> **Deleting a file affects the whole team.** Every role can delete any team
> file, and deletion is permanent. Before removing one, check whether a live
> workflow reads it: a workflow whose file is gone fails at the step that
> references it. Keep a source copy of anything you would have to rebuild.
## What's Next?
- See where the roles in that table come from in [Team Management](/manage/workspace-settings/team-management).
- Check the storage quota for your plan in [System Limits & Quotas](/reference/system-limits).
---
Source: https://docs.getglow.ai/manage/workspace-settings/mcp
# Model Context Protocol (MCP)
> Architecture, tool specifications, and integration design for Model Context Protocol in Glow.
[Model Context Protocol (MCP)](https://modelcontextprotocol.io) is an open standard developed by Anthropic that provides a unified, structured protocol for AI assistants, coding agents, and IDEs to interact with external automation tools and systems.
> **Developer Preview:** Model Context Protocol (MCP) integration is currently
> available for workspace developers and engineering preview accounts. This
> guide details the architecture, tool specifications, and integration models.
Glow supports MCP across two complementary architectures:
- [Glow as an MCP Server](#server-architecture--protocol-flow): Connect external AI assistants (Cursor, Claude Desktop, Zed, Claude Code) to discover, inspect, and trigger automations directly from your IDE.
- [Glow as an MCP Client](#glow-as-an-mcp-client): Equip visual [AI Agent](/build/ai-features/ai-agent) steps with external tool servers (Postgres MCP, GitHub MCP, custom internal APIs).
---
## Server Architecture & Protocol Flow
When an authorized AI client connects to Glow's MCP server, the protocol negotiates capabilities and establishes a secure JSON-RPC channel. The gateway authenticates every tool invocation against workspace policies before dispatching it to the execution engine:
```mermaid
sequenceDiagram
autonumber
actor Developer as Developer / AI Agent
participant Client as IDE / Client (Cursor / Claude)
participant Gateway as Glow MCP Gateway
participant Engine as Workflow Execution Engine
Developer->>Client: "Run Lead Triage for ada@example.com"
Client->>Gateway: execute_workflow(workflowId, payload)
Gateway->>Gateway: Verify Token & Workspace Scopes
Gateway->>Engine: Admit & Queue Execution
Engine-->>Gateway: Execution Started (executionId)
Gateway-->>Client: Return Status: in_progress
Client->>Gateway: get_execution_status(executionId)
Gateway-->>Client: Status: pass (Step Outputs)
Client-->>Developer: Present Formatted Run Summary
```
---
## Access & Permission Model
MCP access is governed by scoped developer tokens with explicit capability boundaries:
| Permission Scope | Granted Operations | Security Policy |
| :--------------- | :------------------------------------------------------------------------------------ | :--------------------------------------------------- |
| `mcp:read` | Read-only discovery: `list_workflows`, `get_workflow_schema`, `get_execution_status`. | Cannot trigger executions or modify workspace state. |
| `mcp:execute` | Execution capabilities: `execute_workflow`, `test_step`. | Strictly limited to the authenticated workspace. |
> **Security Guarantees:** - **Scoped Bearer token authentication** with
> cryptographic verification. - **Tenant isolation:** Access strictly limited to
> your authorized workspace. - **Audit visibility:** Sandboxed executions tagged
> with an `MCP test` badge. - **Zero credential leakage:** Real secrets and
> OAuth tokens are never exposed in tool schemas.
---
## Example Developer Interactions
When connected to an MCP server, an AI assistant interprets natural language instructions and executes structured tool calls:
```text
"Show me all active workflows in my workspace."
→ Calls list_workflows(status="live")
```
```text
"What inputs does the 'Support Ticket Triage' workflow require?"
→ Calls get_workflow_schema(workflowId="flow_84920481")
```
```text
"Run the 'Lead Enrichment' workflow for customer alex@company.com."
→ Calls execute_workflow(workflowId="flow_84920481", payload={ customer_email: "alex@company.com" })
```
```text
"Test step 2 (HTTP Request) in isolation with mock input { ticket_id: 104 }."
→ Calls test_step(workflowId="flow_84920481", stepNumber=2, mockedInputs={ ... })
```
---
## MCP Server: Tool Reference
The Glow MCP server exposes five primary tools organized by operational function:
| Tool | Scope | Purpose |
| :------------------------------------------------ | :------------ | :------------------------------------------------------------------ |
| [`list_workflows`](#1-list_workflows) | `mcp:read` | Discover available workflows, trigger types, and status. |
| [`get_workflow_schema`](#2-get_workflow_schema) | `mcp:read` | Inspect trigger parameter schemas, variables, and step layout. |
| [`execute_workflow`](#3-execute_workflow) | `mcp:execute` | Trigger a workflow execution with custom JSON payload. |
| [`get_execution_status`](#4-get_execution_status) | `mcp:read` | Poll live run progress, duration, and step-level outputs. |
| [`test_step`](#5-test_step-isolated-sandbox-test) | `mcp:execute` | Run a single action step in a sandbox with mock predecessor inputs. |
---
### 1. `list_workflows`
Returns a list of workflows available in the authenticated workspace.
**Parameters**
| Parameter | Type | Required | Default | Description |
| :-------- | :-------- | :------- | :------ | :------------------------------------------------------ |
| `status` | `string` | No | `"all"` | Filter by status: `"live"`, `"draft"`, or `"all"`. |
| `search` | `string` | No | `null` | Keyword filter matching workflow name or description. |
| `limit` | `integer` | No | `50` | Maximum number of workflow summaries to return (1–100). |
```json
{
"name": "list_workflows",
"arguments": {
"status": "live",
"search": "Support"
}
}
```
```json
{
"workflows": [
{
"id": "flow_84920481",
"name": "AI Support Ticket Triage",
"status": "live",
"triggerType": "webhook",
"stepCount": 4,
"updatedAt": "2026-09-05T14:22:10Z"
}
],
"totalCount": 1
}
```
---
### 2. `get_workflow_schema`
Fetches the complete structural schema for a workflow, including required trigger parameters, mapped variables, and step sequences.
**Parameters**
| Parameter | Type | Required | Description |
| :----------- | :------- | :------- | :------------------------------------------------------------ |
| `workflowId` | `string` | **Yes** | The unique identifier of the workflow (e.g. `flow_84920481`). |
```json
{
"name": "get_workflow_schema",
"arguments": {
"workflowId": "flow_84920481"
}
}
```
```json
{
"workflowId": "flow_84920481",
"name": "AI Support Ticket Triage",
"status": "live",
"trigger": {
"stepNumber": 1,
"type": "webhook",
"expectedPayload": {
"type": "object",
"properties": {
"customer_email": { "type": "string" },
"ticket_subject": { "type": "string" },
"ticket_body": { "type": "string" }
},
"required": ["customer_email", "ticket_body"]
}
},
"steps": [
{ "stepNumber": 2, "type": "ai_prompt", "name": "Classify Urgency" },
{ "stepNumber": 3, "type": "switch", "name": "Route Priority" },
{ "stepNumber": 4, "type": "slack_send_message", "name": "Notify Team" }
]
}
```
---
### 3. `execute_workflow`
Triggers a workflow run with a supplied JSON payload and returns an execution tracking ID.
**Parameters**
| Parameter | Type | Required | Default | Description |
| :-------------- | :------- | :------- | :------- | :--------------------------------------------------- |
| `workflowId` | `string` | **Yes** | — | Target workflow ID. |
| `payload` | `object` | **Yes** | — | JSON data dictionary passed to the trigger step. |
| `correlationId` | `string` | No | `null` | Optional tracking identifier for log correlation. |
| `mode` | `string` | No | `"live"` | Run mode: `"live"` (published version) or `"draft"`. |
```json
{
"name": "execute_workflow",
"arguments": {
"workflowId": "flow_84920481",
"payload": {
"customer_email": "alex@company.com",
"ticket_subject": "Payment API returned 504",
"ticket_body": "Transactions timed out during checkout."
},
"correlationId": "ticket-4812"
}
}
```
```json
{
"executionId": "exec_9a8f234b01e",
"status": "in_progress",
"startedAt": "2026-09-07T10:15:30Z",
"correlationId": "ticket-4812"
}
```
---
### 4. `get_execution_status`
Queries the execution state and individual step outputs of an active or finished run.
**Parameters**
| Parameter | Type | Required | Default | Description |
| :------------------- | :-------- | :------- | :------ | :------------------------------------------------- |
| `executionId` | `string` | **Yes** | — | Execution ID returned from `execute_workflow`. |
| `includeStepOutputs` | `boolean` | No | `true` | When `true`, includes step-level `result` objects. |
```json
{
"name": "get_execution_status",
"arguments": {
"executionId": "exec_9a8f234b01e"
}
}
```
```json
{
"executionId": "exec_9a8f234b01e",
"status": "pass",
"startedAt": "2026-09-07T10:15:30Z",
"completedAt": "2026-09-07T10:15:33Z",
"durationMs": 3120,
"steps": [
{
"stepNumber": 1,
"name": "Webhook Trigger",
"status": "pass",
"result": { "customer_email": "alex@company.com" }
},
{
"stepNumber": 2,
"name": "Classify Urgency",
"status": "pass",
"result": { "category": "critical", "urgency": "high" }
},
{
"stepNumber": 4,
"name": "Notify Team",
"status": "pass",
"result": { "channel": "#ops-urgent", "ts": "1725704133.01" }
}
]
}
```
---
### 5. `test_step` (Isolated Sandbox Test)
Executes a single step in complete isolation, using real workspace credentials and optional mock data representing predecessor steps.
```mermaid
flowchart LR
M[Mock Inputs] --> S[Step Sandbox] --> R[Output to MCP]
S -.->|Downstream Blocked| X[Skip Rest]
```
**Parameters**
| Parameter | Type | Required | Description |
| :------------- | :-------- | :------- | :------------------------------------------------------------------ |
| `workflowId` | `string` | **Yes** | ID of the workflow containing the step. |
| `stepNumber` | `integer` | **Yes** | Step number to execute (e.g. `2`). |
| `mockedInputs` | `object` | No | Dictionary mapping predecessor step numbers to mock output objects. |
**Key Sandbox Capabilities**
- **No cascade execution:** Steps wired after the test target are not run.
- **Authentic authentication:** The step uses configured workspace integrations and secrets securely.
- **Audit tracking:** Test executions are logged in **Activity** and tagged with an `MCP test` badge.
```json
{
"name": "test_step",
"arguments": {
"workflowId": "flow_84920481",
"stepNumber": 2,
"mockedInputs": {
"1": {
"ticket_subject": "504 Gateway Timeout during checkout",
"ticket_body": "Payment endpoint stopped responding."
}
}
}
}
```
```json
{
"stepNumber": 2,
"status": "pass",
"durationMs": 840,
"result": {
"category": "billing_critical",
"urgency": "high",
"suggested_action": "alert_finops"
}
}
```
---
## Glow as an MCP Client
In addition to serving tools to external AI clients, Glow automations can consume external MCP tool servers to empower visual [AI Agent](/build/ai-features/ai-agent) steps:
```mermaid
flowchart LR
A["1. Analyze Goal"] --> B["2. Invoke MCP Tool
(e.g. query_db)"] --> C["3. External Server
Returns Records"] --> D["4. Synthesize Answer
on Canvas"]
```
1. **External Server Registration:** Connect remote MCP servers in workspace settings with remote endpoint URLs and authentication headers.
2. **Agent Tool Assignment:** Toggle external tool servers on inside the AI Agent step's **Tools** panel.
3. **Autonomous Reasoning:** During workflow runs, the agent discovers and invokes external tools dynamically to fulfill user goals.
## What's Next?
- 👉 **[REST API & Webhooks →](/manage/workspace-settings/developer-settings)**: Standard REST endpoints for programmatic workflow execution.
- **[AI Agent Step](/build/ai-features/ai-agent)**: Build multi-turn autonomous reasoning workflows on the visual canvas.
- **[Secrets and Variables](/manage/workspace-settings/secrets-and-variables)**: Secure management for API keys and credentials.
---
Source: https://docs.getglow.ai/manage/workspace-settings/permissions-and-access
# Permissions and Access
> Understand how account security, workspace roles, workflow visibility, shared resources, and MSP delegation combine to control access in Glow.
Access in Glow is decided in layers: your account proves who you are, each workspace membership gives you a role, workflow visibility narrows or widens one workflow, and an MSP delegation grant provides a separate route for an approved partner.
## The access model
A **team** and a **workspace** are two views of the same boundary. The team is the people and their roles; the workspace is the workflows, app connections, variables, secrets, files, billing, and settings those people work with.
```mermaid
flowchart LR
A[Account Identity] --> M[Team Membership] --> R[Workspace Role] --> V[Workflow Visibility]
G[MSP Grant] --> R
```
| Layer | What it decides | Where to manage it |
| ----------------------- | ------------------------------------------------------------------- | -------------------------- |
| **Account** | Your identity, profile, password, and personal 2FA | **Personal Settings** |
| **Team membership** | Which workspace you can enter | **Team Settings** |
| **Workspace role** | What you can administer inside that workspace | **Team Settings** |
| **Workflow visibility** | Who can open one workflow | **Share** on that workflow |
| **MSP delegation** | What an approved partner can reach across the workspace boundary | **Settings → Governance** |
| **Impersonation** | Whether a partner operator may temporarily act as a workspace Admin | **Settings → Governance** |
These layers do not replace one another. Signing in through SSO does not assign a workspace role. Making a workflow Public does not expose its connected accounts or run history. Ending an MSP grant does not remove a separate team membership.
## Account, team, and workspace roles
Your account follows you across every workspace you belong to. Profile settings and personal 2FA therefore apply to you, while your role can be different in each workspace.
Glow uses three workspace roles:
| Role | Use it for | Key workspace authority |
| ----------- | -------------------------------------- | ------------------------------------------------------------------------------------------------- |
| **Admin** | People responsible for the workspace | Team settings, billing management, invoices and payments, all workspace roles, and MSP governance |
| **Manager** | People who organise day-to-day work | Workflows, files, variables and secrets; usage and pricing; Manager and Member role changes |
| **Member** | People who build and operate workflows | Workflows and files; usage and pricing; variable and secret names; invitations for other Members |
All three roles can create, edit, run, and set team-visible workflows Live. A Member is a builder, not a read-only seat. Use workflow visibility when one workflow needs a narrower audience.
All three roles can open **Billing & Usage** to view **Usage** and **Pricing**. Only Admins can view invoices and payments or manage billing. See [Billing & Usage](/manage/billing/overview).
Workspace resources follow their own controls:
- **App connections** belong to the workspace context and can be selected in its workflows. Every workspace role can create a connection. Only the person who created one can reconnect or disconnect it; disconnecting it affects every workflow that uses it.
- **Variables and secrets** are workspace resources. Every role can see their names, while Managers and Admins can create, change, or delete them. Secret values are never shown again after saving.
- **Files** are shared workspace resources. Admins, Managers, and Members can view, upload, rename, move, duplicate, and delete them.
## Workflow visibility is a separate layer
A workflow's visibility works on top of workspace membership and role:
| Visibility | Who can open it | What that means |
| ----------- | ------------------------- | ---------------------------------------------------------------- |
| **Private** | Its author | Other workspace members cannot see it |
| **Team** | Everyone in the workspace | The default for a new workflow; workspace members can work on it |
| **Public** | Anyone with the link | External visitors get a read-only view of the canvas shape |
A Public visitor sees step names, apps, notes, and connections between steps. They do not receive step configuration, app accounts, variables, secrets, or run history. Only the workflow's author can change its visibility.
A signed-in outsider can request access from a Public workflow. Approving that request adds them to the workspace as a **Member**; it does not create a view-only guest role for that workflow.
## Sign-in security does not grant workspace access
**SSO** controls how a person proves their identity. Workspace membership and roles are still managed in Team Settings, whether the person signs in with a password or through your identity provider.
**2FA** protects an individual password-based Glow account and is enabled in Personal Settings. For people who sign in through SSO, apply your identity provider's multi-factor policy instead. To require a second factor across the whole workspace today, use SSO with that policy enabled.
## MSP delegation is another access path
A consultancy or MSP reaches a client workspace through a **delegation grant**, not through the Admin, Manager, or Member role table. The grant records a tier, scope, expiry, and whether impersonation is allowed.
- **Read-only** supports monitoring and alerts covered by the grant.
- **Full operational** adds workflow copies and operational actions within the grant's scope.
- **Impersonation** is separate consent on a full-operational grant. It lets an operator act temporarily as a selected client Admin, within a scope no broader than the grant.
Impersonation can use existing app connections when running or repairing workflows. It does not allow billing, team settings, membership, governance, security, or connection lifecycle changes.
> **Review both access paths at the end of an engagement.** Leaving MSP
> management ends the delegation grant, active impersonation sessions, partner
> console visibility, and planned workflow transfers. It does not remove a
> direct team membership held by one of the partner's people. Removing that
> person in Team Settings does not end the delegation grant either. Use
> **Settings → Governance** for the grant, then **Team Settings** for any direct
> memberships that should also end.
Workflows and workspace resources remain in the client workspace when governance ends. Ending access changes who can reach them; it does not remove the work already delivered.
## I need to…
| I need to… | Use this control | What to expect |
| --------------------------------------------------------- | --------------------------------------------------------------- | ----------------------------------------------------------------------------------------------------------------------------- |
| Change what a teammate can administer | Change their role in **Team Settings** | The new role applies only in this workspace |
| Remove a teammate from the workspace | Remove their membership in **Team Settings** | They lose this direct access path; an MSP grant is unchanged |
| Keep a draft workflow to myself | Set **Share → Private** on the workflow | Only the author can open it |
| Let the whole workspace work on a workflow | Set **Share → Team** | All workspace roles can open and edit it |
| Let someone inspect a workflow without joining | Set **Share → Public** and send the link | They receive a read-only canvas view without configuration or run data |
| Give someone full workspace access from a Public link | Approve their access request | They join as a Member, not as a workflow-only guest |
| Add an app account | Connect it from **Connections** or the step's **Account** field | Every workspace role can create a connection; it becomes available to workflows in that workspace |
| Reconnect or remove an app account | Have its owner manage it from **Connections** | Other members do not see lifecycle actions for that connection; disconnecting leaves affected steps without a working account |
| Control who manages secrets and variables | Assign **Manager** or **Admin** | Members can see names but cannot create, change, or delete these resources |
| Require corporate sign-in and multi-factor authentication | Set up **SSO** and enforce MFA with your identity provider | Team membership and roles still remain in Team Settings |
| Let a partner monitor or operate selected work | Approve a delegation grant in **Settings → Governance** | The grant's tier, workflow scope, and expiry set the boundary |
| Let a partner work temporarily as an Admin | Enable **Allow impersonation** on a full-operational grant | Each session is time-bound and remains confined to the grant |
| Stop one impersonation session | End the active session in **Settings → Governance** | The grant remains available for future permitted work |
| Stop all future impersonation | Turn off **Allow impersonation** | Any active session ends; the underlying grant remains active |
| End the MSP relationship | Choose **Leave MSP management** in **Settings → Governance** | Delegated access ends; review Team Settings separately for direct memberships |
| Remove a partner operator who is also a teammate | Remove them in **Team Settings** | Their direct membership ends; review Governance separately for the grant |
## What's Next?
- Manage members and workspace roles in [Team Management](/manage/workspace-settings/team-management).
- Set access for an individual workflow in [Workflow Visibility and Sharing](/build/core-concepts/workflow-visibility).
- Review partner tiers, scope, and session controls in [If a Partner Manages Your Workspace](/msp/governance/for-clients).
---
Source: https://docs.getglow.ai/manage/workspace-settings/personal-settings
# Personal Settings
> Manage your personal profile, security settings, and two-factor authentication (2FA) in Glow.
Your personal settings apply globally to your user account, regardless of which Team or Workspace you are currently working in.
Reach them at `/app/user/account`, or through your name in the top right of the header.
*Account settings apply to you personally, in every workspace you belong to.*
---
## Profile
Two things shape how you appear to teammates on a shared canvas:
1. **Your picture.** Click the avatar at the top of the page to upload one. Images are capped at 5 MB.
2. **Your name.** Set **Full name** under **Bio**.
Both show next to your cursor when you are on a canvas with someone else, so they are worth filling in. An unnamed, faceless collaborator is hard to work alongside.
A workspace can carry its own logo in the same way, uploaded from the team settings rather than here.
## Security
From the settings panel, you can manage the login credentials that protect your account and automations.
> **Turn on Two-Factor Authentication.** Your account can reach whatever your
> workflows can: databases, internal APIs, the channels your team runs on. A
> password on its own is thin protection. Setup takes a minute, below. See
> [Signing In and SSO](/manage/workspace-settings/enterprise-sso) for how this
> fits with your organisation's identity provider.
### Change Password
Enter your current password, then the new one twice. Six characters is the minimum Glow accepts. Use a long, unique passphrase from your password manager, since this account reaches everything your workflows do.
### Enable 2FA
Click **Enable 2FA**. Glow hands you to the sign-in screen to set up your authenticator app: that redirect is the setup flow, not a sign-out. Scan the code with Google Authenticator, Authy, 1Password or any TOTP app, then enter the six-digit code it shows. You are returned to this page with 2FA on.
If you sign in through your company's identity provider and have never set a Glow password, the button is replaced by a note: 2FA is not available for your account. Two-factor authentication is then your identity provider's to enforce, not Glow's. See [Signing In and SSO](/manage/workspace-settings/enterprise-sso).
## Workflow settings
Customize your default experience in the workflow editor.
**Disable all confirmation screens** is off by default. Turn it on to remove confirmation prompts before destructive or major actions in the workflow editor, including deleting a step or clearing a canvas. Those actions then take effect immediately.
## What's Next?
- Move from your own account to workspace-wide settings in [Team Management](/manage/workspace-settings/team-management).
- See how workspace-level 2FA enforcement interacts with your account in [Signing In and SSO](/manage/workspace-settings/enterprise-sso).
---
Source: https://docs.getglow.ai/manage/workspace-settings/secrets-and-variables
# Secrets and Variables
> Store API keys, tokens and shared values once at workspace level, and reference them from any workflow without exposing the plaintext.
Secrets and variables store API keys, tokens and shared values once at workspace level, referenced by name from any workflow. Secrets are encrypted at rest, so sensitive values are never hardcoded into a workflow.
## Finding them
Open your workspace and choose the **Variables** tab. Secrets and variables share that one page. The table's **Type** column tells them apart.
## Creating a secret
1. Open the **Variables** tab in your workspace.
2. Click **Create new** and choose **Secret**.
3. Enter a **Key**. Letters, numbers and underscores only: a hyphen, dot or space is rejected. Glow upper-cases whatever you type, so `stripe_api_key` is stored as `STRIPE_API_KEY`. References are upper-cased before lookup too, so `{{ $secret.stripe_api_key }}` still resolves. Writing the key in capitals is a convention, not a requirement, and it keeps what you type matching what is stored. Name it for the service and the job: `STRIPE_API_KEY`, `SLACK_WEBHOOK_URL`.
4. Enter the **Value**: the sensitive data you want to store.
5. Click **Save**.
The value is encrypted immediately. Once saved, the value is never displayed in the UI again.
## Referencing secrets in workflows
To use a secret inside a workflow step, reference it as `{{ $secret.KEY_NAME }}`:
```
{{ $secret.KEY_NAME }}
```
For example, if you created a secret with the key `STRIPE_API_KEY`, you would reference it as:
```
{{ $secret.STRIPE_API_KEY }}
```
Non-secret team variables use the same shape with `$var`: `{{ $var.REGION }}`.
This works in any step field that supports dynamic values: HTTP request headers, code blocks, AI prompt configurations, and more. The **Syntax** column on the Variables tab shows the exact reference for each key, so you can copy it rather than type it.
> **The double braces and the `$` are both required.** A reference Glow does not
> recognise is passed through as literal text, so `secrets.STRIPE_API_KEY`
> written without them arrives at the other service as those exact characters.
> In an `Authorization` header, that comes back as a `401`. Copy the reference
> from the **Syntax** column rather than typing it.
> **Tip:** Use clear, consistent naming conventions for your secrets. A pattern
> like `SERVICE_PURPOSE` makes each one's job obvious: `GITHUB_ACCESS_TOKEN`,
> `SENDGRID_API_KEY`.
## Rotating a secret
**A secret's value cannot be edited.** The dialog says so when you create one: _"Secret values cannot be edited once created. Delete and recreate to change value."_ The row offers only **Delete**, where a variable offers **Edit** and **Delete**. The stored value is never readable again, including by us.
To change a secret, replace it:
1. Open the **Variables** tab in your workspace.
2. Delete the existing secret.
3. Create a new one **using the same key**.
Keeping the key identical means every `{{ $secret.KEY }}` already in your workflows keeps resolving. Nothing needs re-editing or re-deploying.
> **Rotate when the workflows using it are quiet.** Between the delete and the
> create there is no value under that key, and a run reaching that step in the
> gap fails there. For a busy workflow, switch it to **Draft** first so triggers
> stop firing, rotate, then switch it back to **Live**.
## Updating a variable
Non-secret variables _are_ editable in place, since their values stay readable:
1. Open the **Variables** tab in your workspace.
2. Find the variable and click **Edit**.
3. Enter the new value and save.
The new value is picked up by every step that runs from that point on, including steps still to come in a run already under way. The value is read when the step executes, not when the run starts.
## Deleting a secret
1. Open the **Variables** tab in your workspace.
2. Find the secret you want to remove.
3. Click **Delete** and confirm.
Before deleting, check that no active workflows reference the secret. A workflow that references a deleted secret fails at the step where the missing secret is used.
## Security notes
- Secret values are **encrypted at rest** and are never exposed in the UI after creation.
- When a stored result or error contains the exact value of a Glow Secret, standard run processing replaces it with `[REDACTED]`. Paste-sensitive values stored directly in step fields do not carry the same protection.
- Secrets are **scoped to a team**. Members of other teams cannot access them.
- Secrets **stay in the workspace they were created in**. A workflow moved to another workspace arrives with each secret key created empty, for that team to fill in its own value.
- Only **Admins and Managers** can create, update, or delete secrets. Members can view secret keys (names) but not their values.
## What's Next?
- Compare connections, secrets, workspace variables, files, and literals in [Where Data Lives](/manage/workspace-settings/where-data-lives).
- Reference a secret correctly inside a step using the [Variable Reference Syntax](/reference/variable-syntax).
- Hold run-scoped values that do not belong in a secret with [Custom Variables](/build/action-steps/custom-variables).
---
Source: https://docs.getglow.ai/manage/workspace-settings/security-compliance
# Security & Compliance
> Learn how Glow protects your data, workflows, and enterprise integrations.
This page describes how Glow handles the data passing through it: what is retained and for how long, how it is encrypted, and where credentials live.
## Certifications & Compliance
### SOC 1
Glow holds a **SOC 1** attestation, which covers controls relevant to financial reporting. If Glow sits inside a process your own auditors examine, this is the report they will want. It is not a security attestation: for that, see SOC 2 below. Your account team can supply the current report.
### SOC 2
A **SOC 2** audit is underway. For a SOC 2 report, talk to your account team: they can say where the audit stands and what evidence is available to share now.
### GDPR
Glow acts as a data processor under the General Data Protection Regulation. The platform provides data export and the retention limits described below.
**For a deletion request, work with your account team.** A workspace holds more than its database rows — uploaded files and the authorisations you granted to reach your other systems are held separately. Your account team confirms removal across all of it and gives you that confirmation in writing, which is what an auditor asks for.
> For a security questionnaire or vendor review, contact your account team
> rather than working from this page. They can supply the current attestation
> reports and a completed questionnaire directly.
## Data lifecycle and retention
Glow is an execution engine: it processes your data and keeps it only as long as running and debugging a workflow requires.
- **Execution Logs:** Payload data (inputs and outputs) passed through your workflows is retained strictly for debugging, then purged automatically. **Run records and step-level payloads are purged 30 days after the run finishes, by default.** Bounded retention limits exposure, but it also means Glow is not a system of record. If you need an audit trail of what your automations did, export it as it happens. Each run keeps the retention policy in effect when it started. Where a specific period is a compliance requirement, your account team can set a different one for your workspace. See [System Limits](/reference/system-limits#data-retention).
- **Temporary Files:** Files a workflow fetches during a run (a PDF pulled from an email, say) live in isolated run storage. They are not added to your team's [file library](/manage/workspace-settings/file-management) and are not retained as durable storage.
- **Personally Identifiable Information (PII):** Glow acts as a data processor. PII passes through only where your workflow sends it, and is not indexed or stored beyond the execution logs above.
## Data protection
- **Encryption at Rest:** All sensitive data, including your third-party API credentials, OAuth tokens, and stored workspace secrets, is encrypted at rest using industry-standard AES-256 encryption.
- **Encryption in Transit:** All communication with Glow web applications and API endpoints is encrypted in transit using TLS 1.2 or higher. Outbound requests from workflows to third-party services are sent over HTTPS.
- **Credential Sandboxing:** Your connected App credentials are never exposed to the end-user or the workflow canvas directly. The Glow execution engine injects them securely at runtime.
## Hosting architecture
Glow runs as a multi-tenant cloud platform. Every workspace's workflows, executions, files and variables are scoped to that workspace. Every request is checked against the workspace it names before any data is returned. Some access crosses a workspace boundary, such as an MSP operator reaching a client. That exists only where a delegation grant permits it, and is logged.
If you have a data-residency requirement, such as a specific region or a single-tenant deployment, raise it with your account team. Those are handled case by case, not by a setting in the product.
## Third-Party Access
If a managed service provider administers your workspace, their operators hold a **delegation grant**. That is a separate, revocable permission, sitting outside the roles in [Team Management](/manage/workspace-settings/team-management).
You control its scope and duration. You are emailed whenever an operator acts as one of your admins, and any of your Admins can end it immediately. [If a Partner Manages Your Workspace](/msp/governance/for-clients) sets out exactly what each access tier permits, what it never permits, and how to revoke it.
## What's Next?
- Apply these controls to your own workspace in [Team Management](/manage/workspace-settings/team-management).
- See how sensitive values are stored and scoped in [Secrets and Variables](/manage/workspace-settings/secrets-and-variables).
---
Source: https://docs.getglow.ai/manage/workspace-settings/team-management
# Team Management
> Organize your workspaces securely. Teams in Glow provide isolated, role-based environments for your workflows, connections, and files.
A team is an isolated workspace. Its workflows, connections, secrets, files and members stay within it by default. Content crosses a workspace boundary only through an explicit action, such as a confirmed [workflow push](/msp/cross-workspace-pushing), while a [delegation grant](/msp/governance) can give an approved partner scoped access.
Create a second team when a set of automations should not share credentials with the first. Internal HR separate from engineering, or one team per client.
## Creating a Team
*Switch teams, open the Manage team dashboard, or create a brand new isolated workspace.*
### Open the Menu
From the top-left workspace menu, click **Create Team**.
### Provide details
Enter a team name that clearly defines the workspace's purpose.
### Create
Click **Create**. Your new environment is provisioned immediately, and you are automatically assigned the **Admin** role.
## Role-Based Access Control
Glow uses three distinct permission levels. They let your team collaborate freely while protecting critical infrastructure, such as billing and team settings, from unauthorized changes.
| Role | Workflows | Team Settings | Secrets / Variables | Invites |
| ----------- | ----------- | ----------------- | ------------------- | ------------------------------- |
| **Admin** | Full access | Full access | Manage & View | Can invite & manage any role |
| **Manager** | Full access | Change roles only | Manage & View | Can invite Managers and Members |
| **Member** | Full access | No access | View only | Can invite other Members |
Only Admins can remove any member, change team settings, or manage billing. Managers and Members can remove only the people they invited themselves.
All three roles can view **Usage** and **Pricing** in [Billing & Usage](/manage/billing/overview). Invoices, payments, and billing management are Admin-only.
> **These roles cover people in your workspace.** If a managed service provider
> administers your automations, their operators reach your workspace through a
> separate delegation grant that is not shown in this table. You control it,
> including how much access it carries and when it ends, from **Settings →
> Governance**, which team Admins alone can open. See [what you are agreeing
> to](/msp/governance/for-clients).
> 💡 **Workflow Access** All roles, including **Members**, can create, edit, run
> and set team workflows Live. Members are not read-only viewers, so your team
> can build automations without waiting on an Admin. To limit who can open a
> particular workflow, use [Workflow Visibility and
> Sharing](/build/core-concepts/workflow-visibility) rather than roles.
## Managing members
All team administration happens on the dedicated full-page **Team Settings** (`/app/[team]/settings`): invite people, change roles, inspect pending invites, and remove members. Who can do which is in the table above.
*Paste email addresses, choose a role, and send the invites.*
### Open Settings
Navigate to your team settings by clicking **Manage team** or **Team Settings** in the main sidebar.
### Invite
Type the email addresses of your colleagues and select the appropriate role from the dropdown. *(The roles you can assign depend on your own permission level).*
### Send
Click **Send Invite**. Your colleagues can join the workspace with a single click from their inbox.
### Open settings
Navigate to the members directory on the **Team Settings** page.
### Locate member
Find the individual in the directory.
### Update role
Click the dropdown next to their name and select the new role. Changes take effect instantly. _(Only Admins and Managers can alter roles.)_
### Locate Member
Find the member you want to remove in the Team Settings modal.
### Remove
Click **Remove** and confirm. The user immediately loses all access to the workspace, its workflows, and its app connections. *(Only Admins can remove anyone; Managers and Members can remove only the people they invited themselves).*
## What's Next?
- Let members sign in with their corporate credentials via [Signing In and SSO](/manage/workspace-settings/enterprise-sso).
- See how secrets are scoped to a team in [Secrets and Variables](/manage/workspace-settings/secrets-and-variables).
---
Source: https://docs.getglow.ai/manage/workspace-settings/where-data-lives
# Where Data Lives
> Choose the right home for an app account, secret, shared setting, run-scoped value, file, or literal field value.
Put each value where its lifetime, sensitivity, and purpose fit. App connections authorize a service, workspace assets are shared across workflows, Custom Variables belong to one run, and literal values belong to one field.
## Choose the right home
| What you are storing | Put it here | Scope and lifetime | How a workflow uses it |
| ----------------------------------------------------------------------------- | ------------------------- | ------------------------------------------------------------------- | ----------------------------------------------------------- |
| Permission to act in Slack, Google Sheets, Salesforce, or another catalog app | **App connection** | Shared in the workspace until disconnected or reauthorized | Select the account from the app step's **Account** dropdown |
| API key, token, signing key, or password used in a field | **Secret** | Shared in the workspace; encrypted and not shown again after saving | `{{ $secret.KEY }}` |
| Non-sensitive setting used by several workflows | **Workspace variable** | Shared in the workspace; editable in place | `{{ $var.KEY }}` |
| Intermediate value, flag, or calculation for one run | **Custom Variables step** | One step in one workflow run | `{{ N.variable_name }}` |
| Template, reference document, data set, or other reusable asset | **File** | Shared in the workspace until deleted | Select it in a file field or use `{{ $file. }}` |
| Fixed text or number used by one field | **Literal field value** | Stored in that workflow field | Type it directly, such as `approved` or `30` |
## App connection: permission to use a service
Use a connection when a catalog app step needs to act on an account. The connection holds the authentication required by that service; the step holds the action, destination, and mapped data.
For example, a Google Sheets step selects a connected account from **Account**, then selects a spreadsheet and worksheet. Do not copy that account's OAuth token into a secret or a field. The connection manages the service authorization and can be reused by other app steps in the workspace.
Use a [secret](#secret-sensitive-text-used-by-a-field) instead when you are configuring an HTTP Request or another field that explicitly asks for a token rather than offering an **Account** dropdown.
## Secret: sensitive text used by a field
Store an API key, bearer token, webhook signing key, or password as a secret when a workflow field must send the value itself.
```text
{{ $secret.BILLING_API_KEY }}
```
A secret's value is encrypted at rest and is not displayed again after you save it. Rotate it by deleting and recreating the same key; existing references keep the same name.
Do not paste credentials directly into an HTTP header, URL, prompt, or code block. A literal stays visible with the workflow and does not receive the same secret handling.
> **Connection or secret?** If the app step offers an **Account** dropdown, use
> a connection. If a field needs the credential text itself, store that text as
> a secret and reference it with `$secret`.
## Workspace variable: a shared, non-sensitive setting
Use a workspace variable for a value that several workflows should read by the same name and that workspace members may see, such as a region, support address, tax rate, or environment base URL.
```text
{{ $var.REGION }}
{{ $var.TAX_RATE }}
```
Variables are editable in place and are not fixed when a run starts. Each step reads them when its placeholders are resolved, so a later step can see a value changed while the run is under way. References resolved together within one step use the same fetched value set.
Use a secret instead if exposing the value would grant access or reveal sensitive information. Use a literal instead if only one field needs the value and central updates would add no benefit.
## Custom Variables: values scoped to one run
The **Custom Variables** step creates named fields for later steps in the same run. It is useful for an intermediate calculation, a flag chosen on one branch, or a value assembled once and read later.
If step 3 defines `requires_approval`, downstream steps read:
```text
{{ 3.requires_approval }}
```
A Custom Variables value belongs to the step that created it and disappears when the run ends. The next run starts without it. Two Custom Variables steps can both define `status`; `{{ 3.status }}` and `{{ 7.status }}` remain separate values.
Use a workspace variable when the same maintained setting must be available to many workflows or future runs. Use Custom Variables when the value is produced or decided during this run.
## File: a reusable workspace asset
Use **Files** for content whose identity as a file matters: a document template, reference text, configuration file, image, spreadsheet, or data set.
Select the file from a step's file picker where one is available. A reference can also use its file id:
```text
{{ $file. }}
```
Text files, JSON, XML, and YAML insert up to the first 512 KiB of their contents. Other files usually insert a short-lived download link, so do not treat the resolved value as a permanent file URL. Test with the same kind of file you will use in the Live workflow.
Use a workspace variable for a short setting such as `Europe/Prague`; use a file when the content is naturally maintained, uploaded, downloaded, or forwarded as an asset.
## Literal field value: configuration local to one place
Type a value directly when it is fixed, non-sensitive, and meaningful only to that field:
```text
approved
30
https://api.example.com/v1/orders
```
A literal is often the clearest choice for an action name, a fixed status, a limit used once, or ordinary message text. It travels with the workflow and changes only when someone edits that field.
You can mix literals with mapped values:
```text
Order {{ 2.ret.order_id }} is ready.
```
Move a literal into a workspace variable when several workflows must change together. Move it into a secret when the value is sensitive. Keep it literal when centralizing it would make the workflow harder to understand without improving reuse.
## Common decisions
| Situation | Best fit | Reason |
| ----------------------------------------------------------- | ------------------------- | ------------------------------------------------------ |
| A Gmail step sends from a team account | **App connection** | The step needs authorization to act in Gmail. |
| An HTTP Request sends `Authorization: Bearer …` | **Secret** | The field needs sensitive token text. |
| Every workflow sends alerts to the same public channel name | **Workspace variable** | One visible setting can be updated centrally. |
| A run calculates whether a review is required | **Custom Variables step** | The flag exists only for that run. |
| Several AI steps use the same policy document | **File** | The document is a reusable asset, not a short setting. |
| One step always writes the status `processed` | **Literal field value** | The value is local, fixed, and non-sensitive. |
## Avoid look-alike storage choices
- **A secret is not an app connection.** It supplies text to a field; it does not create an account in an app step's **Account** dropdown.
- **A workspace variable is not a Custom Variables value.** The first is shared across workflows and runs; the second is output from one numbered step during one run.
- **A file is not a long variable.** Store document-like content as a file so file-aware steps can select, forward, or download it correctly.
- **A literal is not a safe place for a credential.** Put sensitive values in secrets even when only one step currently uses them.
## What's Next?
- **[Connecting an App](/manage/apps-and-integrations/connecting-an-app)**: Add an account and select it from an app step.
- **[Secrets and Variables](/manage/workspace-settings/secrets-and-variables)**: Create, reference, update, and rotate workspace values.
- **[File Management](/manage/workspace-settings/file-management)**: Upload reusable assets and reference them from workflows.
---
Source: https://docs.getglow.ai/msp/automation-blueprints
# Automation Blueprints
> Example workflow patterns for MSPs and IT providers: user lifecycle, billing reconciliation, security triage, endpoint maintenance, and reporting.
These reusable patterns give MSPs and IT consultants a practical starting point for user lifecycle work, billing reconciliation, security triage, endpoint maintenance, and reporting. Configure each one for the client's systems, approval process, and operating procedures.
,
},
{
value: "Per workspace",
label: "Client Credentials",
note: "Connections and secrets stay isolated inside each client's workspace",
icon: ,
},
{
value: "REST & webhooks",
label: "Custom Connections",
note: "Use documented APIs and webhook endpoints where no app action fits",
icon: ,
},
]}
/>
---
## 1. Zero-Touch Joiner Provisioning (M365 & Security Stack)
Automate new hire onboarding across directory services, license assignment, password management, and documentation without manual technician steps.
[HR Form / Webhook](/build/triggers/webhook) → [Create in Entra ID](/build/action-steps/http-request) → Assign M365 SKU → Invite to 1Password → Create PSA Contact → [Notify Manager](/manage/apps-and-integrations/overview)
**How to build this in Glow:**
1. **Trigger ([Webhook](/build/triggers/webhook)):** Ingest the HR ticket or onboarding form submission (`{{ 1.first_name }}`, `{{ 1.last_name }}`, `{{ 1.department }}`, `{{ 1.manager_email }}`).
2. **Credential Generation ([Code Execution](/build/action-steps/code-execution)):** Generate a compliant random temporary password and format the User Principal Name (UPN): `{{ 1.first_name }}.{{ 1.last_name }}@clientdomain.com`.
3. **Directory Creation ([HTTP Request](/build/action-steps/http-request)):** Call Microsoft Graph API (`POST /v1.0/users`) to provision the user object in Entra ID.
4. **License & Security Groups:** Assign the appropriate M365 Business Premium / Standard license SKU and add the user to departmental security groups.
5. **Password Manager:** Invite the user to the client organization's 1Password or Bitwarden tenant.
6. **PSA & Documentation Update:** Create the contact record in HaloPSA, ConnectWise, IT Glue, or Hudu to link future tickets and asset configurations.
7. **Manager Notification ([Teams](/manage/apps-and-integrations/overview) / [Slack](/manage/apps-and-integrations/overview)):** Send a direct message to the hiring manager with a secure one-time link to access initial credentials.
---
## 2. EDR Threat Detection Triage & Host Isolation Routing
Process high-volume security alert webhooks, extract incident forensic indicators with AI, and isolate affected endpoints when critical threats are confirmed.
[SentinelOne Webhook](/build/triggers/webhook) → [AI Threat Triage](/build/ai-features/ai-prompt) → [Evaluate Severity](/build/action-steps/conditions) → Isolate Endpoint → PagerDuty / PSA Ticket
**How to build this in Glow:**
1. **Trigger ([Webhook](/build/triggers/webhook)):** Inbound webhook from SentinelOne, Huntress, or CrowdStrike containing process hash, command line, threat classification, and host ID.
2. **AI Analysis ([AI Prompt](/build/ai-features/ai-prompt)):** Prompt the AI step with the raw command line arguments and detection details to summarize the attack technique and extract indicator of compromise (IoC) context in plain text.
3. **Severity Routing ([Conditions](/build/action-steps/conditions)):**
- **Critical (High Confidence Threat):** Call the EDR API (`POST /web/api/v2.1/agents/{id}/actions/isolate`) to disconnect the host from the network, trigger an on-call alert via PagerDuty/Twilio, and open a Critical priority PSA ticket.
- **Low/Medium (Informational or Quarantined):** Log the event as a standard service ticket on the client's PSA service board for routine review during business hours.
---
## 3. CSP / SaaS License Reconciliation vs. PSA Agreements
Cross-reference active M365 / Pax8 subscription quantities against billed PSA recurring agreement additions to prevent unbilled license leakage.
[Scheduler (Monthly)](/build/triggers/scheduler) → [Fetch PSA Agreement](/build/action-steps/http-request)
**How to build this in Glow:**
1. **Trigger ([Scheduler](/build/triggers/scheduler)):** Executes automatically on the 1st of each month at 02:00 UTC before the billing cycle closes.
2. **Fetch Cloud Quantities ([HTTP Request](/build/action-steps/http-request)):** Query Pax8 API or Microsoft Graph API for active assigned license counts per client tenant.
3. **Fetch Contract Quantities:** Query HaloPSA or ConnectWise Manage for the current recurring addition unit count on the client's agreement.
4. **Variance Calculation ([Data Transformation](/build/core-concepts/data-transformation)):** Subtract the billed seat count returned by step 3 from the active seat count returned by step 2. Pick both numbered outputs from the Workflow data panel rather than inventing field references.
5. **Reconciliation Routing ([Conditions](/build/action-steps/conditions)):**
- If the calculated variance is greater than zero: update the agreement addition count through the PSA API, or create a billing-variance review ticket with the supporting line items.
- If the calculated variance is zero: record the successful check in run history.
---
## 4. Immediate Leaver Deprovisioning & Session Invalidation
Execute time-sensitive employee offboarding immediately to close security attack surfaces and stop unneeded recurring license costs.
[Departure Ticket](/build/triggers/webhook) → Convert Mailbox to Shared → Reclaim Paid Licenses → Remove Password Vault → Update Documentation
**Key automated operations:**
- **Revoke Active Sessions:** Call Microsoft Graph (`POST /v1.0/users/{id}/revokeSignInSessions`) to immediately terminate all active OAuth refresh tokens, browser sessions, and mobile connections.
- **Convert Mailbox:** Disable the account, convert the user's Exchange mailbox to a Shared Mailbox, and delegate read access to the direct manager.
- **Reclaim Licenses:** Remove paid M365 Business Premium, Copilot, or add-on SKUs to stop unnecessary recurring billing.
- **Vault Deletion:** Revoke the user from 1Password / Bitwarden company collections.
- **Documentation & Ticket Closure:** Update the user state to "Inactive" in the documentation system and add the completed actions to the offboarding ticket.
---
## 5. Automated Tier-1 RMM Disk Space Remediation
Resolve recurring low-disk-space alerts across client workstations and servers without requiring level-1 technician dispatch.
[NinjaOne Alert Webhook](/build/triggers/webhook) → [Wait for Completion](/build/action-steps/delay) → [Re-check Free Space](/build/action-steps/http-request)
**How to build this in Glow:**
1. **Trigger ([Webhook](/build/triggers/webhook)):** Ingest alert payload from NinjaOne or Datto RMM when volume free space drops below the monitor threshold (e.g., < 5%).
2. **Execute Remediation Script ([HTTP Request](/build/action-steps/http-request)):** Trigger an approved maintenance script via RMM API to clear Windows Update caches (`C:\Windows\SoftwareDistribution`), purge temp directories, and empty system recycle bins.
3. **Wait Step ([Wait](/build/action-steps/delay)):** Pause workflow execution for 2 minutes while the remote agent script finishes execution.
4. **Re-query Endpoint Health:** Query the RMM device status API for the updated free space metric on the affected drive.
5. **Evaluate Outcome ([Conditions](/build/action-steps/conditions)):**
- If free space is restored above threshold: Auto-resolve the RMM alert, append the recovered gigabytes to the PSA ticket, and close the ticket.
- If free space remains below threshold: Escalate the ticket to Tier-2 service queue with full diagnostic output attached.
---
## 6. Hardware Asset Warranty & Lifecycle Reporting
Automate asset aging analysis to streamline Quarterly Business Review (QBR) prep and identify workstation replacement opportunities.
[Scheduler (Monthly)](/build/triggers/scheduler) → [Aggregate by Department](/build/action-steps/summarize)
**How to build this in Glow:**
1. **Trigger ([Scheduler](/build/triggers/scheduler)):** Executes on the 15th of every month.
2. **Fetch Device Lifecycle Data ([HTTP Request](/build/action-steps/http-request)):** Query ScalePad, IT Glue, or Microsoft Intune for client devices with OEM warranties expiring within 90 days or running unsupported OS builds.
3. **Data Aggregation ([Summarize](/build/action-steps/summarize)):** Group expiring assets by client department, compute estimated budget impact, and generate a structured overview table.
4. **Delivery:** Send a formatted summary card to your account management team's channel in Microsoft Teams or Slack to prepare client upgrade quotes.
---
## Deploying a Blueprint to Clients
Once you have built and tested a pattern in your own workspace:
1. Start a push and choose **one client workspace** as the target.
2. Review the preflight. It shows the app connections, variable and secret keys, files, and sample data that need attention.
3. Resolve client-specific items with the client. If they have no account for an app, or more than one, the copied step arrives without an account selected. Missing variables and secrets are created without values for the client to fill in.
4. Start the push. The workflow arrives as an **inactive copy**, so the client can review its configuration, complete any missing values, and switch it to Live.
5. Repeat the push for each additional client.
---
## What's Next?
👉 **[Pushing Workflows to Clients →](/msp/cross-workspace-pushing)** — review the preflight, resolve client-specific connections and values, and deliver an inactive copy.
Sideways from here: return to the [App Directory](/msp/integration-directory) when a pattern needs another client system.
---
Source: https://docs.getglow.ai/msp/choosing-a-deployment-method
# Choose a Deployment Method
> Choose between a reviewed one-client Admin Push and a saved-version Workspace Deployment.
Glow provides two ways to copy a workflow into client workspaces. Choose based on the source you want to deploy, the number of clients and when you want to review the copy.
Admin Push
Review one client copy before creating it.
Source: current active workflow
Workspace Deployment
Roll out a selected saved version to one or more clients.
Source: saved workflow version
## Compare the two paths
| Decision | Admin Push | Workspace Deployment |
| ----------------- | --------------------------------------------------- | -------------------------------------------------------------- |
| **Source** | The workflow's current active version | A saved version you select |
| **Destination** | One client workspace | One or more selected client workspaces |
| **Review timing** | A detailed preflight appears before the copy starts | You choose the approved version and destinations in Deployment |
| **Best fit** | A reviewed, one-client handoff | A controlled rollout from a known version |
| **Result** | A new inactive client copy | A new independent Draft copy in each selected workspace |
Neither path updates an existing client workflow. Treat every delivered copy as independent, and finish its client-owned connections, variables and test data before making it Live.
## Use Admin Push
Choose Admin Push when you want to inspect one target in detail before the copy is created. The preflight reports the client resources that need attention, including connections and workspace values.
👉 **[Follow Pushing Workflows to Clients →](/msp/cross-workspace-pushing)**
## Use Workspace Deployment
Choose Workspace Deployment when you have saved the exact version you approved and want to select the client destinations for that version. The Deployment page is also where a workflow can be prepared for other reuse routes.
👉 **[Follow the Deployment Page →](/getting-started/templates/deployment)**
## Before either deployment
- Confirm that your grant permits writing to the client workspace.
- Save and test the source you intend to deliver.
- Keep client-specific values in workspace variables or secrets rather than embedding them in Step fields.
- Plan to connect client-owned accounts and collect fresh test data in the receiving workspace.
For an end-to-end handoff, follow [Your First Client Workflow](/msp/first-client-workflow).
## What's Next?
- 👉 **[Deploy and Test Your First Client Workflow →](/msp/first-client-workflow)**
- Review what may cross workspace boundaries in [How Multi-Tenancy Works](/msp/how-multi-tenancy-works).
- Monitor delivered workflows from [Your Console](/msp/dashboard-analytics).
---
Source: https://docs.getglow.ai/msp/client-onboarding
# Client Onboarding
> Three ways to bring a client under management: create their workspace, invite them to create it, or request access to one they already have.
Onboarding brings a client workspace into your roster through a delegation grant. New workspaces start at full operational so you can begin setting them up immediately. Existing workspaces require client approval first. Choose the route based on whether the client already uses Glow and who should own signup.
> This page assumes the client layer is already on your workspace, which is what
> gives you the console referenced below. Your account team switches it on with
> you: see [Getting Set Up](/msp/overview#getting-set-up).
Open your console and select **Client**. The **New client** dialog opens.
## Choosing a mode
| Mode | Use when | Client appears in your roster | Starting tier |
| --------------------- | ------------------------------------------ | ----------------------------- | ---------------------------- |
| **Create workspace** | New client, you set everything up for them | Immediately | Full operational |
| **Invite by email** | New client, they should own the signup | When they accept | Full operational |
| **Add existing team** | They already use Glow | When they approve | Whatever the client consents |
The first two modes create a new workspace with an active full-operational grant. **Create workspace** also makes you an Admin so you can configure the workspace immediately. With **Invite by email**, the grant becomes active when the client accepts. Only **Add existing team** asks the client to approve a tier before access begins.
### Which mode to choose
- **MSP / Ongoing Operations:** Use **Create workspace** to set up and manage client automations directly.
- **Consultant / Project Handover:** Use **Invite by email** so the client owns their workspace from day one, making handoff clean and immediate.
- **Existing Glow Users:** Use **Add existing team** to request scoped delegation access to an existing organization.
## Create workspace
You create the client's workspace yourself and start building right away. Fastest route, and the one to use when the client would rather you handled setup.
### Pick the mode
In **New client**, choose **Create workspace** and give it a name, such as `Acme Corp — Managed`.
### It is yours to configure
The workspace appears in your roster immediately with an active full-operational grant. You are also added as an Admin, so you can switch into it and start building without waiting for anyone.
### Hand it over
When the build is ready, invite the client's people and make their lead an **Admin**. Invites and roles work as described in [Team Management](/manage/workspace-settings/team-management). With an Admin of their own in place, the workspace is genuinely theirs to run.
> **Set up a clear handover.** Add a client Admin before handover, then review
> both your team membership and the delegation grant with them. [Team
> Management](/manage/workspace-settings/team-management) covers workspace
> roles, while [Governance & Impersonation](/msp/governance) covers delegated
> access.
## Invite by email
The client creates their own workspace from a link you send. Use it when they want ownership of the signup, or when their IT prefers accounts created by their own people.
### Send the invite
Choose **Invite by email** and enter the client's address. They receive a co-branded invite.
### They sign up
The link takes them through signup, and the workspace is created when they accept. It is born under your governance, at full operational: an invite carries fixed terms rather than a tier you pick when sending it.
### They appear in your roster
Until they accept, the invite sits in **Pending**. Nothing exists on your side yet.
> **This one starts at full operational too.** The client owns the signup, but
> the tier comes from the invite rather than from a choice they made. Same
> responsibility as above: tell them where it starts, and point them at
> **Settings → Governance**, where they can narrow it or end it.
## Add existing team
The client already uses Glow. Nothing is created. You ask for access to what they have.
### Get their workspace ID
Ask the client's admin to read it off **Settings → General** and send it to you.
There is deliberately no lookup by name or email. Without that restriction, anyone could probe whether a given company uses Glow.
The ID on its own is not a key to anything. Requesting access needs an Admin account in a workspace Glow has enabled as a practice, and the client's own Admin still has to accept. A client can therefore share the ID over ordinary channels without it becoming a way in.
### Send the request
Choose **Add existing team**, paste the ID, and pick the access tier you need. See [Access Tiers](/msp/governance#access-tiers). Take the narrower one unless you genuinely need to act on their behalf.
### They decide
Their admins see exactly what you asked for: tier, scope, and expiry. Nothing changes until one of them accepts, and they can downgrade the tier or limit it to specific workflows first.
> Unlike the other two modes, this one cannot put the client in your roster on
> submit. The grant stays **Pending** until a client admin approves it.
## Pending invites and requests
The **Governance** tab of the console lists everything outstanding: invites not yet accepted, requests not yet approved.
If an invite expires or is caught by a spam filter, **Resend** or **Cancel** it from that table rather than sending a second one.
## What's Next?
👉 **[Governance & Impersonation →](/msp/governance)** — understand what each access tier permits before working inside a client workspace.
Sideways from here: [Team Management](/manage/workspace-settings/team-management) covers the roles you assign inside a workspace.
---
Source: https://docs.getglow.ai/msp/cross-workspace-pushing
# Pushing Workflows to Clients
> Copy the current active version of a workflow into one client workspace after reviewing what the copy needs.
Cross-workspace pushing copies the current active version of a workflow from your workspace into one client workspace. It rebinds a step when the client has one matching connected account and leaves ambiguous or missing connections for review. A preflight shows what the copy needs before you push it.
A push copies. Your original stays exactly as it is and keeps running: nothing in your workspace is torn down or retired.
Not sure whether this is the right route? [Choose a Deployment Method](/msp/choosing-a-deployment-method) compares Admin Push with saved-version Workspace Deployment.
**Pushing needs a full-operational grant on the receiving client.** A read-only grant can look at that client's workflows but not write to them, so the push is refused before anything is copied. See [Access Tiers](/msp/governance#access-tiers) for what each tier covers, and ask the client to raise the grant if you need to push to them.
## The push flow
Pushing happens in two phases: review the preflight, then start the copy. Nothing is written to the client workspace during preflight.
### Start the push
In your console, click **Push workflow** in the quick actions along the top.
### Pick the workflow and the client
Choose one of your own workspace's workflows as the source, and one client workspace as the target. Each push goes to a single client, so to roll a template out across several, repeat the push for each one.
### Review the preflight
Glow checks the source and target, then shows the connections, values, files and sample data that need attention. Nothing has changed yet.
### Push the workflow
Start the push from the reviewed state. Glow creates a new inactive copy in the selected client workspace.
## Reading the Preflight
The preflight is the important part. It tells you what the client copy will need before you start the push.
### Connected accounts
Each step that uses an app must be rebound to an account the client owns. Every one resolves in one of two ways:
| Resolution | Meaning |
| ----------------------- | -------------------------------------------------------------------------------------------------------------------------------------------------------------------------------- |
| **Bound automatically** | The client has exactly one account for that app. The step arrives connected. |
| **Needs connecting** | The client has no account for that app, or more than one. The step arrives with the connection cleared, and the client picks or connects an account before the workflow can run. |
You never pick between a client's credentials. Where a client has several accounts for the same app, only they know which one belongs in which step. The push leaves the choice to them.
Your own connected accounts never travel. The workflow is always rebound to the client's own connections.
### Team variables and secrets
The preflight lists every variable and secret key the workflow references, and whether that key already exists in the target.
> **Values never cross workspace boundaries.** Where a key is missing in the
> target, Glow creates it **empty** so the client can see exactly what they need
> to fill in. A secret's value is never copied out of your workspace, and never
> into theirs.
### Files
Any team files the workflow references are listed, along with whether they were found and whether they will be copied.
### Sample data
Captured sample payloads never cross a workspace boundary. Whatever test data your steps hold on your canvas is stripped from every copy, and the preflight confirms it.
That is the right default: sample data is real customer data belonging to whoever it came from. It does mean the client's copy opens with empty step previews, so tell them the first run is what fills those in.
The preflight reports missing or ambiguous client configuration before you push. Review those items with the client so they know what must be completed after the copy arrives. Existing copies need separate care, covered in [Preventing Accidental Overwrites](#preventing-accidental-overwrites) below.
## After the Push
Pushed workflows arrive **inactive**. The client reviews the configuration, connects any missing accounts, fills in any empty variables, and activates it themselves. Nothing starts running in a client workspace without their action.
Both workspaces get an activity-log entry recording the transfer, and admins in the target workspace are emailed when it completes.
## Preventing Accidental Overwrites
A push does not update a workflow already in the client workspace. If Glow reports that the client already has a copy, stop and inspect that workflow before taking another action. Clients may have customised what you sent them, so treating a new push as an update could leave two independent versions to manage.
If the existing workflow needs a change, work in that client-owned copy instead. This preserves the client's edits and avoids presenting an additional copy as a replacement.
## What's Next?
👉 **[Your Console →](/msp/dashboard-analytics)** — watch what you deployed: execution health per client, and where a pushed workflow is failing.
Sideways from here: compare this procedure with [Workspace Deployment](/msp/choosing-a-deployment-method).
Sideways from here: if you need to go into a client's workspace to fix something, see [Impersonation](/msp/governance#impersonation).
---
Source: https://docs.getglow.ai/msp/dashboard-analytics
# Your Console
> One console covering your managed client workspaces: fleet health, cross-client activity, workflows, users, AI activity, and delegation grants.
The console brings your managed client workspaces into one view. It shows which automations are failing, what changed and where, AI generation activity, and who has access to what.
It appears in the sidebar as your **Consultant Dashboard** or your **MSP Dashboard**, according to how your practice is set up. See [Working With Clients](/msp/overview#choose-the-path-that-fits-your-practice).
The **Open Admin Console** button in the workspace switcher opens the same console, or go straight to `/app/console`.
> The console shows only the clients you hold an active delegation grant for,
> and only what that grant's tier permits. A client who revokes consent
> disappears from it immediately. See [Governance &
> Impersonation](/msp/governance).
## Tabs
### Overview
Your landing page. It shows fleet health across all managed workspaces: total workflows, how many are active, and user counts. Alongside sits the client roster and an activity rail. Start an impersonation session or open a client's workspace from here.
### Activity
A cross-client feed of workflow, execution, governance, impersonation, deployment and membership events. Filter to a single client to trace when something changed or failed.
Pending alerts appear above the feed, so what needs attention sits ahead of what merely happened.
### Workflows
Every workflow across every managed workspace, in one list. Use it to find a specific automation without switching workspaces, and to see at a glance which clients have something running and which do not.
### Fleet
Execution health across the estate, with a trend chart over a selectable window.
> **Individual runs follow the client workspace's retention policy.** The
> default is 30 days after a run finishes, and the policy can differ by
> workspace. Investigate a reported failure while its run is still available if
> you need to open the underlying detail. See [Data
> Retention](/reference/system-limits#data-retention).
### AI
AI generation activity with status, workflow, user, model, time and response details. Summary metrics show generation volume, failures, clarification rate and tool use, helping you spot patterns that need investigation.
> This tab shows activity rather than spend. See [Billing across
> clients](#billing-across-clients) for how costs work today.
### Users
Users across your managed workspaces. Useful when onboarding, offboarding, or answering "who has access to this client?"
### Governance
Delegation grants and client invites: who has granted you access, at what tier and scope, what is still pending, and what has been revoked. Manage your client roster here.
## Billing across clients
Billing today works per workspace. Consolidated billing across your clients is in
development. Talk to your account team about where it stands and what
arrangement suits your practice.
How it works right now:
- **Each tenant is billed separately.** A client's plan sets their limits, and those limits apply inside their workspace. See [Billing & Usage](/manage/billing/overview) and [System Limits](/reference/system-limits).
- **Credits are per workspace.** When one exhausts its allowance, its workflows stop with an **Out of Credits** error. Yours running out does not affect theirs, and the reverse.
- **Verify recovery after restoring credits.** Confirm the client workflow is **Live**, then send one controlled webhook request or inspect the next scheduled occurrence. Check that a new run appears, and decide separately whether any missed work still needs replacing.
- **Check the plan before you push.** A workflow that loops 500 items runs fine on Pro and fails on Free, so confirm the target workspace's plan covers what the workflow does.
## What's Next?
When the console shows you a client's workflow failing:
- **[Troubleshooting](/reference/troubleshooting)**: the common failures, by symptom.
- **[Error Handling](/build/core-concepts/error-handling)**: retries and error paths, so the next failure handles itself.
- **[Governance & Impersonation](/msp/governance#impersonation)**: going into the client's workspace to fix it.
---
Source: https://docs.getglow.ai/msp/first-client-workflow
# Your First Client Workflow
> Take one client from onboarding to a tested, Live workflow, then monitor it and review access at handover.
This runbook takes one client from an empty relationship to an operating workflow in their own workspace. The client keeps the deployed copy, connected accounts, configuration, and run history; your access remains governed separately through their delegation grant.
> This guide uses one client and one workflow deliberately. Complete the whole
> operating loop once before repeating it across your client roster. The client
> layer and console must already be enabled for your practice; see [Getting set
> up](/msp/overview#getting-set-up) if the **Client** quick action is not
> available.
## 1. Onboard the client
Open your console, select **Client**, and choose the route that matches the client's starting point in the **New client** dialog.
| Route | Use when | When access begins |
| --------------------- | -------------------------------------------- | ---------------------------------------------------------------------------------- |
| **Create workspace** | You are setting up a new workspace for them | Immediately, with an active full-operational grant; you are also added as an Admin |
| **Invite by email** | The client should create their own workspace | When they accept the invite, with an active full-operational grant |
| **Add existing team** | The client already has a Glow workspace | After a client Admin approves the requested tier, scope, duration, and consent |
For an existing workspace, request **Full operational** because deployment writes a workflow into the client workspace. The request remains pending and the client does not appear in your active roster until an Admin accepts it. If you will need to enter the workspace without direct membership, ask the client to enable **Allow impersonation** as a separate consent.
See [Client Onboarding](/msp/client-onboarding) for each route and [Governance & Impersonation](/msp/governance) for the access controls.
## 2. Confirm the grant
Before you build, open the console's **Governance** tab and confirm that the grant is active, unexpired, and **Full operational**. Read-only access is not enough to deploy into the client workspace. The client can narrow or end the grant later.
## 3. Enter the client workspace
Open the client from the console. Glow uses your normal membership when you are already a member of that workspace. Otherwise, entering the client workspace requires an impersonation session allowed by the active grant.
For an impersonation session, choose a client Admin, set the shortest practical duration and scope, and record a specific reason. The client receives notice when the session starts and ends, and the activity trail attributes your actions to both identities.
> A full-operational grant does not let you create, rotate, remove, or
> re-authorise the client's connections. Impersonation does not change that
> boundary.
## 4. Connect the client's accounts
Have the client connect each app account the workflow will use from their own workspace. Keep production and test accounts distinct where an action can create or change real records.
These connections belong to the client. Your own connected accounts never cross into their workspace, and deployment only considers accounts already connected there.
## 5. Prepare and version the workflow
Return to your own workspace and finish the reusable workflow there. Before deployment:
- Use variables and secrets for client-specific values rather than embedding them in step fields.
- Test the main path, branches, and failure handling with representative data.
- Check that the client's plan supports the workflow's expected volume and limits.
- Save a named version with notes that identify what you approved for this client.
A saved version is an immutable deployment point. Later canvas edits do not change the version already selected for deployment.
## 6. Deploy one Draft copy
Glow has two client deployment paths. This runbook uses **Workspace Deployment** because it starts from the saved version you approved. If you need a detailed one-client preflight against the current active workflow instead, compare the paths in [Choose a Deployment Method](/msp/choosing-a-deployment-method).
In your workspace, open **Deployment**, select the workflow, and choose **Deploy**. Select the approved version, enable the client destination, and choose only this client.
Choose the saved version and client workspace, then start the deployment.
The client receives a new, independent workflow in **Draft**. Its triggers are disabled, so nothing begins running when the copy arrives. An existing client copy is never overwritten; deploying again creates another separate workflow.
## 7. Complete the client copy
Open the new workflow in the client workspace and check every resource it depends on:
- **Exactly one healthy matching client account:** Glow binds the step automatically.
- **No healthy match, several matches, or only an unhealthy match:** the step arrives without an account selected. Have the client choose or connect the correct account.
- **Missing variable or secret key:** Glow creates the key without a value. Have the client enter the value in their workspace.
- **Referenced team file:** confirm that the copied file is the one the client workflow should use.
- **Captured sample data:** collect fresh test data in the client workspace because source samples are stripped during deployment.
Do not copy credentials or secret values from your workspace. Resolve each reference against resources owned by the client.
## 8. Test in Draft
Keep the client copy in **Draft** while you test. Draft disables automatic triggers but still permits manual runs.
### Test uncertain steps individually
Run each step that writes to an external system against a safe client-owned test record or account. Read the step's **Executions** tab and confirm the destination changed as intended.
### Run from the trigger
Set the trigger as the run point and press **Run**. Starting in the middle is useful for diagnosis, but it does not prove the full path.
### Read the Execution Log
Confirm the branch taken, the values passed between steps, and the first unexpected result. A completed step shows that the call finished; verify the resulting message, ticket, row, or record in the destination too.
### Save a restore point
Once the test passes, consider saving a version of the client-owned copy before enabling its triggers. This gives the client a restore point for later changes.
## 9. Set the workflow Live
Review the trigger with the client, including its schedule, timezone, webhook sender, or app event. Then switch the workflow from **Draft** to **Live**.
**Live enables automatic triggers.** It does not create another copy or version. Future edits affect this same client-owned workflow, so save a version and return it to Draft before a controlled change.
## 10. Monitor the first runs
Use the console for cross-client health and the client's **Execution Log** for the full sequence of one run.
- In **Fleet**, watch execution health and trends for the client.
- In **Activity**, filter to the client to see failures and workflow changes.
- In the client workspace, open the **Execution Log** to find where a run stopped or took an unexpected branch.
- Open the affected step's **Executions** tab for its exact input, output, and error.
Confirm the first real outcome in the destination system. If an external write is uncertain, check that system before retrying so you do not create a duplicate business event.
## 11. Review or end access
At handover or the end of the engagement, review the two access paths separately:
1. **Delegation grant:** confirm that its tier, scope, impersonation consent, and expiry still match the work you are doing. From the client card's actions, use **Leave workspace…** or **Leave workflows…** when your delegated work is complete.
2. **Direct membership:** if your people were added under **Team Management**, remove memberships that are no longer needed. Ending the grant does not remove direct workspace members.
The workflow remains in the client's workspace when delegated access ends. It keeps its configuration and can remain Live under the client's ownership. The client also keeps the grant and impersonation history in their audit trail.
## What's Next?
- **[Pushing Workflows to Clients](/msp/cross-workspace-pushing)**: use the one-client admin path when you need a detailed preflight.
- **[Your Console](/msp/dashboard-analytics)**: monitor workflow health across the rest of your client roster.
- **[Operating Workflows](/build/core-concepts/operating-workflows)**: use the same test, Live, monitor, diagnose, and recovery loop for ongoing changes.
---
Source: https://docs.getglow.ai/msp/governance
# Governance & Impersonation
> How delegated access works between a partner practice and a client workspace: consent, tiers, scope, impersonation sessions, and revocation.
A consultancy or MSP reaches a client workspace through a **delegation grant**. New workspaces created through the partner onboarding flow start with an active full-operational grant. For an existing workspace, a client Admin approves the tier, scope, and duration before access begins. The client can review, narrow, or end delegated access from Governance settings.
This page is written for the partner side: what a grant gives you, and how to work inside a client's workspace.
- [If a Partner Manages Your Workspace](/msp/governance/for-clients): Deciding whether to accept a request, and how to narrow or end access afterwards. Written for the client.
## The grant lifecycle
A grant is only ever in one of two live states. Everything else is a way it finished.
A grant has two live states, Pending and Active. Every other state is final.
From **Pending** (requested, nothing granted yet):
- Accepted → **Active**. The client's admin accepted, at the tier and scope they chose. Accepting also declines any competing request and ends any previous grant.
- Declined → **Declined**. The client's admin said no. The partner may ask again.
- Withdrawn → **Withdrawn**. The partner cancelled its own request before it was answered.
- 14 days passed → **Expired**. The request timed out unanswered.
From **Active** (the partner has the access the client consented to):
- Revoked → **Revoked**. The client ended the relationship, effective immediately.
- Ended or replaced → **Ended**. The partner ended it, or a newer grant replaced it.
- Reached its end date → **Expired**. The grant hit the expiry date set when it was accepted.
A workspace can be governed by **one partner at a time**. Accepting a grant declines any competing request and ends any previous one.
**A new request emails the client's Admins** with what was asked for and a link to answer it, and it also waits for them under **Settings → Governance**. Both the email and that page are Admin-only, so a workspace whose day-to-day runs on Manager accounts should make sure an Admin is watching for it. Accepting or declining emails the operator who asked.
Ended grants are kept permanently. The client's audit history of the relationship is never deleted, and stays exportable by the client.
## Access tiers
The partner requests a tier; the client can accept it or downgrade it, never raise it. To move an active grant to a higher tier later, the partner sends a new request. Accepting it ends the old grant and activates the newly consented one.
| Capability | Read-only | Full operational |
| ----------------------------------------------------------- | :-------: | :------------------------- |
| View workflows, executions, failures, members, credit usage | Yes | Yes |
| Receive alerts about this team | Yes | Yes |
| Copy workflows into or out of this team | No | Yes |
| Acknowledge or resolve alerts, operational actions | No | Yes |
| Impersonation as a team admin | No | Only if separately allowed |
| Change billing, delete data, read credentials | **Never** | **Never** |
> **What "never read credentials" does and does not mean.** At no tier can an
> operator open your credential vault, or create, rotate, or remove a
> connection, impersonation included. When a result or error contains the exact
> value of a workspace secret referenced through Glow Secrets, standard run
> processing replaces it with `[REDACTED]` before storing the history. Do not
> paste tokens directly into step fields or outputs: those values do not carry
> the same protection. What a full-operational grant can read is the rest of the
> step result: the business data your workflows move. If a workflow handles data
> you would not show your partner, scope the grant to exclude it, or grant
> read-only.
## Access scope
A grant covers either the whole workspace or a specific list of workflows.
**Full workspace**: every workflow in the team.
**Selected workflows**: only the workflows the client's admin picks when accepting, up to 100. The request cannot name workflows, because a partner without a grant cannot see what a workspace contains. Widening the list later requires a new request and a new consent.
The cap shapes what scoping is good for. It works when you want a partner confined to a handful of automations. Exposing more than 100 means granting the whole workspace instead, so scoping is not the way to exclude a few workflows from a large one.
> Workflow scoping confines which workflows an operator can see, run, and edit.
> But working on those workflows still reaches the team resources they depend
> on: files, variables, and connected accounts. Scoping is narrower than
> full-workspace access, not a sealed box.
Under a workflow-scoped session, operators cannot create new workflows at all. A new workflow would fall outside the consented set.
## Grant duration
The partner picks a duration when requesting: 30 days, 90 days, 1 year, or 2 years. **The default is 2 years**, and the minimum is 30 days. Check the expiry date shown on the consent screen before accepting.
Clients see a warning in Governance settings when fewer than 30 days remain, and receive an email with an extend option once a grant lapses.
### Choosing a duration for the way you work
Consultant and MSP practices carry exactly the same access. Where they differ is
what happens after the work is done, and that is worth thinking about when you
pick a duration.
**Delivering a project and handing it over.** Set the grant to the length of the
engagement rather than the default. When the project ends, leave management
yourself rather than waiting for the grant to lapse: the client keeps every
workflow you built, and the record of the engagement stays in their audit
history. A grant that quietly runs for another eighteen months after the last
invoice is the thing a client's security review will ask about.
**Running the automations you built, indefinitely.** A long grant is the point,
and the default suits it. What matters instead is that the client understands
the relationship is ongoing: say so when they accept, and expect to be asked
about it at review time. If a client narrows the scope later, the console tells
you what you can no longer reach rather than failing quietly.
Either way, the client sets the ceiling. You request; they accept, downgrade, or
decline.
## Impersonation
Impersonation lets an operator act **as one of the client's admins**, with that admin's permissions. It is a second, separate consent. Accepting a grant does not enable it.
Three conditions must all hold for a session to start: the grant is active and unexpired, its tier is full operational, and the client has switched on **Allow impersonation**.
### Starting a session
The operator chooses the target admin, a duration, and must type a reason of at least ten characters. The reason is recorded, emailed to the client's admins, and shown in the client's session log.
Available durations: 5, 15, and 30 minutes; 1, 3, 6, 12, and 24 hours; 3, 7, 14, and 30 days. The default is one hour, and 30 days is a hard ceiling.
An operator can run **one session at a time across your whole client list**, not one per client: starting a second session while one is open is refused until the first ends. Two operators can be in two different clients at once, so parallel work is a matter of how many people you have, not a per-client limit. Sessions can be narrowed below the grant's scope at start, never widened.
### What is recorded
The client's admins are emailed the moment a session starts, before the operator does anything. They are emailed again when it ends, with the duration and an action count. Every action is attributed to both identities in the client's activity trail.
Even under impersonation, credential operations stay blocked. An operator can run workflows against existing connections, but cannot mint, remove, or re-authorise them.
### Agent memory is shared with the client
An [AI Agent](/build/ai-features/ai-agent) step with **Memory Enabled** keys its memory to the workflow rather than to the person running it. Run a client's workflow under impersonation and that applies to your run too: the agent recalls what the client's own runs taught it. Whatever it learns on your run is there for the client's next one.
This is worth a thought before you trigger a client workflow whose agent has memory switched on. If a run of yours would teach the agent something the client's runs should not inherit, use a test workflow in your own workspace instead. A copy of a workflow does not inherit the original's memory.
## For clients
If a partner has asked to manage your workspace, or already does, everything
you decide and control lives on its own page: **[If a Partner Manages Your
Workspace](/msp/governance/for-clients)**. It covers the consent screen, the
**Allow impersonation** toggle, and the three different ways to stop access.
## What's Next?
👉 **[Your First Client Workflow →](/msp/first-client-workflow)** — apply the grant, workspace and handover model to one complete rollout.
Sideways from here: read [If a Partner Manages Your Workspace](/msp/governance/for-clients) before asking a client to approve access.
---
Source: https://docs.getglow.ai/msp/governance/for-clients
# If a Partner Manages Your Workspace
> Deciding whether to accept a consultancy or MSP's request for access, what you keep control of afterwards, and the three different ways to stop it.
A consultancy or MSP works in your workspace through a **delegation grant** that you can review, narrow, or end. If they requested access to an existing workspace, you choose whether to approve it and can reduce the requested tier. A new workspace created through partner onboarding starts with a full-operational grant so setup can begin immediately.
## Deciding on a request
You have had an email, or there is something waiting under **Settings → Governance**. Four things decide it, and you can change three of them before you accept.
| What you are asked | What you can do about it |
| -------------------------------------------------- | ------------------------------------------------------------------------------------------------------------------------------------ |
| **The tier** — read-only or full operational | Accept it, or downgrade to read-only. You can never raise it above what was asked. See [Access Tiers](/msp/governance#access-tiers). |
| **The scope** — whole workspace or named workflows | If the request is workflow-scoped, you pick the workflows, up to 100. |
| **Impersonation** — acting as one of your admins | A separate checkbox, unchecked by default, and offered only at full operational. Accepting the grant does not enable it. |
| **The expiry date** | Set by the partner's requested duration. Read it before accepting; it is shown on the consent screen. |
Take the narrower option unless the work genuinely needs the wider one. A partner who needs more later has to ask again, and you consent again.
### Reviewing a request
The email links to a consent screen. Nothing is decided by opening it. Unlike ordinary invite links, no decision is committed until you choose. Only team admins can act on it.
The screen shows who is asking, the tier and scope requested, the exact expiry date, the [capability table](/msp/governance#access-tiers), and any note the partner added. If full operational was requested, you can downgrade to read-only before accepting. If the request is workflow-scoped, you pick the workflows.
**Allow impersonation** is a separate checkbox, unchecked by default, and available only at full operational.
> **What "never read credentials" does and does not mean.** At no tier can an
> operator open your credential vault, or create, rotate, or remove a
> connection, impersonation included. When a result or error contains the exact
> value of a workspace secret referenced through Glow Secrets, standard run
> processing replaces it with `[REDACTED]` before storing the history. Do not
> paste tokens directly into step fields or outputs: those values do not carry
> the same protection. What a full-operational grant can read is the rest of the
> step result: the business data your workflows move. If a workflow handles data
> you would not show your partner, scope the grant to exclude it, or grant
> read-only.
## Ongoing control
Everything lives under **Settings → Governance**, which only team Admins can open:
- A banner while a session is live: who, when, why, when it ends automatically, and a button to end it now.
- Current status: tier, expiry, who granted it, and how the grant originated.
- The **Allow impersonation** toggle.
- A log of every impersonation session ever run against the workspace.
- The activity trail and the history of past grants.
You are emailed the moment an impersonation session starts, before the operator does anything, and again when it ends with the duration and an action count.
## Three different ways to stop access
These are easy to confuse, and they do different things.
| Control | Stops | Leaves in place |
| ----------------------------- | ---------------------------------- | --------------------------------------------------------------------------------------------- |
| **End session** | The one session running now | The grant. A new session can start later. |
| **Allow impersonation** (off) | All impersonation, now and future | The grant — console visibility continues. |
| **Leave MSP management**\* | Delegated access through the grant | Audit history, your workflows, and any direct team membership the partner's people also hold. |
\* The wording follows your partner's own brand, so it reads **Leave consultancy management** where the practice is set up as a consultancy.
**Your workflows stay yours.** Leaving management ends the partner's delegation grant, active sessions, console visibility and planned workflow transfers. It does not remove anything from your workspace. Workflows they built or pushed to you remain, keep running, and are yours to edit.
If the partner's people also appear under **Team Management**, remove those direct memberships separately. This matters for workspaces created through partner onboarding, where the person who created or accepted the workspace can also hold an Admin membership. Ending the grant does not remove that second access path.
> **Check both access paths when the relationship ends.** Removing a person from
> Team Management leaves the delegation grant active. Leaving MSP management
> ends the grant but leaves any direct team membership in place. Use Governance
> for the grant, then Team Management for partner members who should no longer
> belong to the workspace.
### Revocation takes effect immediately
There is no cached access anywhere. When you revoke a grant or switch off impersonation, live sessions end in the same transaction. The operator's next request is refused, and any open canvas disconnects within 30 seconds. You do not wait for a session to expire.
Ending a grant also clears the partner's console visibility and cancels any planned workflow transfers between the two workspaces.
## Grants that never showed you a consent screen
Not every grant comes from a request you approved. Check the origin on your status card:
- **Invited by request**: you consented on the screen described above. This is the only origin where you picked the tier.
- **Workspace created by** your consultancy, agency or MSP — the card names whichever applies: the workspace has been governed since it was created, so no consent screen ever appeared. These start at **full operational**. It covers two cases. They may have created the workspace for you. Or **you created it yourself from an invite link they sent**, in which case signing up personally did not mean choosing their access level.
- **Pre-existing management**: migrated from before this system existed.
- **Assigned by Glow**: a break-glass assignment by Glow support.
Whatever the origin, the controls above are yours: you can downgrade impersonation consent or leave management at any time.
## What's Next?
- **[Governance & Impersonation](/msp/governance)**: the full detail of what each tier permits, how scope works, and what an impersonation session records.
- **[Security & Compliance](/manage/workspace-settings/security-compliance)**: how the rest of your workspace's access controls fit together.
- **[Team Management](/manage/workspace-settings/team-management)**: roles and members inside your own team, which is a separate thing from a grant.
---
Source: https://docs.getglow.ai/msp/how-multi-tenancy-works
# How Multi-Tenancy Works
> Every client keeps their own workspace, and you reach it through a grant they control. What that separation guarantees, and what crosses between workspaces.
Every client you work with has a workspace of their own. Their workflows, connected accounts, secrets, files and run history live inside it and belong to them.
You do not work from a shared account with access to everything. Access to a client workspace is governed by a **delegation grant**, and only what that grant permits is visible to you. New workspaces created through partner onboarding start with an active full-operational grant. A client Admin reviews requests for an existing workspace before access begins.
This page is the model in one place: what separation means here, what crosses a boundary, and what the client keeps hold of throughout. The pages after it cover each part in practice.
[Video](https://www.youtube.com/watch?v=sY-58wmzQD8)
## One workspace per client
The workspace is the unit everything is scoped to. Two clients never share one.
| Belongs to the client's workspace | What that means for you |
| --------------------------------- | ------------------------------------------------------------------------------------- |
| Workflows and their run history | You see a client's runs only while your grant is active |
| Connected accounts | Their Slack, their CRM, authorised under their own account — never yours |
| Secrets and team variables | You can use them in a workflow, and their values are never shown to you in plain text |
| Files | Uploaded to their workspace, read by their workflows |
| Plan, credits and limits | Their plan governs what runs there, independently of yours |
**Their plan applies inside their workspace.** A workflow that loops 500 items runs on a client with a Pro plan and stops on one with Free. Check the plan before you deploy something demanding. See [System Limits](/reference/system-limits).
## Access is granted, not assumed
For a request to an existing workspace, the grant names four things for the client to review:
- **The tier.** Read-only, or full operational. You request one; they can accept it or downgrade it, never raise it.
- **The scope.** The whole workspace, or a list of workflows they pick.
- **How long.** 30 days, 90 days, 1 year or 2 years, with the exact expiry date shown before they accept.
- **Whether you may work as them.** Impersonation is a separate checkbox, unchecked by default, and offered only at full operational.
New workspaces created through either partner onboarding route begin at full operational without this request screen. The client can review, narrow, or end the grant afterwards. Full detail is in [Governance & Impersonation](/msp/governance).
> **A workspace is governed by one practice at a time.** Accepting a grant
> declines any competing request and ends any previous one, so a client always
> knows exactly who holds access.
## What crosses between workspaces
Three things cross a boundary, each deliberately:
**Your view of their workspace**, limited to what the grant permits. A client who revokes consent disappears from your console immediately.
**A workflow you push to them.** Build an automation once in your own workspace and deploy it into a client's. A step is rebound when the client workspace has one matching connected account. If none or several match, the copied step arrives without an account selected for the client to complete.
**Nothing else.** A client's data is not pooled, aggregated across your roster, or visible to another client. Your own workspace's secrets do not travel with a pushed workflow: variables land as empty **references** for the client to fill, never your values. Team files the workflow reads are the one thing copied in, and the one-client Push preflight lists each one before anything is written.
> **The one-client admin Push shows a preflight before the copy starts.** Review
> its connections, workspace values, files, and sample-data handling with the
> client, then start the push. For a multi-client rollout, Workspace Deployment
> uses the saved workflow version you select instead. See [Pushing
> Workflows](/msp/cross-workspace-pushing).
## What the client keeps
Worth being able to state plainly, because clients ask:
- **Ownership.** Workflows built in their workspace are theirs. Ending the relationship does not take them away.
- **Visibility.** Every impersonation session is recorded, with who, when and how long. The audit history survives the grant ending and is exportable.
- **Control.** Consent can be narrowed to specific workflows, downgraded to read-only, or withdrawn outright, without going through you.
- **Their own accounts.** Connections are authorised under the client's accounts. Nothing you hold gives access to their tools once the grant ends.
## What's Next?
👉 **[Client Onboarding →](/msp/client-onboarding)** — choose how to create a client workspace or request access to an existing one.
Sideways from here: share [If a Partner Manages Your Workspace](/msp/governance/for-clients) with a client who wants to review the controls they keep.
---
Source: https://docs.getglow.ai/msp/integration-directory
# App Directory
> Explore MSP tools, PSA systems, RMM platforms, and identity providers by category and connection method.
Explore the apps and connection methods available for an MSP technology stack, grouped by the work they support.
Click **Explore Actions ↗** on a card to check the triggers, actions, and fields currently available for that tool. For the complete, current app catalogue, use the [Glow Integrations Directory](https://getglow.ai/integrations).
---
---
## Connecting Custom, On-Premise, and Niche Tools
For internal scripts, proprietary client databases, or tools without a pre-built connector:
- Use the **[HTTP Request](/build/action-steps/http-request)** step with instant cURL command import.
- Store sensitive tenant credentials in workspace **[Secrets](/manage/workspace-settings/secrets-and-variables)** for strict per-client isolation.
- Ingest live alert streams using the **[Webhook Trigger](/build/triggers/webhook)** with cryptographic HMAC SHA-256 signature verification.
---
## What's Next?
👉 **[Automation Blueprints →](/msp/automation-blueprints)** — turn these connection methods into example client workflows.
Sideways from here: [Supported Integrations](/msp/msp-integrations) explains when to use an app connection, HTTP Request, or webhook.
---
Source: https://docs.getglow.ai/msp/msp-integrations
# Supported Integrations
> Choose how to connect PSA, RMM, identity, documentation, security, and billing systems in each client workspace.
Glow connects the systems an MSP uses through pre-built app connections, HTTP requests, and inbound webhooks. Choose the method each client system supports, then keep its credentials inside that client's workspace.
Build a reusable workflow in your own workspace, then copy it to one client at a time after reviewing its preflight.
,
},
{
value: "Per workspace",
label: "Client Credentials",
note: "Secrets and tokens stay in the workspace where they were added",
icon: ,
},
{
value: "REST & webhooks",
label: "Custom Connections",
note: "Connect services that expose a compatible API or webhook",
icon: ,
},
]}
/>
---
## Connection Methods
Glow communicates with client systems through three connection methods:
1. **Pre-built apps ([Apps and Integrations](/manage/apps-and-integrations/overview)):** Use a visual action or trigger where the required service and operation are available in the directory.
2. **REST APIs ([HTTP Request](/build/action-steps/http-request)):** Call a service that exposes a compatible REST endpoint, using its documented authentication method.
3. **Inbound webhooks ([Webhook Trigger](/build/triggers/webhook)):** Receive real-time telemetry and alerts, with signature verification where the sender supports it.
| Category | Examples in the Glow ecosystem | Ways to connect | Typical authentication | Example workflows |
| ------------------------ | ---------------------------------------------------- | ----------------------------------------------------------------------------------------------------------------------------------------------- | ------------------------------- | --------------------------------------------------------------------------------------------------------- |
| **PSA & Service Desk** | ConnectWise PSA, Autotask, ServiceNow, Zendesk, Jira | [Pre-built app](/manage/apps-and-integrations/overview) or [HTTP Request](/build/action-steps/http-request) | OAuth 2.0, API key or secret | Dispatch tickets, sync configuration items, update agreements and log technician time |
| **Identity & IAM** | Microsoft 365, Entra ID, Google Workspace, Okta | [Pre-built app](/manage/apps-and-integrations/overview) or [HTTP Request](/build/action-steps/http-request) | OAuth 2.0 or admin consent | Provision and offboard users, assign licences, update groups and revoke sessions |
| **RMM & Endpoint Mgmt** | NinjaOne, Datto RMM, ConnectWise Automate | [Pre-built app](/manage/apps-and-integrations/overview), [HTTP Request](/build/action-steps/http-request) or [Webhook](/build/triggers/webhook) | OAuth 2.0, API key or secret | Receive device alerts, fetch hardware details and start remediation |
| **Documentation & CMDB** | IT Glue, Hudu, ScalePad, Liongard | [Pre-built app](/manage/apps-and-integrations/overview) or [HTTP Request](/build/action-steps/http-request) | API key or bearer token | Create records, track warranty dates and sync contacts |
| **Cybersecurity & EDR** | CrowdStrike Falcon, SentinelOne, Huntress, Duo | [Pre-built app](/manage/apps-and-integrations/overview), [HTTP Request](/build/action-steps/http-request) or [Webhook](/build/triggers/webhook) | OAuth 2.0, API key or signature | Receive detections, route forensic indicators and isolate endpoints where the selected action supports it |
| **CSP & Cloud Billing** | QuickBooks, Xero, Stripe, DocuSign, Pax8 | [Pre-built app](/manage/apps-and-integrations/overview) or [HTTP Request](/build/action-steps/http-request) | OAuth 2.0 or API key | Compare subscriptions with agreements, route billing exceptions and prepare reconciliation |
| **Alerts & Team Comms** | Microsoft Teams, Slack, PagerDuty, Twilio | [Pre-built app](/manage/apps-and-integrations/overview) or [HTTP Request](/build/action-steps/http-request) | OAuth 2.0 or API key | Send notifications, route on-call escalations and dispatch messages |
---
## How Connections Work
The available method depends on the service and operation. Check the Integrations Directory first, then use HTTP Request or a webhook when that is the better fit.
### 1. Pre-Built App Connections
Where the app and operation are available in the directory, configure them from the App drawer:
1. Open your workflow canvas and click **Apps** in the dock.
2. Select your application from the catalogue and click **Connect**.
3. Authorize the account. Glow securely stores credentials inside the active workspace and handles token lifecycles and background refreshes automatically.
4. Pick your pre-built action or trigger from the drawer and configure inputs using dynamic variable tags.
### 2. Custom PSA & RMM REST APIs ([HTTP Request](/build/action-steps/http-request))
For specialized MSP platforms and on-premise tools with a documented REST API:
1. Add an [HTTP Request](/build/action-steps/http-request) step to your canvas or paste a cURL snippet to generate it instantly.
2. Configure your endpoint URL using workspace variables: `https://{{ $var.PSA_INSTANCE }}/api/v1/tickets`.
3. Provide authentication in headers: `Authorization: Bearer {{ $secret.PSA_API_KEY }}`.
4. Response payloads are automatically parsed into structured variables accessible in subsequent steps.
### 3. Real-Time Telemetry & Threat Feeds ([Inbound Webhooks](/build/triggers/webhook))
For instant alert ingestion (NinjaOne monitoring alerts, SentinelOne threat detections, Huntress incident feeds):
1. Add a [Webhook](/build/triggers/webhook) trigger step to your workflow canvas.
2. Switch the workflow to **Live** mode to generate your unique, per-workflow webhook URL.
3. Configure your RMM or EDR to dispatch alert notifications to this webhook URL.
4. Provide a secret key to enforce cryptographic HMAC signature verification on every inbound payload.
---
## Workspace Credential Isolation
Each client's credentials belong in that client's workspace:
- **Separate client workspaces:** Secrets, API keys, and app connections added in Client A's workspace are not available to workflows in Client B's workspace.
- **Client-owned authentication:** A client can connect its own service accounts without giving you the underlying credential value.
- **Reviewed workflow copies:** Build a reusable workflow in your own workspace, then copy it to one client through [Pushing Workflows to Clients](/msp/cross-workspace-pushing). The preflight identifies connections and values the client still needs to provide.
---
## Explore Integrations & Blueprints
- [App Directory](/msp/integration-directory): Search commonly used MSP platforms by category, connection method, and authentication type.
- [Automation Blueprints](/msp/automation-blueprints): Example workflow patterns for onboarding, billing reconciliation, security alerts, and routine operations.
## What's Next?
👉 **[App Directory →](/msp/integration-directory)** — find the connection method available for a specific MSP platform.
Sideways from here: [How Multi-Tenancy Works](/msp/how-multi-tenancy-works) explains what stays inside each client workspace.
---
Source: https://docs.getglow.ai/msp/overview
# Working With Clients
> How consultancies and managed service providers run automations inside their clients' workspaces, and where the two paths differ.
**Build and operate automations across separate client workspaces from a single login.** Each client gets their own isolated workspace governed by delegation grants. Workflows, connected accounts and run histories stay completely separate.
[Video](https://www.youtube.com/watch?v=sY-58wmzQD8)
## Choose the path that fits your practice
Select your role during onboarding to configure your console and client consent screens:
Consultant
Projects delivered to clients, then handed over.
Your console: Consultant Dashboard
MSP
Client automations you run and maintain on an ongoing basis.
Your console: MSP Dashboard
**Both paths share the same core features**: delegation grants, recorded session access, cross-workspace pushes, and a unified management console.
What does differ is the shape of the work, and it shows up in three places in
this section:
| | Consultant | MSP |
| ------------------------ | -------------------------------------------------------------------------------------------- | ---------------------------------------------------------------------------- |
| **Bringing a client in** | Inviting them to create the workspace makes the handover cleaner: it is theirs from day one. | Creating it yourself suits a workspace you will be operating. |
| **Grant duration** | Set it to the length of the engagement, and leave management when you are done. | The default two years fits an ongoing relationship. |
| **When it ends** | You leave; the client keeps every workflow you built. | It does not, usually. Reviews and scope changes take the place of an ending. |
### Managed Service Provider (MSP) Practice
MSPs govern ongoing IT operations across dozens or hundreds of client tenants with strict SLA commitments and recurring revenue models:
- **Your Stack:** PSA service boards (HaloPSA, ConnectWise, Autotask), RMM agents (NinjaOne, Datto RMM), Directory services (Microsoft 365, Entra ID, Google Workspace), EDR threat feeds (SentinelOne, Huntress, CrowdStrike), and CSP billing (Pax8).
- **Core Problems Solved:** Eliminating technician toil on high-volume Tier-1 tickets, automating JML user provisioning and session revocation, catching unbilled SaaS license leakage, and enforcing compliance audits.
- **Operational Workflow:** Build reusable patterns in your primary workspace, review each one-client preflight before pushing, then monitor execution activity from your **MSP Dashboard**.
- **Key Resources:**
- [Supported Integrations](/msp/msp-integrations)
- [App Directory](/msp/integration-directory)
- [Automation Blueprints](/msp/automation-blueprints)
### Automation Consultant & Solutions Agency
Consultants and agencies deliver custom, milestone-driven integration projects and specialized business automations with clean client handovers:
- **Your Stack:** CRM pipelines (HubSpot, Salesforce), Financial & ERP systems (QuickBooks, NetSuite, Stripe), Document & e-Signature tools (DocuSign, PandaDoc), and bespoke REST/GraphQL APIs.
- **Common Uses:** Building custom data pipelines without sharing credentials, bringing clients into separate workspaces, and delivering client-owned workflow copies.
- **Operational Workflow:** Invite your client to create their workspace, request a scoped delegation grant for the sprint duration (e.g. 30 or 90 days), deploy your solutions via cross-workspace push, and hand over complete ownership when the project is signed off.
- **Key Resources:**
- [Client Onboarding & Invitations](/msp/client-onboarding)
- [Governance & Scoped Delegation](/msp/governance)
- [Cross-Workspace Push & Preflight](/msp/cross-workspace-pushing)
Nothing above is enforced. They are the defaults that tend to fit, and each is
covered where it comes up.
Already signed up as an Individual / Team? The answer is not fixed — tell your
account team which path fits and they will move you across.
## Getting set up
Start on your own, and the last step is a short conversation with us. Everything
except the client layer is yours from the moment you sign up: your workspace,
your workflows, your connected accounts.
### Sign up and say what you are
Signing up names your workspace, then asks who you are on the **Choose your
role** screen: Individual / Team, **Consultant** or **MSP**. Choose the one that
describes your practice. The answer is recorded against your account and is what
we work from, so it is worth answering accurately rather than picking the middle
option. See [Account & Authentication](/getting-started/account-and-authentication).
### Build in your own workspace
Start by connecting your own accounts and building workflows in your workspace. Once the client layer is enabled, the push process copies a reviewed workflow into each client's workspace.
### We turn the client layer on with you
Multi-tenancy changes how billing, access and client consent work across your
account, so we switch it on together rather than leaving it behind a toggle.
Tell us roughly how many clients you manage and what you want to automate for
them, through [Support](https://forum.getglow.ai/) or your account team, and the
console appears on your workspace. From there the rest of this section applies.
Onboarding support, architecture reviews and the billing arrangement for your
practice come with it. Billing works per client workspace today, so bring how
you invoice your own clients and we will fit it to that.
---
## The rest of this section
The pages below follow the order the work actually happens in.
- [1. How Multi-Tenancy Works](/msp/how-multi-tenancy-works): The model in one place: what each client's workspace holds, what a grant permits, and what crosses between them. Written so you can hand it to a client who asks.
- [2. Client Onboarding](/msp/client-onboarding): Three ways to bring a client in: create their workspace, invite them to create it, or request access to one they already have.
- [3. Governance & Impersonation](/msp/governance): Confirm what your access permits, how it is scoped, and how a client narrows or ends it before you work in their workspace.
- [4. Your First Client Workflow](/msp/first-client-workflow): Follow one client from approved access through deployment, testing, Live operation, monitoring, and handover.
- [5. Choose a Deployment Method](/msp/choosing-a-deployment-method): Compare a reviewed one-client Admin Push with a rollout from a selected saved version before following either procedure.
- [6. Your Console](/msp/dashboard-analytics): Every client in one view: execution health, cross-client activity, and where something is failing.
- [7. Supported Integrations](/msp/msp-integrations): Protocol matrix and architecture across PSA, IAM, RMM, Security, and Billing with OAuth and REST steps.
- [8. App Directory](/msp/integration-directory): Searchable catalogue of commonly used MSP platforms, with connection methods and setup links.
- [9. Automation Blueprints](/msp/automation-blueprints): Example patterns for onboarding, offboarding, security triage, billing reconciliation, endpoint maintenance, and lifecycle reporting.
---
## What's Next?
👉 **[How Multi-Tenancy Works →](/msp/how-multi-tenancy-works)** — the model in one page, opening with a two-minute walkthrough. Then [Client Onboarding](/msp/client-onboarding), which is where the work starts.
---
Source: https://docs.getglow.ai/reference/connections-and-external-apis
# Connections and External APIs
> Diagnose connection failures, HTTP errors, timeouts, rate limits, and partial external writes.
Use this page when an app or HTTP step cannot complete a request, or when the destination may have changed before the run failed. Read the provider's full message and inspect the destination before retrying a write.
## An app asks for authentication again
A `401`, `403`, or _"<account> is no longer authorized"_ means the connection needs attention. Open the affected step and use **Reconnect** beside the named account, completing the provider's sign-in and permission flow.
Automatic retries do not repeat an authentication failure. After reconnecting, test the step and inspect its output. If the failed action writes to the app, check the destination before replacing the run.
## 401 Unauthorized / 403 Forbidden
**Symptom:**
The step fails immediately with an HTTP 401 or 403 error.
**The Cause:**
The credentials for the third-party app are either expired, invalid, or lack the required permission scopes to perform the requested action.
Retries do not help here. The same request with the same credentials fails the same way every time, so leaving **Retry on fail** on only delays the failure. Reconnecting the account is the fix.
**The Fix:**
Open the step that uses the account. The App drawer names the broken connection and offers a **Reconnect** button beside it. Follow the OAuth flow, granting all requested permissions. See [Managing Connections](/manage/apps-and-integrations/managing-connections).
## 429 Too Many Requests
**Symptom:**
The step fails with an HTTP 429, in the service's own words rather than Glow's. You were sending faster than that service allows.
**The Cause:**
A rate limit at the other end. It is usually temporary, and often self-inflicted: a loop over several hundred items calls the service several hundred times in quick succession.
**The Fix:**
- **Turn on retries and let it pass.** A 429 is treated as worth retrying. Open the step's **Test & Debug** tab and switch on **Retry on fail**. Where the service sends a `Retry-After` header saying how long to wait, Glow waits that long rather than guessing.
- **Slow the loop down.** Add a [Wait](/build/action-steps/delay) step inside the loop body, so the calls are spaced rather than sent together.
- **Ask for less.** One request that fetches fifty records beats fifty requests that fetch one each.
## The step ran for a long time and then failed
**Symptom:**
The step spins for a long time and then fails with a `Timeout` error.
**The Cause:**
Glow gives an outbound HTTP request 30 seconds by default. If the service is down, slow, or building something large before it answers, the call is cut off.
**The Fix:**
- **Check the service:** look at the third-party service's status page before changing anything on your side.
- **Ask for less:** if the endpoint supports pagination, fetch smaller pages rather than everything at once. The same applies to an AI step. A shorter prompt carrying less context answers faster.
- **Raise the timeout when the service needs longer:** the [HTTP Request](/build/action-steps/http-request) step uses 30 seconds by default and accepts up to 300 seconds.
- **For work that outlasts one request:** have the remote service accept the job and call you back on a [Webhook](/build/triggers/webhook) when it finishes. See [System Limits & Quotas](/reference/system-limits).
A timeout does not prove that an external write failed. Check the destination before retrying a step that sends, creates, updates, or charges.
## Only part of the destination was updated
Do not start by rerunning the whole workflow. Open the Execution Log, then inspect the writing step's entries and the destination itself.
A step in **Run for each item** records work for individual items, so successful items may already have changed the destination even when others failed. Inspect the step's actual output before referencing summary fields. Build recovery input from the missing source or destination ids and process only those items. If the step says its app action may already have gone through, verify that record in the connected app before repeating it.
For future runs, carry a stable business id through the workflow and use an update or idempotency key where the destination supports one. That gives a repeated request the same identity instead of creating a second record.
## What's Next?
- Reconnect and manage accounts in [Managing Connections](/manage/apps-and-integrations/managing-connections).
- Inspect the failed request with [Debug a Run](/reference/debug-a-run).
- Design retries and recovery paths with [Error Handling & Retries](/build/core-concepts/error-handling).
---
Source: https://docs.getglow.ai/reference/data-and-mapping-problems
# Data and Mapping Problems
> Fix literal references, missing values, wrong data shapes, and list/item mapping problems.
Use this page when a step ran with the wrong value or stopped because its input did not match what it expected. Compare the mapped value with the upstream step's output before changing the destination step.
## A step succeeded but sent the reference as literal text
**Symptom:**
The step is green and the run completed. But the email went to nobody, the record has braces in a field, or the message body shows the reference instead of a value.
**The Cause:**
Two reference forms are not step references at all, so Glow leaves them exactly as you typed them: a bare `{{ $index }}` where `{{ item.$index }}` was meant, and `{{ item }}` used in a Filter rule, which needs `{{ $item }}` instead. A reference that does start with a step number fails the step instead. See the next entry.
**The Fix:**
1. Look at where the value ended up: the message that was sent, the row that was written. Braces still visible in the output mean the reference never resolved, rather than resolving to something empty.
2. Open the step you were referencing, run it in **Test & Debug**, and read its output. Compare the path you wrote against what is actually there. The path follows the object that particular step stored: app actions and [HTTP Request](/build/action-steps/http-request) use `ret`, AI answers use `result`, and triggers expose their payload at the top level. [Referencing step output](/reference/variable-syntax#referencing-step-output) explains the common shapes.
3. Delete the reference and re-insert it from the **Workflow data** panel (the data icon in the field) rather than retyping it. See [Variable Reference Syntax](/reference/variable-syntax).
## "Placeholder 5.email didn't find data"
**Symptom:**
The run stops on a step, and the step records a message like _"Placeholder 5.email didn't find data"_. Open the run in **Executions** and expand the row to read it.
**The Cause:**
The reference found nothing: either the step number is not on the canvas, or the path after it is not in that step's output. Both stop the run rather than sending an empty value onward, and both carry this message.
A step's number is its identity, not its position on the canvas. Moving or renaming a step does not change it, and deleting a step does not make its number available again. Read the number from the step you mean rather than assuming a sequence.
**The Fix:**
1. Read the reference in the message, `5.email`, and look for a step carrying that number on the canvas. No step with it means the number is the problem.
2. If the step is there, open it and read its output. The path after the number has to match what that step actually produces. Use [Referencing step output](/reference/variable-syntax#referencing-step-output) as a guide, then confirm against the step's latest output.
3. Rather than retyping, delete the reference and insert it from the **Workflow data** panel, opened from the data icon in the field. It writes both the number and the path correctly.
## The step sent a whole record where one field was wanted
**Symptom:**
A step fails with a type error. It expected a `String` but received an `Object`, or expected a `Number` but received a `String`.
**The Cause:**
You picked the whole record instead of one field inside it. A field that wants an email address wants just the address. Select the customer pill and the step sends the customer's name, email and ID all together. The other service does not know which part to use.
**The Fix:**
1. Click the failing step on the canvas to open the App drawer.
2. Look at what arrived at the far end: the message, the row, the request body. Where a single value should be, you will see a whole block of fields instead.
3. Back in the settings tab, delete the variable pill and open the Workflow data panel again. Open the record up and pick the one field you want: `email` rather than the customer it belongs to.
## The step ran but the value came through empty
**Symptom:**
A step runs successfully but the output is empty. Or it fails outright, because a required API field was missing.
**The Cause:**
The upstream step you are referencing did not produce the data you expected in that specific run. This happens frequently with conditional logic or webhooks where some payloads contain certain fields, and others do not.
**The Fix:**
1. Check the **Executions** tab of the _upstream_ step (the one providing the data).
2. Look at its **Output Data**. Verify if the field you are trying to reference actually existed in this specific run.
3. Sometimes the data is missing by design. Add a **Conditions** step to check that it exists before routing it to the action step.
## AI output has the wrong shape
Open the AI step's **Executions** tab and inspect the value under `result`. AI Prompt, AI Transform, and AI Agent store their answer there, so a structured field is referenced as `{{ N.result.field }}`.
If `result` contains prose when the next step expects fields, configure a response shape or enable the step's JSON option, then test the AI step again. Insert the field from **Workflow data** after the successful test rather than typing the path. Do not route an irreversible action from a field until the tested output shows that field in the expected type.
## Only the first item was processed
**Symptom:**
You are trying to insert multiple items into a database, or send multiple emails. But only the first item processes, or the step throws an error about receiving an Array instead of an Object.
**The Cause:**
You mapped a list (array) pill into a field that only accepts a single item.
**The Fix:**
Click the step's repeat badge on the canvas, choose **Each item**, and select the list. Map the current item into the step's fields with `{{ item.… }}`. See [Run for Each Item](/build/action-steps/loops/run-for-each-item) for the full setup.
## What's Next?
- Confirm the supported forms in [Variable Syntax](/reference/variable-syntax).
- Trace the value to its source with [Debug a Run](/reference/debug-a-run).
- Reproduce the mapping safely with [Testing & Debugging](/build/the-canvas/testing-and-debugging).
---
Source: https://docs.getglow.ai/reference/debug-a-run
# Debug a Run
> Trace a failed or unexpected run from the Execution Log through Step-level Executions and upstream data.
Debug one run by finding the first result that differs from what you expected. The final red Step may only be where an earlier data or connection problem became visible.
## Follow the run from the first wrong result
### Open the run
Find the event or time in the [Execution Log](/build/the-canvas/execution-log). If no run exists, troubleshoot the trigger instead with [Workflow Did Not Start or Is Still Waiting](/reference/workflow-did-not-start-or-is-still-waiting).
### Find the first unexpected Step
Follow the route through the canvas. Stop at the first Step that failed, was skipped unexpectedly, or produced the wrong value.
### Read its Executions entry
Open the Step's App drawer, go to [Executions](/build/core-concepts/executions), and read the full message, input, and output for that run. Copy an exact validation message into [Step Error Messages](/reference/step-error-messages).
### Trace the input upstream
If the input is wrong, open the upstream Step's Executions entry. Continue backward until you find where the value or shape first changed.
### Reproduce the smallest safe part
Use [Test & Debug](/build/the-canvas/testing-and-debugging) on the affected Step with controlled data. Check the connected app before repeating a create, update, send, or charge action.
## The workflow ran twice
First decide whether you are looking at two runs or two attempts:
- **Two execution ids:** the trigger started two runs. A webhook creates one run for every request it receives, including duplicate deliveries from the sender. Scheduled workflows can overlap when a run lasts longer than the schedule interval.
- **One execution with an Attempt 2 or Attempt 2 of 4 marker:** this is **Retry on fail** repeating one Step. Single attempts and some historical entries may not show an attempt marker.
- **One execution with several unmarked entries on a looping Step:** these may be separate items or loop passes, not retries.
Compare the trigger payloads and timestamps. For webhooks, use the sender's stable event id to recognise an event already processed. For destination writes, prefer an idempotency key or an update keyed by a stable record id where the app supports it.
## Route the finding
- A missing or still-waiting run belongs in [Workflow Did Not Start or Is Still Waiting](/reference/workflow-did-not-start-or-is-still-waiting).
- A wrong value, missing field, or list/item mismatch belongs in [Data and Mapping Problems](/reference/data-and-mapping-problems).
- A provider error, timeout, or uncertain write belongs in [Connections and External APIs](/reference/connections-and-external-apis).
- A named Step validation message belongs in [Step Error Messages](/reference/step-error-messages).
## When the documentation does not have the answer
Take it to the [Glow Forum](https://forum.getglow.ai/). Post the workflow name, the Step that failed, and the error text as it appears in Executions. The exact error text gives others enough information to identify the next check.
## What's Next?
- Learn the run-level view in the [Execution Log](/build/the-canvas/execution-log).
- Inspect individual Step attempts in [Step-Level Executions](/build/core-concepts/executions).
- Build a recovery path with [Error Handling & Retries](/build/core-concepts/error-handling).
---
Source: https://docs.getglow.ai/reference/glossary
# Glossary
> Key concepts, terminology, and component definitions used across Glow.
The canonical definitions for terminology, canvas concepts, execution mechanics, and billing models used across Glow.
A
B
C
D
E
F
G
H
I
L
M
P
R
S
T
V
W
---
## A
Account
Identity
Your personal user profile identified by your email address. Your account
travels with you across every workspace you belong to. What actions you can
perform inside a given workspace is determined by your role in that
workspace, not your account.
Learn more in Account & Authentication →
Action
Canvas Steps
A type of step that executes an active task: dispatching an email, creating
or updating records in a CRM, querying a database, or evaluating custom
code. Actions are the executable operations of a workflow, distinct from
triggers and flow controls.
Learn more in Triggers and Actions →
App drawer
Canvas UI
The right-hand configuration panel that opens when you select any step on
the canvas. The App drawer provides tabs for **Setup** (input fields and
data mappings), **Executions** (step output history), and **Test & Debug**
(isolated test runners).
Learn more in The Dock & App drawer →
---
## B
Billing & Usage
Workspace Settings
The administration hub located at `/app/subscription` where teams monitor
live meters (Step credits, Glow AI tokens, Retained storage), review
published pricing calculators, configure budget safeguards, manage payment
methods, and download PDF invoices.
Learn more in Billing & Usage Overview →
---
## C
Canvas
Core Interface
The real-time multiplayer visual workspace where workflows are designed,
wired, tested, and operated. The canvas renders triggers, action steps,
routing branches, sticky notes, and live collaborator cursors.
Learn more in Steps and Connections →
Client workspace
MSP & Governance
An isolated tenant workspace belonging to a client organization, managed by
a consultancy or MSP through an authenticated delegation grant. Workflows,
credentials, logs, and billing remain strictly segregated from all other
tenants.
Learn more in How Multi-Tenancy Works →
Conditions
Flow Control
A flow control step that evaluates structured rules and routes workflow
execution down matching branches. Each matching rule triggers its own path,
while an optional ELSE branch executes when no rules match.
Learn more in Conditions Step →
Connection (app)
Integrations
An authenticated third-party OAuth token or API credential securely stored
in the workspace. Workflows bind to connections to interact with external
services on behalf of your team.
Learn more in Connecting an App →
---
## D
Date
Data Tools
A data transformation step that formats timestamps for human readability,
computes intervals between dates, adds or subtracts time offsets, or
extracts components (e.g. month, weekday).
Learn more in Date Step →
---
## E
Execution
Engine & Runtime
A discrete run of a workflow initiated by a trigger or manual run point.
Each execution maintains its own isolated context, step logs, input
payloads, and output states.
Learn more in Step-Level Executions →
---
## F
Flow
Flow Control
The dock group of built-in logic steps that control execution flow:
Conditions, Switch, Filter, Repeater, Wait, Human Review, Stop and Error,
and Do Nothing.
Learn more in Choosing a Flow Step →
---
## G
Glow AI Tokens
AI & Billing
The consumption unit for hosted AI features in Glow (AI Prompt, AI Agent, AI
Data Transform, Workflow Assistant). Total billable tokens equal input
tokens + output tokens + reasoning tokens. AI tokens never convert into Step
credits and reset monthly.
Learn more in Step Credits, Tokens & Storage →
Grant
MSP Governance
The formal delegation agreement granted by a client Admin to an external MSP
or consultancy. Grants specify access tiers (Audit, Standard, Full
Operational), covered workflows, expiration dates, and audit logging.
Learn more in Governance & Impersonation →
---
## H
HTTP Mode
Step Configuration
The deterministic configuration mode on a step where you explicitly specify
input fields, values, and variable mappings, ensuring identical execution on
every run.
HTTP Request
Developer Tools
A built-in action step located under `Tools → Data → Dev tools` that makes
custom REST API calls (GET, POST, PUT, DELETE, PATCH) to any publicly
accessible web service.
Learn more in HTTP Request →
---
## I
Interface
Templates & Forms
The canvas drawer that transforms a backend workflow into an interactive
standalone form. End-users fill in input fields and submit requests without
opening or modifying the workflow canvas.
Learn more in Form Templates →
---
## L
Link / Edge
Canvas Visuals
The directional wire connecting two steps on the canvas. An edge defines
data dependency and execution order: Step B executes after Step A completes,
with Step A's outputs available to Step B.
Loop
Batch & Iteration
Glow provides two looping mechanisms: **Run for each item** (a setting on a
single action step to iterate over a list) and **Repeater** (a canvas step
that repeats a multi-step workflow body).
Learn more in Loops & Iteration →
---
## M
MCP Mode
Step Configuration
An authoring toggle on steps that lets you describe intended behavior in
natural language, which an AI model interprets to populate fields. For
deterministic production runs, use HTTP Mode.
Model Context Protocol (MCP)
Developer & AI
An open standard connecting AI coding assistants (Cursor, Claude Desktop,
Zed) to Glow as an **MCP Server** for workflow discovery and step
sandboxing. Glow also acts as an **MCP Client** allowing canvas AI Agents to
call external tool servers.
Learn more in Model Context Protocol (MCP) →
---
## P
Prepaid Resource Model
Billing Architecture
Glow's resource-based billing model where workspaces configure independent
monthly allowances for Step credits, Glow AI tokens, and Retained storage in
advance. When an allowance depletes, operations pause safely without
surprise fees.
Learn more in Billing & Usage Overview →
---
## R
Record
Data Structures
A structured key-value data object (such as a customer contact, CRM lead, or
invoice). Collections of records are passed between steps, mapped into
fields, or transformed using data helpers.
ret
Variable Syntax
The root property key under which connected App action steps and HTTP Request steps store their returned response payload (e.g. `{{ 3.ret.id }}`). Triggers store output at the root without `ret` (e.g. `{{ 1.id }}`).
Learn more in Variable Reference Syntax →
Retained Storage
Storage & Billing
The persistent cloud storage capacity (measured in Gigabytes) allocated to a
workspace for stored files, attachments, and generated documents. Storage
represents continuous standing capacity and never resets monthly.
Learn more in Step Credits, Tokens & Storage →
Role
Team & Security
The permission tier assigned to a workspace user: **Admin**, **Manager**, or
**Member**. All three roles can build, edit, and run workflows. Financial
management and team settings are restricted to Admins.
Learn more in Permissions and Access →
---
## S
Scheduler
Triggers
A built-in trigger step that automatically initiates workflow runs on a
recurring schedule (e.g. every weekday at 9:00 AM) using plain-language
schedules or manual cron expressions.
Learn more in Scheduler Trigger →
Secret
Security & Config
An encrypted workspace credential (such as an API key, signing secret, or
password). When referenced in workflows, secret values are automatically
masked with `[REDACTED]` in execution logs.
Learn more in Secrets and Variables →
Starting Point
Canvas Testing
The specific trigger or step selected in the canvas dock when performing
manual test runs on multi-trigger workflows.
Step
Core Concept
The fundamental building block on the Glow canvas. Every trigger, action, AI
model, and flow control element is a Step identified by a permanent step
number.
Learn more in Steps and Connections →
Step Credit
Billing & Execution
The execution unit in Glow. Each executed non-AI step consumes 1 Step
credit. Control steps (Wait, Human Review, Do Nothing) consume 0 credits. If
a step fails prior to external work, the reservation is released.
Learn more in Step Credits, Tokens & Storage →
Subflow
Modular Automations
A canvas step that executes another workflow as a modular child routine and
waits for its return payload before continuing.
Learn more in Calling Another Workflow (Subflow) →
Summarize
Data Tools
A data step that aggregates arrays into grouped statistical summaries (count, sum, average, min, max) under `{{ N.groups }}`.
Learn more in Summarize Step →
Switch
Flow Control
A routing step that evaluates ordered cases against an input value and
executes the first matching route (or a fallback branch).
Learn more in Switch Step →
---
## T
Team / Workspace
Collaboration
The shared organizational unit in Glow. Workflows, connections, secrets,
files, and execution logs belong to the workspace rather than individual
user accounts.
Learn more in Setting Up Your Team →
Template
Marketplace
A pre-built workflow blueprint from the public Marketplace or your team
library that can be forked into a canvas to accelerate development.
Learn more in Templates and Reuse →
Trigger
Canvas Entry
The initial step that starts a workflow run (e.g. inbound Webhook, Scheduler
timetable, App event, or Chat trigger). Workflows can feature multiple
triggers.
Learn more in Triggers and Actions →
---
## V
Variable
Data & State
A named data value referenced across workflow steps using `{{ N.field }}` placeholders. Ephemeral variables exist within a single run, while persistent variables live in workspace settings.
Learn more in Secrets and Variables →
---
## W
Wait
Flow Control
A flow control step that suspends workflow execution for a defined duration
(up to 13 days), resuming automatically when the timer elapses.
Learn more in Wait (Delay) Step →
Webhook
Triggers & REST
A trigger step that exposes an unguessable HTTPS endpoint to ingest
real-time JSON payloads from external applications, with optional
cryptographic HMAC signature verification.
Learn more in Webhook Trigger →
Workflow
Core Architecture
An end-to-end automation graph created on the canvas, composed of one or
more triggers, action steps, data transformations, and flow controls
connected in sequence.
Learn more in What Is a Workflow? →
Workflow data panel
Canvas Data Picker
The interactive data picker opened from the icon beside any step field,
listing exact outputs produced by earlier steps to insert verified variable
tags into your configuration.
Learn more in Workflow Data →
Workspace
Administration
The active organizational tenant context you are currently operating in,
isolating workflows, connections, variables, files, and billing.
Learn more in Administer a Workspace →
## What's Next?
- See how these terms fit together in practice in [What Is a Workflow?](/build/core-concepts/what-is-a-workflow).
- Build something using them in [Quickstart: Your First Workflow](/getting-started/tutorials/your-first-workflow).
- Explore system boundaries in [System Limits & Quotas](/reference/system-limits).
---
Source: https://docs.getglow.ai/reference/keyboard-shortcuts
# Keyboard Shortcuts
> Glow supports keyboard shortcuts for quickly adding steps to the canvas, running workflows, and navigating the editor.
Every shortcut on the canvas, grouped by what it does. Multi-key shortcuts are pressed in sequence, not held together.
> **OS Mapping:** In the tables below, Cmd/Ctrl refers to the{" "}
> ⌘ Command key on Mac and the Ctrl key on Windows. Where
> a row shows ⌘ Command on its own, it is the Command key on Mac and
> has no Windows equivalent.
## Canvas navigation
| Shortcut | Action | Description |
| ------------ | -------------- | -------------------------------------------------- |
| = | **Zoom In** | Zoom in on the canvas. |
| - | **Zoom Out** | Zoom out of the canvas. |
| 0 | **Reset Zoom** | Reset the canvas zoom and fit the steps on screen. |
| 9 | **Tidy Up** | Auto-layout the workflow to make it readable. |
## Execution & Workflow State
| Shortcut | Action | Description |
| ----------------------------------------------------- | ------------------ | ------------------------------------------------------------------------------------------------------------- |
| ⌘ Command + Enter | **Run Workflow** | Trigger a test run. This one is the Command key specifically — on Windows, use the Run button in the toolbar. |
| Space | **Stop Execution** | Immediately halt a running workflow. |
| u then r | **Clear Counters** | Reset the execution bubbles across all steps. |
| Cmd/Ctrl + Alt + a | **Actions Menu** | Open the workflow actions menu. |
| Cmd/Ctrl + Alt + t | **Triggers Menu** | Open the workflow triggers menu. |
| Cmd/Ctrl + Z | **Undo** | Undo your last change on the canvas. |
| Cmd/Ctrl + Shift + Z | **Redo** | Redo the last undone change. |
## Step management
| Shortcut | Action | Description |
| ---------------------------------------------------- | -------------- | ----------------------------------------- |
| Cmd/Ctrl + A | **Select All** | Select all steps currently on the canvas. |
| Cmd/Ctrl + S then D | **Duplicate** | Duplicate the currently selected step. |
| Cmd/Ctrl + S then C | **Disconnect** | Disconnect the selected step from others. |
| Backspace / Delete | **Remove** | Delete the selected step entirely. |
---
## Adding Steps (Quick Drop)
You can drop utility steps and logical blocks directly onto the canvas by using sequential hotkeys.
> **Sequential Hotkeys:** Multi-key shortcuts (like D then{" "}
> T) are pressed sequentially. Press and release the first key, then
> immediately press the second. Do not hold them simultaneously.
### Artificial Intelligence
| Shortcut | Action |
| ------------------------------ | ---------------------- |
| A then P | Add **AI Prompt** step |
| A then G | Add **AI Agent** step |
### Flow
| Shortcut | Action |
| ------------------------------ | ----------------------- |
| F then C | Add **Conditions** step |
| F then L | Add **Repeater** step |
| F then D | Add **Wait** step |
Switch and Filter have no quick-drop key. Add them from the dock's **Tools** group, under **Flow**, or from the [Canvas Context Menu](/build/the-canvas/canvas-context-menu).
### Data & Transformations
| Shortcut | Action |
| ------------------------------ | ------------------------- |
| T then C | Add **Code editor** step |
| T then V | Add **Custom Variables** |
| T then P | Add **Parse JSON** step |
| T then S | Add **Split Text** step |
| T then H | Add **HTML to text** step |
| D then T | Add **AI Data Transform** |
### Canvas Annotations
| Shortcut | Action |
| ------------ | --------------------------------------------------------- |
| N | Add **Sticky Note** |
| Y | Add **YouTube Video** note |
| I | Add **Image** note |
| C | Pin a [Comment](/build/the-canvas/comments) to the canvas |
## What's Next?
- Reach the same actions with the mouse via the [Canvas Context Menu](/build/the-canvas/canvas-context-menu).
- Learn what the steps behind these shortcuts do in [Steps and Connections](/build/core-concepts/steps-and-the-canvas).
---
Source: https://docs.getglow.ai/reference/step-error-messages
# Step Error Messages
> Look up exact validation messages from Combine, Sort, Repeater, list-processing steps, and Human Review.
Use the exact text from the step's Executions tab to find the matching remedy. These messages identify configuration or input that the Step cannot accept.
## "Combine needs exactly two incoming branches"
**Symptom:**
A Combine step fails before it does any work. The message names branches rather than lists.
**The Cause:**
Combine takes one list from each of two connected branches. One branch, or three, and it cannot tell which is which.
**The Fix:**
Count the lines arriving at the step. Add the missing branch, or take the extra one out.
Related: **"Combine must wait for both incoming branches. Set its branch wait mode to AND."** Combine always waits for both of its inputs, so its wait mode is fixed and the chip on it is a label rather than a control. If you see this message, delete the Combine step and add it again to restore its wait mode.
## "First list and Second list must refer to different connected branches"
**Symptom:**
Combine refuses, and both list fields look correctly filled in.
**The Cause:**
Both fields point at the same branch. Combining a list with itself has no useful answer.
**The Fix:**
Open **Second list** and pick from the other branch.
## "Sort needs at least one 'Sort by' row"
**Symptom:**
Sort fails immediately.
**The Cause:**
No rule has been added, so there is nothing to order by.
**The Fix:**
Add a **Sort by** row: a field, a type and a direction. Leave the field blank to compare each whole item, which is what you want for a list of plain values.
Related: **"Limit needs a number of items to keep"** and **"Limit's 'Number of items' must be a whole number of zero or more"** mean the count is missing or is not a whole number. Zero is allowed and returns an empty list.
## "The list was empty, so this loop ran no passes"
**Symptom:**
A [Repeater](/build/action-steps/loops) finished at once. Nothing inside the loop ran, and the step is not marked failed.
**The Cause:**
The list it was given had no entries. That is not an error, and the run carries on from **When finished**.
**The Fix:**
Nothing, if an empty list is possible in normal use. If it should never be empty, look at the step that produced it: a [Filter](/build/action-steps/filter-items) that discarded everything, or a fetch that returned nothing, are the usual reasons.
## "The loop finished but nothing connected back into it"
**Symptom:**
A [Repeater](/build/action-steps/loops) ran, but no results came out of it.
**The Cause:**
A loop turns because the last step of its body connects **back** into the Repeater. Without that returning line, each pass runs and its output goes nowhere.
**The Fix:**
Draw a connection from the last step inside the loop back to the Repeater step.
## "can work on at most 100,000 items at once"
**Symptom:**
[Sort](/build/action-steps/sort), [Limit](/build/action-steps/limit) or [Remove duplicates](/build/action-steps/remove-duplicates) refuses, naming both the ceiling and your list's length.
**The Cause:**
These steps hold the whole list in memory to work on it, and 100,000 entries is the ceiling.
**The Fix:**
Reduce the list before it reaches the step. A [Filter](/build/action-steps/filter-items) that removes what you do not need, or fetching in pages, are both cheaper than trying to process everything at once.
## "approverEmail is required but was not provided"
**Symptom:**
A [Human Review](/build/action-steps/user-approval) step fails instead of waiting for somebody.
**The Cause:**
No approver address, or one that is not a single valid email. A list of addresses is not accepted here.
**The Fix:**
Set one address. If it comes from an earlier step, check what that step actually produced: a field holding several addresses, or an empty one, fails the same way.
## What's Next?
- Find the failing step and its input with [Debug a Run](/reference/debug-a-run).
- Check list and field references in [Data and Mapping Problems](/reference/data-and-mapping-problems).
- Review platform-wide ceilings in [System Limits & Quotas](/reference/system-limits).
---
Source: https://docs.getglow.ai/reference/system-limits
# System Limits & Quotas
> The ceilings that apply to workflow execution in Glow: batch sizes, concurrency, retries, timeouts, and payload limits, by plan.
The ceilings that apply when a workflow runs: batch sizes, step timeouts, webhook payloads, and how long a run stays in your history. Limits that depend on your plan say so.
## Every limit, in one table
The figures you are most likely to be looking for. Each has its own section below with what to do when you reach it.
| Limit | Figure | Depends on plan |
| ---------------------------------- | ------------------------------------- | --------------- |
| **Items in one looping step** | 50 / 1,000 / 10,000 | Yes |
| **Items processing at once** | 1 / 5 / 10 | Yes |
| **Items a Filter can check** | 100,000 | No |
| **In-field list transformation** | 10,000 items | No |
| **Repeater Until-condition limit** | 50 passes (default safety cap) | No |
| **Webhook payload** | 1 MB per request | No |
| **App trigger payload** | 10 MB per request | No |
| **Outbound HTTP response payload** | 10 MB per request | No |
| **Combined results of a loop** | 25 MB | No |
| **Single file upload** | 100 MB | No |
| **AI Agent run** | 150 seconds | No |
| **Code editor run** | 150 seconds | No |
| **Outbound HTTP request timeout** | 30 seconds by default, 300 at most | No |
| **Wait** | 13 days | No |
| **Human Review expiry** | 30 days | No |
| **Retries on a failed step** | 0–10, off unless you turn them on | No |
| **Run history** | See [Data Retention](#data-retention) | Yes |
Everything here is enforced when a workflow runs, not when you build it. A
workflow that works on forty test records can fail at sixty.
## Batch processing (Run for each item)
When a step runs in [Run for each item](/build/action-steps/loops/run-for-each-item) mode, four limits apply. Three of them depend on your plan; the fourth is your credit balance.
| Limit | Free | Pro | Enterprise |
| ---------------------- | ---- | ----- | ---------- |
| **Items per batch** | 50 | 1,000 | 10,000 |
| **Parallel item runs** | 1 | 5 | 10 |
| **Retry failed items** | No | Yes | Yes |
**Items per batch** is the ceiling on the list (array) you feed into the step. A list longer than the limit is rejected when the step fans out.
The [Repeater](/build/action-steps/loops/repeater) step has a field of the same name, and it means something else: how many items one pass receives. These plan limits are about the length of the whole list.
**Parallel item runs** is how many items process simultaneously. Free plans process strictly one at a time.
**Retry failed items** lets a batch continue past individual failures and retry them. Available on Pro and Enterprise.
**Account for repeated work.** Usage depends on the step's rate and the work it performs for each item. See [Step Credits, Tokens & Storage](/manage/billing/credits-and-allowances) for how usage is counted, including failed attempts. A list whose length you do not control is worth capping with a [Filter](/build/action-steps/filter-items) before it reaches the looping step.
**Not every step can loop.** The toggle is absent on flow control: Conditions, Switch, Filter. It is also absent on steps that wait (Wait, Human Review), and on steps with no per-item work to do (Stop and Error, Do Nothing). Triggers never loop, because they start the run.
**Need a pause between passes?** Put a [Wait](/build/action-steps/delay) as the last step of a [Repeater](/build/action-steps/loops/repeater) loop body, before the connection back into the Repeater step, rather than trying to loop the Wait itself.
## Filter
A [Filter](/build/action-steps/filter-items) step evaluates up to **100,000 items** in a single pass. That ceiling is separate from the batch limits above. Filtering is not the same mechanism as "Run for each item".
The same 100,000-item ceiling applies to [Sort](/build/action-steps/sort), [Limit](/build/action-steps/limit) and [Remove duplicates](/build/action-steps/remove-duplicates). Each refuses a longer list with a message naming both numbers, rather than returning a partial answer. [Sort](/build/action-steps/sort) also takes at most **ten** "Sort by" rows.
## Retries
Two separate mechanisms retry work, and they are easy to confuse.
### Retry on fail (yours to configure)
A per-step setting in the step's **Test & Debug** tab. This is the one that produces the **Attempt 2 of 11** markers in the step's execution history. The second number is your retry budget plus the first run.
| Setting | Range | Default |
| ---------------------- | ------------ | ------- |
| **Retry on fail** | on / off | **Off** |
| **Max retries** | 0–10 | 10 |
| **Wait between tries** | 0–60 seconds | 60 |
**The count is retries, not attempts:** 10 means the step runs eleven times before the run fails. The form opens at the ceiling of both settings: ten retries, sixty seconds apart. That is roughly ten minutes of a run held open on one step. Lower both before you turn retries on, unless you mean it.
The wait is a **fixed** interval, not exponential. Retries are off unless you turn them on, so a step that fails once fails the run unless you have configured otherwise. See [Error Handling](/build/core-concepts/error-handling).
> **Retries do not inspect why the step failed.** A request the other service
> rejected outright (a `400` from a malformed payload, a `404` on a record that
> is not there) is re-sent unchanged on every attempt. It fails identically
> every time. At the defaults that is ten attempts a minute apart: ten minutes
> of a run held open for a result that cannot change.
>
> Three things are exempt: an expired connection, [Stop and Error](/build/action-steps/stop-and-error), and a step whose outward call may already have landed. See [Three things never retry](/build/core-concepts/error-handling#three-things-never-retry). Turn retries on for what is genuinely transient. Rate limits, timeouts, or a service having a bad minute. For a step that fails on its own input, fix the input instead, or route it through an [error path](/build/core-concepts/error-handling).
**Inside [Run for each item](/build/action-steps/loops/run-for-each-item) it works differently.** A failed item is retried only when the failure looks retryable: a `429`, a `5xx`, a dropped connection. A rejection like `400` moves straight to failed without burning the budget.
### Make repeatable steps safe to run twice
Separately from your own retry setting, a step can occasionally run a second time — if the worker handling it is interrupted part-way through, for instance. It is rare, and it carries no attempt marker in the execution history.
So a step that charges a card, sends a message or creates a record is worth making safe to run twice: send an idempotency key where the service accepts one, or check for the record before creating it. That holds on any platform, and it is the one habit that makes a workflow safe to retry at all.
Deliberate waits are **not** counted by either mechanism. A [Wait](/build/action-steps/delay) step, or a scheduled backoff after a third-party rate limit, is re-queued rather than retried. It consumes no retry budget and shows no attempt marker.
## Timeouts
| Scope | Limit |
| --------------------- | --------------------------------------------------- |
| AI Agent run | 150 seconds |
| Code editor run | 150 seconds |
| Code editor memory | 1.5 GB |
| Outbound HTTP request | 30 seconds default, 300 max |
| Code editor output | 100,000 characters |
| Wait step | 13 days (a larger number is refused as you type it) |
| Human Review expiry | 30 days (a larger number is refused as you type it) |
An [HTTP Request](/build/action-steps/http-request) uses a 30-second timeout by default. Raise it when the remote service needs longer, up to the 300-second maximum. For work that cannot finish within one request, have the service accept the job and call a [Webhook](/build/triggers/webhook) when it finishes.
A [Wait](/build/action-steps/delay) step takes an **Amount** and a **Unit**, from seconds up to days. It re-queues the run rather than holding a worker, so long waits are cheap. It accepts up to **13 days** and refuses a larger value as you enter it. If you need a wait measured in weeks, a [Scheduler](/build/triggers/scheduler) trigger on a second workflow is the sturdier shape.
A [Human Review](/build/action-steps/user-approval) step with no expiry holds the run until someone decides. Set an expiry, capped at **30 days**, and mark one of your Decisions rows as the **Expired** branch: a request nobody answers then takes that branch, so you can chase it, escalate it, or carry on without it. With no row marked, the timeout settles the run through the step's error path.
A [Code editor](/build/action-steps/code-execution) step keeps at most 100,000 characters of output; past that the result is stored truncated. If you are processing large datasets, filter before the expensive work or return a summary rather than the whole thing.
An exported workflow file is accepted up to **512,000 characters**. A larger export from another platform has to be split before it will import — see [Migrating to Glow](/getting-started/migrating-to-glow).
## Payloads and storage
| Scope | Limit |
| ------------------------------------ | -------------------------------------------- |
| Payload to a Glow webhook trigger | 1 MB per request |
| Payload to an app's built-in trigger | 10 MB per request |
| Combined results of a loop | 25 MB |
| Single file upload | 100 MB, on every plan |
| Team file storage | Per plan; see the storage meter in **Files** |
A request over the payload ceiling is refused before a run starts, so there is nothing in your history to look at afterwards. If a partner system sends large bodies, have it send you a reference instead, such as an id or a link. Fetch the rest with an [HTTP Request](/build/action-steps/http-request) step.
**The 25 MB loop ceiling applies to everything the items returned together**, not to any one item. A [Run for each item](/build/action-steps/loops/run-for-each-item) step that exceeds it fails and does not pass its results on. Process the list in smaller pages, or return less per item. A step that fetches whole documents will reach the ceiling long before one that returns an id and a status.
The storage meter on the [File Management](/manage/workspace-settings/file-management) page shows current usage against your team's quota. A single file over 100 MB is rejected rather than truncated; leave anything larger in the service that owns it and fetch it at run time with an [HTTP Request](/build/action-steps/http-request).
## Data retention
| Data | Default workspace policy |
| ------------------------------------------------ | ------------------------------ |
| Run records and step-level input/output payloads | 30 days after the run finishes |
**Each run keeps the retention policy in effect when it started.** A policy
change applies to new runs only; it does not shorten or extend what is already
in your history.
> **Glow is not a system of record.** The default 30-day policy covers debugging
> and a monthly review. If you need a lasting audit trail, send what matters out
> as it happens: an [HTTP Request](/build/action-steps/http-request) step to
> your own logging, or a message to the channel your team watches. Your
> workspace may use a different retention policy; your account team can confirm
> its current setting.
See [Step-level Executions](/build/core-concepts/executions) and
[Security & Compliance](/manage/workspace-settings/security-compliance).
## MSP impersonation sessions
Available session durations: 5m, 15m, 30m, 1h, 3h, 6h, 12h, 24h, 3d, 7d, 14d, 30d, with a hard 30-day ceiling.
Sessions are re-validated continuously, not only at expiry. If a client withdraws consent or downgrades the access tier mid-session, the operator's next request is refused and any open canvas disconnects within 30 seconds. See [Governance & Impersonation](/msp/governance).
## Raising a limit
Batch size, concurrency, and item retries are tied to your subscription. See [Billing & Usage](/manage/billing/overview) to compare tiers.
For Enterprise requirements beyond the values above, contact your account team.
## What's Next?
- Design around failures with [Error Handling](/build/core-concepts/error-handling).
- Diagnose a specific failure in [Troubleshooting](/reference/troubleshooting).
---
Source: https://docs.getglow.ai/reference/troubleshooting
# Troubleshooting & Common Errors
> Find the right troubleshooting path from the symptom you see in Glow.
Start with what you can see in the run, step, or connected app. This index gives you the first check, then routes you to the focused troubleshooting page.
## Symptom index
- [It did not start or is still waiting](/reference/workflow-did-not-start-or-is-still-waiting): No run appeared, a webhook seems missing or the run is paused on Wait or Human Review.
- [A value is missing or wrong](/reference/data-and-mapping-problems): A reference stayed literal, a field is empty, the data has the wrong shape or only one list item was processed.
- [A connection or API failed](/reference/connections-and-external-apis): An app reports 401, 403, 429 or a timeout, or an external write may have completed only partly.
- [A Step shows an exact error](/reference/step-error-messages): Look up validation messages from routing, list-processing, loop and Human Review Steps.
- [The run failed, but the cause is unclear](/reference/debug-a-run): Trace the first unexpected result through the Execution Log, Step executions and upstream data.
## What's Next?
- Read what a single run actually did in the [Execution Log](/build/the-canvas/execution-log).
- Reproduce a failure safely with [Testing & Debugging](/build/the-canvas/testing-and-debugging).
- Design a recovery path with [Error Handling & Retries](/build/core-concepts/error-handling).
---
Source: https://docs.getglow.ai/reference/variable-syntax
# Variable Reference Syntax
> The complete reference for referencing step outputs, team variables, secrets, files, and loop items inside any Glow field that accepts dynamic values.
Every field in Glow that accepts dynamic values supports `{{ }}` placeholders. When the workflow runs, Glow replaces each placeholder with the actual value from that run.
This page is the complete reference for what you can put inside the braces. Every form, in one table — the rest of the page explains each one.
| Reference | What it gives you |
| --------------------------------------------------------------------------------- | ------------------------------------------------------------------ |
| [`{{ 3.field }}`](#referencing-step-output) | A field from step 3's output |
| [`{{ 1.customer.address.city }}`](#nested-fields) | A field inside a record |
| [`{{ 1.items.0.name }}`](#picking-an-item-out-of-a-list) | The first item of a list — dots only, never `[0]` |
| [`{{ 5.$full_result }}`](#the-whole-output-object) | A step's entire output object |
| [`{{ item }}` / `{{ item.field }}`](#loop-item-variables) | Current item in "Run for each item" |
| [`{{ item.$index }}` / `{{ item.$total }}`](#loop-item-variables) | Position and size of the current batch |
| [`{{ 5.results }}`](#what-a-looping-step-collects) | Everything a looping step produced (successes only) |
| [`{{ 5.items }}`](#what-a-looping-step-collects) | Every item with its position, status and error |
| [`{{ 5.stats }}`](#what-a-looping-step-collects) | A looping step's counts: `total`, `succeeded`, `failed`, `skipped` |
| [`{{ $item }}` / `{{ $itemIndex }}`](#filter-rules-use-a-different-item-variable) | Current item inside a Filter's rules |
| [`{{ $now }}` / `{{ $today }}`](#system-variables) | Current UTC datetime / date |
| [`{{ $var.KEY }}`](#team-variables-and-secrets) | Team variable |
| [`{{ $secret.KEY }}`](#team-variables-and-secrets) | Team secret (decrypted at run time) |
| [`{{ $file. }}`](#files) | Team file |
| [`{{ $webhook.1.url }}`](#webhook-urls) | Deployed URL of the webhook at step 1 |
| [`{{ $workflow_url }}`](#system-variables) | Canvas URL of the running workflow |
## The `{{ }}` syntax
Wrap any reference in double curly braces:
```
{{ 3.email }}
```
A placeholder is one of two things:
- **A step reference**: a **step number**, followed by a path into that step's output.
- **A system variable**: a `$`-prefixed name such as `{{ $now }}` or `{{ $secret.API_KEY }}`.
Whitespace inside the braces is ignored, so `{{3.email}}` and `{{ 3.email }}` are equivalent.
> **Steps are referenced by number, not by name.** Renaming a step on the canvas
> does not change how you reference it. `{{ 3.email }}` always means "the
> output of step 3". There is no `{{ trigger.… }}` or `{{ myStepName.… }}`
> form.
## Referencing step output
Each step on the canvas has a number shown on the step itself. Use that number, then drill into the output with dot notation.
```
{{ 1.email }}
{{ 2.ret.email }}
```
Given this output from step 1:
```json
{
"email": "ada@example.com",
"name": "Ada Lovelace"
}
```
- `{{ 1.email }}` resolves to `ada@example.com`
- `{{ 1.name }}` resolves to `Ada Lovelace`
The trigger is a step like any other, so you reach what arrived at it the same way. **What a webhook received sits at the top level**, so a POST of `{"email": "…"}` to a trigger numbered 3 gives you `{{ 3.email }}`. There is no wrapper to reach through. For the whole payload rather than one field, use `{{ 3.$full_result }}`.
The examples on this page write the trigger as `1` for readability. Read the real number off the step on your own canvas — see [where the numbers come from](#the-number-is-the-steps-name-not-its-position) below.
**The path after the step number depends on which step it is.** There is no
single wrapper every step uses, so this is the table to check before you type a
path by hand:
| The step | Files its answer under | You write |
| ------------------------------------------------------------------------------ | ------------------------------------- | -------------------------------- |
| **App action steps** — Slack, Google Sheets, the rest of the catalogue | `ret` | `{{ 2.ret.email }}` |
| **[HTTP Request](/build/action-steps/http-request)** | `ret` | `{{ 2.ret.body }}` |
| **Tools** — Split Text, HTML to text and the like | `ret` | `{{ 2.ret }}` |
| **AI steps**, the AI Agent included | `result` | `{{ 2.result }}` |
| **[Code editor](/build/action-steps/code-execution)** — one level deeper | `result.executionOutput` | `{{ 2.result.executionOutput }}` |
| **List steps** — Sort, Remove duplicates, Limit, Combine | `results`, `resultCount` | `{{ 2.results }}` |
| **Triggers**, and Glow's own flow steps — Filter, Repeater, Date, Human Review | nothing — fields sit at the top level | `{{ 1.email }}` |
The last row is the one that catches people. A **trigger** is not an app step:
an app _action_ runs and files its answer under `ret`, while a trigger's payload
is stored as the result itself. So the same field is `{{ 2.ret.email }}` from a
Slack action and `{{ 1.email }}` from the trigger that started the run.
> Pick values from [the data icon](#using-the-visual-workflow-data-panel) rather
> than typing a path from memory, and check the step's **Output Data** on a test
> run before you build against it.
### A reference that finds nothing stops the run
Whether the step number is wrong or the path after it is, the step fails with the same message: _"Placeholder 5.email didn't find data"_. Open the run in **Executions** and expand the step to read it.
The failure is deliberate. A reference that resolved to nothing would send an empty field to whatever comes next. You would find out from the destination rather than from Glow.
A wrong number is the easier of the two to reach for. Picking values from the data icon avoids both.
### The number is the step's name, not its position
A step's number is fixed when the step is created and stays with it for life. It is not "the Nth step from the top", and it does not change when you delete a step, reorder the canvas, or move the step somewhere else.
**Numbers are never reused.** Delete step 4 and the next step you add takes a new number rather than filling the gap. That is deliberate: if numbers were reclaimed, every `{{ 4.… }}` reference elsewhere in the workflow would quietly start pointing at a different step.
So the numbers on a working canvas are often not 1, 2, 3 in a row, and the first step is not always 1. That is normal. Read each number off the step itself, or insert references from the data icon and never type one.
### Nested fields
Dot notation chains as deep as the data structure requires. There is no depth limit.
```
{{ 1.customer.address.city }}
```
### Picking an item out of a list
Reach into a list the same way you reach into a record — with a dot — but using
the item's position instead of a name. **Counting starts at zero**, so the first
item is `0`:
```
{{ 1.items.0.name }}
{{ 1.items.2.price }}
```
Given:
```json
{
"items": [
{ "name": "Widget A", "price": 9.99 },
{ "name": "Widget B", "price": 14.99 },
{ "name": "Widget C", "price": 24.99 }
]
}
```
- `{{ 1.items.0.name }}` resolves to `Widget A`, the **first**
- `{{ 1.items.2.price }}` resolves to `24.99`, the **third**
> **Square brackets do not work.** `{{ 1.items[0].name }}` is read as a
> field literally named `items[0]`, which does not exist. The step fails with a
> message about not finding the data, pointing you at your upstream step rather
> than at the syntax. Use dots throughout. Picking a value from [the data
> selector](#using-the-visual-workflow-data-panel) always produces the correct
> form.
To process _every_ item rather than a specific one, use [Run for each item](/build/action-steps/loops/run-for-each-item) instead of indexing.
### The whole output object
To pass a step's entire output rather than one field, use `$full_result`:
```
{{ 5.$full_result }}
```
Objects and arrays are serialised to JSON when inserted into a text field. This is the usual way to hand a complete payload to an AI step or an HTTP request body.
## Loop item variables
Inside a step running in **Run for each item** mode, the current item is bound to `item`:
| Placeholder | Resolves to |
| ------------------- | --------------------------------------- |
| `{{ item }}` | The current item itself |
| `{{ item.email }}` | A field of the current item |
| `{{ item.$index }}` | Zero-based position of the current item |
| `{{ item.$total }}` | Total number of items in the batch |
**Position and size sit under `item`.** Write `{{ item.$index }}`, not a bare `{{ $index }}`. Glow does not recognise the bare form and passes it through as literal text, so the characters `{{ $index }}` arrive at the receiving service.
### Reading an earlier looping step's result for this item
When two steps loop over the same list, `{{ N.item }}` gives you what step `N` produced **for the item being processed right now**. So "the record step 5 created for this same lead" stays correct as the batch works through the list.
| Placeholder | Resolves to |
| --------------------- | ---------------------------------- |
| `{{ 5.item }}` | What step 5 produced for this item |
| `{{ 5.item.email }}` | A field of it |
| `{{ 5.item.$index }}` | Position of this item in the batch |
| `{{ 5.item.$total }}` | How many items there are |
That is different from `{{ N.results }}`, which is the whole collected list. Because `results` holds successes only, its positions stop matching your input list as soon as any item fails. Use `{{ N.item }}` when you need the result that belongs to the current item, and `{{ N.results }}` when you want the collection as a whole.
### What a looping step collects
When the loop finishes, it passes on three references. This is the same set for [Run for each item](/build/action-steps/loops/run-for-each-item) and for the [Repeater](/build/action-steps/loops/repeater) step.
| Reference | What it holds |
| ----------------- | -------------------------------------------------------- |
| `{{ N.results }}` | Successful results only, in the order of your input list |
| `{{ N.items }}` | Every item with its position, status and error |
| `{{ N.stats }}` | `total`, `succeeded`, `failed`, `skipped` |
`stats` is what a summary message wants: "Processed 47 of 50" needs no counting on your side.
**`results` and `items` answer different questions.** `results` is the collection to hand to the next step, and it holds successes only — so when some passes fail it is shorter than the list you put in, and its third entry is not necessarily your third item. `items` keeps one entry per item instead, each carrying that item's position, whether it succeeded, and the error if it did not. Reach for `items` when you need results lined up against your input, or when you need to see what failed.
### Filter rules use a different item variable
Inside a [Filter](/build/action-steps/filter-items) step's rules, the current item is `$item`, with the dollar sign:
| Placeholder | Resolves to |
| -------------------- | -------------------------------- |
| `{{ $item }}` | The whole item being tested |
| `{{ $item.status }}` | A field of it |
| `{{ $itemIndex }}` | Its position in the list, from 0 |
> **The two forms are not interchangeable.** Filter uses `$item`; "Run for each
> item" uses `item`, with no dollar sign. Each one is left untouched by the
> other mechanism, so a `{{ item }}` written into a Filter rule compares dead
> text rather than the item you meant.
## System variables
These resolve without referencing any step.
| Placeholder | Resolves to |
| ------------------------ | ----------------------------------------------------- |
| `{{ $now }}` | Current UTC date and time at the moment the step runs |
| `{{ $today }}` | Current UTC date |
| `{{ $workflow_url }}` | Absolute canvas URL of the running workflow |
| `{{ $workflow_footer }}` | A ready-made Markdown backlink to the workflow |
| `{{ $user.name }}` | Name of the person who created the workflow |
| `{{ $user.email }}` | Email of the person who created the workflow |
`$user.name` and `$user.email` describe the workflow's **creator**, not whoever pressed Run. They suit a signature line or a reply-to address. If the creator's profile is missing that field, the step fails and says so, rather than sending an empty value on.
`$workflow_url` and `$workflow_footer` are useful in generated output. A Slack message or email can link straight back to the workflow that produced it.
## Team variables and secrets
Reference workspace-level values configured in [Secrets & Variables](/manage/workspace-settings/secrets-and-variables):
```
{{ $var.REGION }}
{{ $secret.STRIPE_API_KEY }}
```
- `$var.` injects a plain team variable.
- `$secret.` injects a decrypted secret at run time without placing the value on the canvas. If the exact secret value appears in a stored step result or error, standard run processing replaces it with `[REDACTED]`. Store tokens as Glow Secrets rather than pasting them directly into step fields.
Keys are upper-cased before they are looked up, so `{{ $var.region }}` and `{{ $var.REGION }}` mean the same thing. Name your variables and secrets in upper case to match.
## Files
Reference a file stored in [File Management](/manage/workspace-settings/file-management) by its id:
```
{{ $file. }}
```
The id is on the file's row in **Files**.
**What you get back depends on the file.** A text-like file is inserted as its contents, so `{{ $file. }}` in an AI Prompt hands the model the text itself. A binary file (a PDF, an image, a spreadsheet) is inserted as a short-lived download URL instead. That is what you want for a step that fetches or forwards the file, not for one expecting to read it. Test with the kind of file you will use in production, not with a `.txt` stand-in.
## Webhook URLs
Reference the deployed endpoint URL of a webhook trigger elsewhere in the same workflow:
```
{{ $webhook.1.url }}
```
Where `1` is the step number of the webhook trigger.
This works on the generic [Webhook](/build/triggers/webhook) trigger only. App triggers that receive their own callbacks do not expose a URL this way.
While the workflow is still a draft the endpoint does not exist yet, so the variable resolves to the text `[URL generated upon activation]`. That is expected. It lets you map the reference downstream before going live. Activate the workflow and the real URL appears in its place.
## Using the Visual Workflow data panel
You do not need to type placeholders from memory, or work out step numbers yourself.
1. Click into any configurable field in the **App drawer**.
2. Click the **data icon** at the edge of the field.
3. A panel opens showing the available output of every previous step, as a tree with a preview of the last known value.
4. Click a field to insert the correct reference at your cursor.
The selector writes the same `{{ }}` syntax described on this page. It is faster and avoids typos. Typing by hand is useful when you already know the path or are editing a reference inline.
> The selector can only show data it has seen. Run a step once (or send a test
> payload to your webhook) so Glow has a sample of its output to offer you.
## Examples
### Referencing a webhook payload
A webhook trigger — written here as step 1 — receives a form submission. To use the submitted address in an email step:
```
{{ 1.email }}
```
The payload the webhook received _is_ the step's output, so a field named `email` in the request body is `{{ 1.email }}`. There is no `body` wrapper to go through.
### Inside an AI Prompt
Placeholders work inline with plain text:
```
Summarize this email from {{ 1.sender }}: {{ 1.content }}
```
The AI step receives only the text you write, so any data you do not reference is invisible to the model.
### In a Condition
Step 3 returns a lead score and you want to route high scorers. Set the Condition's data reference to:
```
{{ 3.score }}
```
Then set the operator to **is greater than** and the value to `80`.
### In an HTTP request
Placeholders work in URLs, headers, and request bodies:
```
https://api.example.com/users/{{ 1.userId }}
```
If `userId` resolves to `42`, the request goes to `https://api.example.com/users/42`.
### Injecting a secret into a header
```
Authorization: Bearer {{ $secret.STRIPE_API_KEY }}
```
## What's Next?
- **[Data Transformation](/build/core-concepts/data-transformation)**: Tidy strings, calculate numbers, format dates, and parse domains on dynamic tokens.
- **[Workflow Data](/build/core-concepts/workflow-data)**: Learn how data moves across canvas steps and how to inspect payloads.
- **[Secrets & Variables](/manage/workspace-settings/secrets-and-variables)**: Store reusable values and encrypted credentials across your workspace.
---
Source: https://docs.getglow.ai/reference/workflow-did-not-start-or-is-still-waiting
# Workflow Did Not Start or Is Still Waiting
> Diagnose missing runs, webhook delivery, and workflows paused on Wait or Human Review.
Use this page when no run appeared or an existing run stopped at a waiting step. Start by deciding which of those two states you have.
## Workflow did not start
First confirm whether the [Execution Log](/build/the-canvas/execution-log) contains a run for the expected time or event.
- **No run exists:** check that the workflow is **Live**. Draft allows manual runs but disables automatic triggers. For a Scheduler, also check the timezone and the next run times shown in its panel. A scheduled occurrence that did not start is not replayed later.
- **A run exists:** the trigger worked. Open the run and find the first failed, skipped, or unexpected step instead.
## A webhook delivery did not start a run
Check the sender's delivery log, then compare it with the Webhook trigger's current state:
1. Confirm the workflow is **Live**. A Draft webhook reports that the workflow needs publishing.
2. Copy the current **Webhook endpoint** from the trigger. A `202 {"received": true}` confirms receipt, but it does not prove that the URL belongs to the active trigger or that a run completed.
3. If signature verification is enabled, confirm the sender uses the configured secret and header. An unsigned or wrongly signed request is rejected before a run exists.
4. Check the request size. A payload over 1 MB is refused before a run starts.
5. Send one controlled request and look for it in the trigger's **Executions** tab.
A `202` confirms receipt, not completion. Use the Execution Log to see whether the resulting run succeeded.
## The run is waiting
Open the waiting step's **Executions** tab and the surrounding run. A Wait step records its continuation details before the workflow pauses; later steps do not run until the wait resumes or expires. For Human Review, check the review request and its configured outcome paths.
For **Wait on webhook call** or **Wait on form submitted**, confirm that the caller received the `resumeUrl` or `formUrl` created for this run. Each address belongs to one run and cannot be reused after that run continues. The workflow must still be Live when the response arrives.
If the step has an expiry, check whether its **Expired** branch is connected. Without that branch, expiry follows the step's error path. A timeout of `0` or a blank timeout waits without an expiry.
## What's Next?
- Trace an existing run with [Debug a Run](/reference/debug-a-run).
- Choose the correct trigger in [Triggers and Actions](/build/core-concepts/triggers-and-actions).
- Inspect completed and active runs in the [Execution Log](/build/the-canvas/execution-log).