Workflow Assistant
The Workflow Assistant builds and changes workflows for you. Describe what you want in plain language and it places the steps, joins them up, and fills in their settings.
It works on an empty canvas and on one that already has a workflow on it, including one a colleague built.
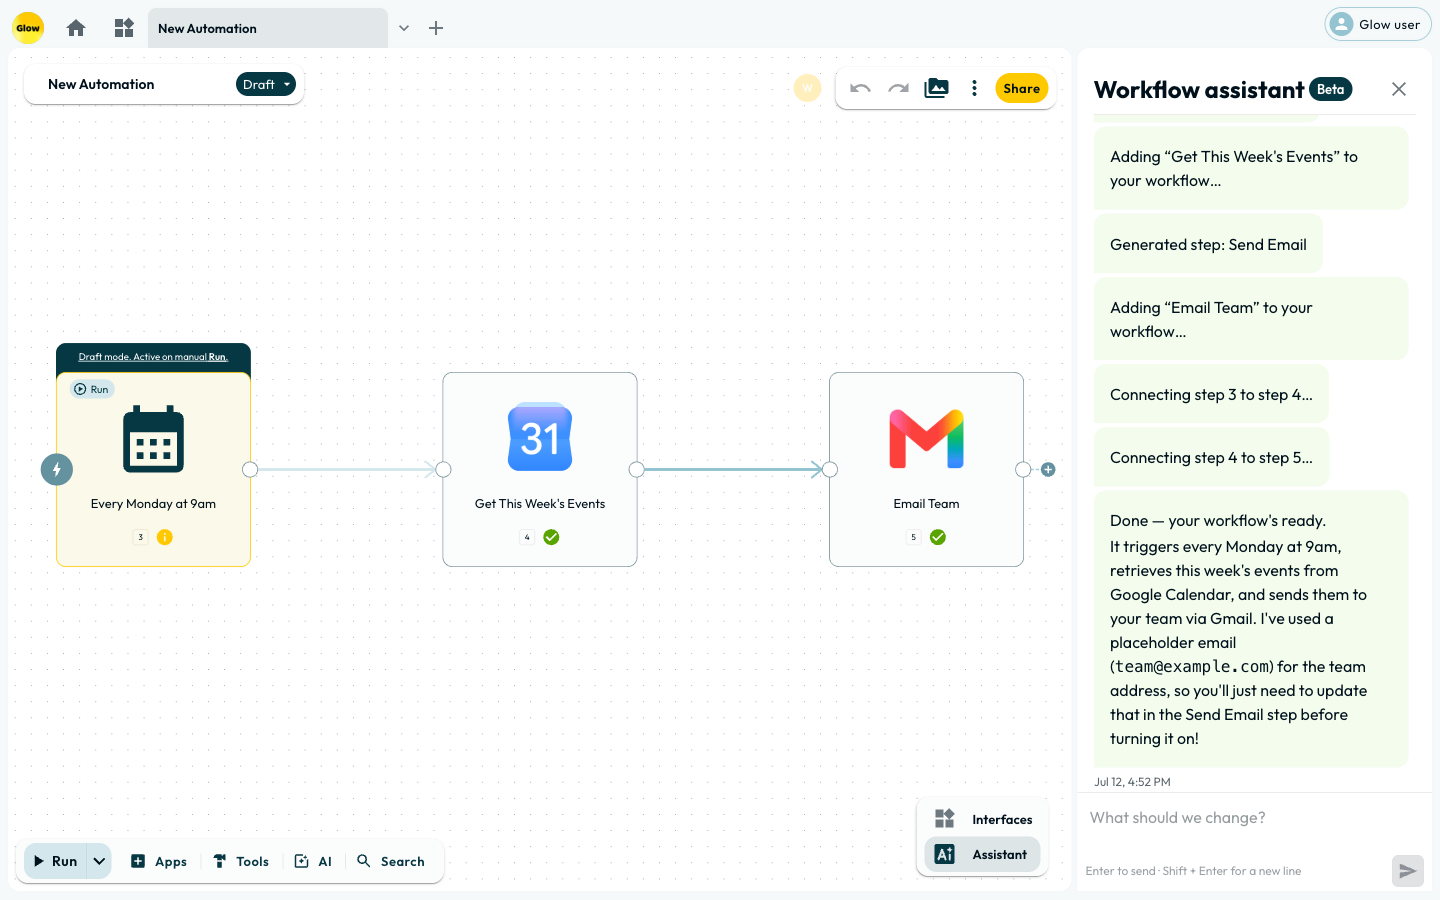
It works beside you, not instead of you
The assistant runs alongside the canvas rather than taking it over. Building takes a minute or two — it reads each app’s documentation before filling in a step — and the canvas stays yours the whole time. Drag a step, edit settings, draw a connection, start a test run. None of it waits for the assistant to finish.
That holds for your teammates too. The assistant works through the same live canvas everyone else is on, so a colleague watches the steps appear as they are placed.
What it does while you carry on:
| Places and connects steps | Trigger, actions and the connections between them, in the order the work happens. |
| Fills in the settings | Channel names, field mappings, references to earlier steps. Ready to run, not ready to configure. |
| Reads the app’s documentation first | Which is why it takes a minute, and why the fields come out right. |
| Handles an unconnected app | It asks you to link the account and keeps building everything else meanwhile. |
| Leaves sticky notes | Your prompt stays on the canvas, so the next person sees what was asked for. |
| Explains a workflow it did not build | Point it at an inherited canvas and ask how the routing works. |
The conversation is shared
The assistant thread belongs to the workflow, not to you. Everyone on the team who can open that workflow sees the same conversation, including prompts your colleagues typed.
Each message shows who wrote it, and you can see when someone else is composing one. The panel behaves like the rest of the multiplayer canvas.
Treat what you type here as visible to your teammates. If a workflow is set to Me only, its conversation is private to you; anything shared with the team is not.
While the assistant builds, its progress updates collapse into a single line you can expand. Questions it asks you, authorization requests, and its final answer always stay visible on their own. They are never folded away.
Building from scratch
Describe the automation you want and the assistant builds a first draft. It places the trigger and the steps, joins them up, and fills in the settings it can work out. You review it and change what you want before going live.
Open the Assistant
The assistant opens on its own with every new workflow. On one you already have, click Assistant in the panel at the bottom right of the canvas.
Prompt your idea
Type a natural-language description and press Enter.
“When a new row is added to my Google Sheet, extract the email address, use AI to draft a welcome email, wait 2 hours, and then send it via Gmail.”
Watch it build
The assistant places the trigger and the steps, joins them up, and fills in the settings it can work out. That prompt produces four connected steps: a Google Sheets trigger, an AI step to draft the email, a two-hour Wait, and a Gmail step to send it.
It also leaves your prompt on the canvas as a sticky note, so the next person can see what was asked for.
Answer anything it asks
Where the request leaves room for interpretation, the assistant asks rather than guessing. “When a message arrives” could mean Slack, Gmail or a webhook, so it will ask which you meant before building.
Modifying and explaining a workflow
The assistant can read a workflow that already exists and explain it, change it, or suggest what to do next. That is useful on one you inherited.
Open a workflow that already has steps and the box asks “What should we change?” rather than what to automate.
Explain the Workflow
Open a workflow built by a colleague and you may not understand how it works. Ask the assistant: “Explain how this routing logic handles failed payments.” It reads the entire canvas context and summarizes the logic for you.
It configures the steps, not just places them
The assistant does not drop a step on the canvas and leave the settings to you.
It fills in the fields
Ask it to “send a message to #sales and mention the person from the webhook”. It places the Slack step, sets the channel to #sales, and points the message text at the person’s name from the trigger. The step is ready to run rather than ready to configure.
When the app is not connected yet
Ask it to add a row to Google Sheets before you have connected Google, and it does not guess or leave a broken step behind. A card appears in the chat naming the app and the action it needs (“To use New Row Added (Instant) in this workflow, please authorize your account”), with a Link account button.
It keeps building everything else in the meantime, so one unconnected app does not hold up the rest of the workflow. Connect the account and that step is ready.
Sketch the plan in sticky notes, then ask for it
The canvas takes sticky notes (N), and the assistant reads what they say. That turns a planning session into a prompt. Sketch each stage of the process as its own note: “leads arrive by webhook”, “score them with AI”, “route hot ones to #sales”. Then ask the assistant to “build the workflow described in my sticky notes.”
Arrows between notes are for the people reading the sketch: draw them to show the order of the plan. The assistant works from the notes’ text, so put the sequence in words too, by numbering the notes or saying in each what follows.
Notes never run and never hold data, so the sketch can stay on the canvas beside the finished workflow as its documentation. See The Dock & App drawer for what else the canvas takes besides steps.
Prompt Library for Common Scenarios
Use these proven prompt patterns to build, refactor, and audit workflows quickly:
1. Inbound Lead Qualification & Routing
"When a new Typeform submission arrives, extract the email domain using data transformation, look up the organization in Apollo, and add a Condition: if employees > 500 route to Salesforce Enterprise AE queue, otherwise send a nurture email via Gmail and log to Airtable."2. Multi-Channel Support & Incident Escalation
"Create a workflow triggered by Zendesk New Ticket. Add an AI Prompt step to classify sentiment as Positive, Neutral, or Angry. If Angry, post an urgent alert to the #support-escalations Slack channel with the ticket URL; otherwise update the Zendesk ticket tags."3. Automated Document Processing with Human Review
"Trigger on new Gmail email with PDF attachment. Add an AI Agent to extract vendor name, invoice date, line items, and total amount as JSON. Insert a Human Review step displaying the extracted total, followed by a loop that inserts each line item into our Notion database."4. Splicing Error Handlers & Fallbacks
"Add an Error Path to the 'HubSpot: Create Contact' step. If it fails, send a notification to #ops-alerts in Slack with the error message and the failed email payload."Best practices
Ask for the shape first, then the detail. Try “When a Typeform response arrives, add the person to HubSpot and post to #sales”. That gets you a working skeleton faster than one prompt carrying every rule you have. Once it is on the canvas, ask for one change at a time: “make the Slack message include their company name.”
Hand it the fiddly configuration. Draw the business logic yourself if you prefer having decided it. Then ask the assistant to fill in a step’s fields, or to point each value from a webhook at the right field in your CRM. That is the part it saves you most on.
Nothing it does is permanent. If you don’t like what it built, Cmd+Z reverts it. The whole generated branch goes in one press. Your undo history stays yours: it never reaches into a teammate’s work. See Undo & Redo.
What’s Next?
The assistant builds a draft, not a finished workflow. Read what it produced before you publish, particularly any step that sends something outward.
- 👉 Quickstart: Your First Workflow →: build a workflow by hand so you can assess what the Assistant drafts for you.
- Choosing an AI Step: decide whether the workflow needs AI Prompt, AI Data Transform or AI Agent.
- Undo & Redo: understand how assisted changes fit into shared canvas history.