Connecting an App
A connection stores your credentials for a third-party service securely, so Glow can call that service’s API on your behalf. You create one before a workflow can use the service.
Navigating to the Connections Page
Open Connections from the left sidebar of the Glow dashboard.
The page shows one card per app, so an app you have already signed in to sits alongside the ones you have not.
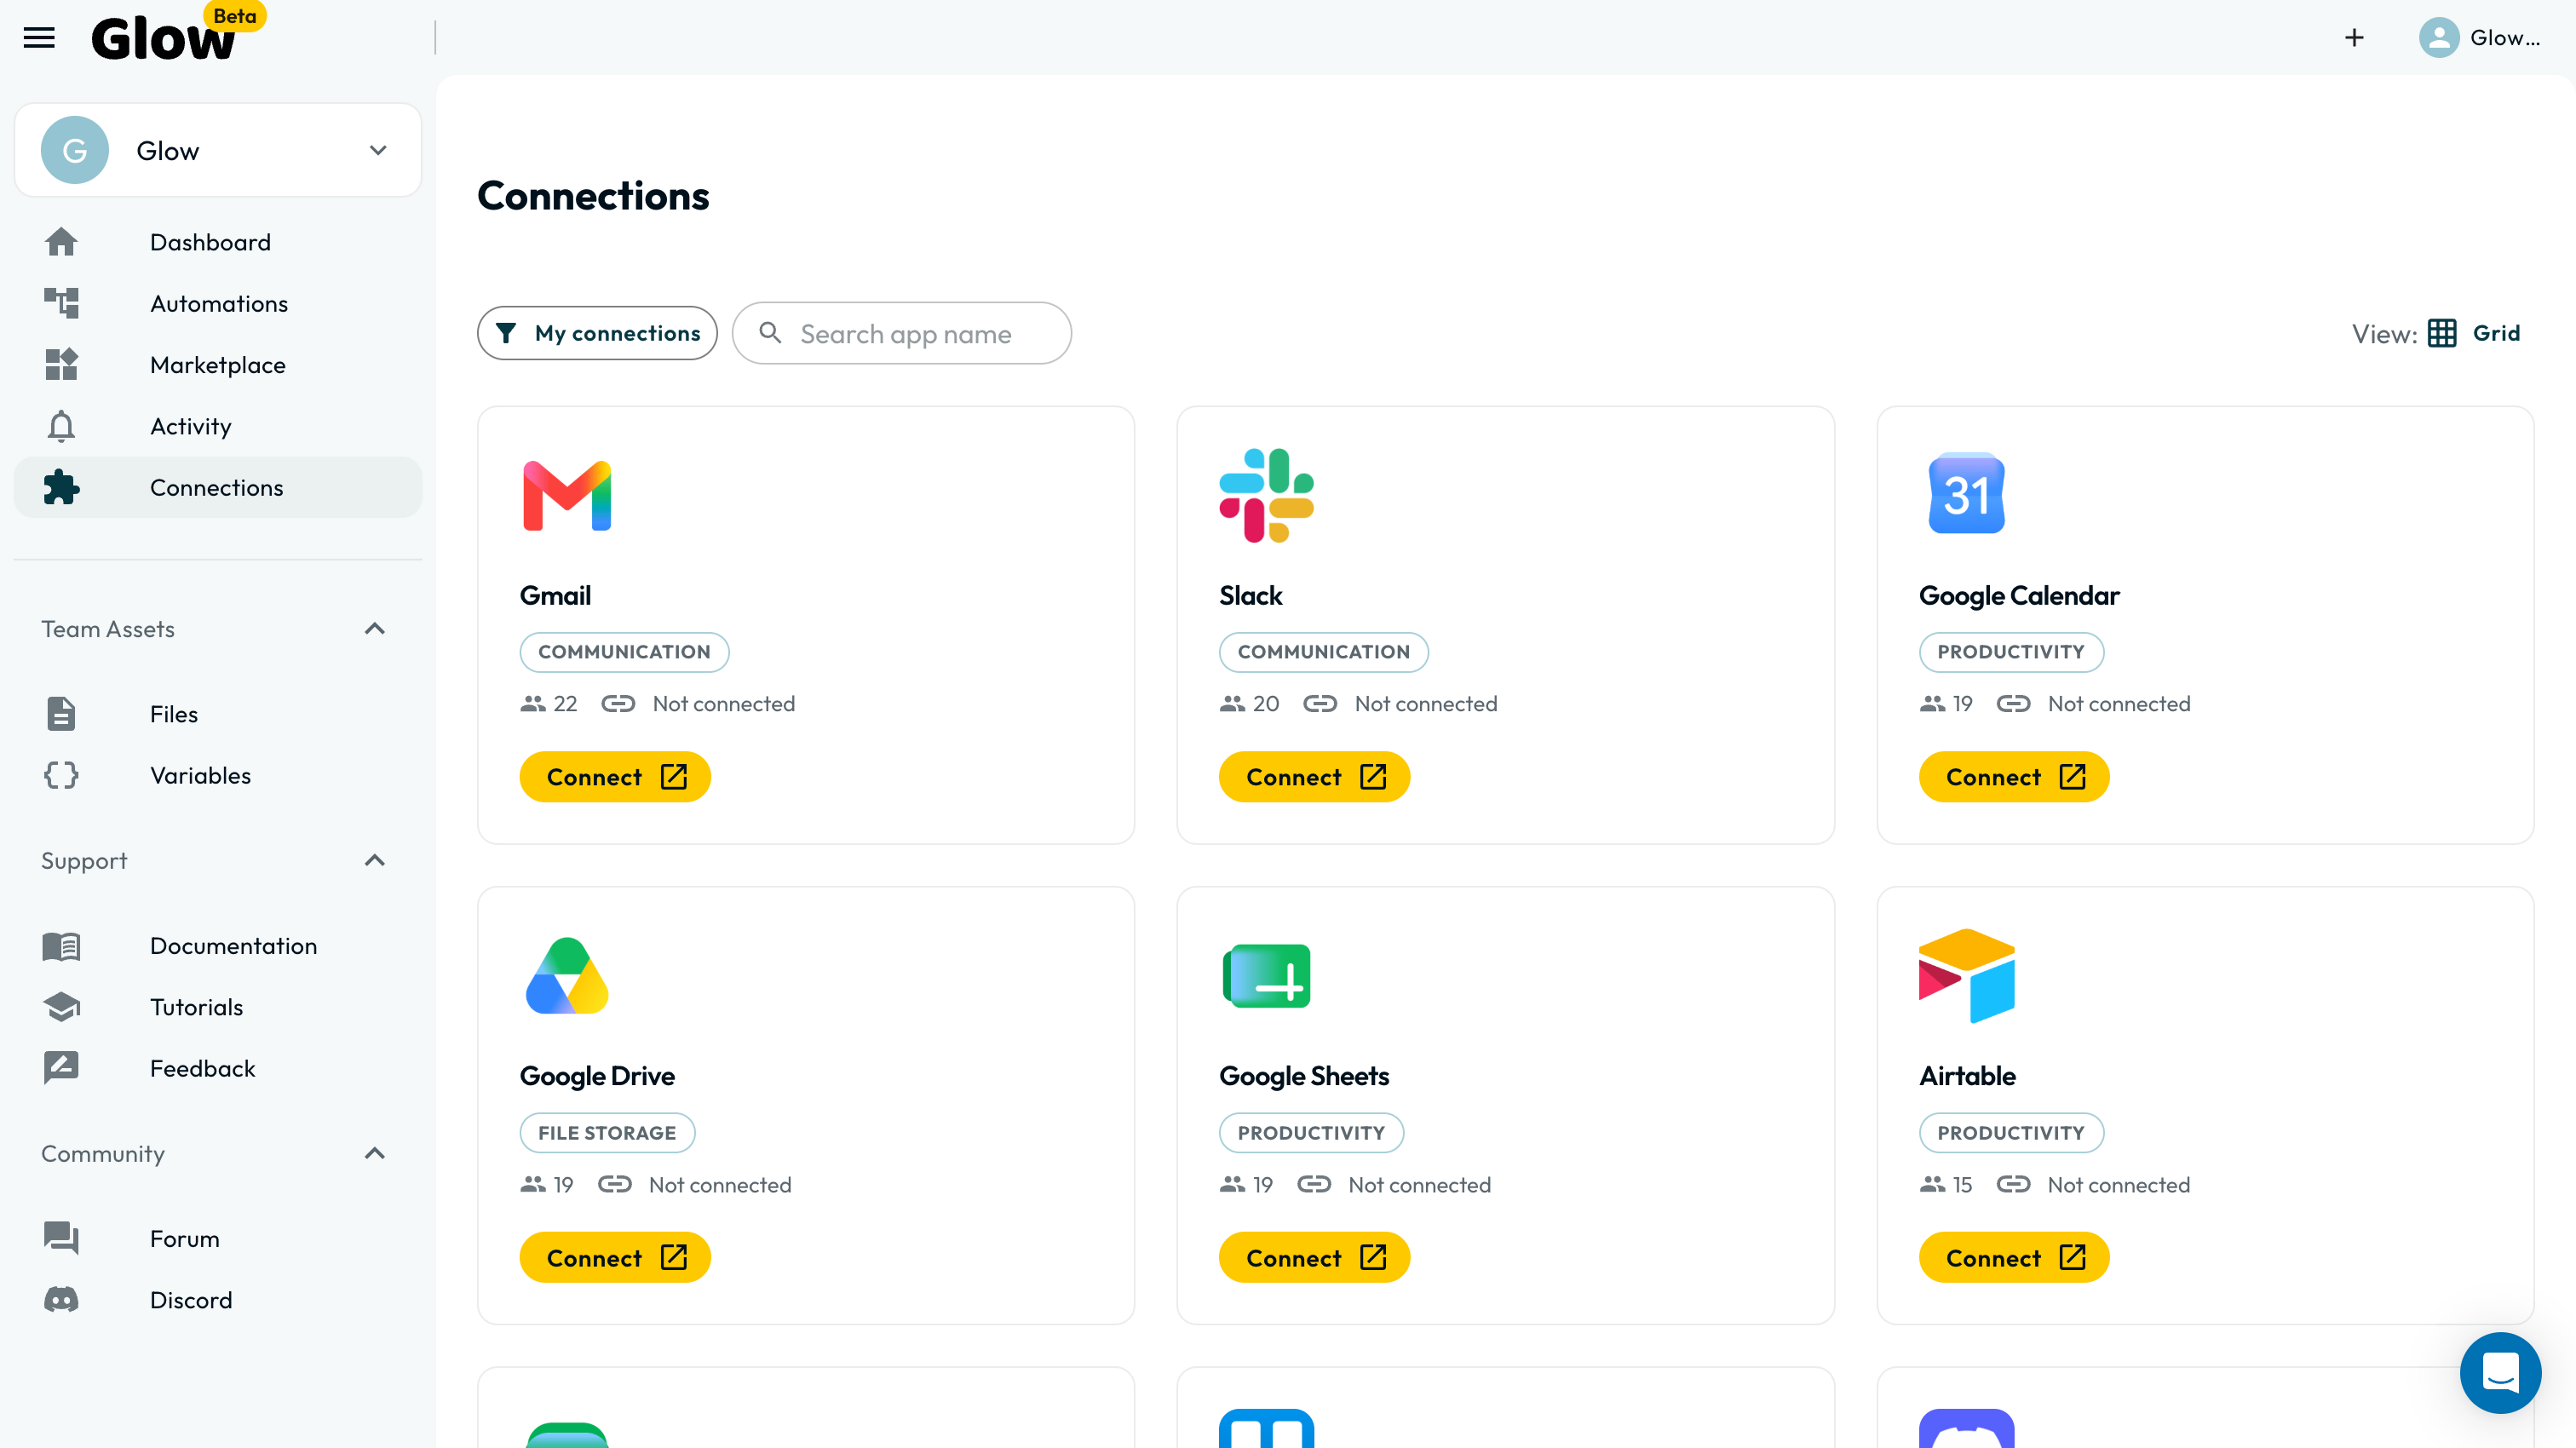
Adding a New Connection
- On the Connections page, type the app’s name into the search box (for example, “Google Sheets”).
- Click Connect on that app’s card.
- Complete the authentication flow in the window that opens. The method depends on the app: see below.
- Glow tests the credentials as you finish. On success the card shows the account you signed in with.
Authentication Types
Glow supports several authentication methods depending on the app you are connecting.
Signing in to the service (most apps)
Most major platforms (Google, Slack, Salesforce, etc.) use OAuth. When you select one of these apps:
- A popup window opens, directing you to the app’s sign-in page.
- Sign in with your credentials for that service.
- Review and approve the permissions Glow is requesting.
- The popup closes automatically and your connection is confirmed.
Tip: If the popup is blocked by your browser, check your popup blocker settings and try again.
API Key
Some services authenticate via API key. When prompted:
- Log in to the third-party service’s dashboard.
- Navigate to the API or developer settings to generate or copy your API key.
- Paste the key into the Glow connection form.
- Click Save.
Username and Password
A small number of services use basic authentication:
- Enter your username and password for the service.
- Click Save.
Custom Authentication
Some integrations require additional fields such as subdomain, region, or token. Glow displays the required fields dynamically based on the app you selected. Fill in all required fields and click Save.
Selecting an Account in the App drawer
When you add an app step to a workflow, its App drawer includes an Account dropdown. This dropdown lists all connections you have created for that app.
- Click the Account dropdown in the App drawer.
- Select the connection you want to use for this step.
- To sign in to another account without leaving the editor, choose Connect new account… from the same dropdown. It is always offered, so this is also how you add a second account for an app you have already connected.
Practical Example: Connecting Google Sheets
- Open Connections and search for “Google Sheets”.
- Click Connect on its card.
- An OAuth popup opens. Sign in with your Google account.
- Review the permissions (Glow will request access to read and write your spreadsheets).
- Click Allow.
- The popup closes, and the Google Sheets card now shows the address you signed in with.
- In your workflow, add a Google Sheets step. In the step configuration, select your Google account from the Account dropdown.
From Connected to Configured: One Full Action
Authentication is half the job. Here is the same Google Sheets connection carried through a working Add Single Row step, which is the pattern every app action follows:
- Open Apps in the dock, search for Google Sheets, and pick Add Single Row. It lands on the canvas; connect it after the step whose data it should record.
- Click the step. Choose your account, or Connect new account… if none is connected yet.
- Pick the Spreadsheet, then the Worksheet. Both dropdowns read from your account, so what you see is what exists.
- Map the columns. Each column of the sheet appears as a field: click the data icon beside one to open the Workflow data panel and pick the value from an earlier step. Mixing picked values with typed text is fine: a field can read
{{ 1.name }} ({{ 1.email }}). - Run it once and open the step’s Executions tab. The output shows what was written, and the row is in your sheet.
The names change per app: a Slack step wants a channel where Sheets wants a worksheet. The sequence is always account, then target, then field mapping with the data icon.
Reading Data Instead of Writing It
The same connection reads as well as writes. Where Add Single Row puts a row in, Get Values in Range takes rows out, and it is the step to reach for when a workflow starts from what is already in a sheet:
- Open Apps, search for Google Sheets, and pick Get Values in Range.
- Choose your account, then the Spreadsheet and the Worksheet, exactly as above.
- Leave Range empty to get everything, or narrow it with A1 notation such as
A1:E50. The field is optional. - Run the step once, then open its Executions tab and read the output. The values arrive under
{{ N.ret }}, whereNis the step’s number, and the Executions tab shows the real field names to build against.
Reading first is what makes a “go through the rows and do something with each” workflow possible: feed the output into a step set to Each item, or into a Repeater if each row needs several steps.
Looking for one specific row rather than a range? Find Row searches a column for a value and returns the match, which saves pulling the whole sheet in and filtering it afterwards.
Testing a Connection
After creating a connection, Glow runs an automatic test to verify that the credentials are valid. If the test fails:
- Double-check that you entered the correct credentials.
- For OAuth connections, ensure you approved all required permissions.
- Verify that the third-party service is not experiencing downtime.
There is no separate re-test action. To inspect a connection, click Details on its card. If the stored credentials have stopped working, the step that uses the connection reports it on its next run.
Edge Cases and Troubleshooting
Expired tokens
OAuth tokens can expire. Glow refreshes them automatically using the stored refresh token. A refresh can still fail, for example when you revoke Glow’s access from the service itself. You then find out in the workflow rather than on the Connections page. Open the step that uses the account, and the App drawer names the broken connection, with a Reconnect button beside it. Clicking it re-runs the sign-in and re-points the step at the refreshed connection.
Re-authentication
You may need to re-authenticate a connection if:
- You changed your password on the third-party service.
- You revoked Glow’s access from the third-party service’s settings.
- The third-party service rotated or invalidated your API key.
- Your organization’s security policy requires periodic credential rotation.
To re-authenticate, open a step that uses the account and click Reconnect in the App drawer. That walks you through sign-in again and points the current step at the refreshed connection. Open the other workflows that depend on the account and confirm their connection before returning them to service.
Popup issues
If the OAuth popup fails to open or closes prematurely:
- Disable your browser’s popup blocker for the Glow domain.
- Try a different browser.
- Clear your browser cache and cookies, then try again.
What’s Next?
- Keep your connections healthy over time with Managing Connections.
- Understand what Glow stores and how it is protected in Credentials & Authentication.