Team Management
A team is an isolated workspace. Its workflows, connections, secrets, files and members stay within it by default. Content crosses a workspace boundary only through an explicit action, such as a confirmed workflow push, while a delegation grant can give an approved partner scoped access.
Create a second team when a set of automations should not share credentials with the first. Internal HR separate from engineering, or one team per client.
Creating a Team
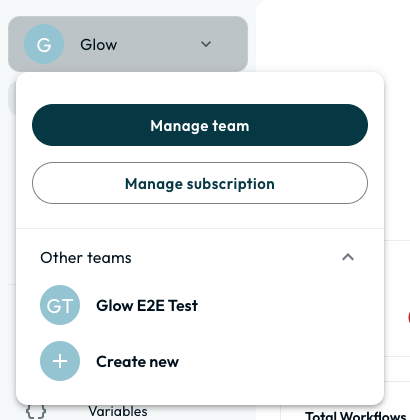
Open the Menu
From the top-left workspace menu, click Create Team.
Provide details
Enter a team name that clearly defines the workspace’s purpose.
Create
Click Create. Your new environment is provisioned immediately, and you are automatically assigned the Admin role.
Role-Based Access Control
Glow uses three distinct permission levels. They let your team collaborate freely while protecting critical infrastructure, such as billing and team settings, from unauthorized changes.
| Role | Workflows | Team Settings | Secrets / Variables | Invites |
|---|---|---|---|---|
| Admin | Full access | Full access | Manage & View | Can invite & manage any role |
| Manager | Full access | Change roles only | Manage & View | Can invite Managers and Members |
| Member | Full access | No access | View only | Can invite other Members |
Only Admins can remove any member, change team settings, or manage billing. Managers and Members can remove only the people they invited themselves.
All three roles can view Usage and Pricing in Billing & Usage. Invoices, payments, and billing management are Admin-only.
These roles cover people in your workspace. If a managed service provider administers your automations, their operators reach your workspace through a separate delegation grant that is not shown in this table. You control it, including how much access it carries and when it ends, from Settings → Governance, which team Admins alone can open. See what you are agreeing to.
💡 Workflow Access All roles, including Members, can create, edit, run and set team workflows Live. Members are not read-only viewers, so your team can build automations without waiting on an Admin. To limit who can open a particular workflow, use Workflow Visibility and Sharing rather than roles.
Managing members
All team administration happens on the dedicated full-page Team Settings (/app/[team]/settings): invite people, change roles, inspect pending invites, and remove members. Who can do which is in the table above.
Invite Members
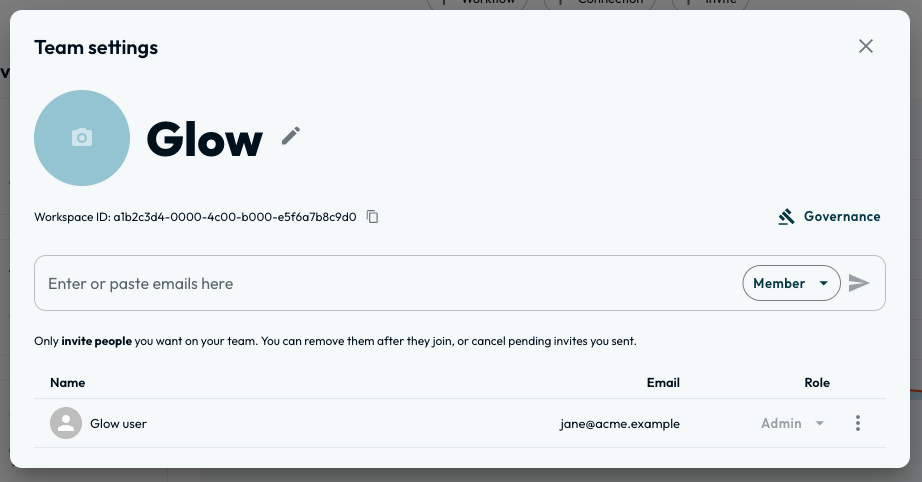
Open Settings
Navigate to your team settings by clicking Manage team or Team Settings in the main sidebar.
Invite
Type the email addresses of your colleagues and select the appropriate role from the dropdown. (The roles you can assign depend on your own permission level).
Send
Click Send Invite. Your colleagues can join the workspace with a single click from their inbox.
What’s Next?
- Let members sign in with their corporate credentials via Signing In and SSO.
- See how secrets are scoped to a team in Secrets and Variables.