Triggers and Actions
Every workflow begins with at least one trigger and carries out its work through one or more actions. Triggers define when a workflow runs and actions define what it does: the trigger-action pattern that underpins all automation in Glow.
Triggers
A trigger is the first step in a workflow. It listens for a specific event and, when that event occurs, starts the workflow and passes incoming data to the next step.
The built-in triggers sit under Tools → Start in the dock:
Webhook
A Webhook trigger gives the workflow its own web address. When another system sends data to that address, the workflow starts, and everything that arrived with it is available to the steps that follow.
Use a webhook when you want another service to start your workflow the moment something happens there. A form provider when somebody submits, a payment gateway when a charge clears, a build system when a deploy finishes.
Scheduler
A Scheduler trigger fires on a recurring time-based schedule (for example, every hour, every weekday at 9 AM, or on the first of each month). Use it for periodic tasks such as syncing data, generating reports, or sending digest emails.
Click to start
A Click to start trigger runs the workflow when a person presses its button: the shape for anything started on demand rather than by an event. See Click to start.
Chat Trigger
A Chat Trigger starts the workflow from an incoming chat message and carries the message text in. See Chat.
App Triggers
Most triggers belong to an app rather than to Glow itself. Open Apps in the dock, pick the service, and choose its trigger: “New row in Google Sheets”, “New Stripe charge”, “New Jira issue”. These are the bulk of what starts workflows in practice.
Multiple triggers
A single workflow can have more than one trigger. For instance, you might attach both a Webhook trigger and a Scheduler trigger to the same workflow so it can be started on demand and on a schedule. Each trigger feeds into the same downstream steps.
Tip: Two triggers hand the workflow two different things. A Webhook passes
on whatever the sender posted. A Scheduler carries no data of its own. A later
step that needs the time uses {{ $now }}. Check that the steps below can
cope with both.
Actions
Actions are every step that comes after a trigger. They do the work: fetching a record, reshaping data so the next step can use it, deciding which way the workflow goes, and writing the result into whichever tool needs it.
App Integrations
Glow connects to thousands of third-party apps through pre-built integrations, among them Slack, Google Sheets, Salesforce, HubSpot, Jira and Stripe. Each app brings its own set of actions: “Send a message”, “Create a row”, “Update a record”.
AI Steps
AI steps bring a language model (the AI that reads and writes text) into the workflow. Use one to classify a message, pull details out of a document, draft content, or summarize a report.
Data
The dock’s Data group (Change, Lists, Convert and Dev tools) reshapes, filters, merges and maps data between steps. Use them when the output of one step does not match the input format the next step expects.
Flow
The Flow group handles branching, conditions, and loops. Use them to route data down different paths based on conditions, run steps in parallel, or iterate over lists.
Human Review
A Human Review step pauses a run part-way through and waits for a person to act. Use it where something needs a human decision before the workflow carries on, such as a manager signing off an expense. It sits in the middle of a workflow rather than at the start: the run has already begun, and approval decides whether it continues.
Code and HTTP Requests
Data’s Dev tools section covers the cases no app integration does: an HTTP Request to any API, and a Code editor step for logic you would rather write out. It runs Python. You do not need either of these for most workflows.
Two ways to configure a step
Every app action ends up configured the same way: a set of fields you can see and edit. How those fields get filled is up to you.
- Fill them yourself. Open the step and map each field, for precise control over what is sent to the external API.
- Let the assistant fill them. Describe what you want and the Workflow Assistant places the step and populates its fields from your description.
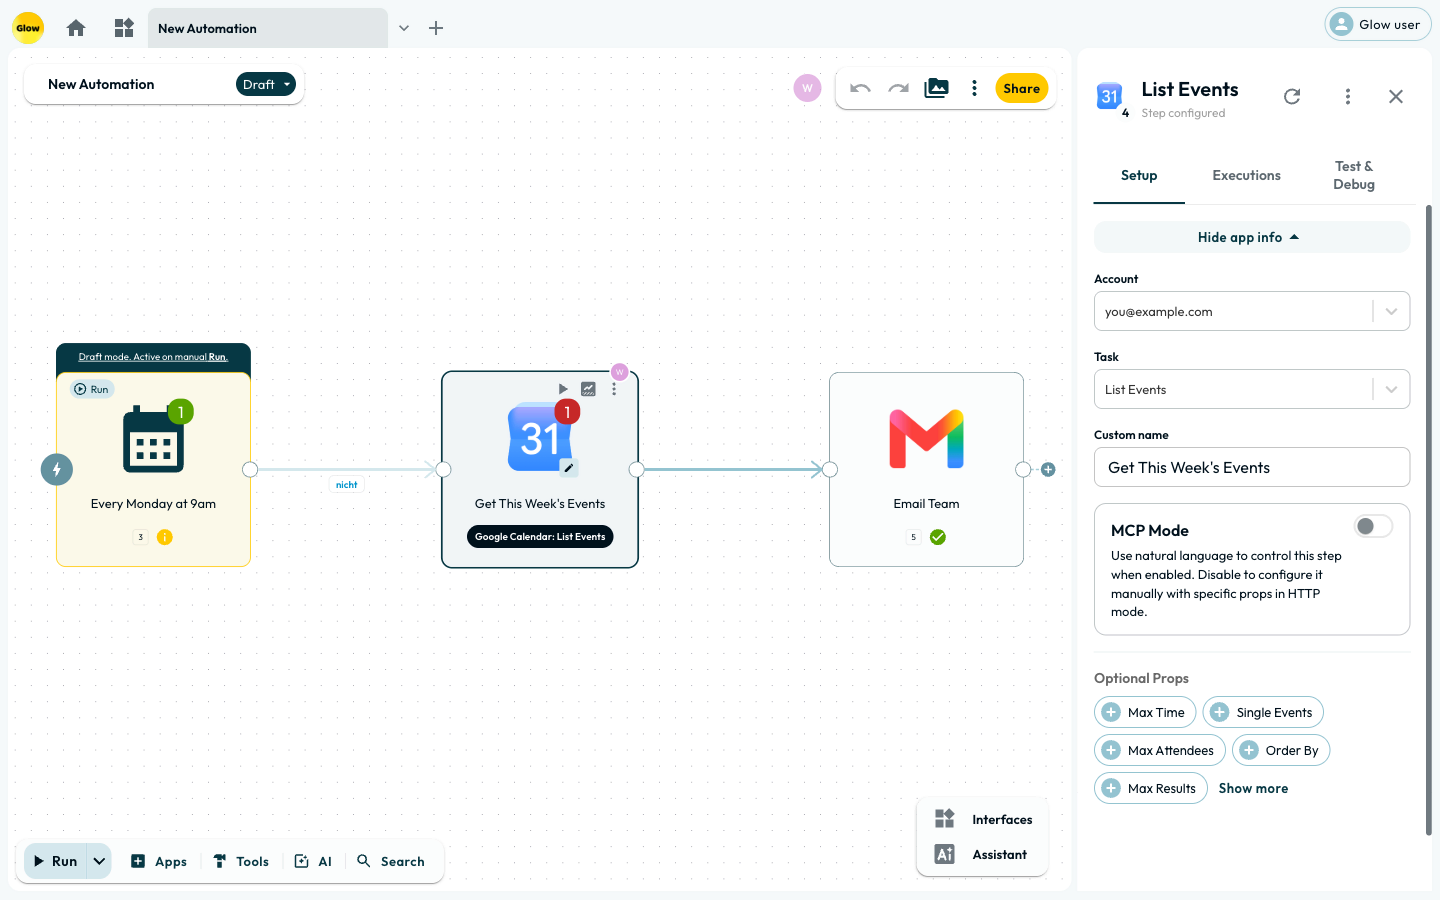
Either way you end up with the same editable step. An assistant-built action is never a black box: open it and adjust anything it got wrong.
What’s Next?
- Set up your first trigger in detail with the Webhook Trigger or Scheduler Trigger.
- See how data flows from one step’s output into the next in Workflow Data.